Welcome to Moda Fabrics!
Dec 2: Grandmother
Dec 2: Grandmother
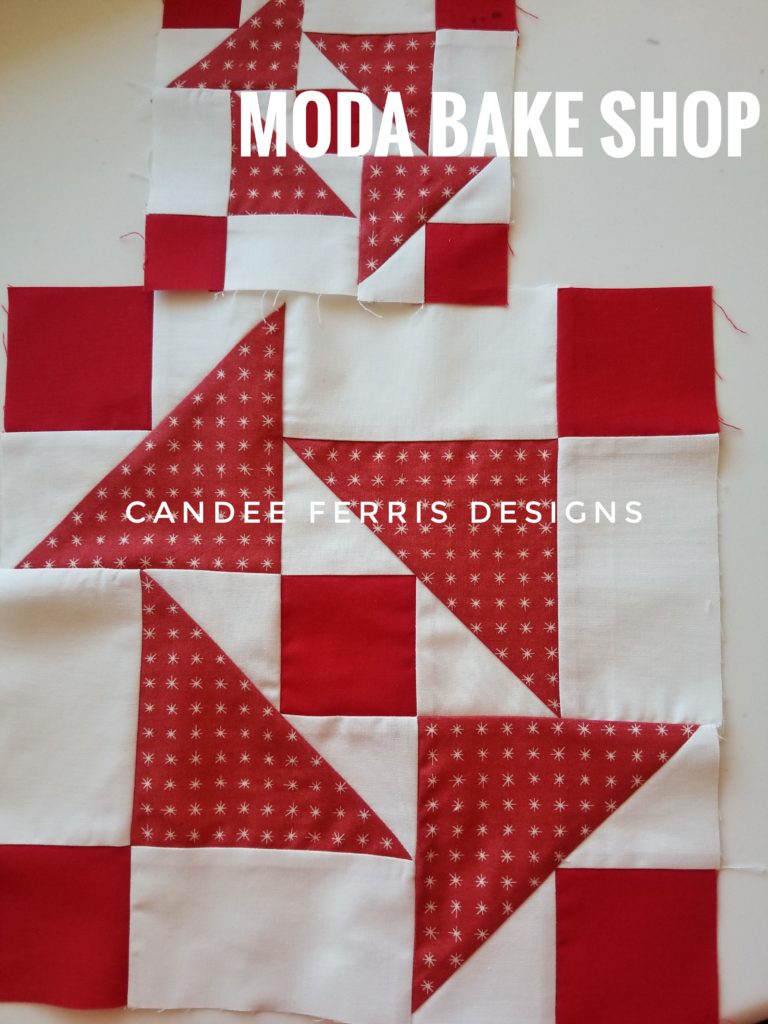
I am a proud Grandmother of five beautiful grandchildren from 14 to 2 years old. I added this block to many of their quilts. I hope that someday they will know the significance of why I placed this block in their quilts. Each of my children have a Christmas quilt with this block to snuggle under to read their favorite Christmas Eve storybook.
This block finishes at 6" or 12" square.
| 6" Block | 12" Block |
|---|---|
From white fabric, cut:
|
From white fabric, cut:
|
| From solid red fabric, cut (5) 1 11/16” squares | From solid red fabric, cut (5) 2 7/8” squares |
| From red print, cut (2) 3 1/4” squares, cut in half diagonally once to make 4 triangles |
From red print, cut two (2) 5 5/8” square, cut in half diagonally once to make (4) triangles |
MAKE OUTER CORNER UNITS
1 - Sew 1 red square to 1 background rectangle. Press.
2 - Sew 1 background rectangle to 1 red triangle. Press.
3 - Join step 1 and step 2 units as shown. Repeat to make a total of two outer corner units.
MAKE CENTER UNIT
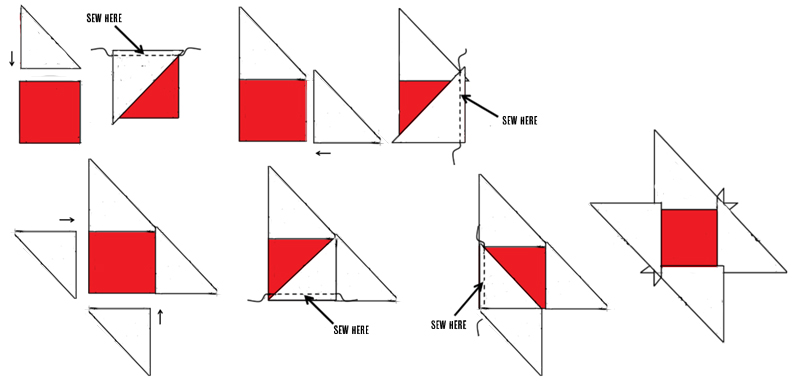
1 - Sew two background triangles to each red square. Press. Make three of these units and set two aside for INNER CORNERS.
2 - Sew two background triangles to each side of the center red square. Press.
MAKE INNER CORNERS
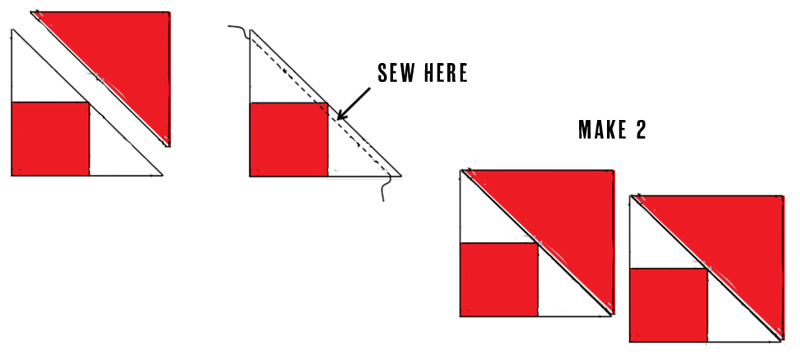
1 - Sew 1 red triangle to the extra unit set aside in CENTER UNIT step. Press. Repeat to make a total of two outer corner units.
ASSEMBLE BLOCK
NOTE: This block is joined with a partial seam. Read directions and go slowly if this is your first time working with a partial seam.
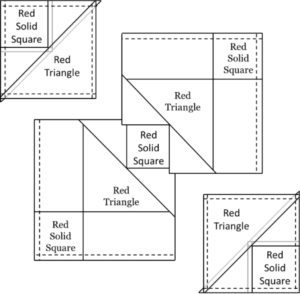
1 - Sew outer corner units to center unit. Remove the last 1/4” of stitches around the Red center square for ease of block assembly. Press seams toward the Red triangles.
2 - Begin sewing 1/4” from Red center square to end of unit. Repeat for other side. Sew all corner units. Press seams.
This block finishes at 6" or 12" square.
Candee Ferris
{instagram: cifquilter}


Comments