Welcome to Moda Fabrics!
Windsor Tote Pattern Hack and Tutorial
Windsor Tote Pattern Hack and Tutorial
Published:
Sep 17 2024 - 07:00
I am a total bag lady – I love making bags and pouches. I’m also one of those people who likes to divert from a pattern and put my own twist on what I’m making, and that’s exactly what I did with one of our new Project Jelly Roll patterns for 2024, the Windsor Tote. (Click HERE to download free Windsor Tote pattern!)

I wanted to write the construction for the basic Windsor Tote pattern to be as easy as possible for newer quilters and quilters who might be sewing with kids. The panels for the front and back of the Windsor Tote feature woven jelly roll strips that are adhered to fusible fleece, which means no piecing is required to make those gorgeous diamonds! Simply unroll your jelly roll, cut the strips in half, and start weaving! It’s a fun way to play with fabric and get your creative juices flowing.
After quilting your panels to secure those woven diamonds just a bit more, you have a couple of options for constructing your Windsor Tote.
The first option is to follow the pattern exactly as written – the pattern walks you through attaching simple handles in between the exterior woven panels and the lining, sewing the exterior and lining panels together, and boxing the corners of the exterior and lining panels to create the bottom of your tote bag and give the bag some shape. It’s all there in the pattern!
But if you want to make a slightly larger bag with a separate panel for the bottom and more decorative handles, like I did, then you’ll need to make some adjustments to the pattern and construction. Keep reading for the additional cutting you'll need to do!
We also have a helpful video tutorial that shows you the different steps I took for this pattern hack. In this video tutorial, I walk you through those changes step by step! You can find the video on Moda's YouTube channel here:
My Windsor Tote hack requires a little extra cutting – you’ll need fabric for the exterior and interior bottom panels, some stiff interfacing, a little lightweight interfacing, and some extra fusible fleece. Here’s what you’ll need to cut:
FROM COORDINATING FABRICS:
- (1) 5 1/2” x 17” rectangle for the exterior bottom panel (I used a Moda toweling for mine)
- (2) 3” x 17” rectangles for the interior bottom panel (I used the same Moda toweling that I picked for the exterior bottom panel)
- OPTIONAL: (1) 5 1/2” x 17” rectangle of muslin or scrap fabric for the other side of your exterior bottom panel. It will be hidden under the tote bag lining!
ADDITIONAL STABILIZERS:
- (1) 5 1/2” x 17” rectangle of extra stiff fusible interfacing (I used Peltex® 2-Sided Fusible Ultra Firm Stabilizer)
- (2) 2” x 17” rectangles of fusible fleece (you can use the same fusible fleece that you used for the woven panels)
- (4) 1 3/4” x 21” rectangles of fusible fleece (to add stability to your handles)
- (4) 1 3/4” x 21” rectangles of lightweight fusible interfacing (to add stability to your handles)
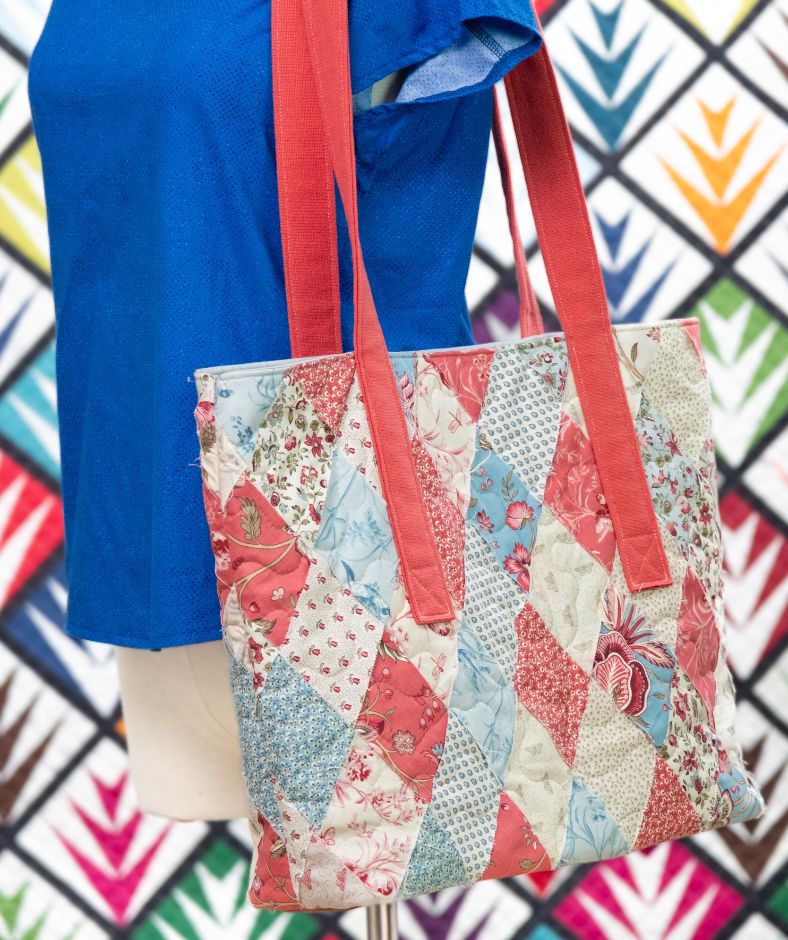
I used slightly longer handles in this version made with French General fabrics -- you can always cut the fabric strips for your handles to a length that works best for you!
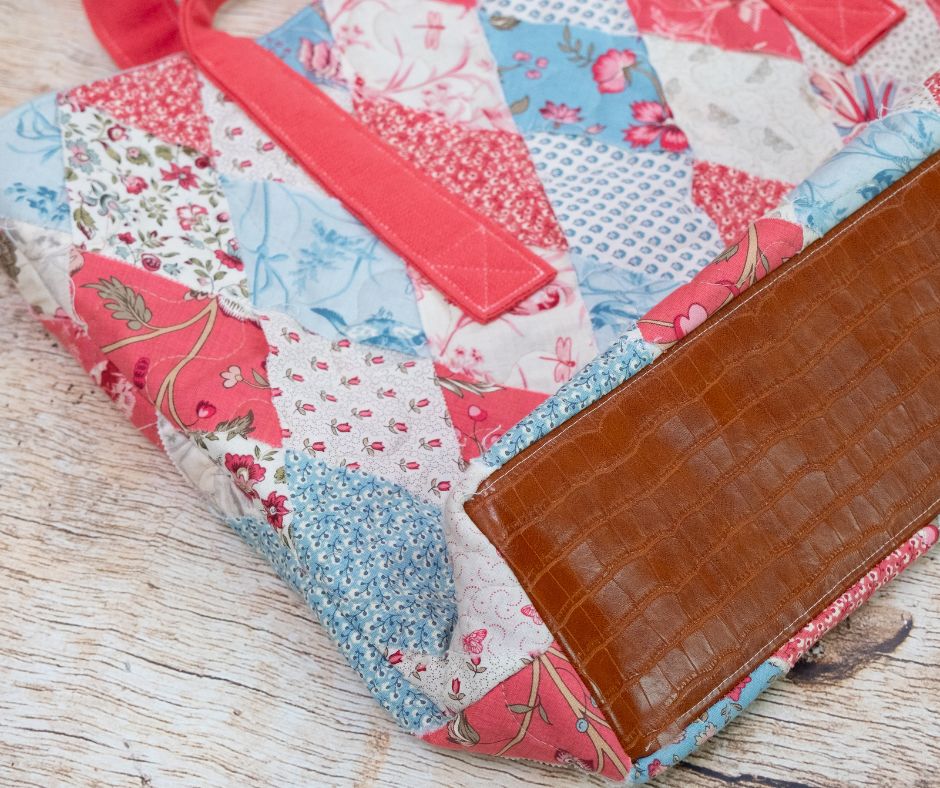
Faux leather looks great as the bottom panel of your Windsor Tote! Here you can see that you'll match the seamed sides of your tote to the short edge of the new bottom panel when boxing the seams -- you won't be cutting squares out of your front and back panels with this construction method.
Because we’re adding an extra panel to the exterior and interior of the tote bag, our construction is just a little different as well. We’re still going to box our corners, but we won’t have to cut our woven panel to do so. Our new bottom panel is not as wide as the woven panels, so we will have that squared space to box the corners without having to cut anything!
The video tutorial linked above shows you exactly what that looks like, but here are the additional steps you’ll need to take for this pattern variation.
FOR THE HANDLES:
- Center (2) 1 3/4” x 21” rectangles of fusible fleece to the wrong side of (1) 2 1/2” x WOF handle strip and fuse the fleece to the strip. Repeat with another handle strip and the remaining (2) 1 3/4” x 21” rectangles of fusible fleece.
- Repeat Step 1 with the other two handle strips and the (4) 1 3/4” x 21” rectangles of lightweight interfacing.
- Follow the pattern instructions to make the handles, pairing (1) handle strip with fusible fleece with (1) handle strip with lightweight interfacing, right sides together, to make each handle. After turning the strip right sides out, don’t trim the handle; instead, tuck in the raw edges of the open end of the handle about 1/4”, and stitch closed with a narrow seam (about 1/8”). Top stitch 1/8” around the entire handle. Repeat to make (2) finished handles.
FOR THE NEW BOTTOM PANELS:
- Fuse the 5 1/2” x 17” exterior fabric rectangle to the 5 1/2” x 17” extra stiff stabilizer rectangle. Optional: fuse the muslin/scrap fabric rectangle to the other side.
- Center (1) 2” x 17” rectangle of fusible fleece on the wrong side of (1) 3” x 17” interior fabric rectangle and fuse the fleece to the interior fabric. Repeat with the other interior fabric rectangle and fusible fleece.
ATTACHING THE HANDLES:
- Measure and mark 5” in from the left and right sides and 4 1/2” down from the top of a woven panel, right side facing up. Place the outer edge of each end of one handle on the 5” marks, aligning the finished edges of the handle with the 4 1/2” marks. Pin handles in place, and stitch them to the woven panels by following the topstitched line on the handles. Begin stitching about 1/4” down from the top of the panel to allow some room for attaching the lining in a later step. Repeat for the second panel and handle.
TOTE ASSEMBLY:
- Center the exterior bottom panel along the bottom edge of a woven panel, right sides together. Pin or clip, and stitch the exterior bottom panel to the woven panel with a 1/4” seam. Repeat to stitch the other long side of the bottom panel to the second woven panel. You should have one large exterior piece now: woven panel – bottom panel – woven panel, with the handles on the outer edges.
- Center one interior bottom panel along the bottom edge of a lining rectangle, right sides together. Pin or clip, and stitch the interior bottom panel to the lining rectangle with a 1/4” seam. Repeat to stitch the other interior bottom panel to the second lining rectangle.
- Follow original pattern instructions to stitch lining panels to the exterior woven panel, making sure handles are pinned out of the way.
- Align lining and exterior panels right sides together, following the original pattern – the only difference is that the exterior woven panels are connected by the new bottom panel. Stitch along the sides of the woven panels and lining panels using a 1/4” seam. On the lining bottom panels, stitch about 1” in on each side, leaving the rest open for turning the bag right side out.
- Pinch the side seam of the woven panel and the short end of the stiff exterior bottom panel together on one side of your tote bag, and sew 1/4” along the edge to create a boxed corner. Refer to the video tutorial for a visual! Repeat for the other corner of the tote bag exterior and both corners of the interior lining. Follow the original pattern instructions for finishing the tote.
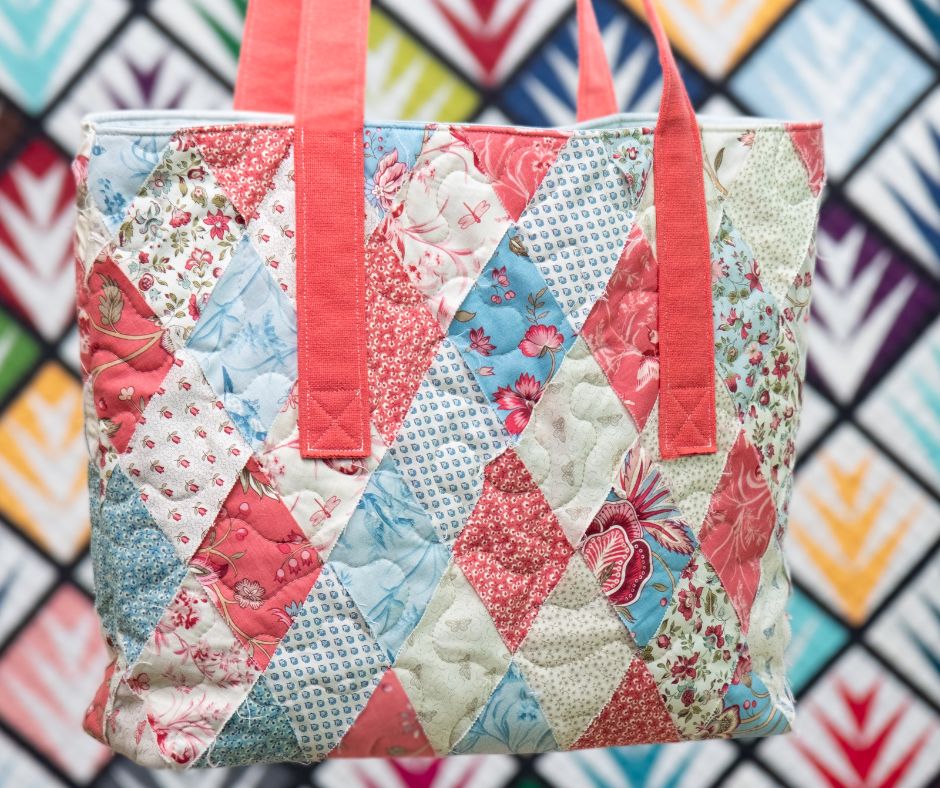
Whether you decide to stick with the original Windsor Tote construction or take a little detour and change up the pattern, the end result is still a fabulous and functional tote that is the perfect size for carrying small projects, farmer’s market finds, and more. It’s also a great done-in-a-day pattern for National Sew a Jelly Roll Day, which is THIS Saturday, September 21. We hope you’ll sew a jelly roll with us! Be sure to share your Windsor Totes on social media using the hashtags #windsortote and #projectjellyroll2024!
Posted in: