Welcome to Moda Fabrics!
Sunday Social: Border 2
Sunday Social: Border 2
Welcome to another Sunday Social and the end of Week 2 of the Choose Your Own Adventure Quilt-Along!
NOTE: This is one post in a series of quilt-along posts. Start from the beginning with the first post {here}.
We have a lot going on at summer camp! If you are just joining in, this is where we are on our journey:
For instructions for the previous posts, click on the links below:
- Center (Path A) - Dresden Peak
- Center (Path B) - Star Valley
- Border 1
- Round 1 (Path A) - Four Points
- Round 1 (Path B) - Cross Creek
- Cornerstone 1 - Tulip Field
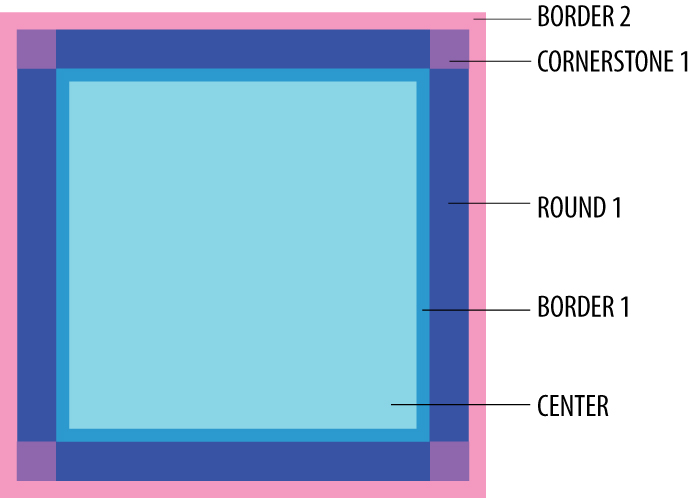
- Border 2 (this post)
If you get lost along the way, just click on the Index tab at the top of the blog to see all of the links to the QAL posts in order.
Today's post has the (very quick and easy!) instructions for Border 2 and then please pop over to our social accounts to see what everyone else is sewing together. You will find a TON of inspiration. Quilters are really taking this quilt and making it their own which is exactly what we hoped for when we designed it.
Now on to Border 2!
- (2) 2" x 27.5" strips for top/bottom borders
- (2) 2" x 30.5" strips for side borders
We suggest using background fabric for this border, but feel free to make it pop with a print!
Lightly starch and press your completed medallion center block + Round 1. Square it up to 27.5" x 27.5".
Sew 2" x 27.5" strips to the top and bottom of your block. Press.
Sew 2" x 30.5" strips to each side of your block. Press seams, lightly starch, and then press the whole block one more time.
![]()
The medallion quilt should measure 30.5" square. And that's it for this week! See you back here tomorrow for Round 3 - Path A.

[Facebook page: facebook.com/ModaBakeShop]
[Facebook group: facebook.com/groups/MBSbakers]
[Instagram: @modabakeshop]


Comments