Welcome to Moda Fabrics!
At the Seashore - Calm Seas Quilt Setting
At the Seashore - Calm Seas Quilt Setting
 Today's setting option is by Anne of Sweet Grass Designs.
This post is part of our summer quilt-along series. Find the rest of the posts by clicking {here}. ![]()
| Use for: | Yardage | |
|---|---|---|
| Fabric A | Setting | 2.5 yds* |
| Fabric B | Binding | .75 yds |
| Fabric C | Backing | 4.5 yds |
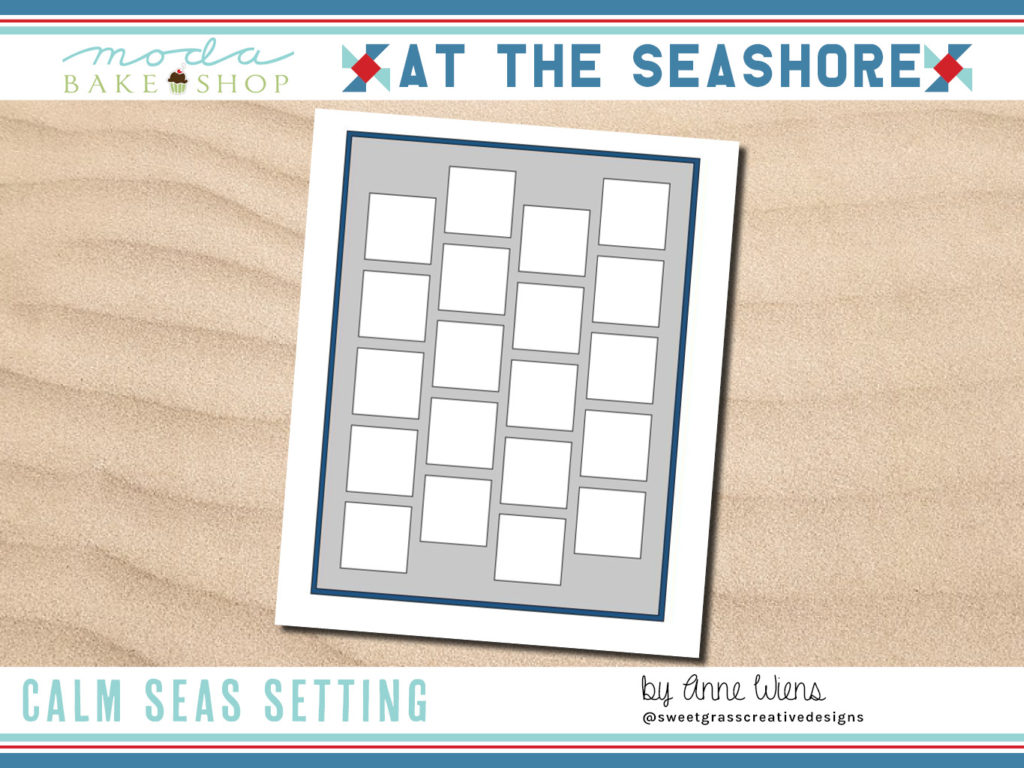
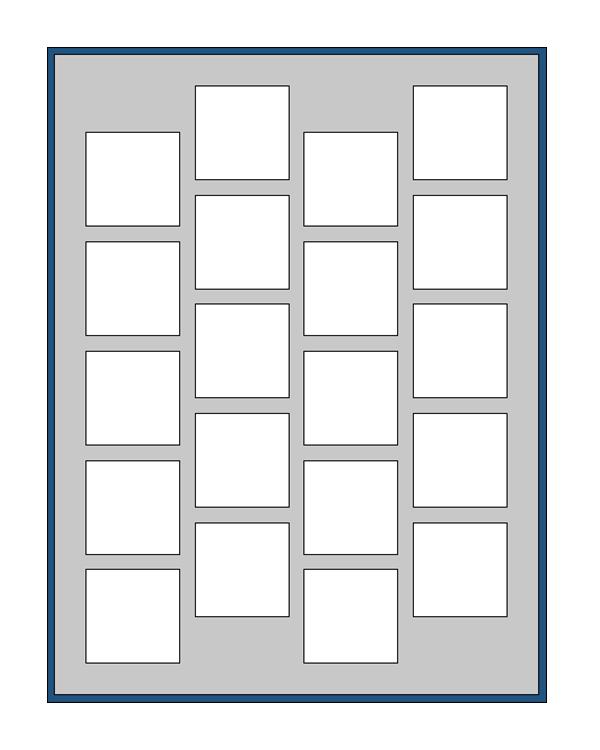
*Yardage for setting only. This does not include fabric for the block backgrounds. If you want to use the same fabric for both, I would buy another 2.5 - 3 yards. That's probably far more than you will actually need, but it's my "best guess." ![]() This simple setting uses twenty 12.5" blocks. Instead of a traditional sashed setting, I've designed this top in vertical rows, staggered just a little bit to create the effect of a gently ocean wave.
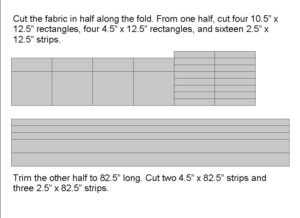
This simple setting uses twenty 12.5" blocks. Instead of a traditional sashed setting, I've designed this top in vertical rows, staggered just a little bit to create the effect of a gently ocean wave.  The biggest challenge in this setting is the cutting, because instead of cutting strips across the width of your fabric (selvedge to selvedge), you're going to cut long lengthwise (parallel to the selvedge edge) strips. Therefore, I suggest you NOT use a directional fabric. You will have to fold your fabric twice before cutting, so be sure those folds are parallel to each other so you don't wind up with "doglegs" in your strips. If you are a beginning quilter, you may want to have a more experienced quilter assist you with this. The first thing you will do is cut your fabric lengthwise, along the fold. This will give you two pieces that are 90" long and about 21-22" wide. Set one half aside. Trim the other to 82.5" long. Fold in half, and in half again. Be sure those folded edges are parallel to each other. Trim off the selvedge edge, then cut two 4.5" x 82.5" strips and three 2.5 x 82.5" strips. Set these aside. From the second half of your fabric, cut four 10.5" x 12.5" rectangles, four 4.5" x 12.5" strips, and sixteen 2.5" x 12.5" strips. Here's a diagram of the cutting:
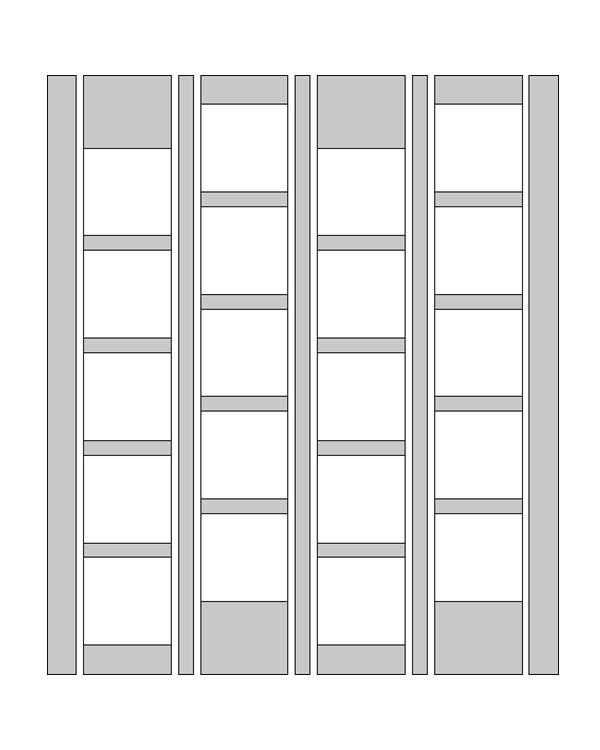
  Assembly is simple. Lay out your blocks in four vertical rows, with five blocks in each row. Sew the rows together, with 2.5" x 12.5" sashing strips between the blocks.
  Rows #1 and #3 have a 10.5" x 12.5" rectangle at the top of the row and a 4.5" x 12.5" strip at the bottom of the row. Rows #2 and #4 have a 4.5" x 12.5" strip at the top of the row and a 10.5" x 12.5" strip at the bottom of the row. Each row should measure 82.5" long. If not, they should at least be close enough to the same length that you can fudge it. You can calculate the average length of the four rows, and trim your 82.5" strips to this length. Complete the top by sewing the 2.5" x 82.5" strips between the rows. Sew the 4.5" x 82.5" strips to the outside edges. To piece the backing, cut two 8.5" x Width of Fabric (WOF) strips. Trim the selvedge ends and set the strips end to end. Trim to 70" long. Set aside. Cut the remaining fabric into two 70" x WOF pieces. Trim the selvedge edges. Sew the 4.5" x 70" strip between the two 70" x WOF pieces. Your backing should measure 70" x approx. 88". Layer quilt top, batting and backing. Quilt as desired. Cut eight 2.5" x WOF strips from fabric B for binding.
 ![]() This quilt finishes at 63" x 82". Over the course of the next few weeks, you're going to receive 25 12.5" quilt block patterns. So what are you going to do with the five blocks you have leftover if you choose this setting plan? My plan would be to make a small wallhanging and/or a few throw pillow covers! Anne Wiens {blog: "Seams Like a Plan"} {instagram: @sweetgrasscreativedesigns} {facebook: Sweetgrass Creative Designs}
This quilt finishes at 63" x 82". Over the course of the next few weeks, you're going to receive 25 12.5" quilt block patterns. So what are you going to do with the five blocks you have leftover if you choose this setting plan? My plan would be to make a small wallhanging and/or a few throw pillow covers! Anne Wiens {blog: "Seams Like a Plan"} {instagram: @sweetgrasscreativedesigns} {facebook: Sweetgrass Creative Designs} ![]()

Comments