Welcome to the Moda Website!
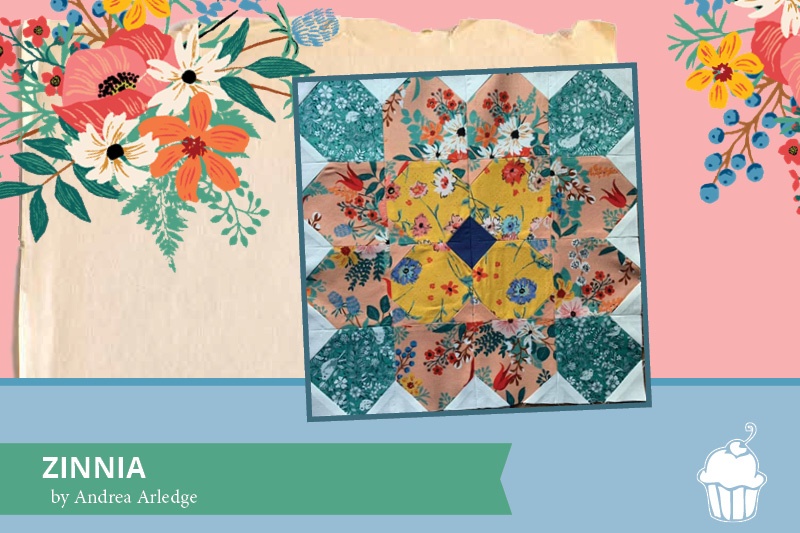
Zinnia - Bonus*
Zinnia - Bonus*
![]()
4", 6", or 12" block
![]()
4” Block
From fabric 1, cut:
{A} (4) ½” squares
From fabric 2, cut:
{B} (4) 1½” squares
From fabric 3, cut:
{A} (12) ½” squares
{B} (8) 1½” squares
From fabric 4, cut:
{B} (4) 1½” squares
From background fabric, cut:
{A} (28) ½” squares
6” Block
From fabric 1, cut:
{A} (4) ¾” squares
From fabric 2, cut:
{B} (4) 2” squares
From fabric 3, cut:
{A} (12) ¾” squares
{B} (8) 2” squares
From fabric 4, cut:
{B} (4) 2” squares
From background fabric, cut:
{A} (28) ¾” squares''
12” Block
From fabric 1, cut:
{A} (4) 1½” squares
From fabric 2, cut:
{B} (4) 3½” squares
From fabric 3, cut:
{A} (12) 1½” squares
{B} (8) 3½” squares
From fabric 4, cut:
{B} (4) 3½” squares
From background fabric, cut:
{A} (28) 1½” squares
![]()
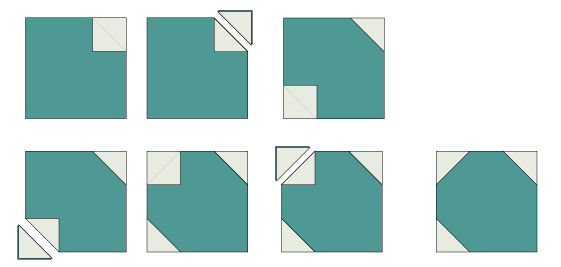
STEP 1. MAKE LEAVES
Using the Easy Corner Triangle (ECT) method, add background squares to the 3 corners of each leaf square as shown. Draw a diagonal line on the background square. Place right sides together on the leaf print square. Align to one corner and sew on the marked line. Cut ¼” away from sewn line. Repeat.
Make 4 leaf units.
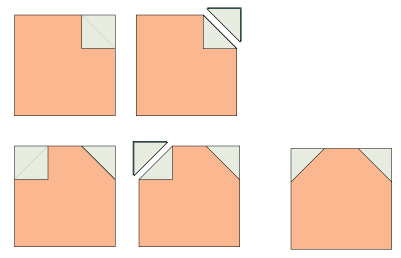
STEP 2. MAKE PETALS
Use the ECT method described in Step 1 to make the outer petals.
Make 8 petals.
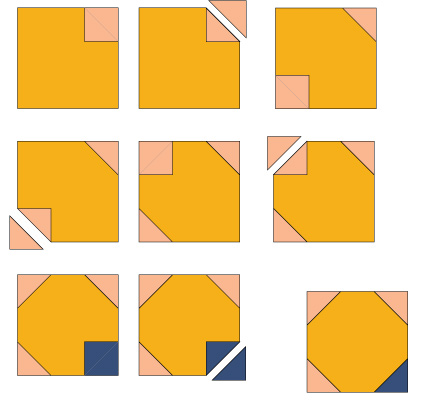
STEP 3. MAKE CENTER
Repeat ECT method to make centers. Pay carefeul attention to the placement of colors in each corner.
Make 4 center units.
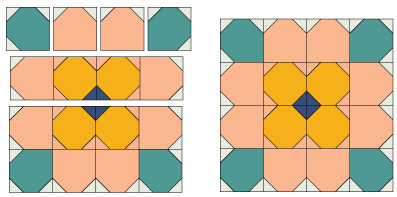
STEP 4. ASSEMBLE BLOCK
Join block components in rows as shown. Sew rows together to complete block.
Andrea Arledge
instagram: @andrea.arledge.designs
Find all Summer in the Garden posts by clicking {HERE}.

Comments