Welcome to Moda Fabrics!
Designing Setting Options with Electric Quilt Software
Designing Setting Options with Electric Quilt Software
Published:
Feb 15 2023 - 02:50
How many times do you see a quilt pattern you love but wish it finished at a different size than what's shown in the pattern?
For me, that was totally the case with the recent Charm Pack Challenge event. I really wanted to make a bed-sized quilt as part of a room makeover I'm working on but also wanted to sew along with friends for the challenge. So, as is so often the case, it's EQ8, the Electric Quilt software to the rescue!
We had so many people ask about our process for digitally creating quilts that I wanted to share some of the process. (Keep following the Moda blog in the coming months as we'll be sharing more tips and tricks for using EQ8 with Moda Fabrics.)
The Charm Pack Challenge block finishes at 32” square. Find the pattern here.
Since I wanted a quilt that would fit my queen-sized bed, I decided to make four of the blocks.
To achieve some color continuity in the blocks, I mixed and matched prints from 6 different collections by various Moda designers.

Once I had my blocks constructed, it was time to use EQ8 to settle on a setting option. I really wanted a clear visual of how the actual quilt would look so I decided to use the “Import Photos” feature in EQ to use actual photos of my blocks as I experimented with setting options. Here’s a quick tutorial of how to use that feature.
Start by taking photos of each block you want to include in your quilt. Using your phone edit feature or an editing program, crop the photo to remove as much of the background around the block as possible.
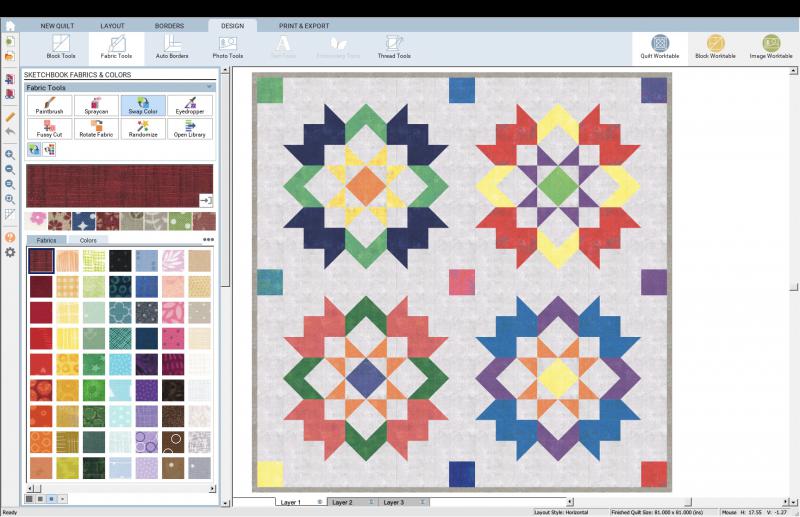
Open your EQ8 Software. I drew the basic Love block in EQ and then started with a simple layout featuring 2 rows of 2 blocks set side by side, separated by a 4” wide finished sashing.
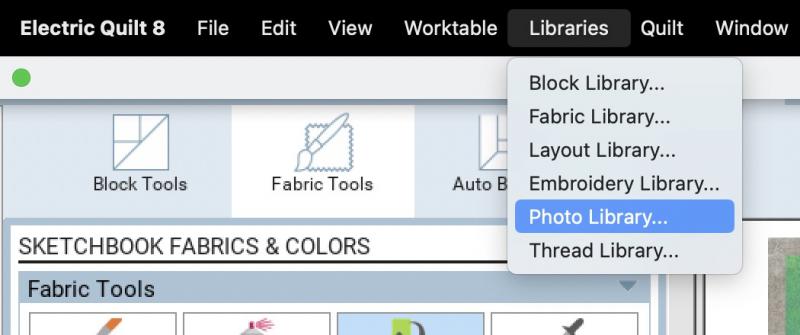
Then, to add your photos, Go to “Libraries” in the Tool bar at top and Select "Photo Library".
Select "Import from Image Files":
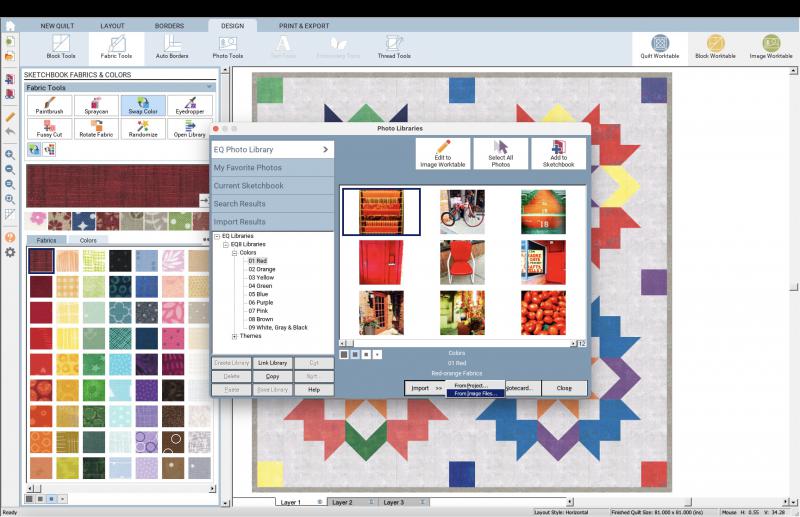
Then, navigate to where you images are stored on your computer and select the photos of your quilt blocks.

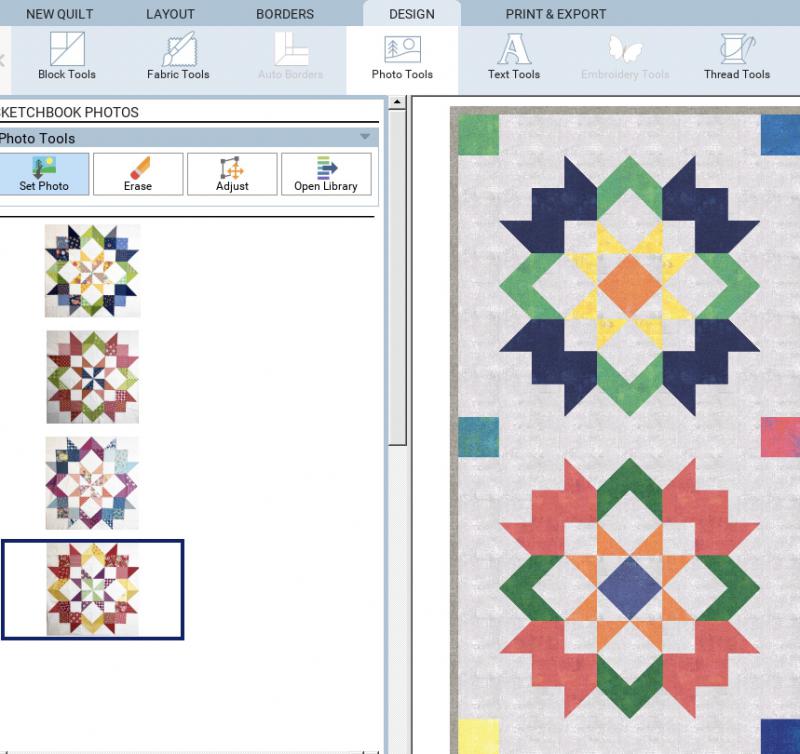
Photos are set into your quilt layouts using "Photo Tools" and placed on Layer 2.
Now the fun can begin!
To place a block on Layer 2, select the photo you want to use and hold down the Shift key. Navigate the cursor to the area you want to place the block and use your mouse to draw a square in the area you want to place the block. Then click "Adjust" and type in the size of the block and use the up and down buttons on the X-axis and Y-axis to move the block into position.

With all the block photos available, you can experiment with any setting you can dream up. My goal is a quilt that will fully cover my queen-sized bed with some drop on the sides.
Here are a few of the options I am considering:
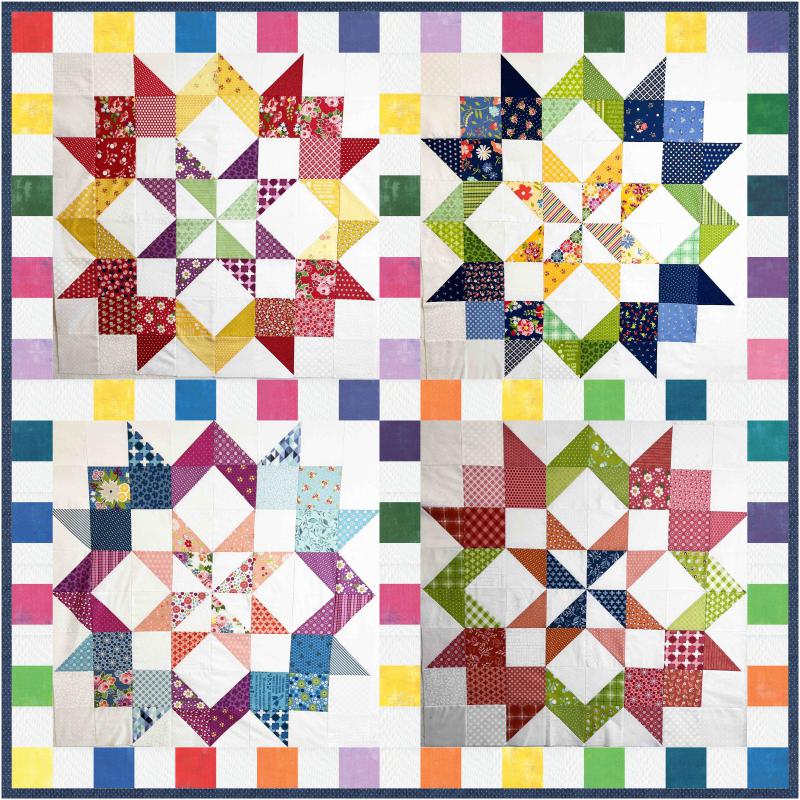
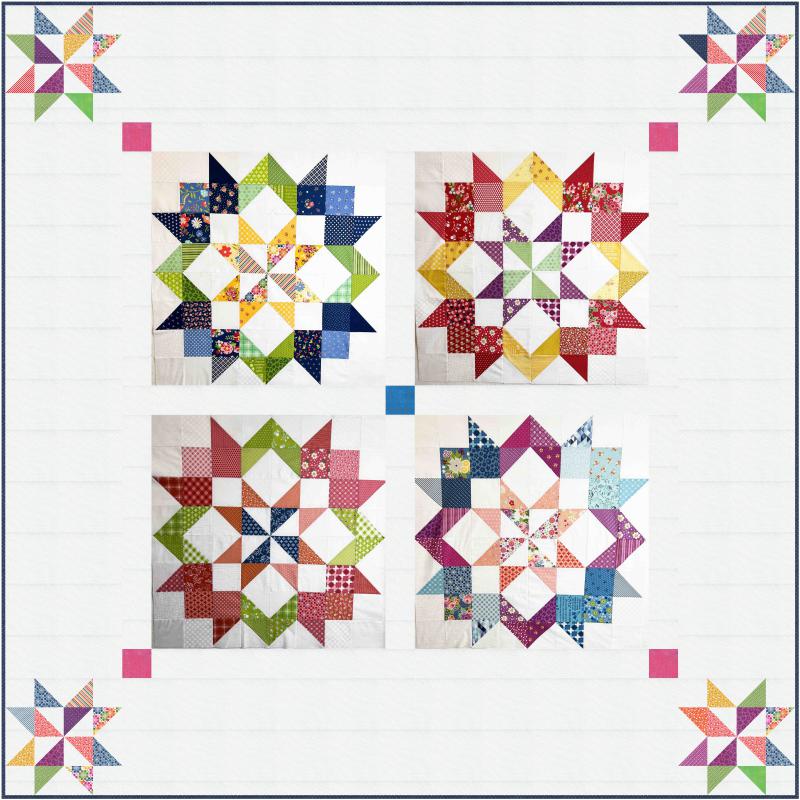
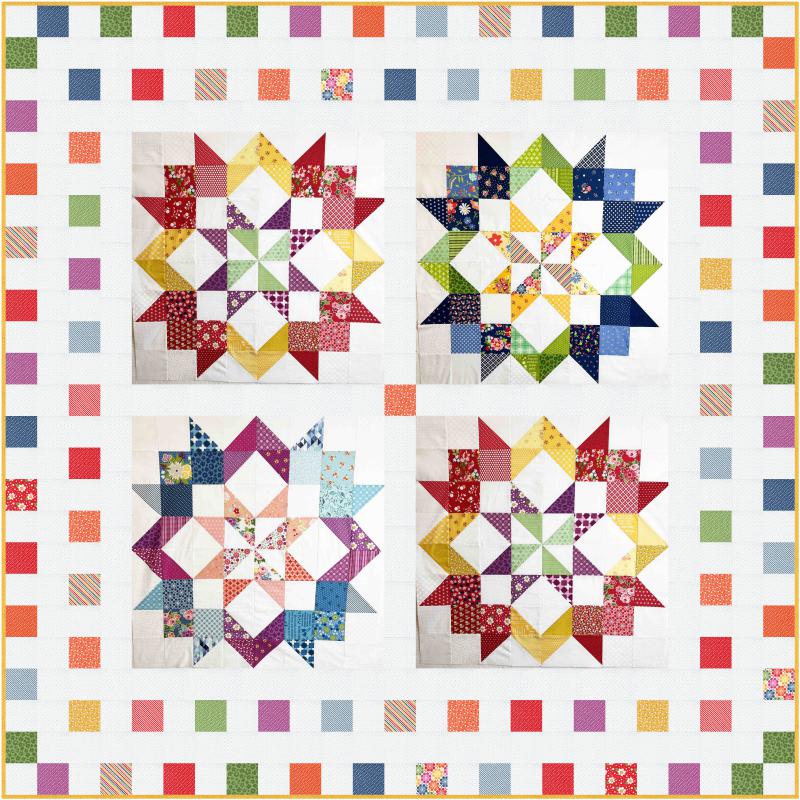
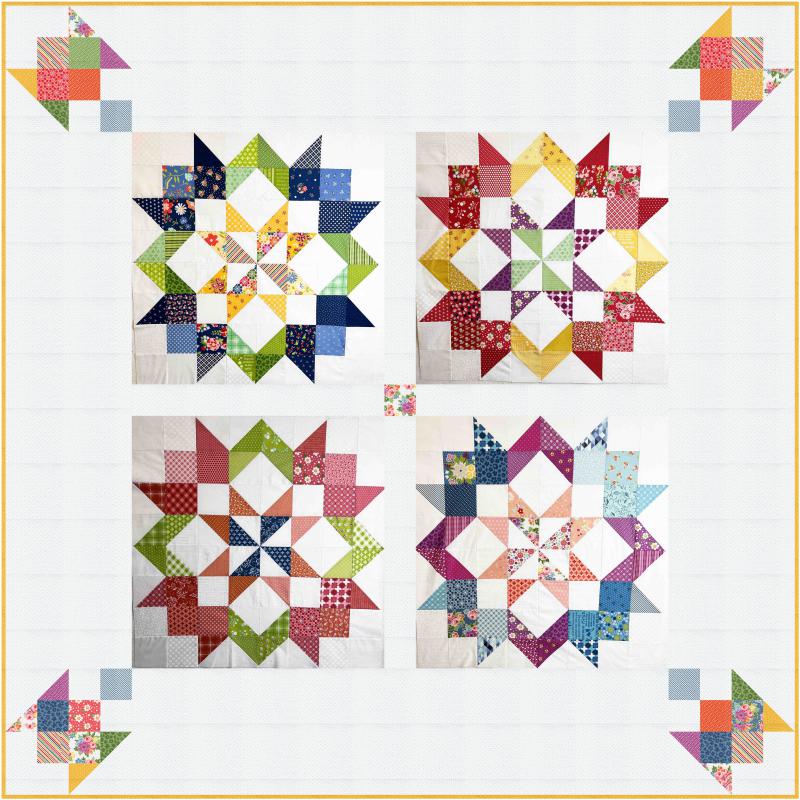
Which one is your favorite? Follow along as I make a final choice and assembly my quilt.
Posted in: