Welcome to Moda!
Chatsworth Quilt-Along: Blocks 1 and 2
Chatsworth Quilt-Along: Blocks 1 and 2
Published:
Jan 25 2024 - 08:00
Welcome to the Chatsworth Quilt along!
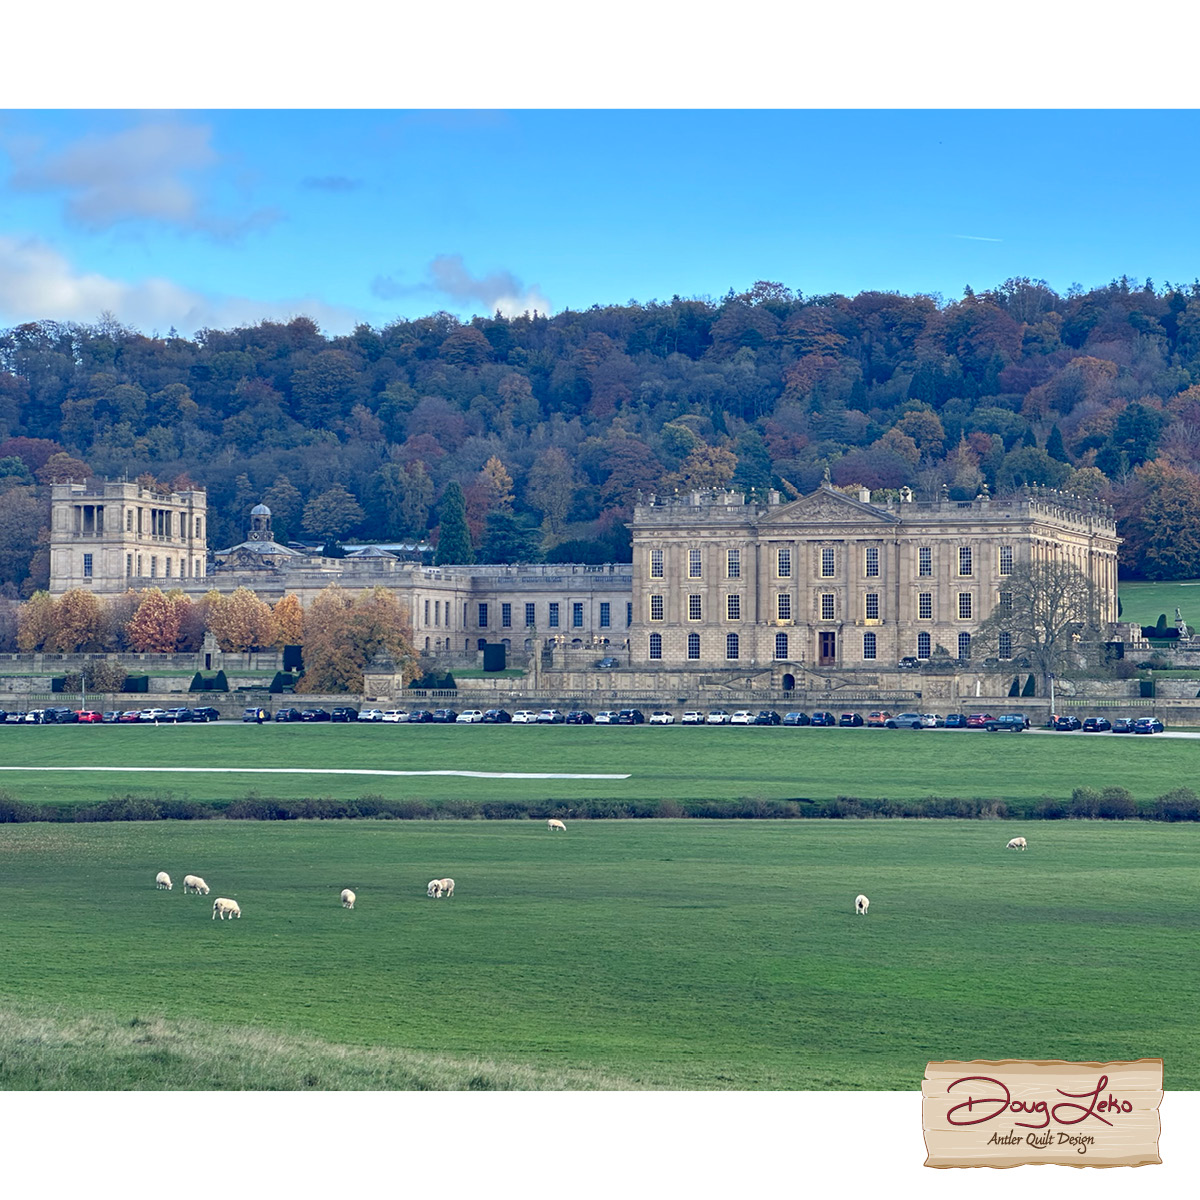
What is Chatsworth?! If you are familiar with my past books and patterns, you know I love anything United Kingdom. I often will use English names for my book and pattern titles. Hence the title for this new book of mine, Chatsworth!
Chatsworth is a beautiful estate that was built in 1687 in the English countryside. It comprises a Grade I listed house and stables, a 105-acre garden, a 1,822-acre park, a farmyard and adventure playground, and one of Europe’s most significant private art collections. It has been home to 16 generations of the Devonshire family for nearly five centuries. (chatsworth.org)
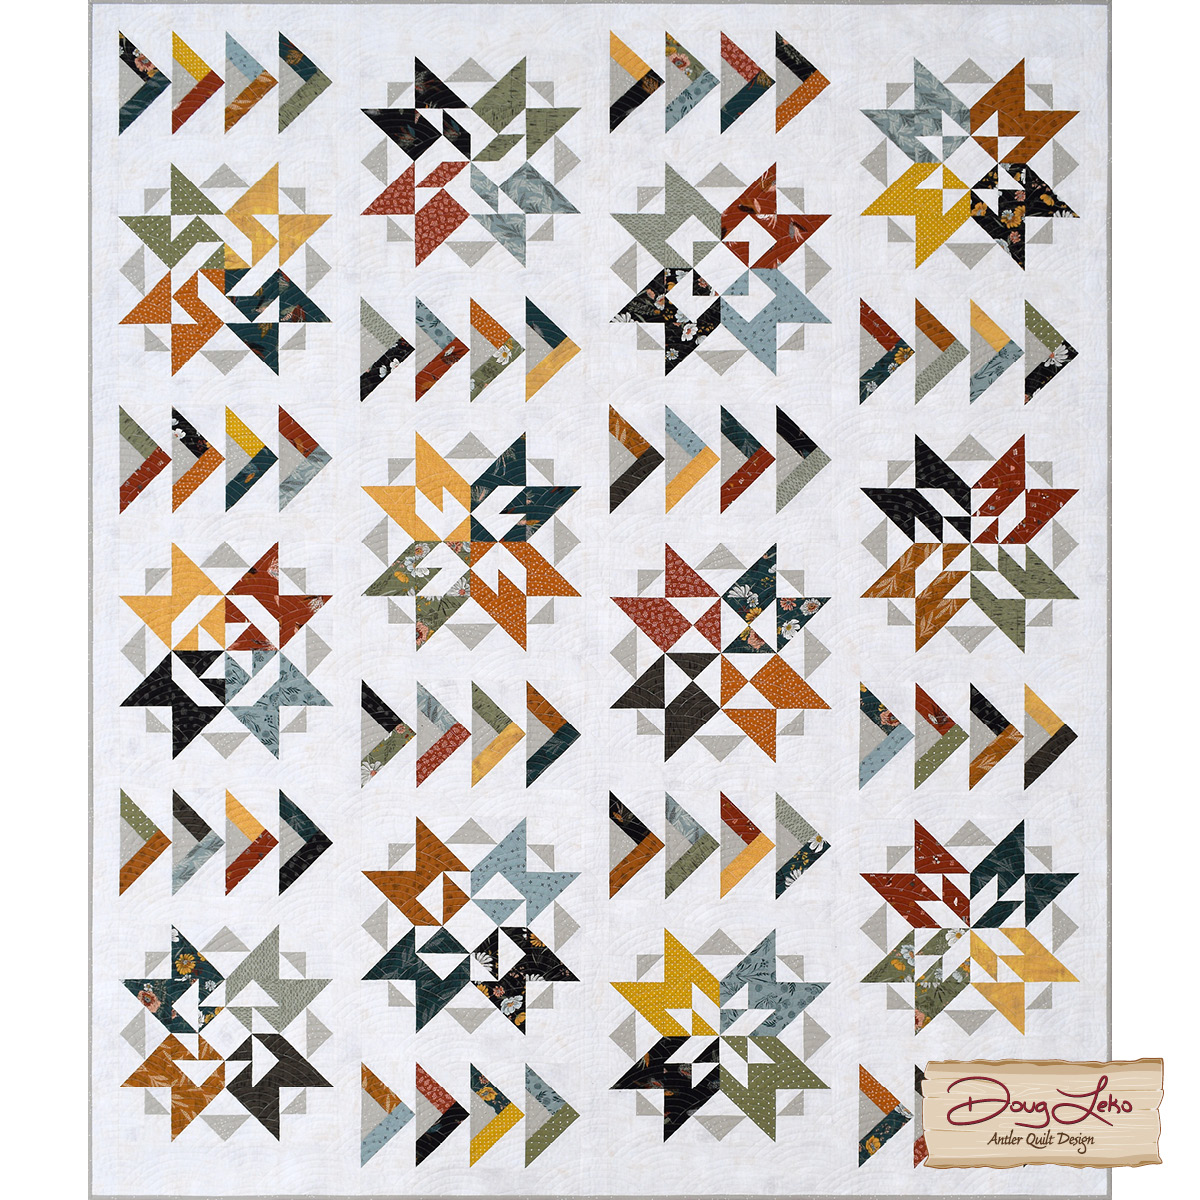
Here is the quilt we will be working on for the next several months. The finished size is 74” x 88”. The fabric featured in the version pictured above is Woodland & Wildflowers by Fancy That Design House for Moda Fabrics.
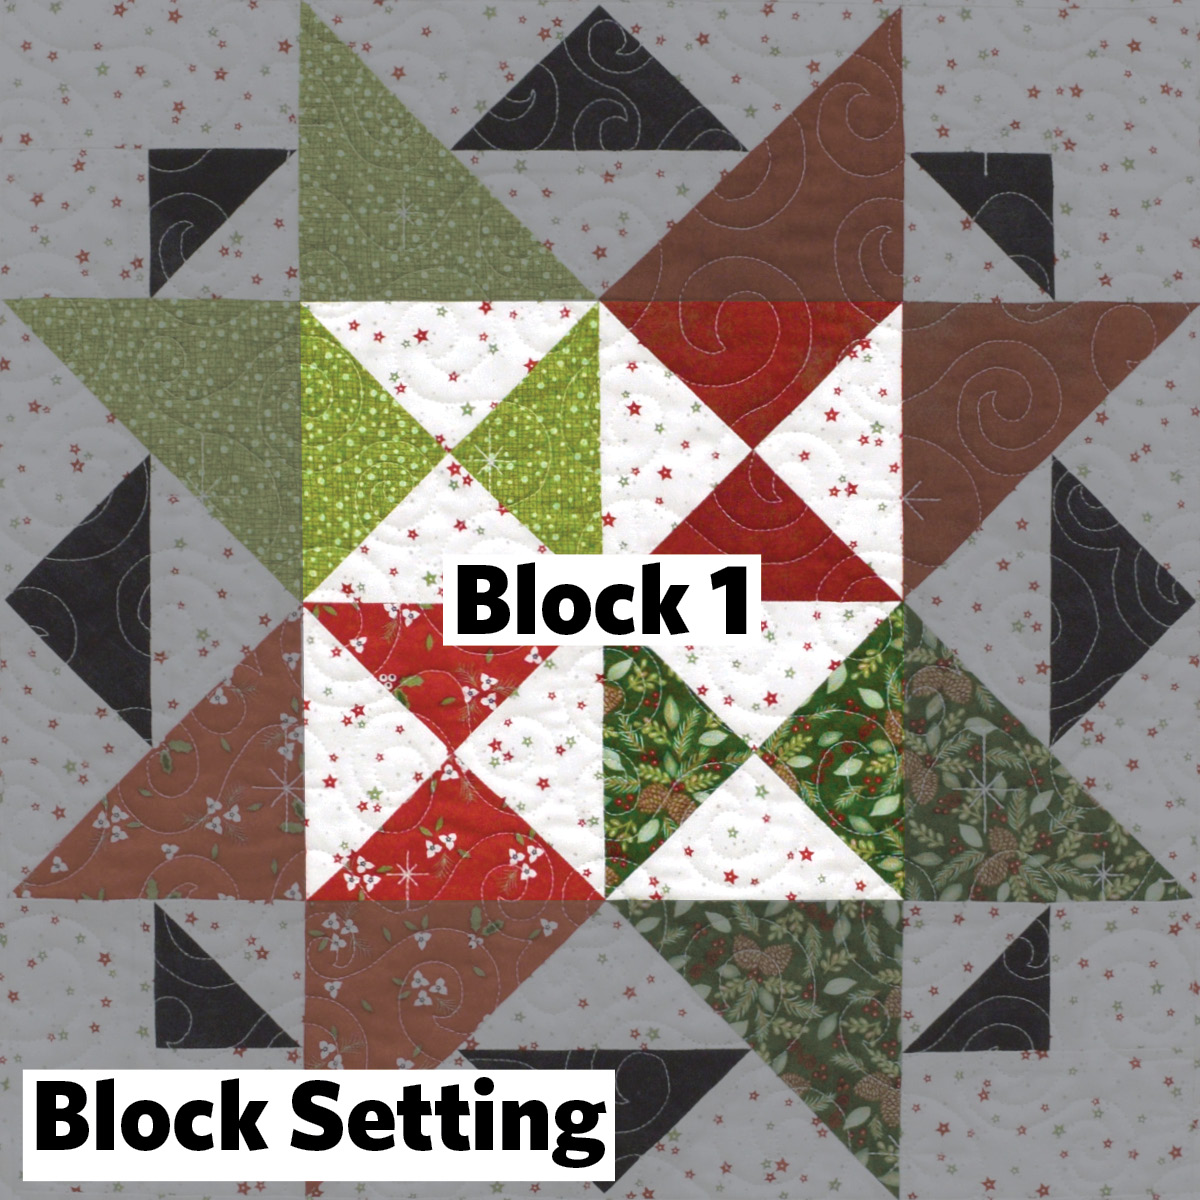
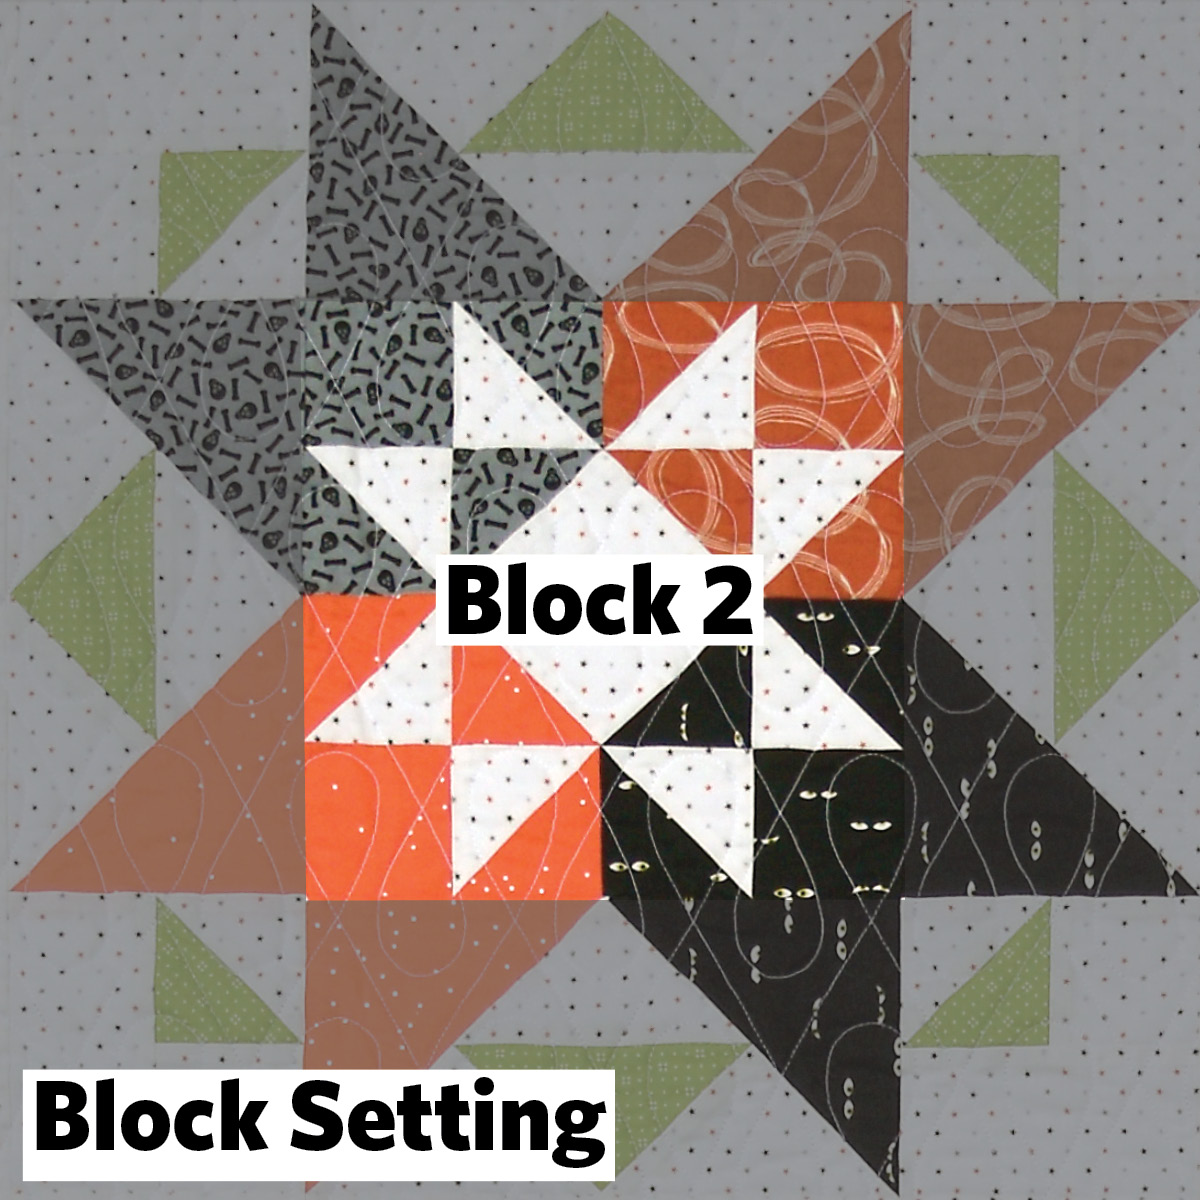
Grab your Chatsworth book -- we will working on page 5, Block 1. Each star block is composed of two parts: The first part is a different center for each of the 12 blocks, and the second part is the “outer star,” which we will work on later on in the quilt and is referred to as the "Block Setting."
For each Block 1-12, you need a background fabric and four different assorted prints (or solids). Follow the cutting chart at the top of page 5, and refer to the cutting diagram to the left of each cutting chart. Make sure you have contrast between your assorted prints; that way, each month the design of the block will show.
Quarter-inch seams will be used throughout this quilt! If you are unsure of your 1/4” seam allowance, cut (3) 1 1/2” x 3 1/2” pieces of fabric and sew them together on the long side, pressing in one direction. The sewn square should measure 3 1/2” square. Adjust your seam allowance as necessary: If the unit is under 3 1/2”, narrow your 1/4” seam; if the unit is over 3 1/2”, widen your 1/4” seam. Remember those settings if you adjust your machine -- use a post-it note as a helpful reminder!
Doug’s Tips:
- Each month, keep the four paired assorted prints together with a Wonder Clip or a pin. This will help save time when we work on the Block Setting and the Braided Flying Geese later in the year.
- I pressed my seams open in Step 2, which helped reduce the bulk in these seams. Shorten your stitch length to 1.8/2.0 when pressing your seams open.
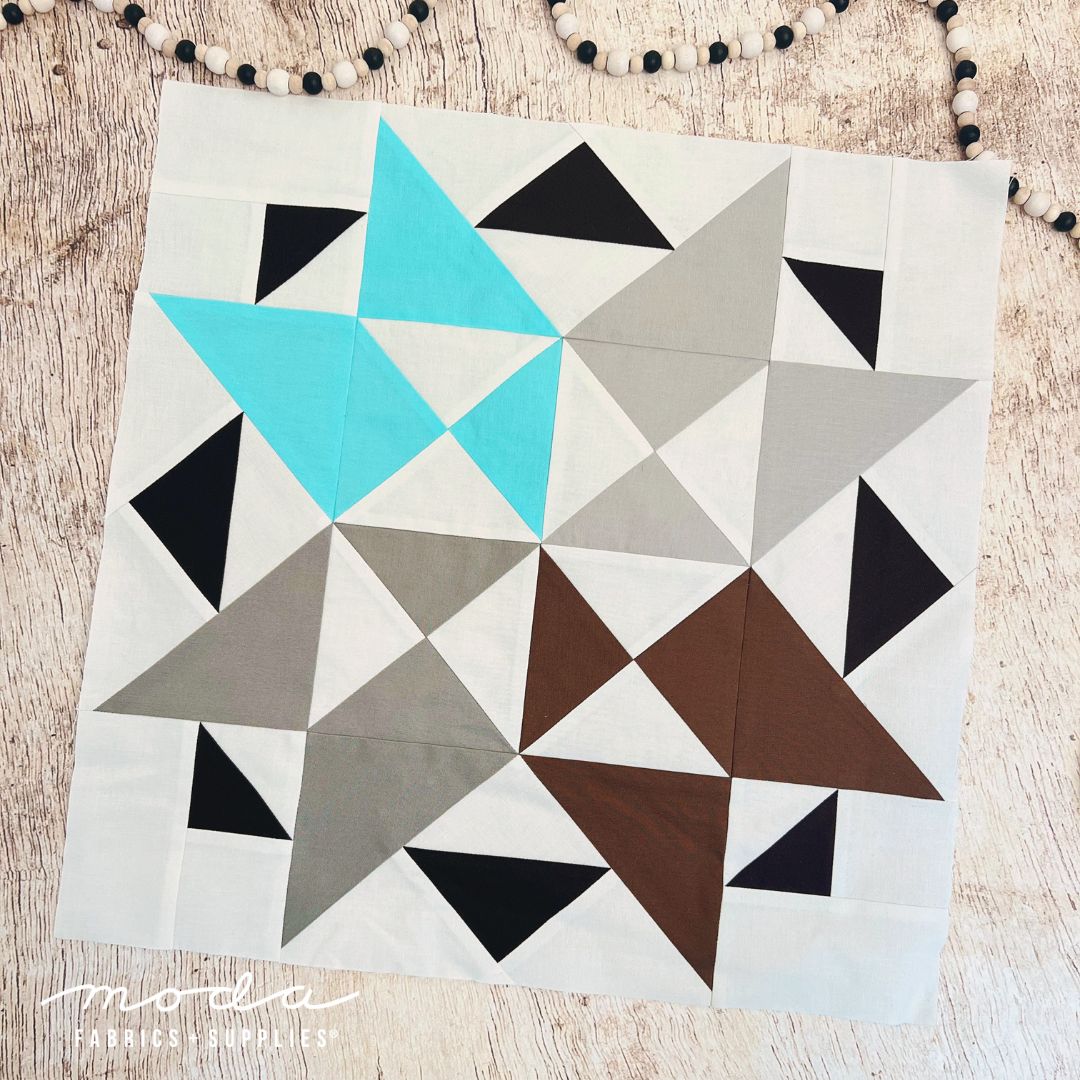
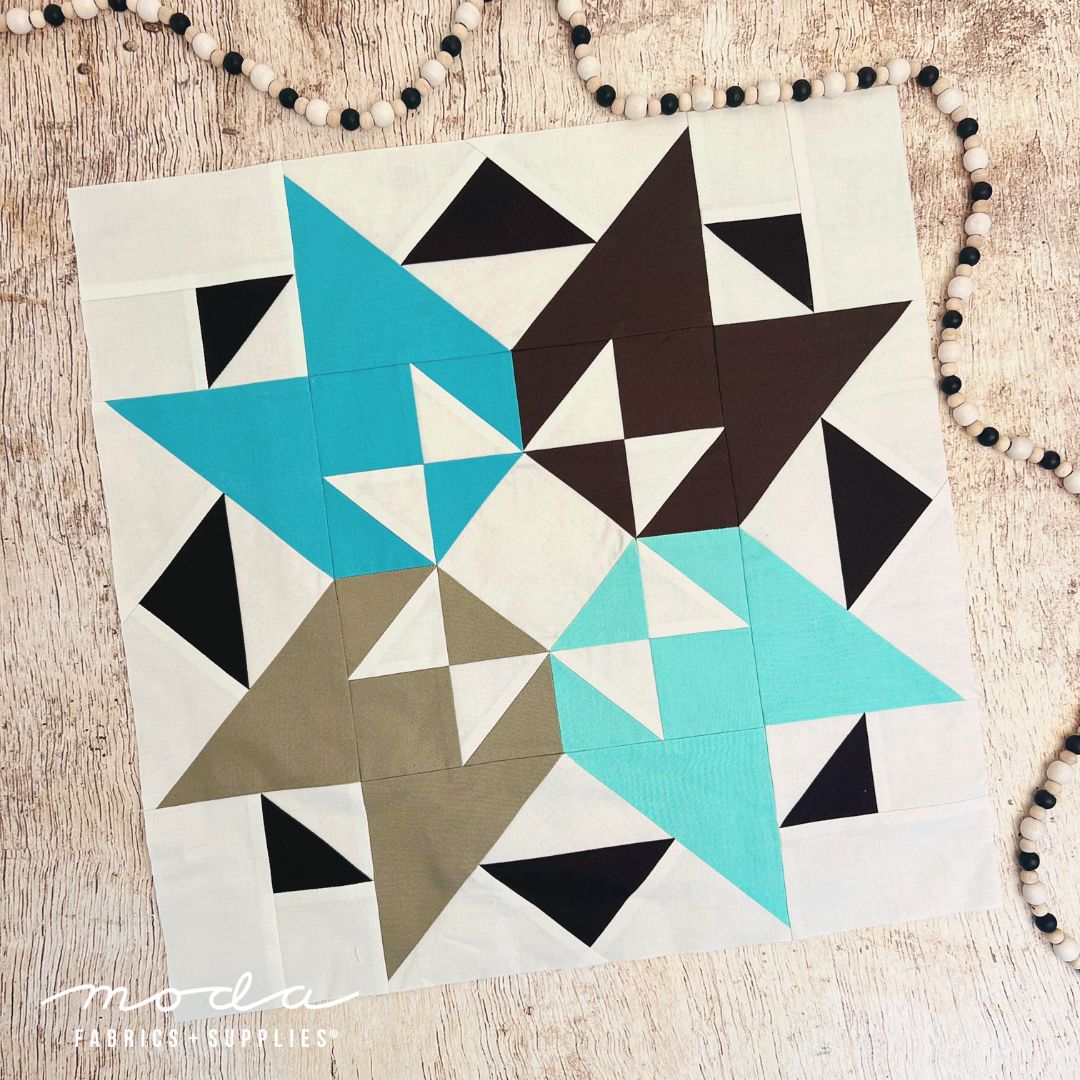
Chatsworth is just as stunning in solids as it is in prints! In my blog posts each month, I'll be sharing blocks made with a modern Southwest palette of sand, stone, turquoise, earth, and charcoal shades of Moda Bella Solids. Here's block 1:
Follow along with me step by step as I sew Block 1 in this video:
Grab your background fabric and four different assorted prints than you used in Block 1. Follow the cutting chart at the top of page 6, and refer to the cutting diagram to the left of each cutting chart.
Pay close attention in Step 3: To match the prints in your block, keep the same fabrics together. Again, I pressed these seams open when assembling Block 2.
Doug’s Tips:
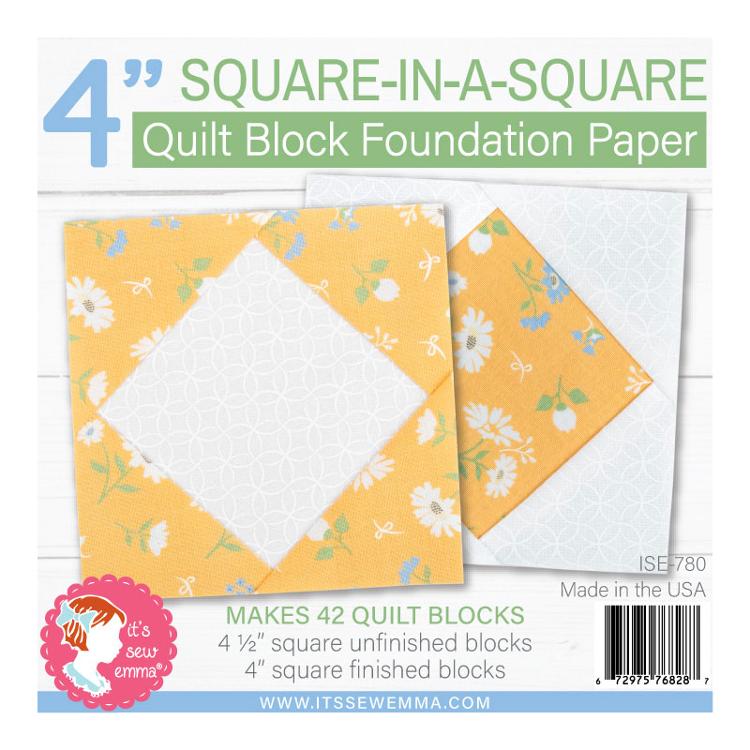
- Sometimes I find when making Step 2 Units (square-in-a-square), I need to use a skinny 1/4” seam. I always like to make a test unit to see how my 1/4” points on the outer edge will turn out, then I can adjust my seam allowance from there.
- If you struggle with the Step 2 Unit, you might want to try the Square-in-a-Square (ISE 780) Foundation Paper! You never can go wrong when stitching on the lines.
Here's my block 2 in solids:
Follow along with me step by step as I sew Block 2 in this video:
That’s it for Months 1 & 2! See you back here February 22 for Blocks 3 & 4.
Join our Chatsworth Facebook Group, where you can post pictures, ask questions, and see everyone else’s progress on their quilts. I can’t wait to see the fabric you use!
Posted in:
Comments