Welcome to Moda Fabrics!
Prairie Rose Garden Remix!
Prairie Rose Garden Remix!
Published:
May 2 2019 - 23:00

![]()
Hello! Sarah from Cedar Fork Stitches, back again with a fun "remix" of an old favorite Bake Shop recipe from 2015, Prairie Rose Garden! I have made several versions of this quilt, but never with solids, so I jumped at the chance to remake this pattern using all beautiful Bella Solids! As it turns out, I was able to make 2 distinct versions of the design, one with 2 colors per block, and the other more like the original, with 3 colors and a uniform "background". So join me as I explore two fun ways to "remix" Prairie Rose Garden!

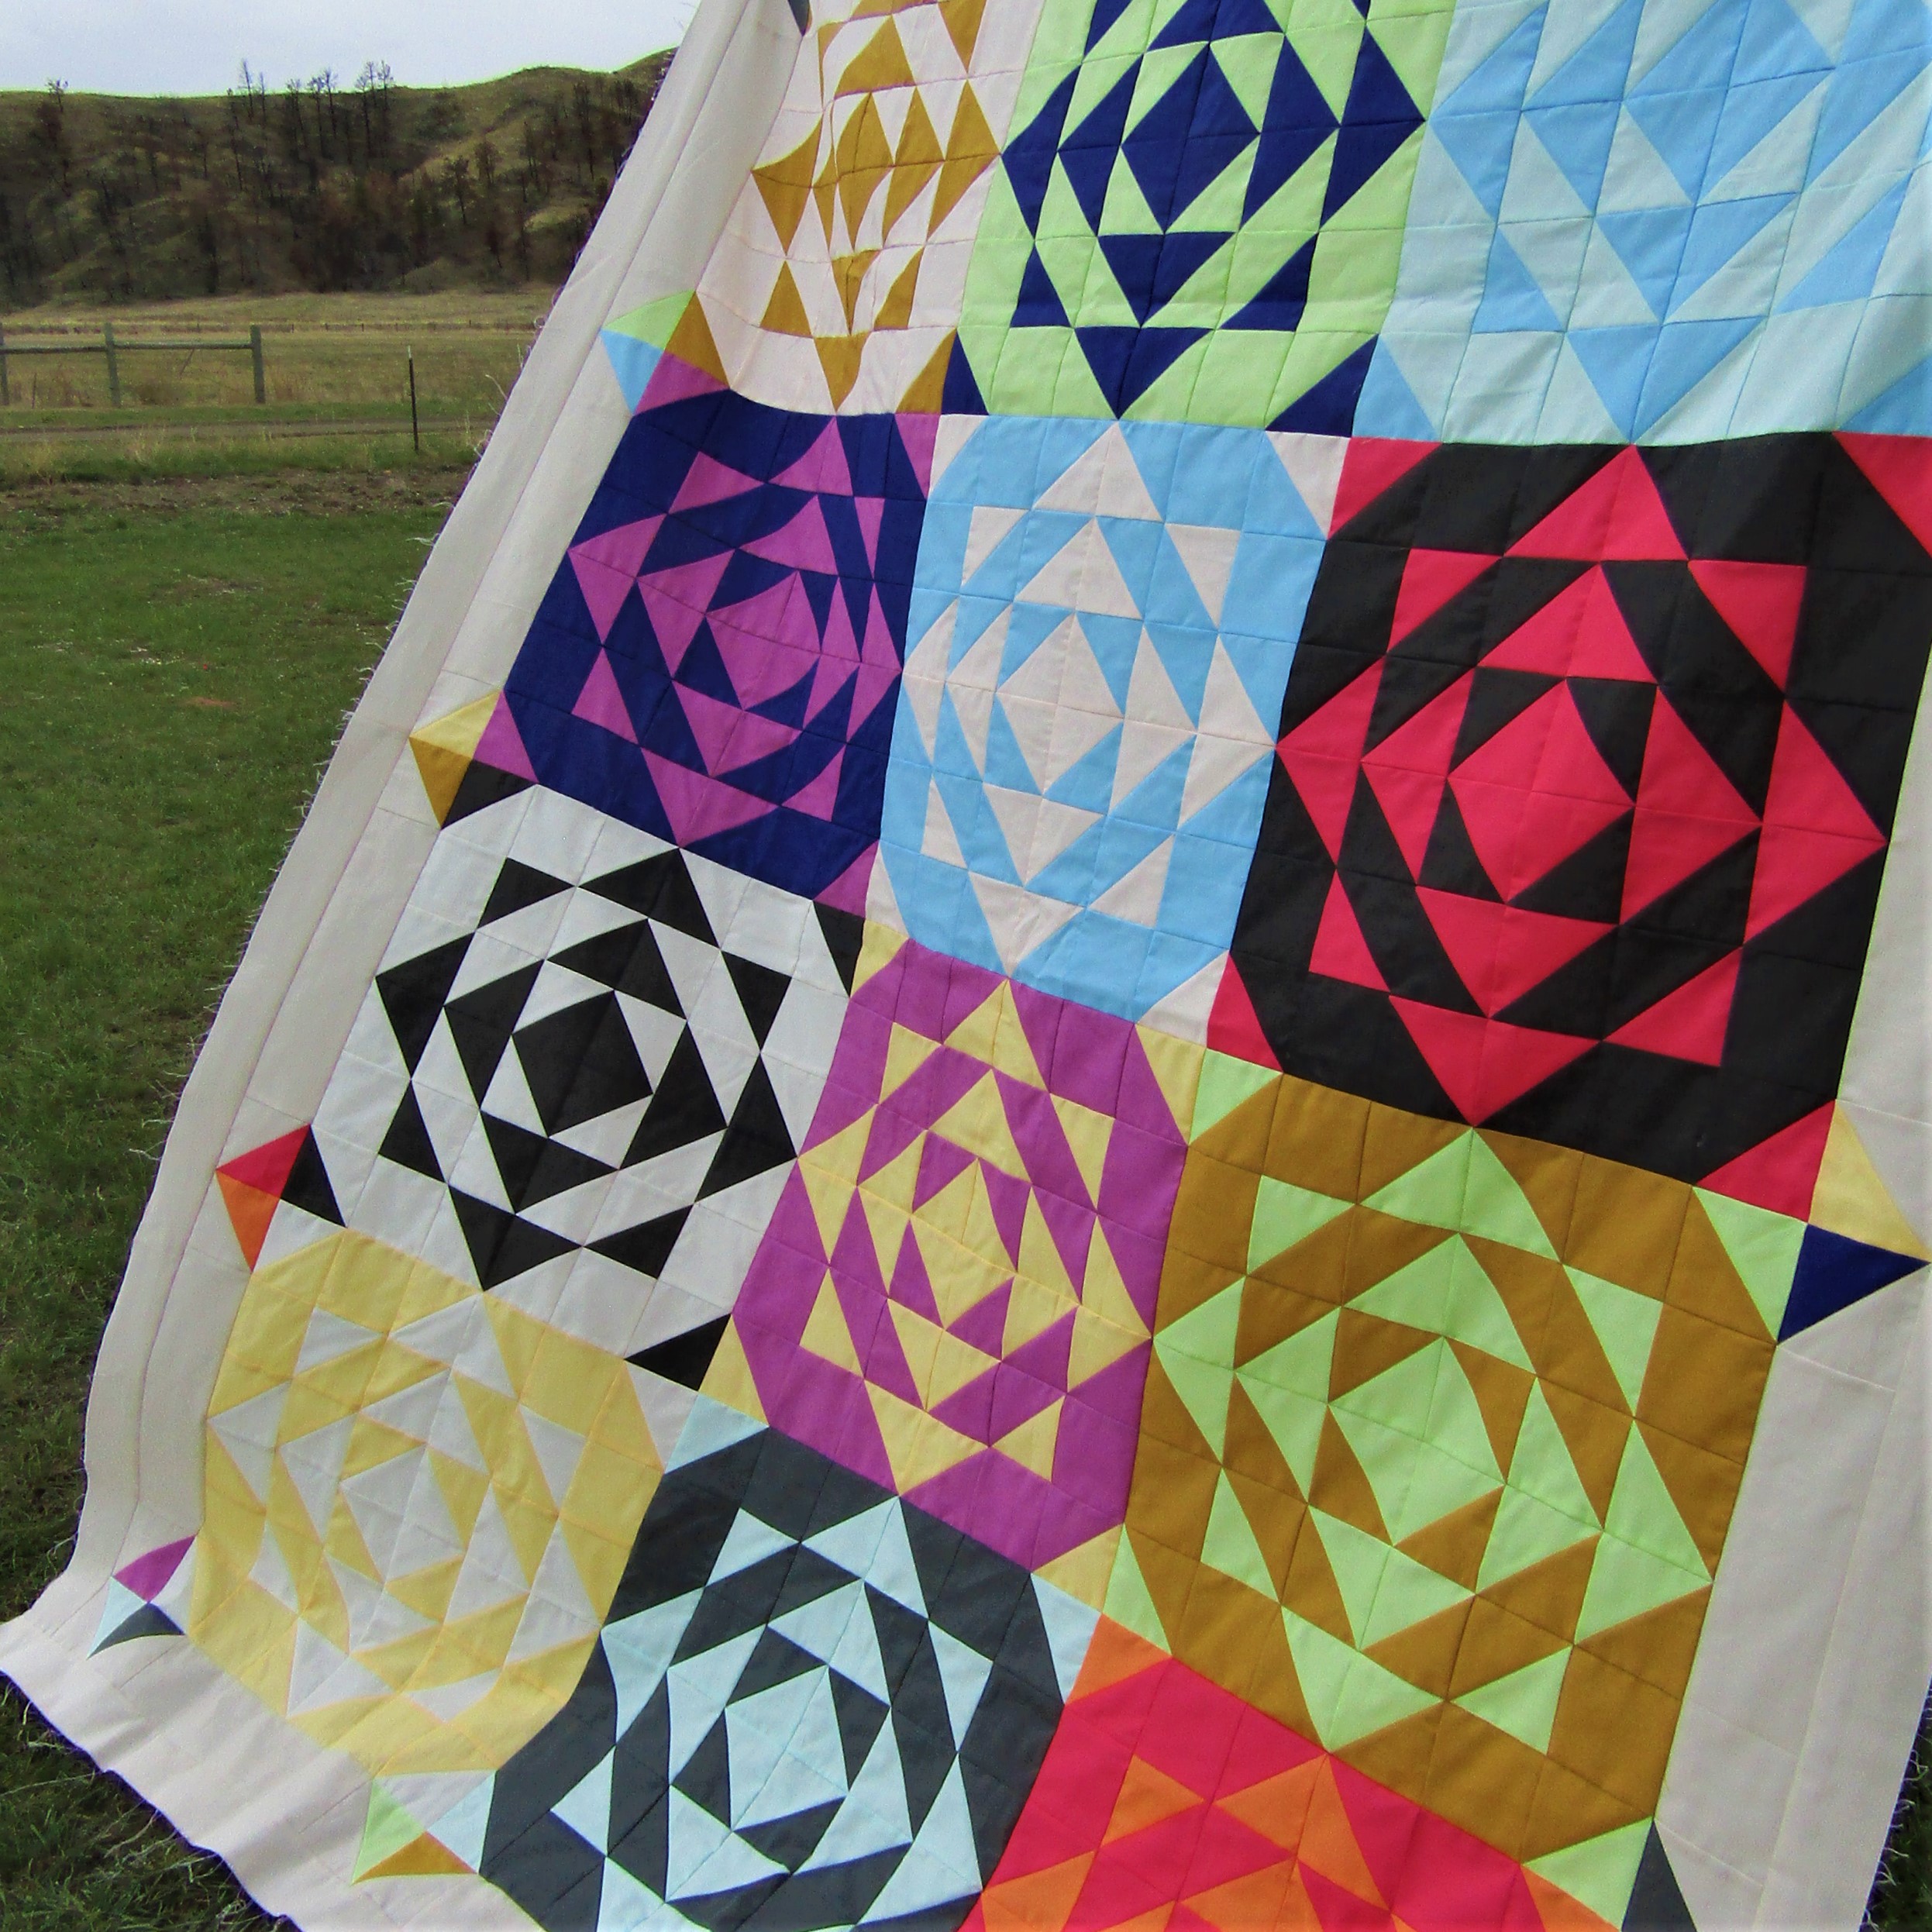
I made this version using 18" blocks, resulting in a quilt 64" x 82".
For all the original instructions see the original post, HERE.
I have included a table at the end of this post that will help you make blocks of various sizes, from 9" all the way up to 24"!
![]()

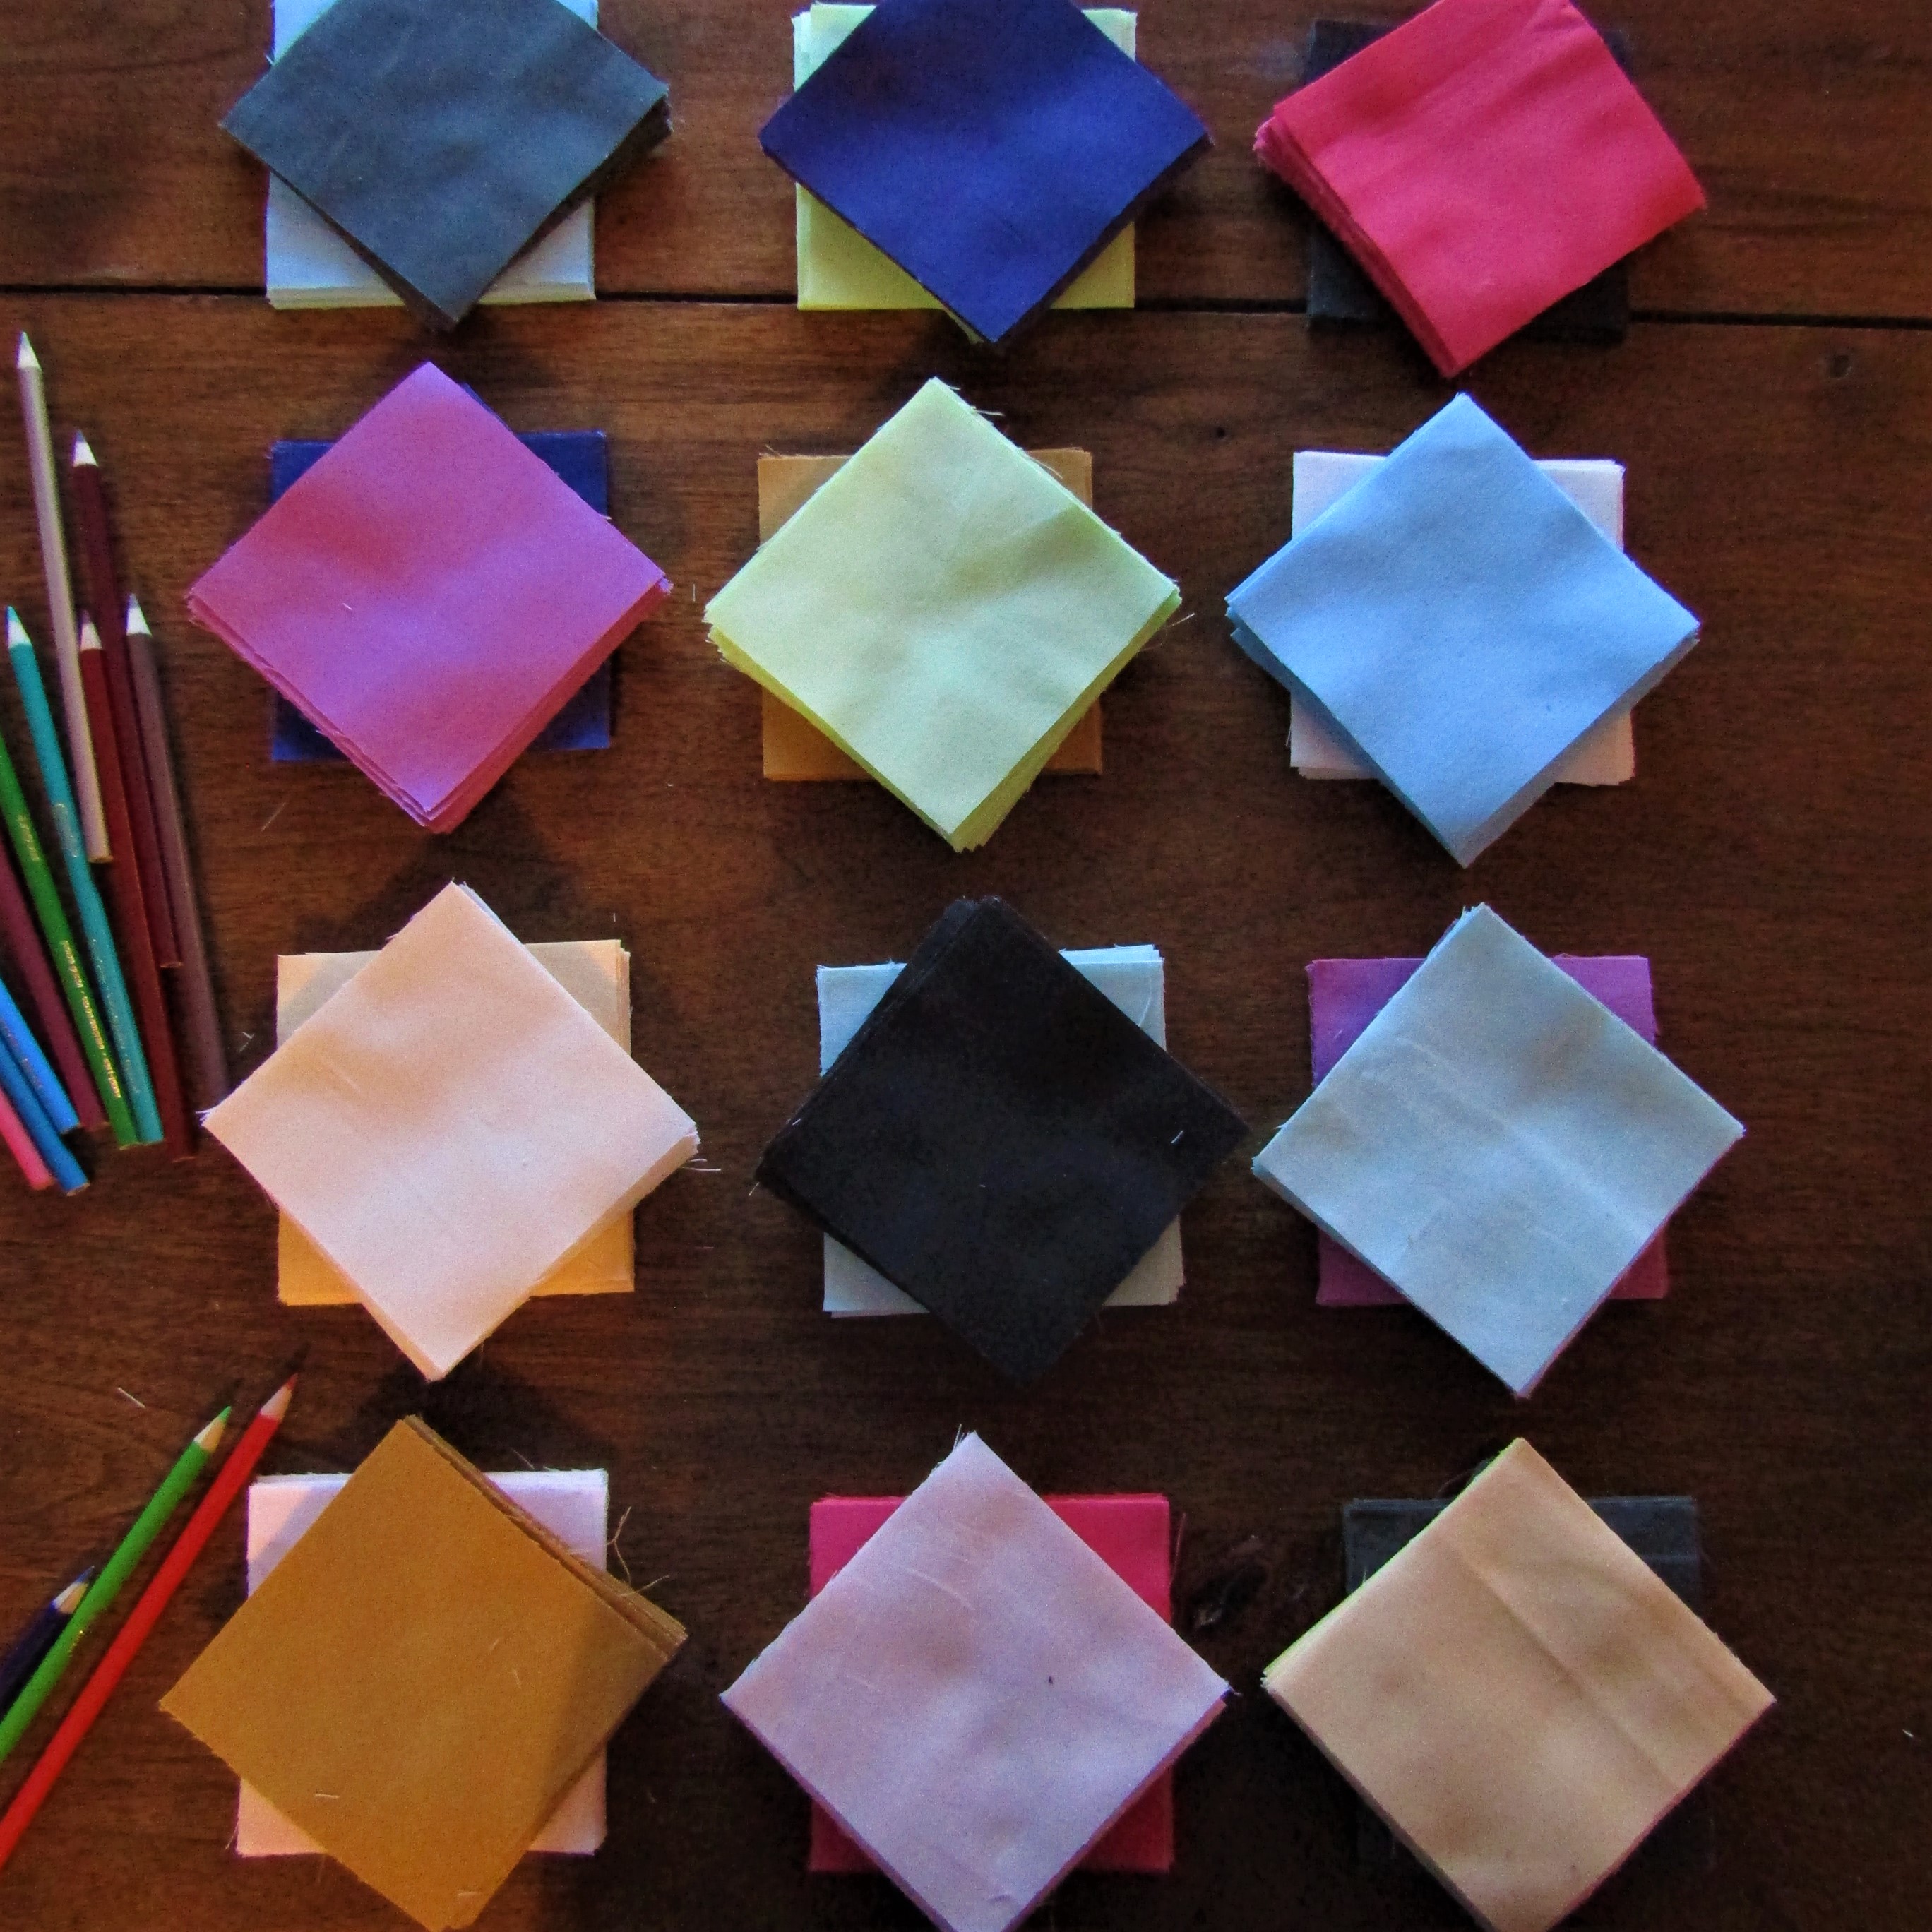
2/3 yd each of 12 Bella Solids, from top to bottom: Bluebell, Slate, Popsicle, Soft Yellow, Feather, Charcoal, Pale Pink, Harvest Gold, Honeydew, Terrain Iris, Ruby Ice, and Violet.
1 1/4 yd Etchings Stone, border fabric
4 yds backing fabric,
1/2 yd binding fabric, Terrain Iris
![]()
For this edition of Prairie Rose Garden Remix I made 12 18" blocks.
Each block is a 36-patch, or 6 rows x 6 columns.

There are 2 colors per block: The "rose" color and the "background" color.

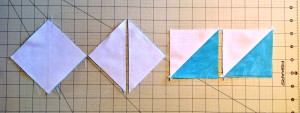
There are 28 Half Square Triangles (HSTs) and 8 squares per block. Make the HSTs using the 2-at-a-time method. From each of the 12 Bellas, cut 3 strips 4" x WOF, subcut into 29 4" squares (10 squares from each of 2 strips, and 9 from the 3rd). Separate into 2 sets of 14 squares each, and set the extra 1 square of each color in a separate set for using in the pieced border. Also, cut 1 strip 3 1/2" x WOF, and subcut into 8 3 1/2" squares. Place the 3 1/2" squares with 1 set of 14 4"squares. The sets with only 14 4" squares are your "rose" sets, and the sets with 14 4" squares and 8 3 1/2" squares are your "background" sets. Each block has one "rose" set and a "background" set.
Next, make pairs of your "rose" and "background" colors by taking a "rose" set of one color and pairing it with the "background" set of another color. Mix them and match them to suit yourself.
Once you have your colors paired up, make HSTs using the 2-at-a-time method. Use the 4" squares for each pair of colors. Trim HSTs to 3 1/2".
Layout and sew each block according to the diagram. Sew each row together, then sew the rows to each other. More detailed block construction, using the "chained row" or "web" method can be found in the original post, HERE.
Make the Pieced Border:
Find the remaining 4" squares, the extras that were set aside. Cut 4 more 4" squares from the colors of your choice for a total of 16 4" squares.
From the border fabric (Etchings Stone), cut 2 strips 4" x WOF. Subcut into 16 4" squares. Pair these with the 16 colored squares and make into 32 HSTs, using the 2 at a time method. Trim HSTs to 3 1/2".
From the border fabric, cut 3 strips 3 1/2" x WOF. Subcut into 14 3 1/2" x 8 1/2" strips. These, with the 32 HSTs, make up the pieced border. For the additional border that surrounds the pieced border, cut 8 2 1/2" x WOF strips.
Lay out your 12 Prairie Rose blocks in a 3x4 arrangement. Position your 8 1/2" border strips and HSTs around the edges, placing the HSTs how you like them. Sew the HSTs to the ends of each 8 1/2" border strip.
The following diagram is from the original recipe and shows how the borders go together with the blocks.
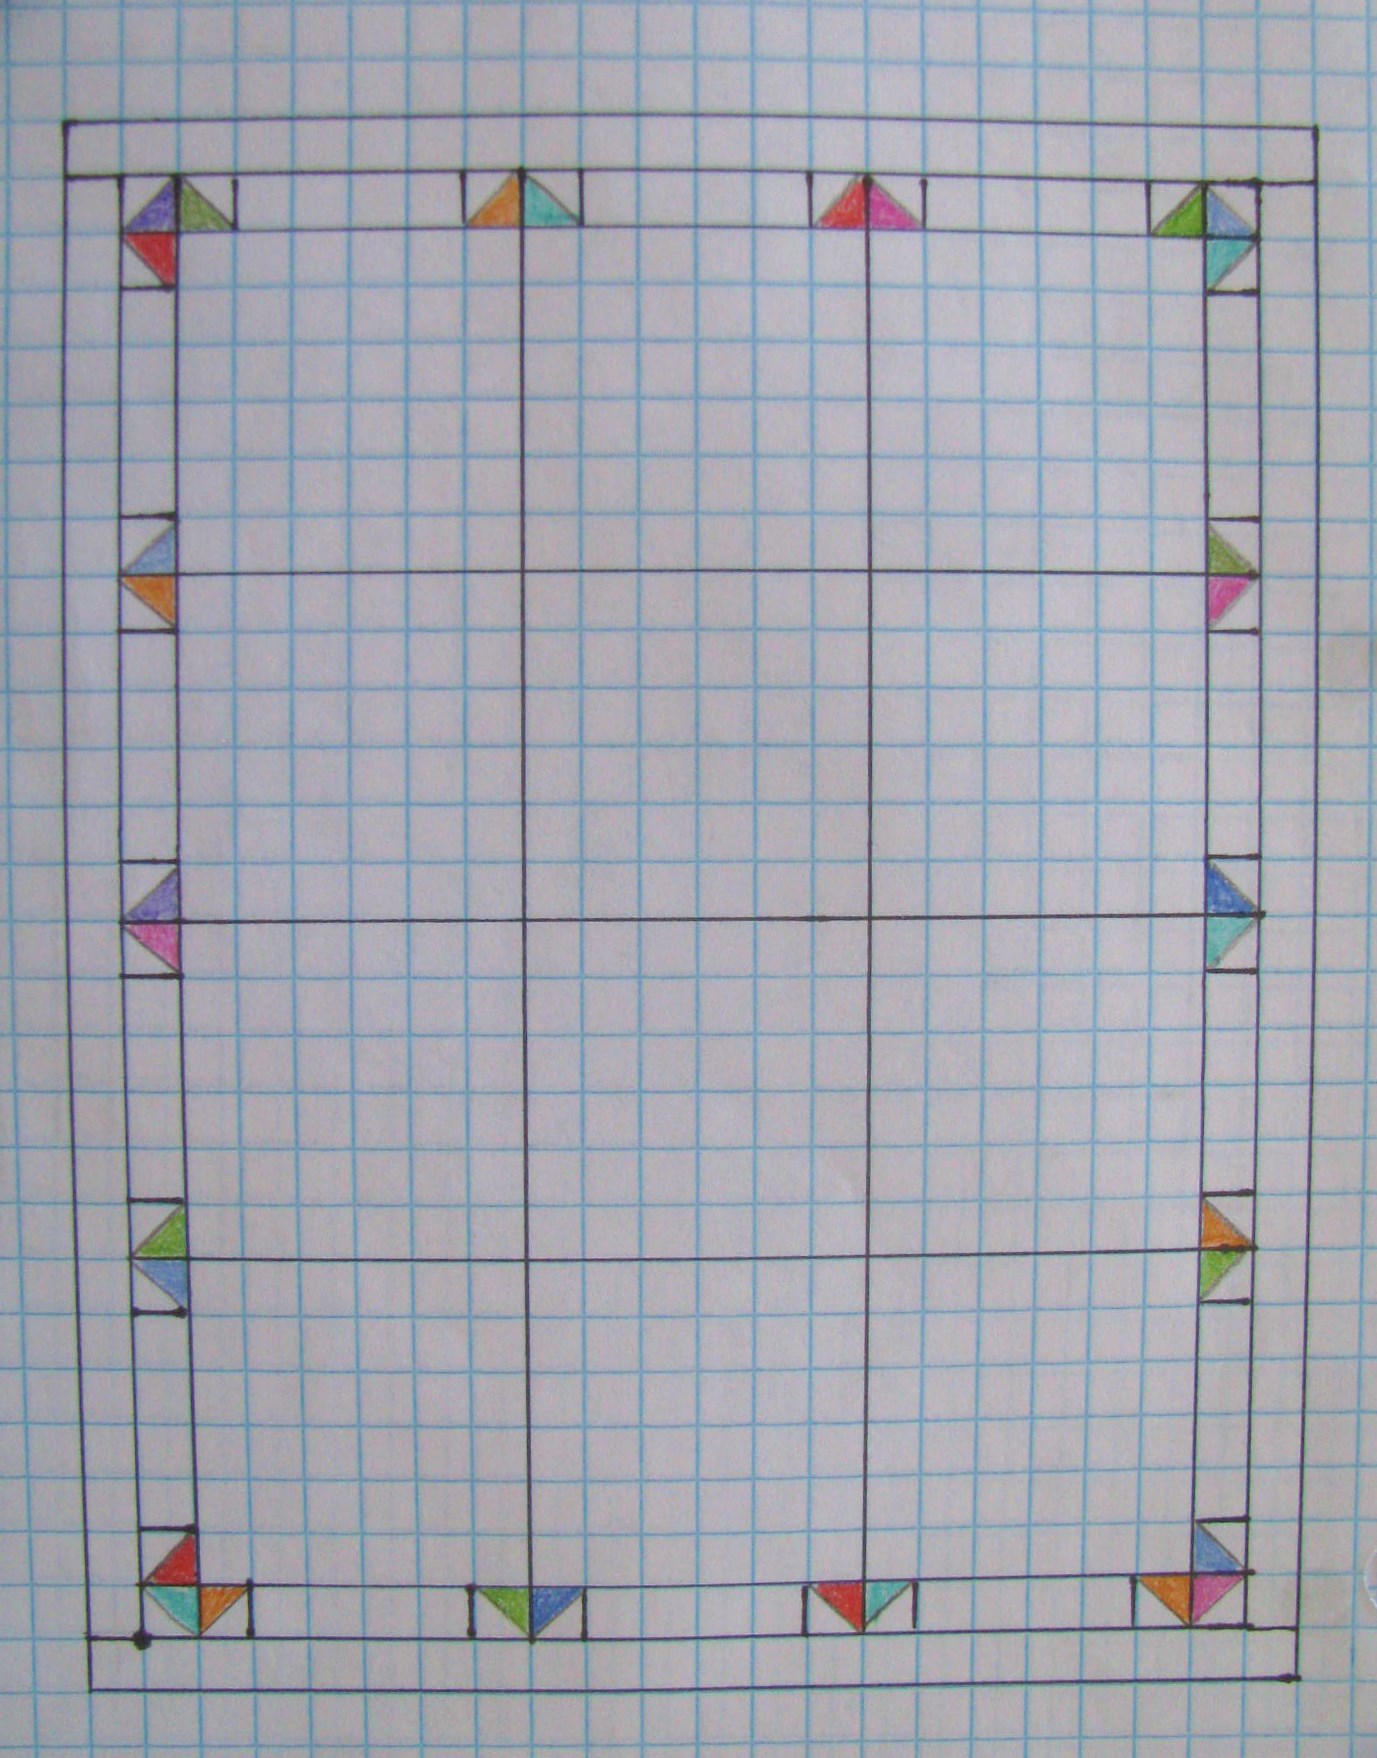
I sew my blocks together into 4 rows. I then add a single pieced border unit to the ends of each row, before joining the rows. Then I sew the top pieced border strips together and the bottom pieced border strips together and add them to the top and bottom, respectively, of the assembled rows.
Make the last border by joining 2 of the 2 1/2"x WOF strips together, one pair for each side. Measure the length of the top. Trim 2 pairs of borders to length. Add to the sides. Measure the width of the top. Trim the remaining pairs of borders to length. Add to the top and bottom.
Congratulations! Your Bi-Colored Prairie Rose Garden top is complete!
Remix 2

As a bit of an afterthought, I went ahead a threw together this 4 block Prairie Rose Garden, using 12" blocks instead of 18". I picked 4 solids and cut 14 3" squares from each. Using a white background for all 4 blocks, I made the HSTS, then mixed the center, middle and outer "rings" of the block to get 4 unique combinations. Increasing the solid white border to 4" brought this up to a respectable 40" x 40" size. I think the solids provide some fun movement in this one!
I am obviously techy challenged, but here is a table showing how you may customize your Prairie Rose blocks by changing the size of your HSTs. The background squares should measure the same as the trimmed HSTs. The pieced border strips should also be cut the same width as the trimmed HSTs.
|
Finished Block Size |
HST Square Size, original |
HST, |
HST, finished unit size |
Quilt size, incl pieced and 2" border |
|
9" |
2 1/2"" |
2" |
1 1/2" |
34" x 43" |
|
12" |
3" |
2 1/2" |
2" |
44" x 56" |
|
15" |
3 1/2" |
3" |
2 1/2" |
54" x 69" |
|
18" |
4" |
3 1/2" |
3" |
64" x 82" |
|
24" |
5" |
4 1/2" |
4" |
84" x 108" |

![]()
I hope these 2 versions give you some ideas to play with color and beautiful Bella solids in your own Prairie Rose Garden quilt! If you do make one, I hope you will share a picture with me, either via email, or on Instagram, using the hashtag #prairierosegarden. And feel free to tag both myself and Moda Bake Shop too! Thanks so much!
Moda Bake Shop Chef Sarah Zimmerman
{blog: Cedar Fork Stitches}
{instagram: @cedarforksarah}
![]()
Posted in:
Comments