Warehouses Closed June 6-13 For Exclusive Event
Dec 16: Cup of Cheer
Dec 16: Cup of Cheer
Published:
Dec 15 2018 - 23:00

![]()
Hi fellow bakers! This is Mona from Kentucky Whittaker Creations. I don't know about you, but I have loved seeing all of the gorgeous blocks by the talented bakers here at the Bake Shop!
Every year around mid-December, I start wanting hot apple cider or hot cocoa. As a child, it seemed like the Christmas season was perfect for enjoying a hot drink. And, of course, you had to share some with your friends or family. I know that we spent many holidays drinking our hot cocoa, eating cookies, and playing games. Those memories are the inspiration for today's block.
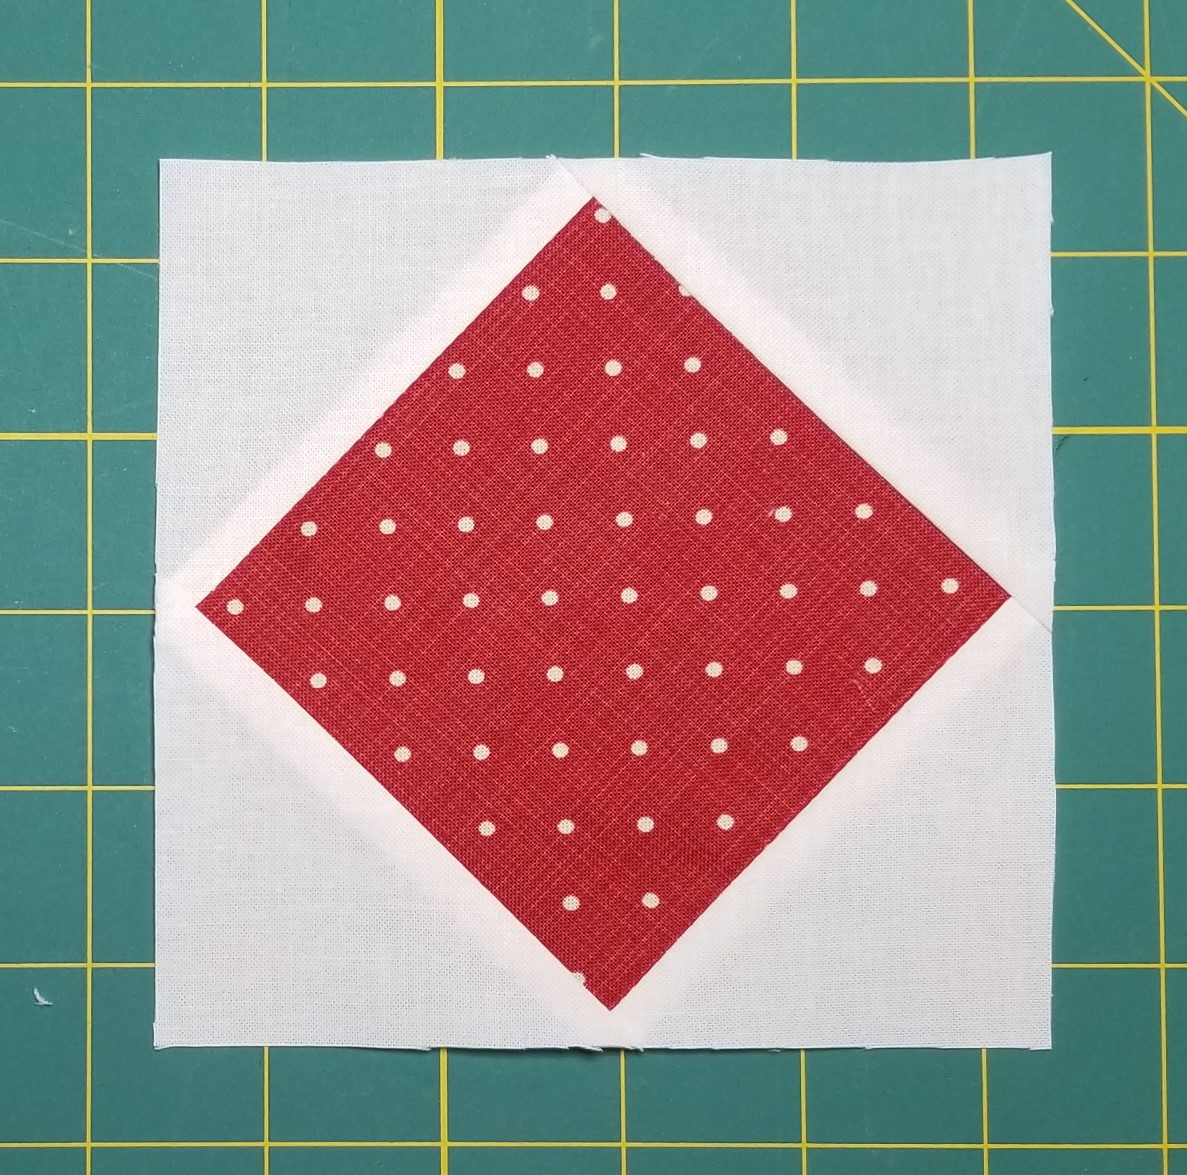
This block finishes at 6" or 12" square.
![]()
| 6" Block | 12" Block |
|---|---|
From white fabric, cut:
|
From white fabric, cut:
|
From solid red fabric, cut:
|
From solid red fabric, cut:
|
From red print #1 (center - Sweetwater Sweat Tea), cut:
|
From red print #1 (center - Sweetwater Sweat Tea), cut:
|
From red print #2 (Grunge Cherry), cut:
|
From red print #2 (Grunge Cherry), cut:
|
From red print #3 (Sweetwater Project Red), cut:
|
From red print #3 (Sweetwater Project Red), cut:
|
![]()
Notes:
- The instructions below are for the 6" finished block. The measurements for the 12" block are in brackets [ ].
- It is best to use a scant 1/4" for all seams. If your measurements are off, we'll be able to make up a little bit at the end with the borders.
- Press all seams open unless noted. This will help the red fabric not shadow behind the white and will also help with bulky seams.
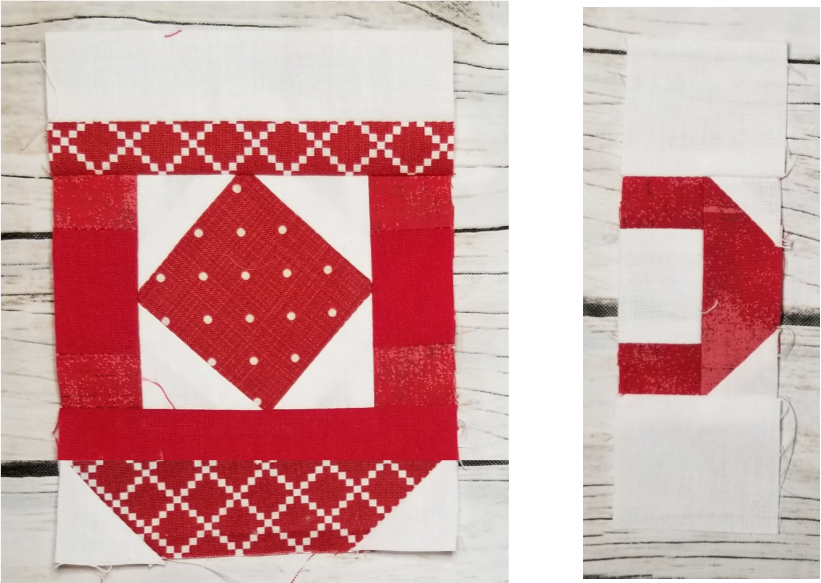
For this block, we're going to break it down into several sections: the center of the mug, the mug body, the handle, and then the final assembly and the borders.
Center of the Mug

Starting with your Red Print #1 - 2 3/8” square [4 3/8” square] fabric piece, sew the 4 white triangles (subcut from the 2 1/2” squares [3 5/8 ” squares]) onto each side. Start by sewing opposite sides (right and left) first, making sure to center the triangle on the block.
Press seams open. Then sew on the remaining two triangles.
Trim to 3" [5 1/2 "] square.
Mug Body

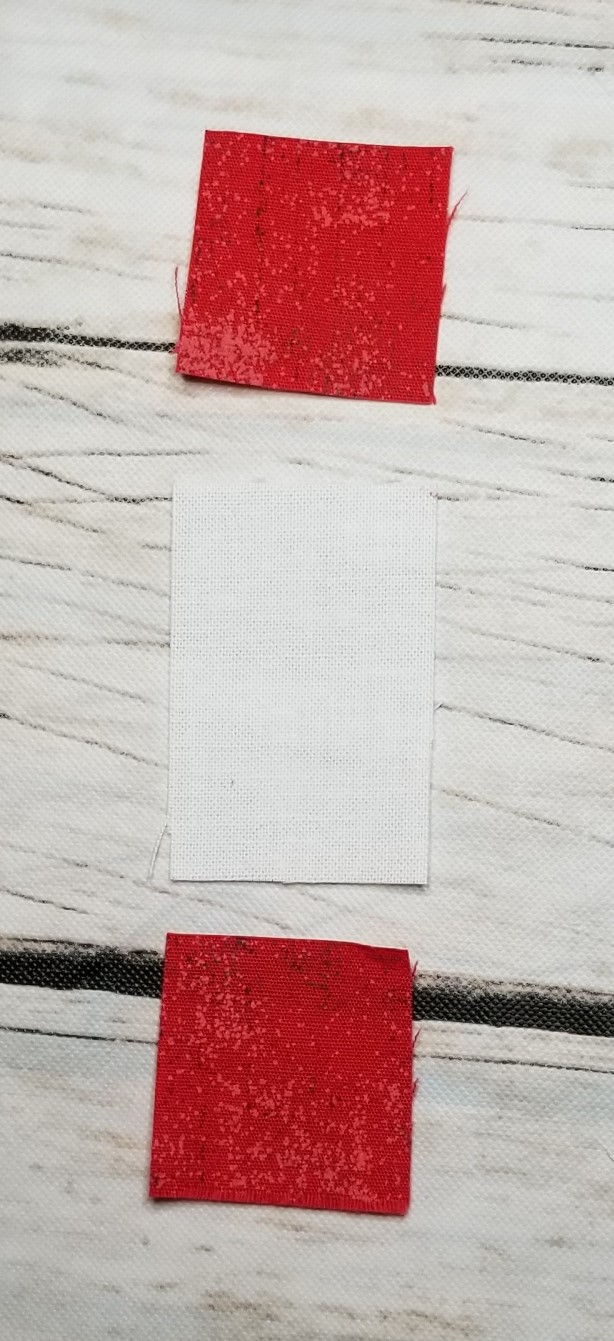
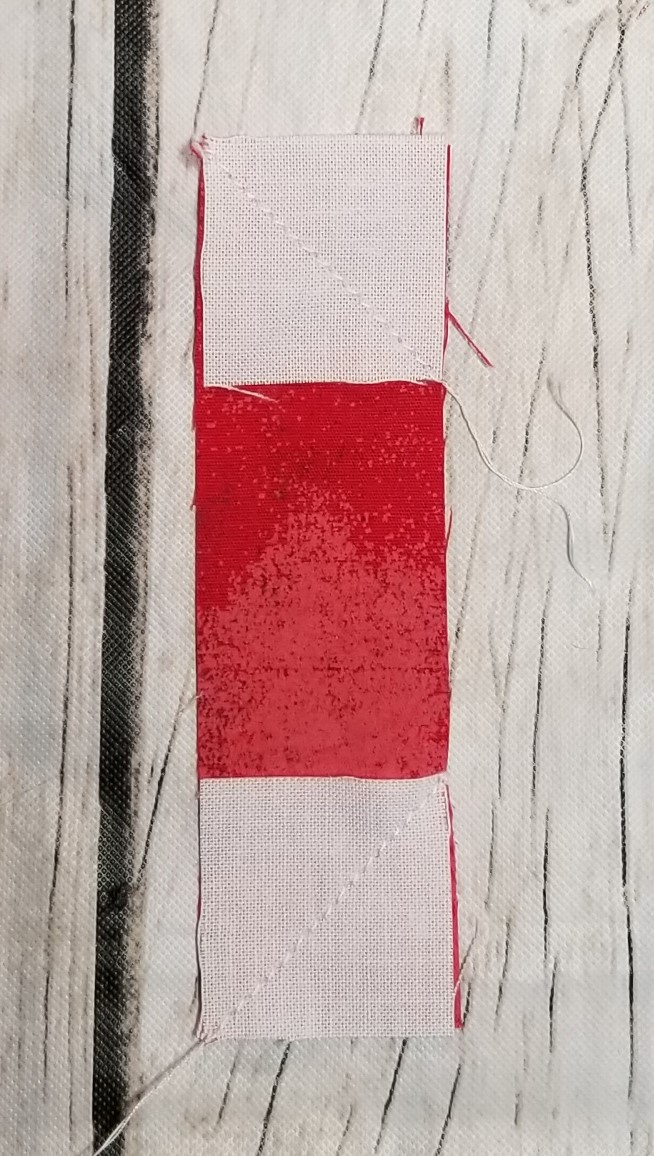
Sew 2 Red Print #2 - 1 1/8” [1 3/4”] squares onto the short end of each the solid red 1 1/8” x 1 ¾” [1 3/4” x 3”] rectangles. Press seams open.
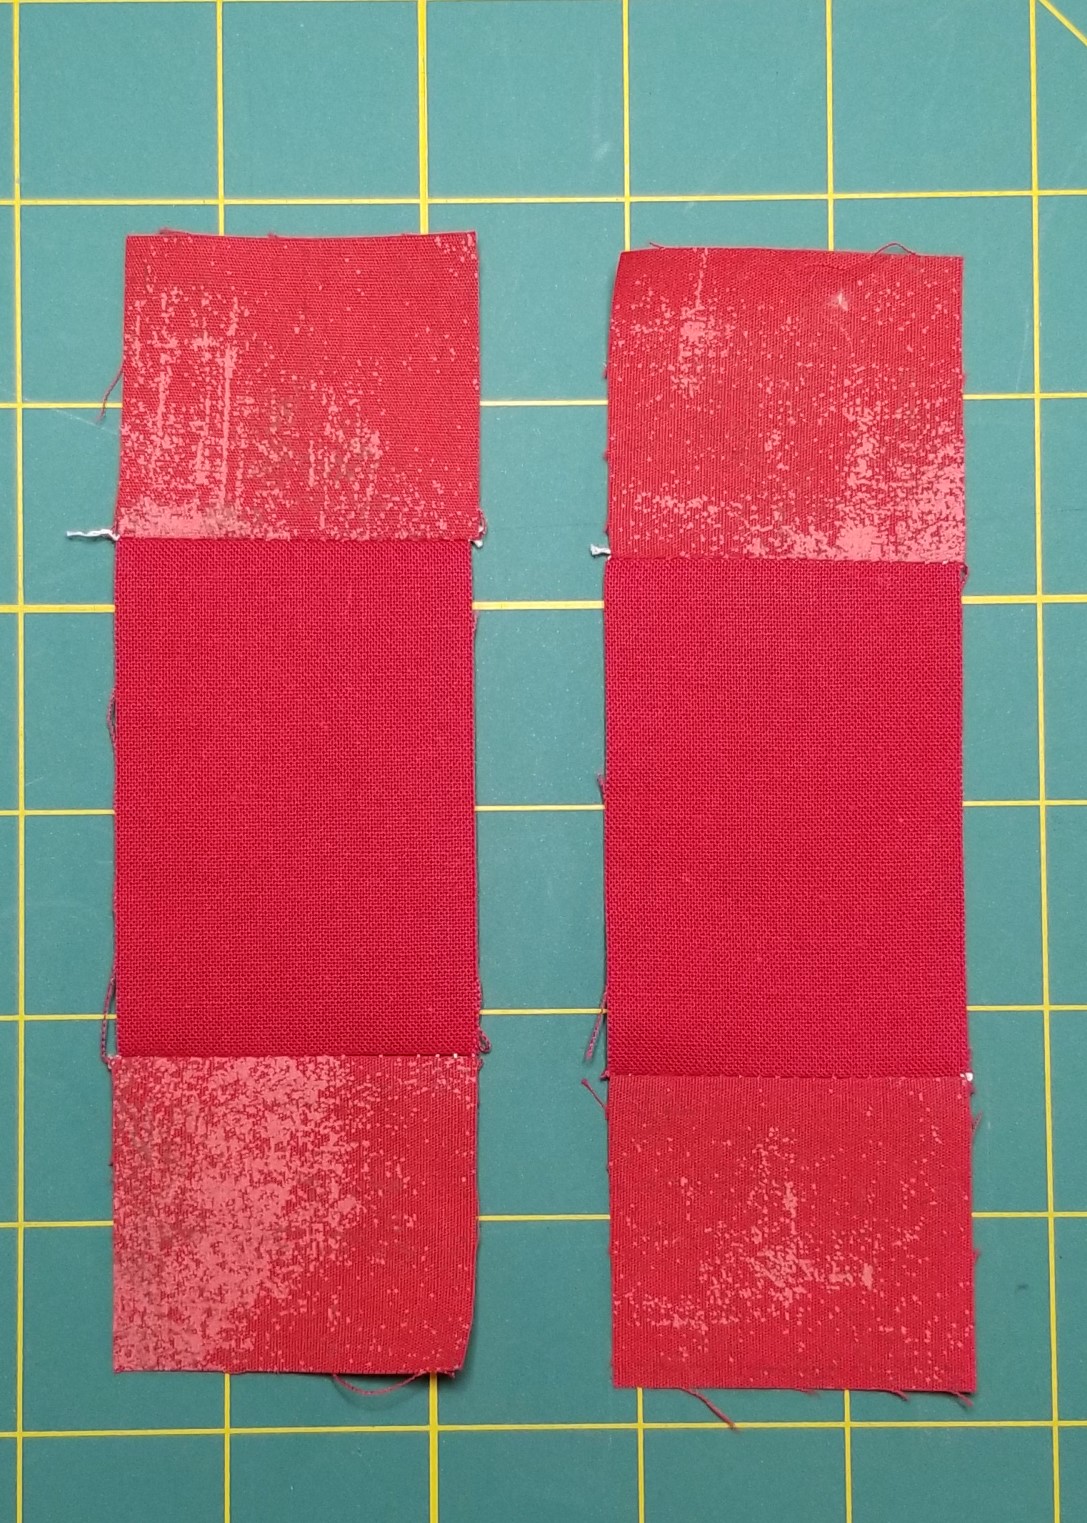
Sew each of these units to the center portion.

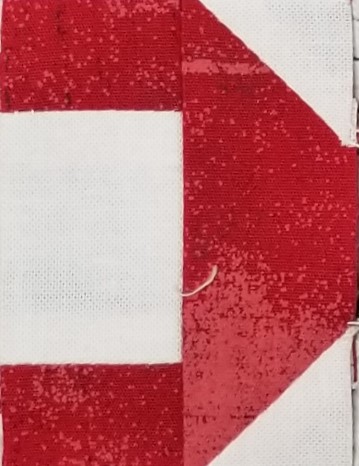
Next, you make the bottom curve of the cup. Take 2 of the 1 1/8" [1 3/4” squares] white squares and draw a line diagonally from one corner to another. Then lay these on one of the Red Print #3 - 4 ¼ x 1 1/8” [8 x 1 3/4” rectangles] rectangles as show below. Sew on the diagonal.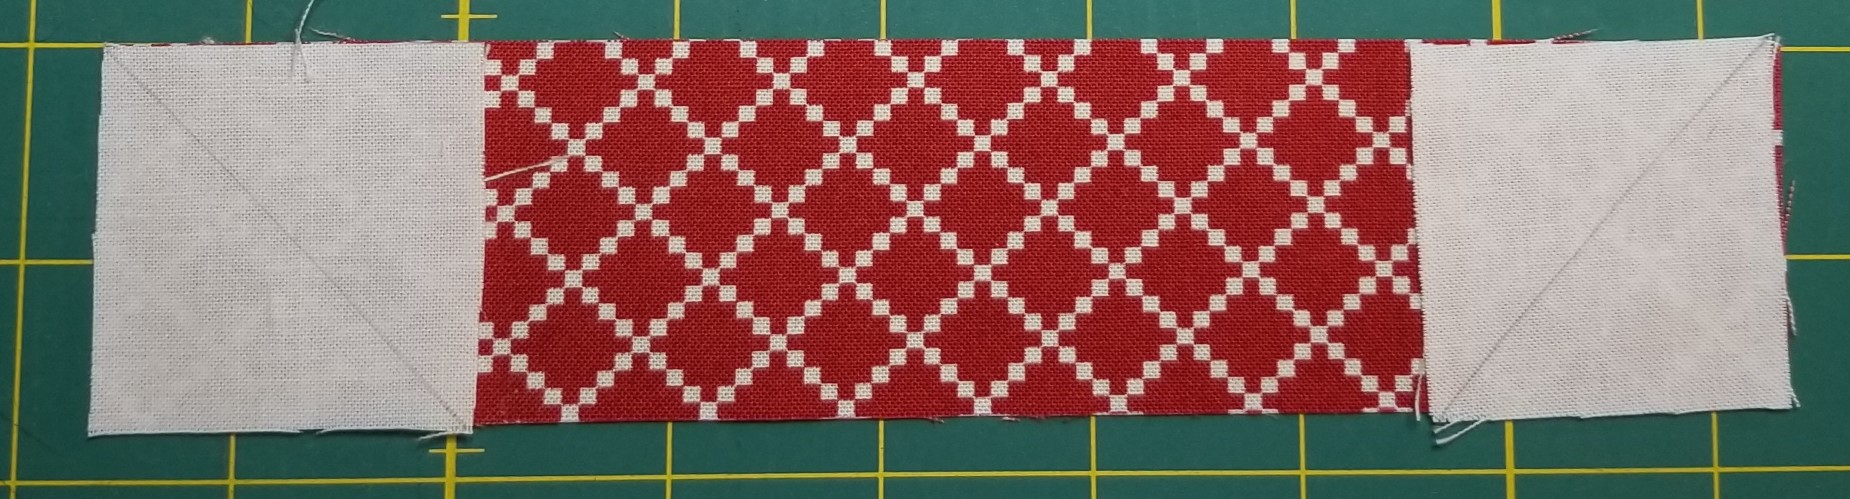
Trim the unit 1/4" on the exterior of where you've sewn and press open.
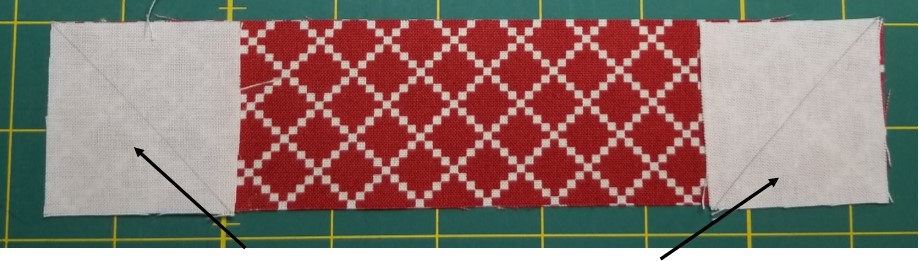
Your final result should look like this:

Now, you will assemble the pieces of the mug body as shown below:
 Mug Handle
Sew two of the Red Fabric #2 - 1 1/8" [1 3/4”] squares to one white 1 1/8” x 1 ¾” [1 3/4” x 3”] rectangle, in order as shown below:
Next, take 2 of the 1 1/8" [1 3/4” squares] white squares and draw a line diagonally from one corner to another. Lay these on the Red Print #2 - 1 1/8” x 3” [1 3/4” x 5 ½”] rectangle as shown below. Sew on the diagonal and trim. Then sew these units together.

Sew 2 of the white 1 ¾” [3”] squares on both ends of this unit, resulting in the handle portion of the block.
Final Assembly and Borders
There are only a couple of steps remaining!
Sew together your mug body and mug handle, making sure to line up the seams where the lines of the body match up to the seams of the handle.
For the borders, sew the two white 5 ½” x 1 1/2” [10 ½” x 2] rectangles to both sides of your block; then the two white 6 ½” x 1 1/2” [12 ½” x 2”] rectangles to the top and bottom. And - you're done!

![]()
This block finishes at 6" or 12" square.

I hope that you enjoy this block as much as I do! Wishing you and yours a wonderful Christmas season and have a Cup of Cheer!
Thanks for reading along. Please follow me on Instagram to keep up with my latest projects.
Mona Phelps
[blog: Kentucky Whittaker Creations]
[instagram: @mona.phelps]
[facebook: facebook.com/ky.whittaker.creations]
![]()
Posted in:
Comments