Warehouses Closed June 6-13 For Exclusive Event
Dec 10: Jolly St. Nick
Dec 10: Jolly St. Nick
Published:
Dec 9 2018 - 23:00

![]()
Happy Holiday's Moda Bake Shopper's!!! It's Melissa Corry from Happy Quilting and I am so excited to be here to share my Jolly St. Nick block as part of the Countdown to Christmas. One of my favorite things about the Christmas season is all of the Christmas music. I remember singing my lungs out in school Christmas programs. In my 5th grade program, I got to sing a duet with my twin sister of Jolly Ol' St. Nicholas. Working on this block reminded me of that memory, so I named the block after the song :) So let's get Merry and make some Ho Ho piecing goodness!!!
This block finishes at 6" or 12" square.
![]()
A Red and a White Fat Quarter
| 6" Block | 12" Block |
|---|---|
| From white fabric, cut
(12) 1 1/4" x 1 1/4" squares labeled A (6) 1 1/4" x 2 3/4" rectangles labeled B |
From white fabric, cut
(12) 2" x 2" squares labeled A (6) 2" x 5" rectangles labeled B |
| From red fabric, cut
(6) 1 1/4” x 1 1/4" squares labeled C (2) 1"x 2 3/4" rectangles labeled D (3) 1" x 5 1/2" rectangles labeled E (2) 1" x 6 1/2"" rectangles labeled F |
From red fabric, cut
(6) 2” x 2" squares labeled C (2) 1 1/2"x 5" rectangles labeled D (3) 1 1/2" x 10 1/2" rectangles labeled E (2) 1 1/2" x 12 1/2" rectangles labeled F |

![]()
We will start by making our 3 patch units. Layout 2 A and 1 C squares as shown below. Place the C square onto the first A square with right sides together and stitch a 1/4" seam along the edge. Then place the second A square on the C square with right sides together and stitch a 1/4" seam along the edge. Press the seam allowances in towards the C square. Repeat to make a total of six 3 Patch units.

Layout two 3 Patch units and 1 B rectangle as shown below to make an H Block. Layout 2 B rectangles and one 3 Patch unit as shown below to make an O block.

Place the first row in each block onto the center row with right sides together as shown below in the H block. Stitch a 1/4" seam along the edge. Then place the third row in each block onto the center row with right sides together as shown below in the O Block. Stitch a 1/4" seam along the edge.

Press the seam allowances in the H Block inwards towards the B rectangle. Press the seam allowances in the O block outwards towards the B rectangles. Repeat to make a total of 2 H Blocks and 2 O Blocks.

Layout 2 D Rectangles, 2 H Blocks, and 2 O blocks as shown below.

Place the D rectangles onto the H Blocks with right sides together as shown below in the first row. Stitch a 1/4" seam along the edge. Then place the O Blocks onto the D rectangles with right sides together as shown below in the second row. Stitch a 1/4" seam along the edges.

Press the seam allowances inwards towards the D rectangles. Layout an E rectangle between your two rows as shown below.
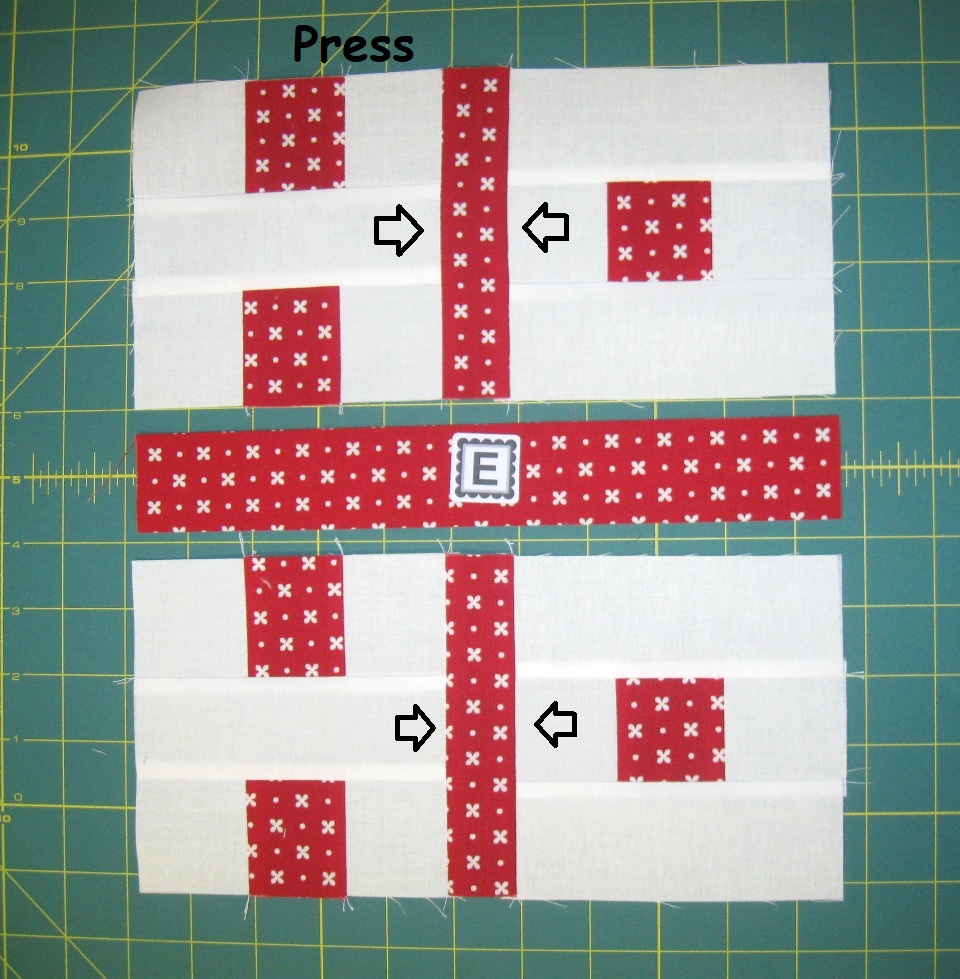
Place the E rectangle onto the first row as shown below. Stitch a 1/4" seam along the edge.

Now place the Second row onto the E rectangle with right sides together as shown below. Stitch a 1/4" seam along the edge.

Press the seam allowances inwards towards the E rectangle. Layout two E rectangles on either side of the block as shown below.
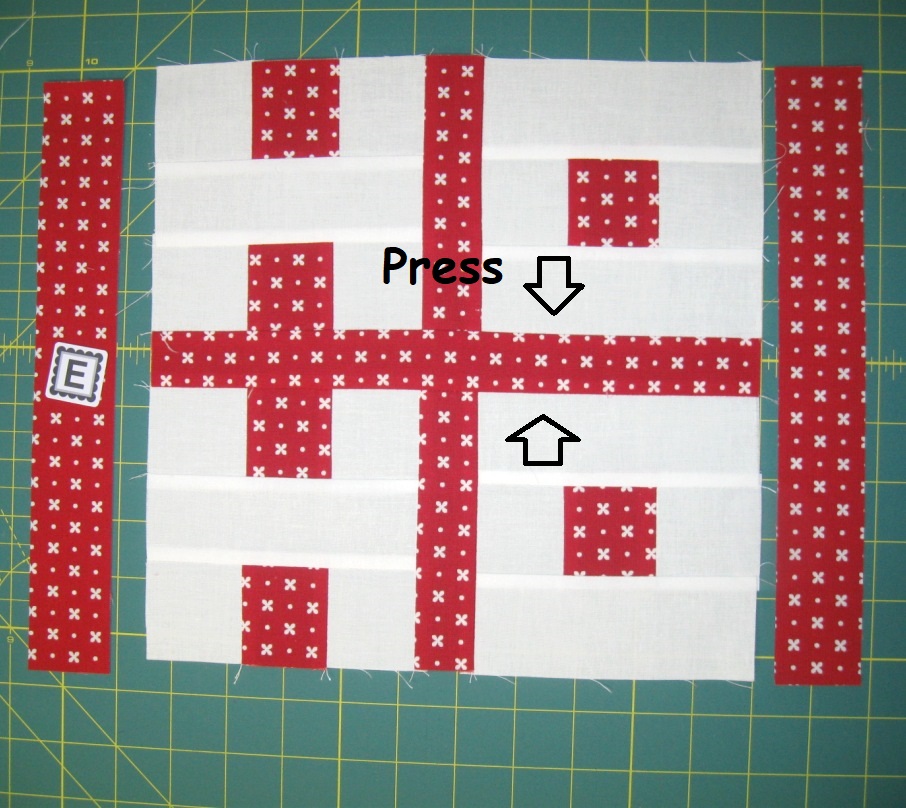
Place the E rectangles onto the sides of the block as shown below. Stitch a 1/4" seam along the edges.

Press the seam allowances outwards towards the E rectangles. Layout two F rectangles on the top and bottom of the block as shown below.
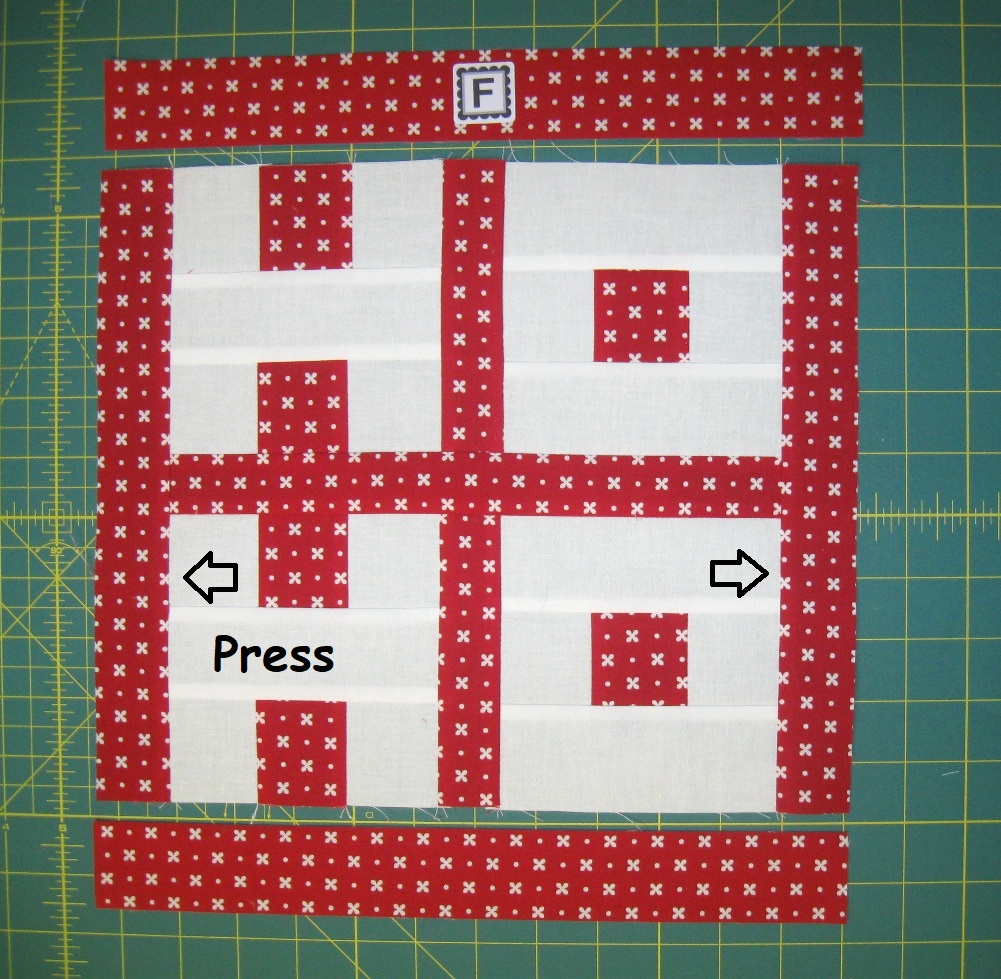
Place the F rectangles onto the top and bottom of the block as shown below. Stitch a 1/4" seam along the edges.

Press the seam allowances outwards towards the F rectangles. And just like that, you are done!!!!

![]()
This block finishes at 6" or 12" square. Doesn't the 6" block look so cute and tiny next to the 12" block!! I just love tiny piecing!!!

I hope you have enjoyed this tutorial and if you make your own Jolly St. Nick Block I would love to see it!! You can email me a picture at [email protected] or post it to social media with #happyquiltingwithmc. I can't wait to see your Jolly St. Nick Blocks!!!
Merry Christmas!!!
Melissa Corry
{blog: Happy Quilting}
{instagram: happyquiltingmc}
![]()
Posted in:
Comments