Warehouse Closed On July 4th
Sunday Social: Border 3
Sunday Social: Border 3
Published:
Jul 14 2018 - 23:00
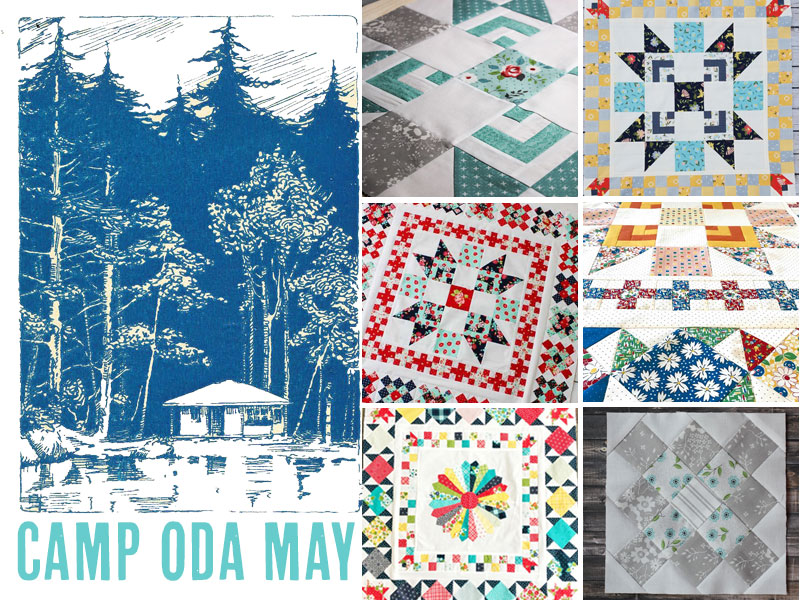
![]() Welcome to another Sunday Social and the end of Week 3 of the Choose Your Own Adventure Quilt-Along! Today we have the super easy instructions for Border 3 plus some tips and answer to frequently asked questions over the past week. NOTE: This is one post in a series of quilt-along posts. Start from the beginning with the first post {here}.
Welcome to another Sunday Social and the end of Week 3 of the Choose Your Own Adventure Quilt-Along! Today we have the super easy instructions for Border 3 plus some tips and answer to frequently asked questions over the past week. NOTE: This is one post in a series of quilt-along posts. Start from the beginning with the first post {here}.
We have traveled from Dresden Peak to Four Points and Over the River to Star View! There are a lot of posts each week so we will be sharing the links here every Sunday as we check in. For instructions for the previous posts, click on the links below:
- Center (Path A) - Dresden Peak
- Center (Path B) - Star Valley
- Border 1
- Round 1 (Path A) - Four Points
- Round 1 (Path B) - Cross Creek
- Cornerstone 1 - Tulip Field
- Border 2
- Round 2 (Path A) - Over the River
- Round 2 (Path B) - Pinwheel Point
- Cornerstone 2 - Star View
- Border 3 (this post)
If you get lost along the way, just click on the Index tab at the top of the blog to see all of the links to the QAL posts in order. ![]()
- (2) 1.5" x 42.5" strips for top/bottom borders
- (2) 1.5" x 44.5" strips for side borders
NOTE: The fabric requirements were calculated to use background fabric for this border but feel free to make this border pop with a print! This is the first week that our borders are getting very close to WOF (width of fabric). You should cut (5) 1.5" strips of border fabric, remove selvedges, sew strips end-to-end, and subcut the long strip into the lengths listed. This is the method that should be used to make borders from this week on. ![]() Lightly starch and press your completed medallion (center block + Round 1 + Round 2). Square it up to 42.5" x 42.5". Sew 1.5" x 42.5" strips to the top and bottom of your block. Press. Sew 1.5" x 44.5" strips to each side of your block. Press seams, lightly starch, and then press the whole block one more time.
Lightly starch and press your completed medallion (center block + Round 1 + Round 2). Square it up to 42.5" x 42.5". Sew 1.5" x 42.5" strips to the top and bottom of your block. Press. Sew 1.5" x 44.5" strips to each side of your block. Press seams, lightly starch, and then press the whole block one more time. ![]() The medallion quilt should measure 44.5" square. TIPS Hand Applique - Hide your thread tail so it doesn’t shadow through to the front of your quilt. Take a few stitches over your thread tail to secure it in place. Take one more stitch to place thread under appliquéd piece and cut thread.
The medallion quilt should measure 44.5" square. TIPS Hand Applique - Hide your thread tail so it doesn’t shadow through to the front of your quilt. Take a few stitches over your thread tail to secure it in place. Take one more stitch to place thread under appliquéd piece and cut thread. 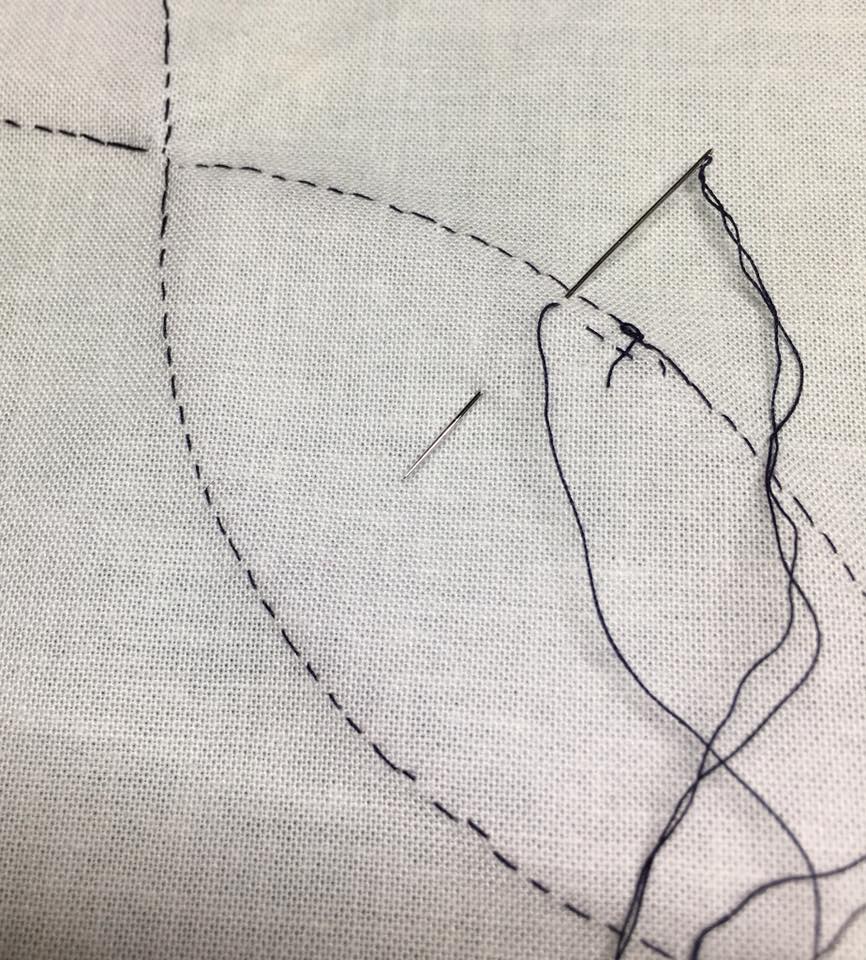 Rows and Borders -When attaching the rows and borders, pin from the center and move out to the edges to help keep the fabric and seams smooth. Pressing - Press each row and border as you attach it. Press it all again once each round is complete. Stay-Stitch - Use a standard stitch length to stitch around each Round/Border to keep everything flat as you work on the next round. Be sure to keep your stay-stitch 1/8" away from the raw edge so that it will be hidden inside the seam of the next round. FABRIC LINES We have often been asked which fabric lines our Camp Counselors are using. Here they are with a link to the fabric on our website. Jessica Dayon is using All Weather Friends by April Rosenthal.
 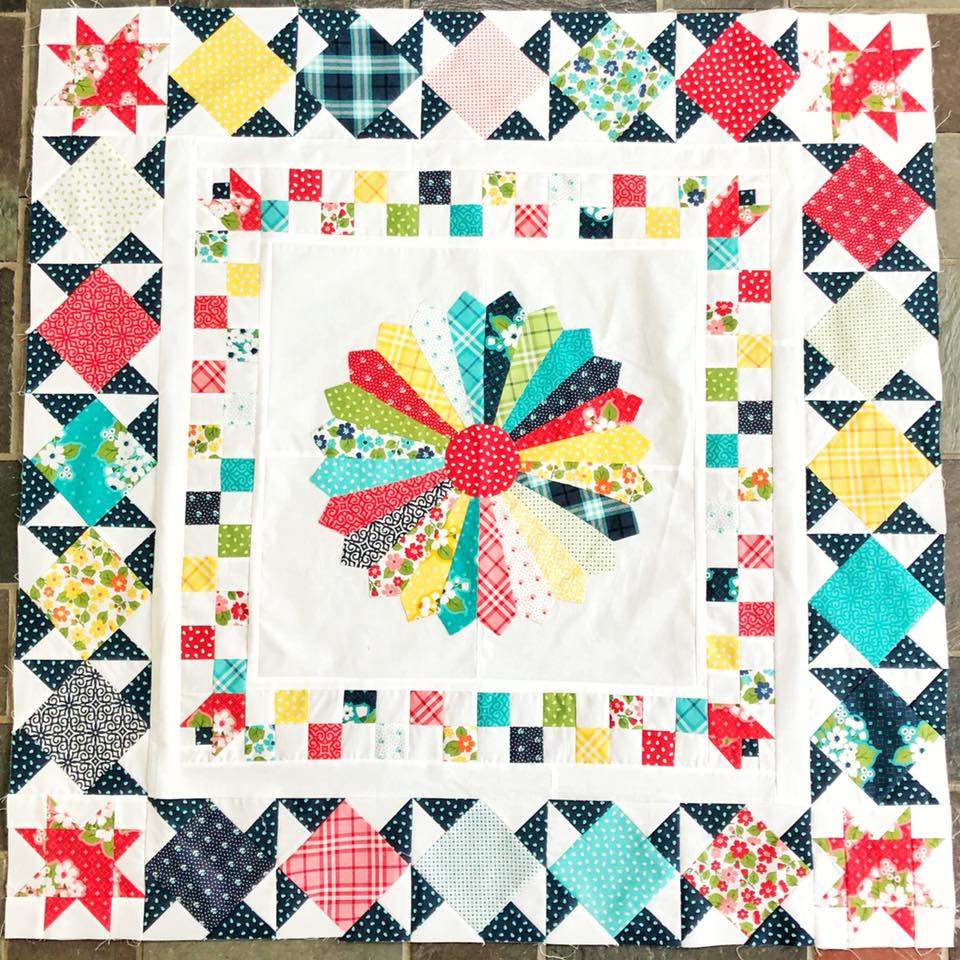 Kristina Brinkerhoff is using Smitten by Bonnie and Camille.
  Mona Phelps is using Clover Hollow by Sherri and Chelsi.
 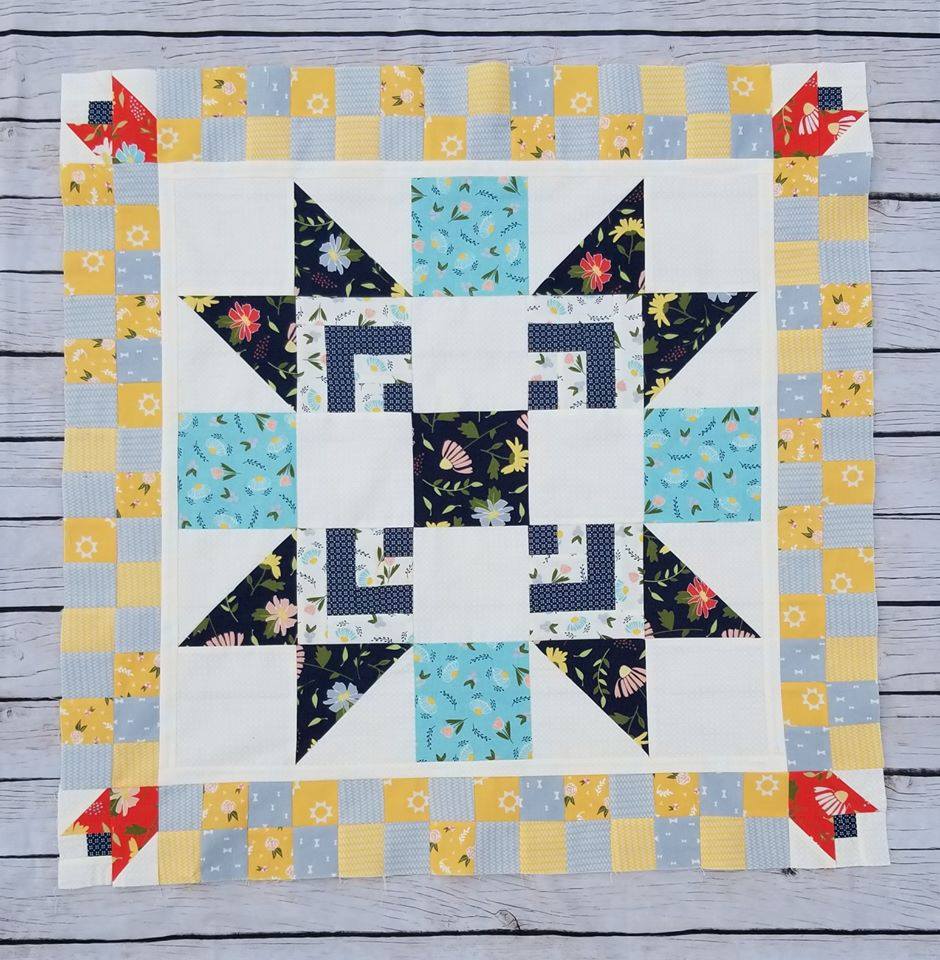 Kristin Esser is using Color Cuts in the Beach Glass and Roadtrip colorways.
 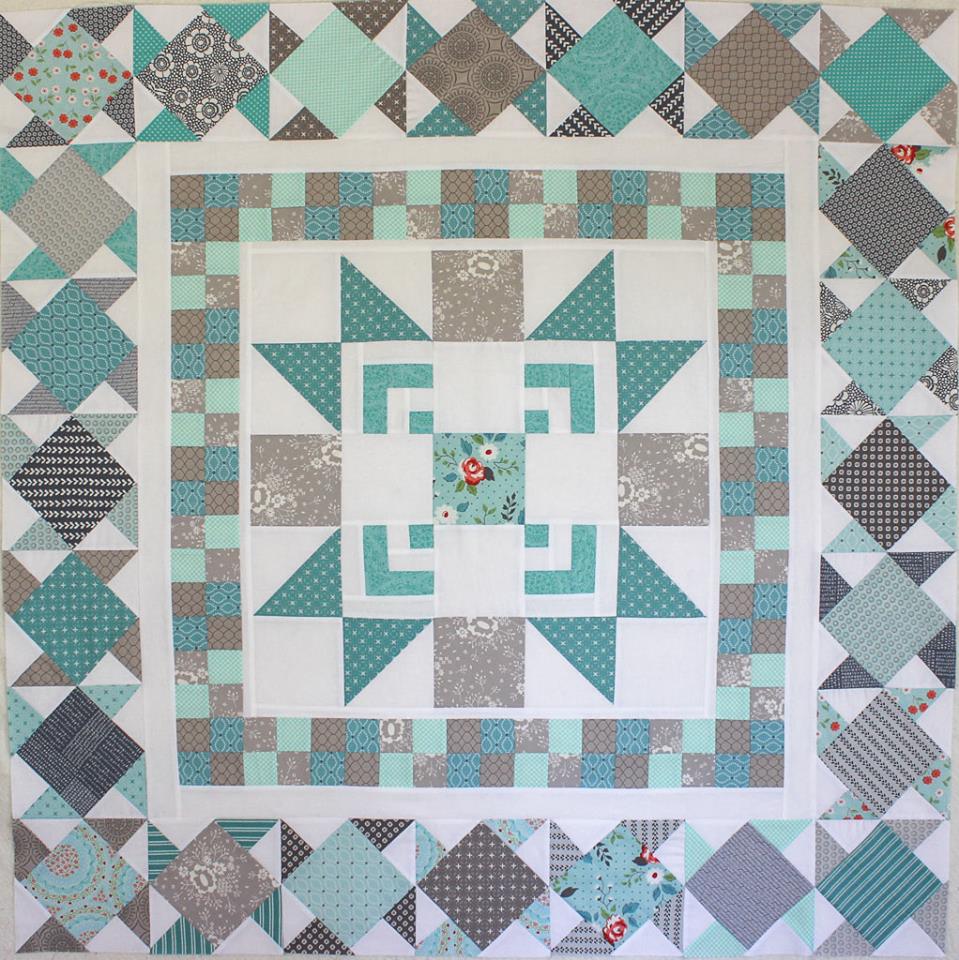 Sharla Krenzel is using Play All Day by American Jane.
 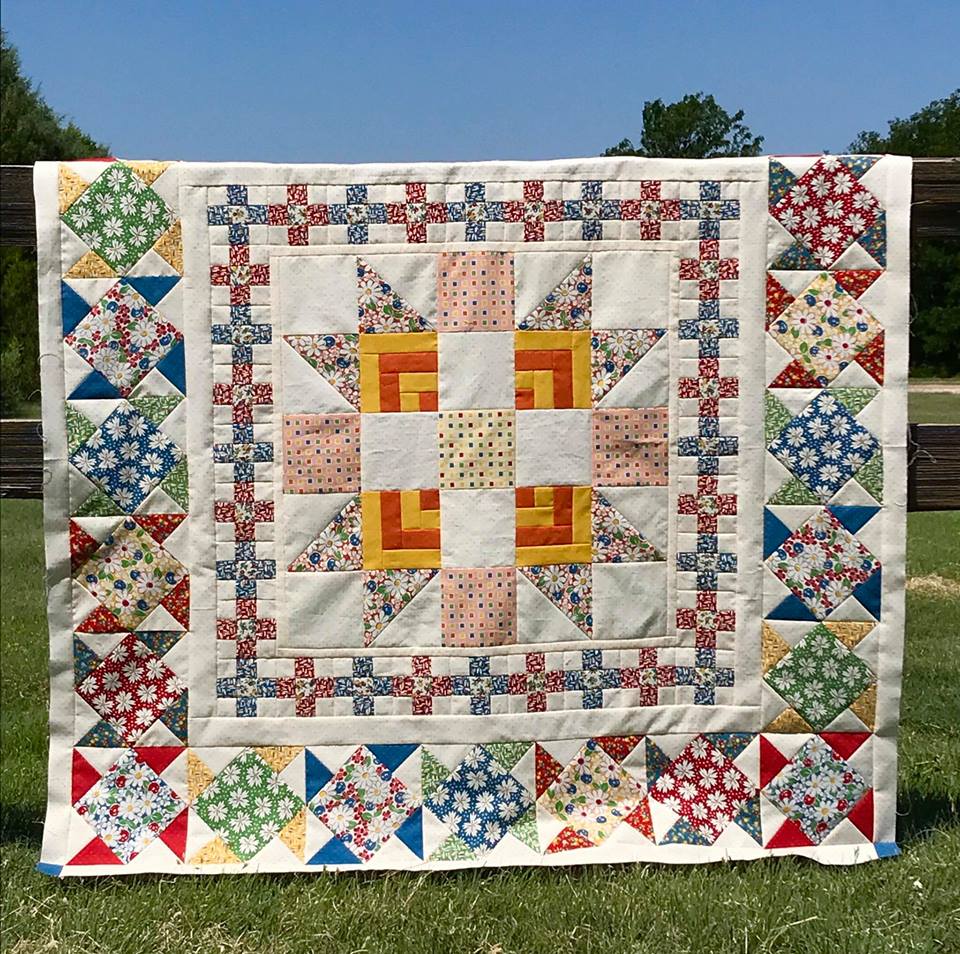 Christine Weld is using Colors Cuts in Roadtrip and Sugar on Top.
 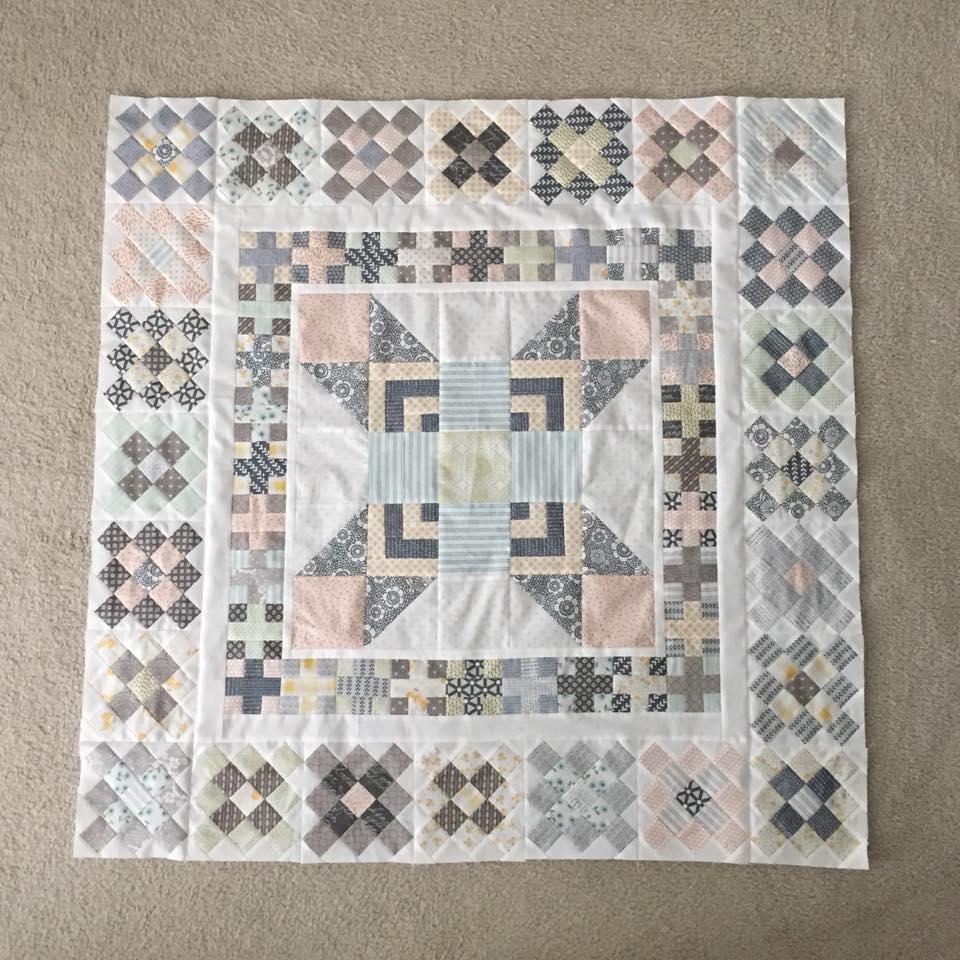 Mary Andra Holmes is using Holly Woods by 3 Sisters.
  Have a great day, Campers! We have lots more planned for you this week so get some rest after you get Border 3 on.
  [Facebook page: facebook.com/ModaBakeShop] [Facebook group: facebook.com/groups/MBSbakers] [Instagram: @modabakeshop]
 ![]()
Posted in:
Comments