Welcome to Moda Fabrics!
Flying Home Quilt
Flying Home Quilt
Published:
Feb 18 2018 - 23:00
![]()
I am happy to share with you this traditional quilt using the fabulous Summer on the Pond fabric line by Holly Taylor. In these cold winter days, this fabric brings wistful thoughts of the summer and vacation time to come.
This quilt/project finishes at 56" x 56".
![]()

Fat Quarter Bundle of Summer on the Pond by Holly Taylor
2 yards background fabric {6538 131}
2 yards border fabric {6722 16}
4 yards backing fabric {6720}
1/2 yards binding fabric {6724 16}
![]()
Deb Tucker's Studio 180 Design Wing Clipper I - A trim down tool for (no waste) traditional flying geese units
![]()
For this quilt I used every fabric in the fat quarter bundle except for the background. For the background I used only the solid cream noted above. The other cream fat quarters I set aside.
Cutting for the 16 - 11 3/4" x 11 3/4" Blocks:
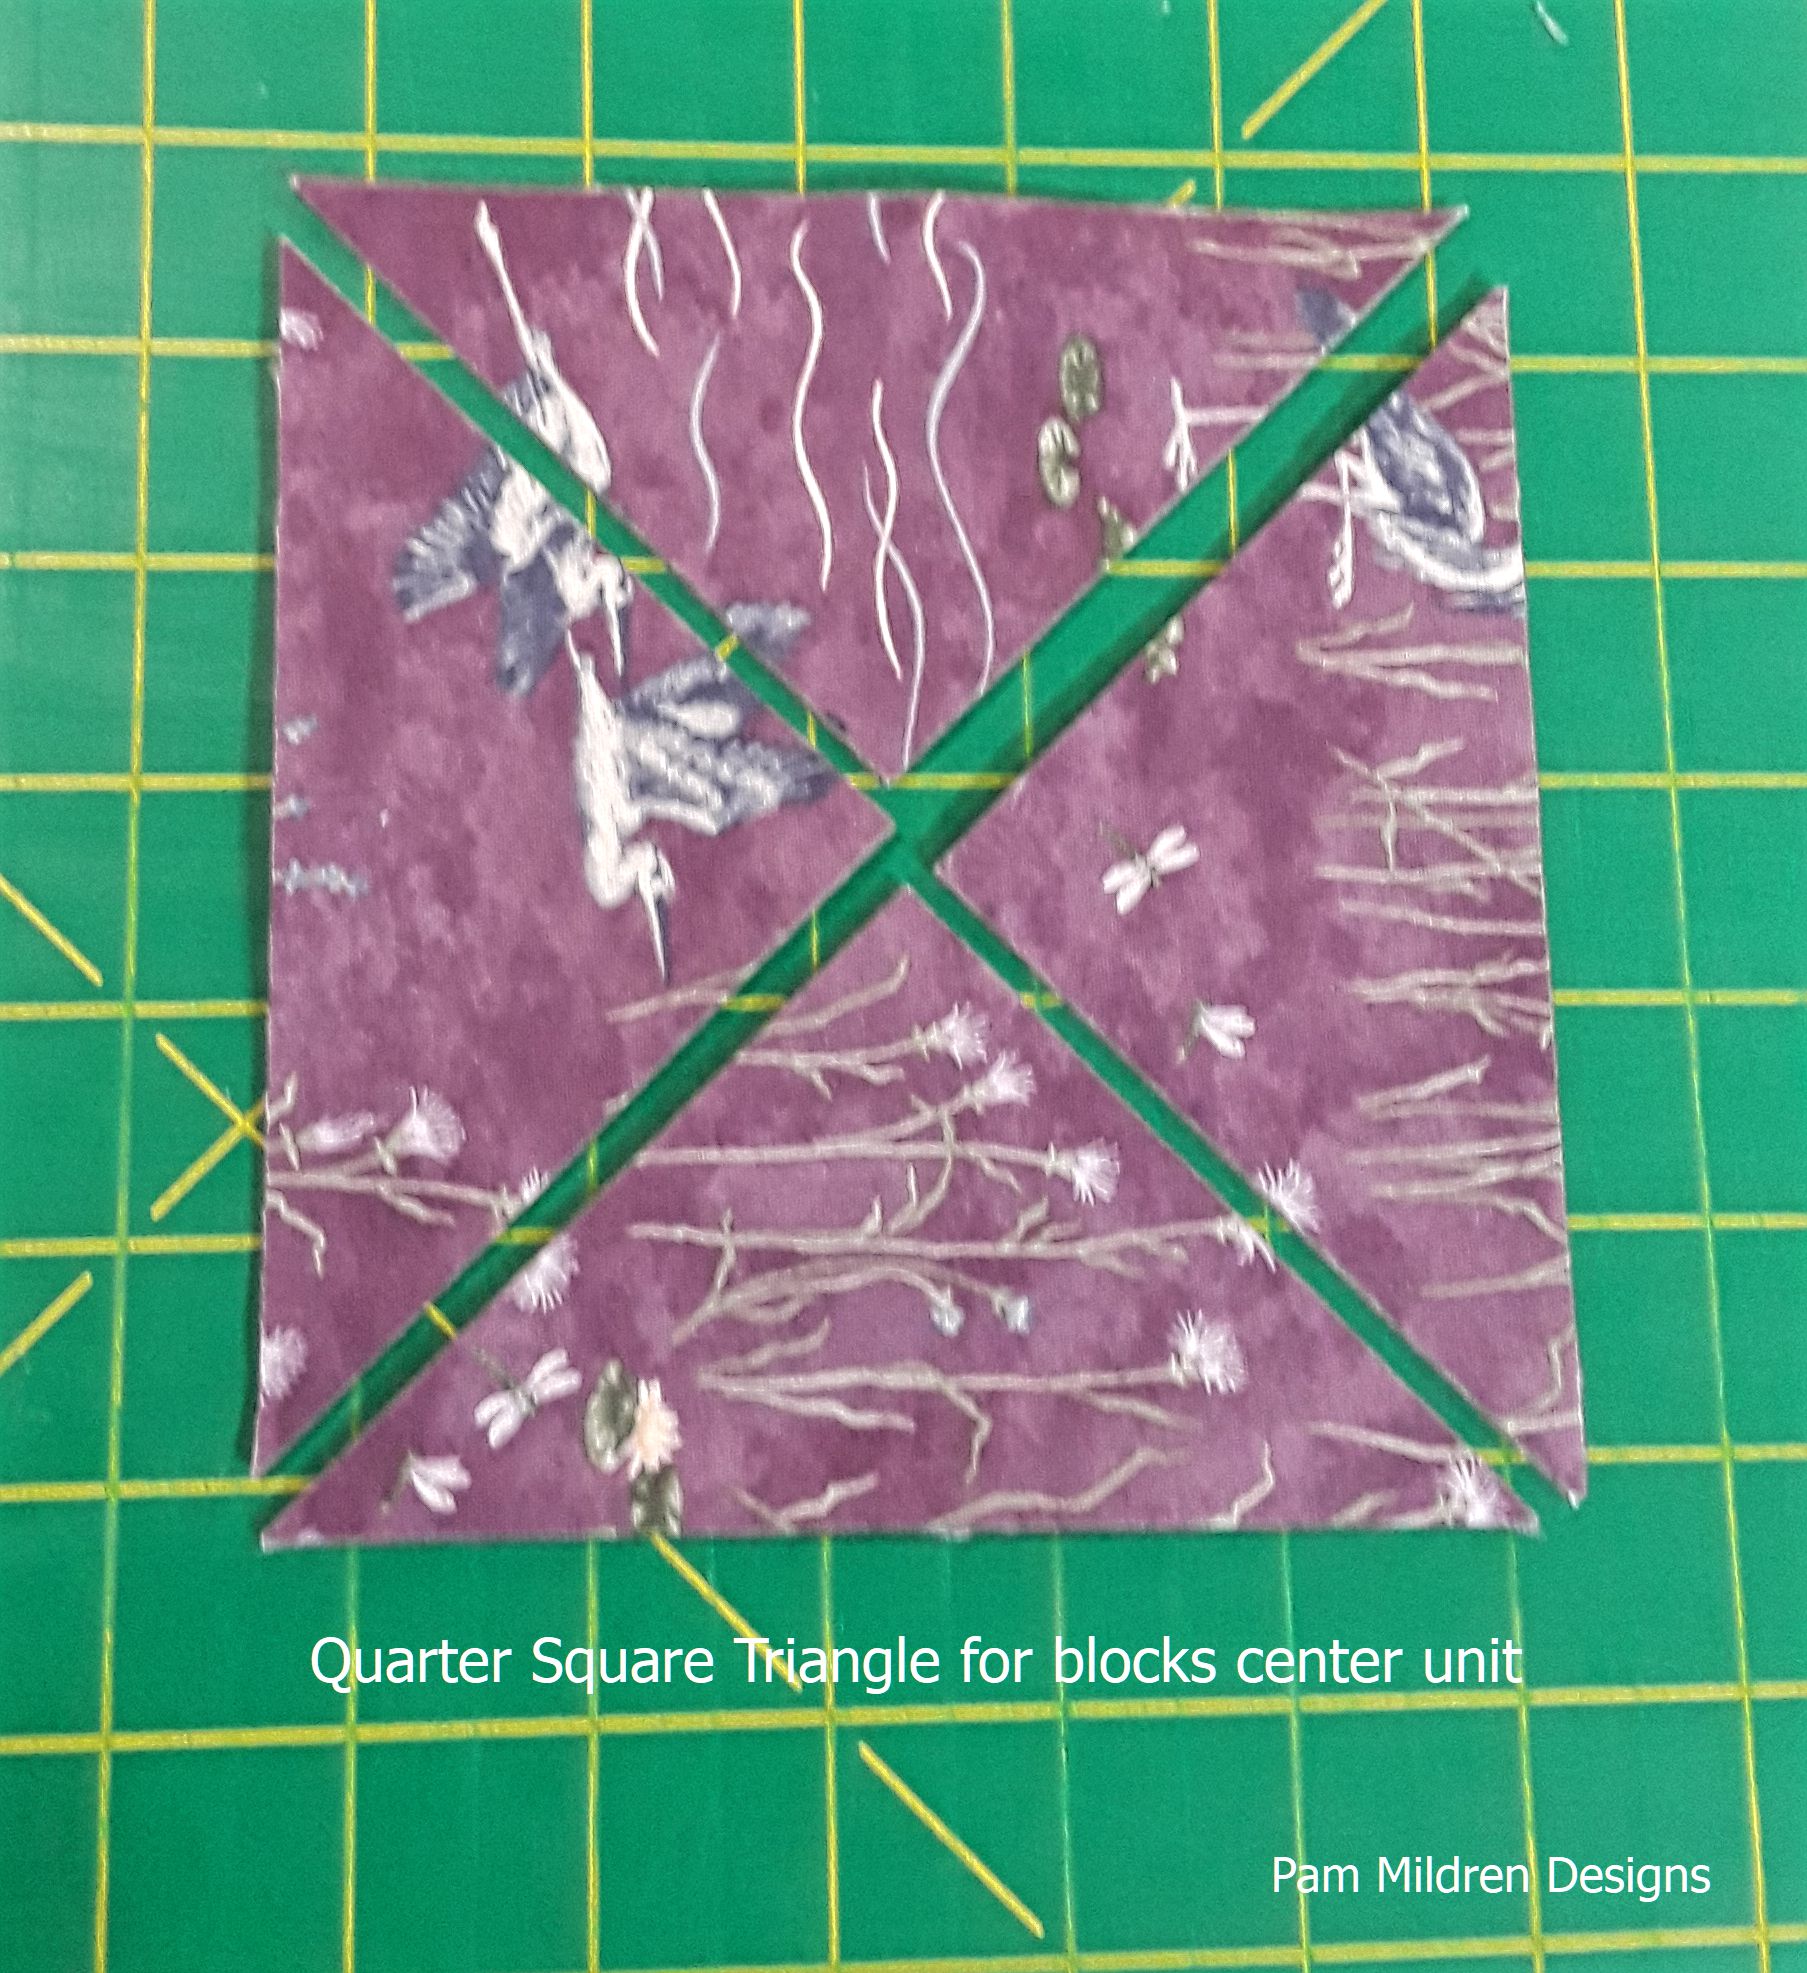
For the Quarter Square Triangle Center Blocks:
16 - 5 1/4" x 5 1/4" medium/dark fabrics cut twice on the diagonal (Yield 64 pieces)
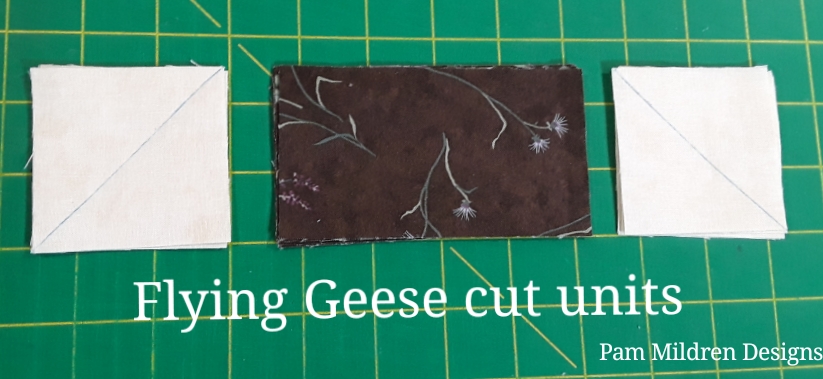
For the Flying Geese Units, these instructions are for the traditional stitch & flip method.
To use the Deb Tucker Wing Clipper Trimming tool follow the cutting instructions found with the ruler.
128 - 2 1/2" x 4 1/2" of medium/dark fabrics
256 - 2 1/2" x 2 1/2"
For the Corner Geese Unit:
32 - 3 7/8" x 3 7/8" of medium/dark fabric cut once on the diagonal

For the Setting Triangles in each Block:
16 - 7 1/4" x 7 1/4" of background fabric cut twice on the diagonal

Borders:
2 - 5 1/2" x width of your quilt
2 - 5 1/2" x length of your quilt
Binding:
6 - 2 1/4" or 2 1/2" x 42"
Piecing of the Block Units:
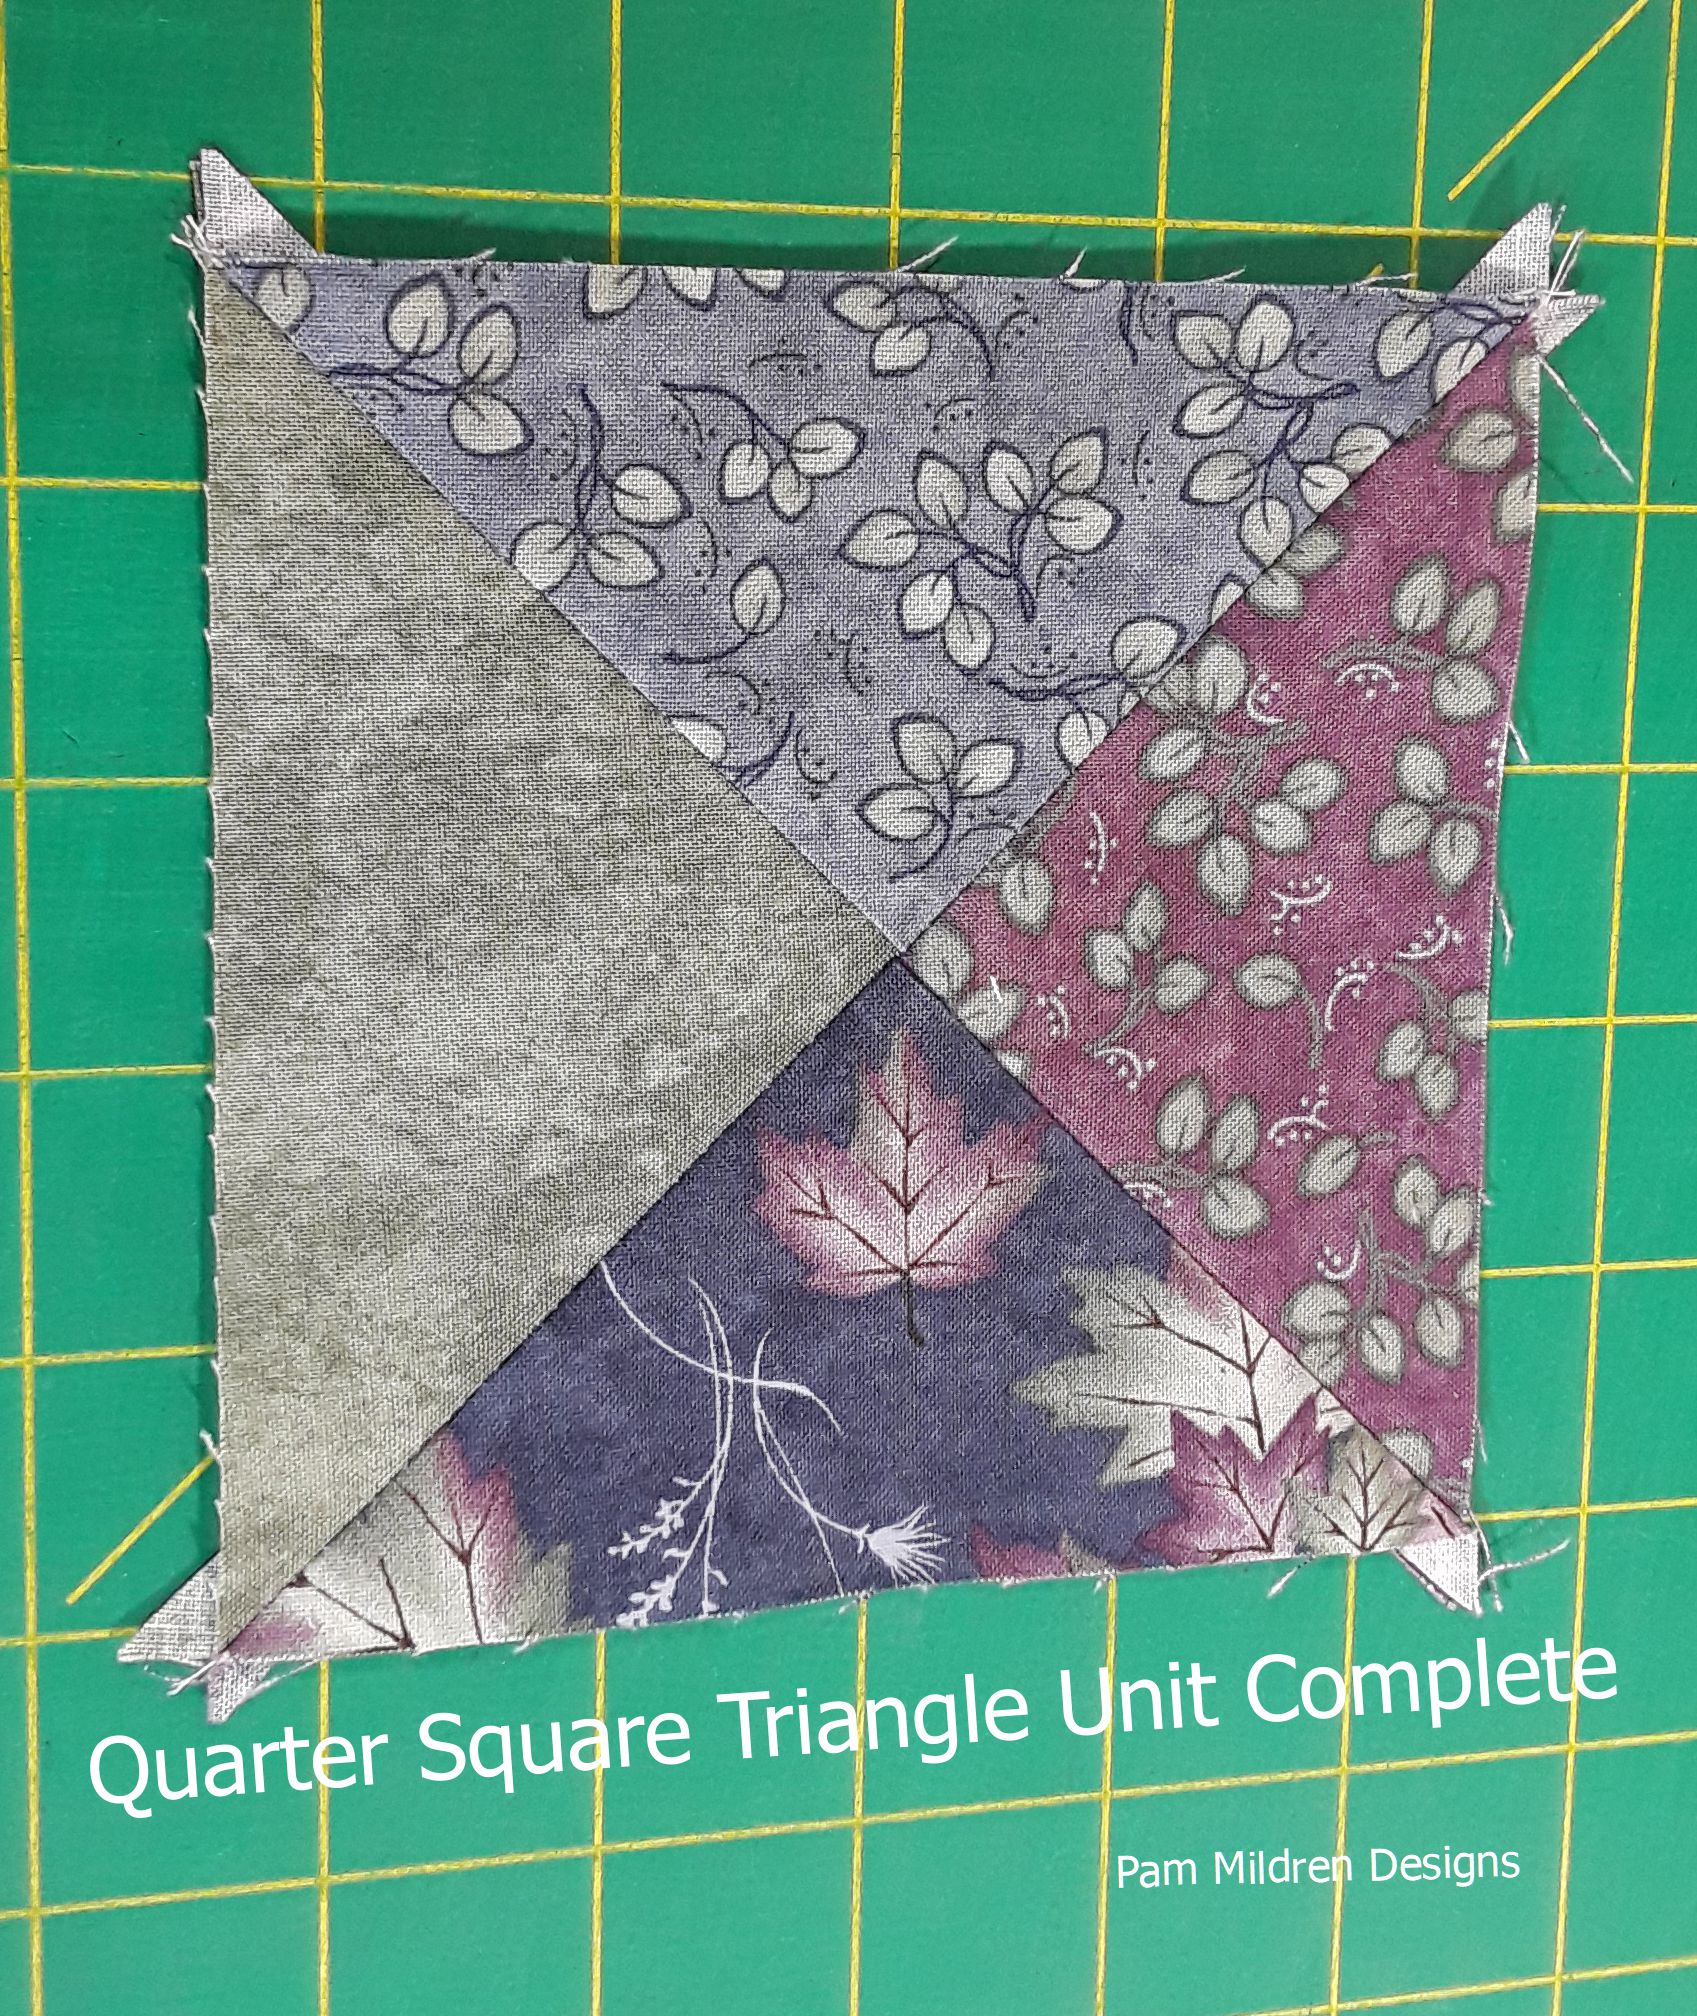
1. Quarter Square Triangle Block Centers (16)
Choose 4 different cut triangles for one block center. Stitch the triangles in pairs, stitching on the short sides of the triangles. Press the seams of the 2 pairs of triangles in opposite directions. With right sides together, nest the seams of the 2 pair of triangle, pin and stitch. To reduce bulk I pressed the final seam open. You may press if one direction if you prefer. Trim this unit as needed to measure 4 1/2" x 4 1/2".


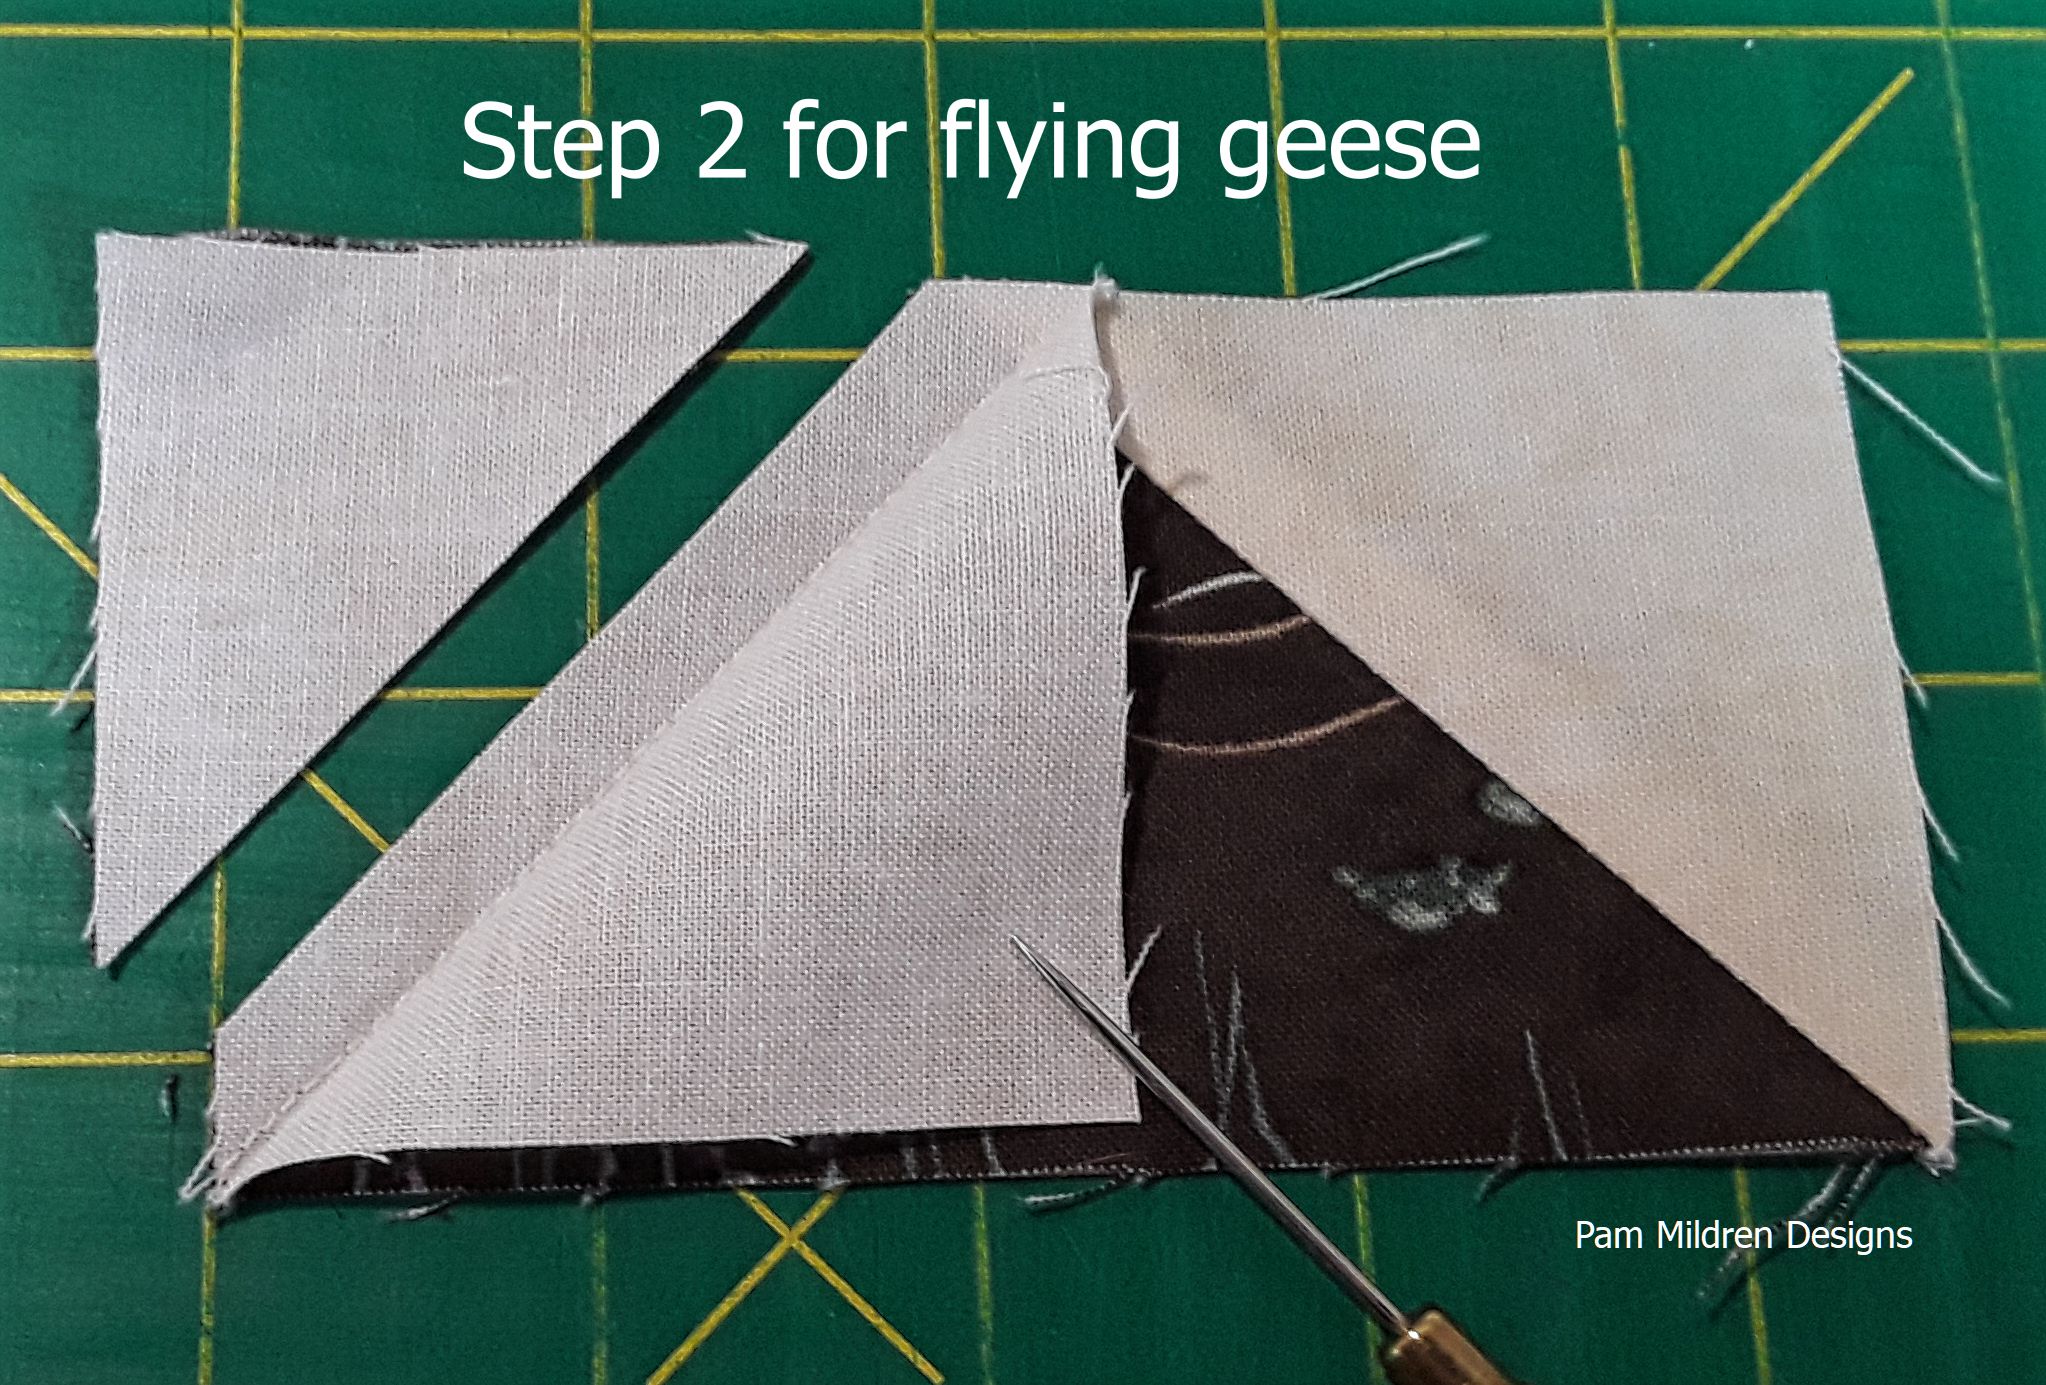
2. Flying Geese Units (64)
First we need to make the 128 flying geese. On the wrong side of the 2 1/2" x 2 1/2" background squares draw a diagonal line. Place a 2 1/2" x 2 1/2" background square on the end of a 2 1/2" x 4 1/2" medium/dark rectangle. Stitch on the edge of this line, closest to the outer edge of the rectangle. Flip the background triangle open and match the corner to the corner of the base rectangle unit. Press with a hot iron. When cool, trim the excess fabric from the back leaving a 1/4" seam. Repeat to the opposite side of the rectangle. Measure and trim to 2 1/2" x 4 1/2".


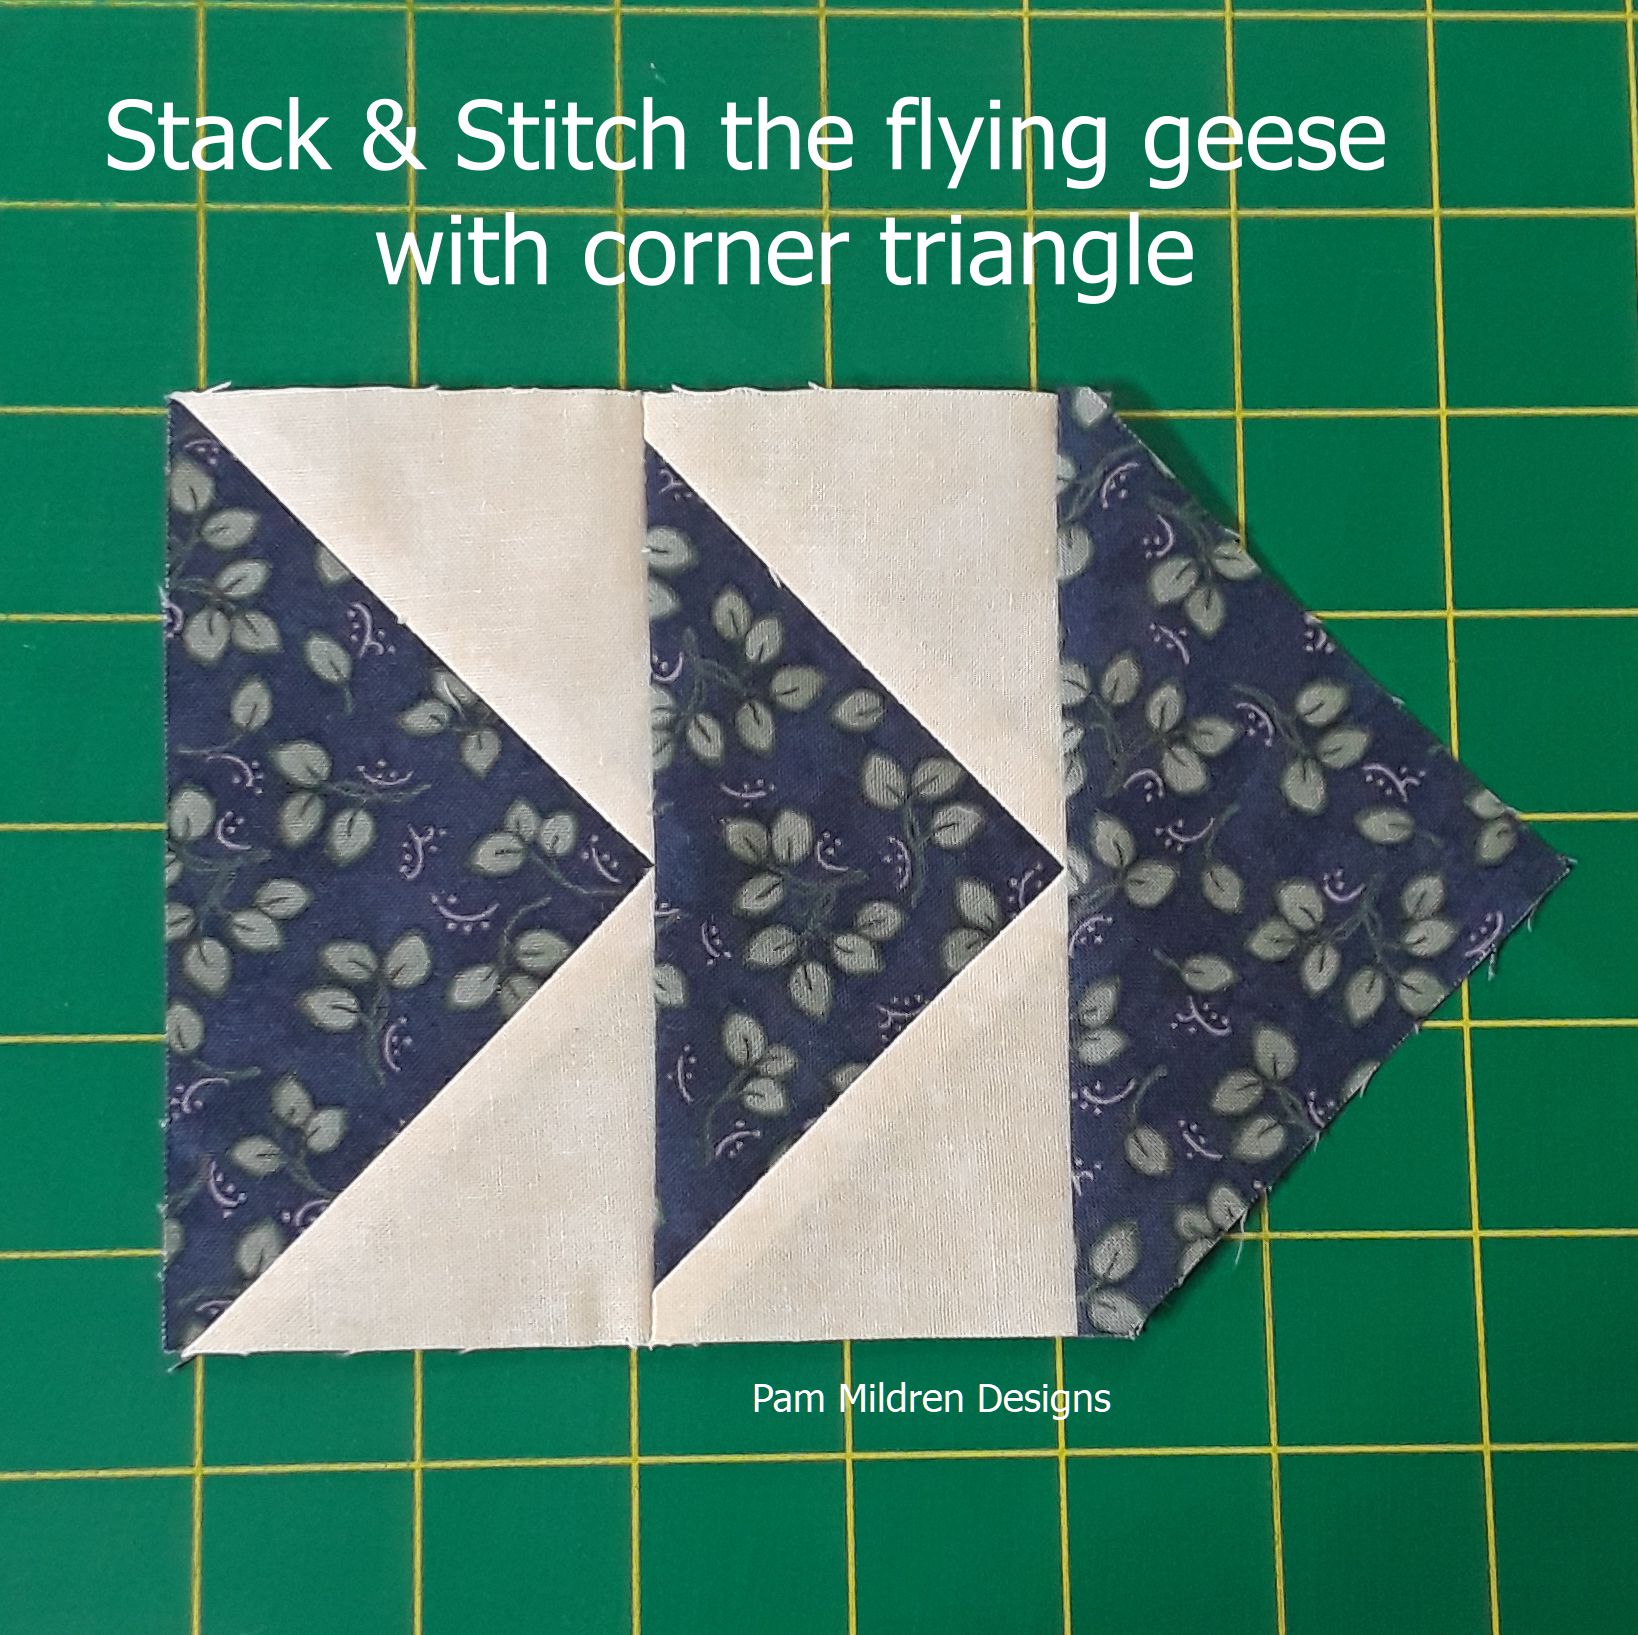
Join 2 flying geese together. Stitch the base of one unit to the pointed top of the other unit. Press the seam toward the base of the top unit. Measure and trim these units to 4 1/2" x 4 1/2". For the pairs of geese, I chose to keep the geese the same fabric in each unit. You may mix the fabric up in whatever manner is pleasing to you.
On the top of each geese unit we need to add a corner triangle. These triangle were cut from the 3 7/8" x 3 7/8" squares. Stitch on the corner triangle, the base of this unit stitched to the point side of the flying geese unit. Press the seam toward the triangle. Now we have 64 flying geese units.
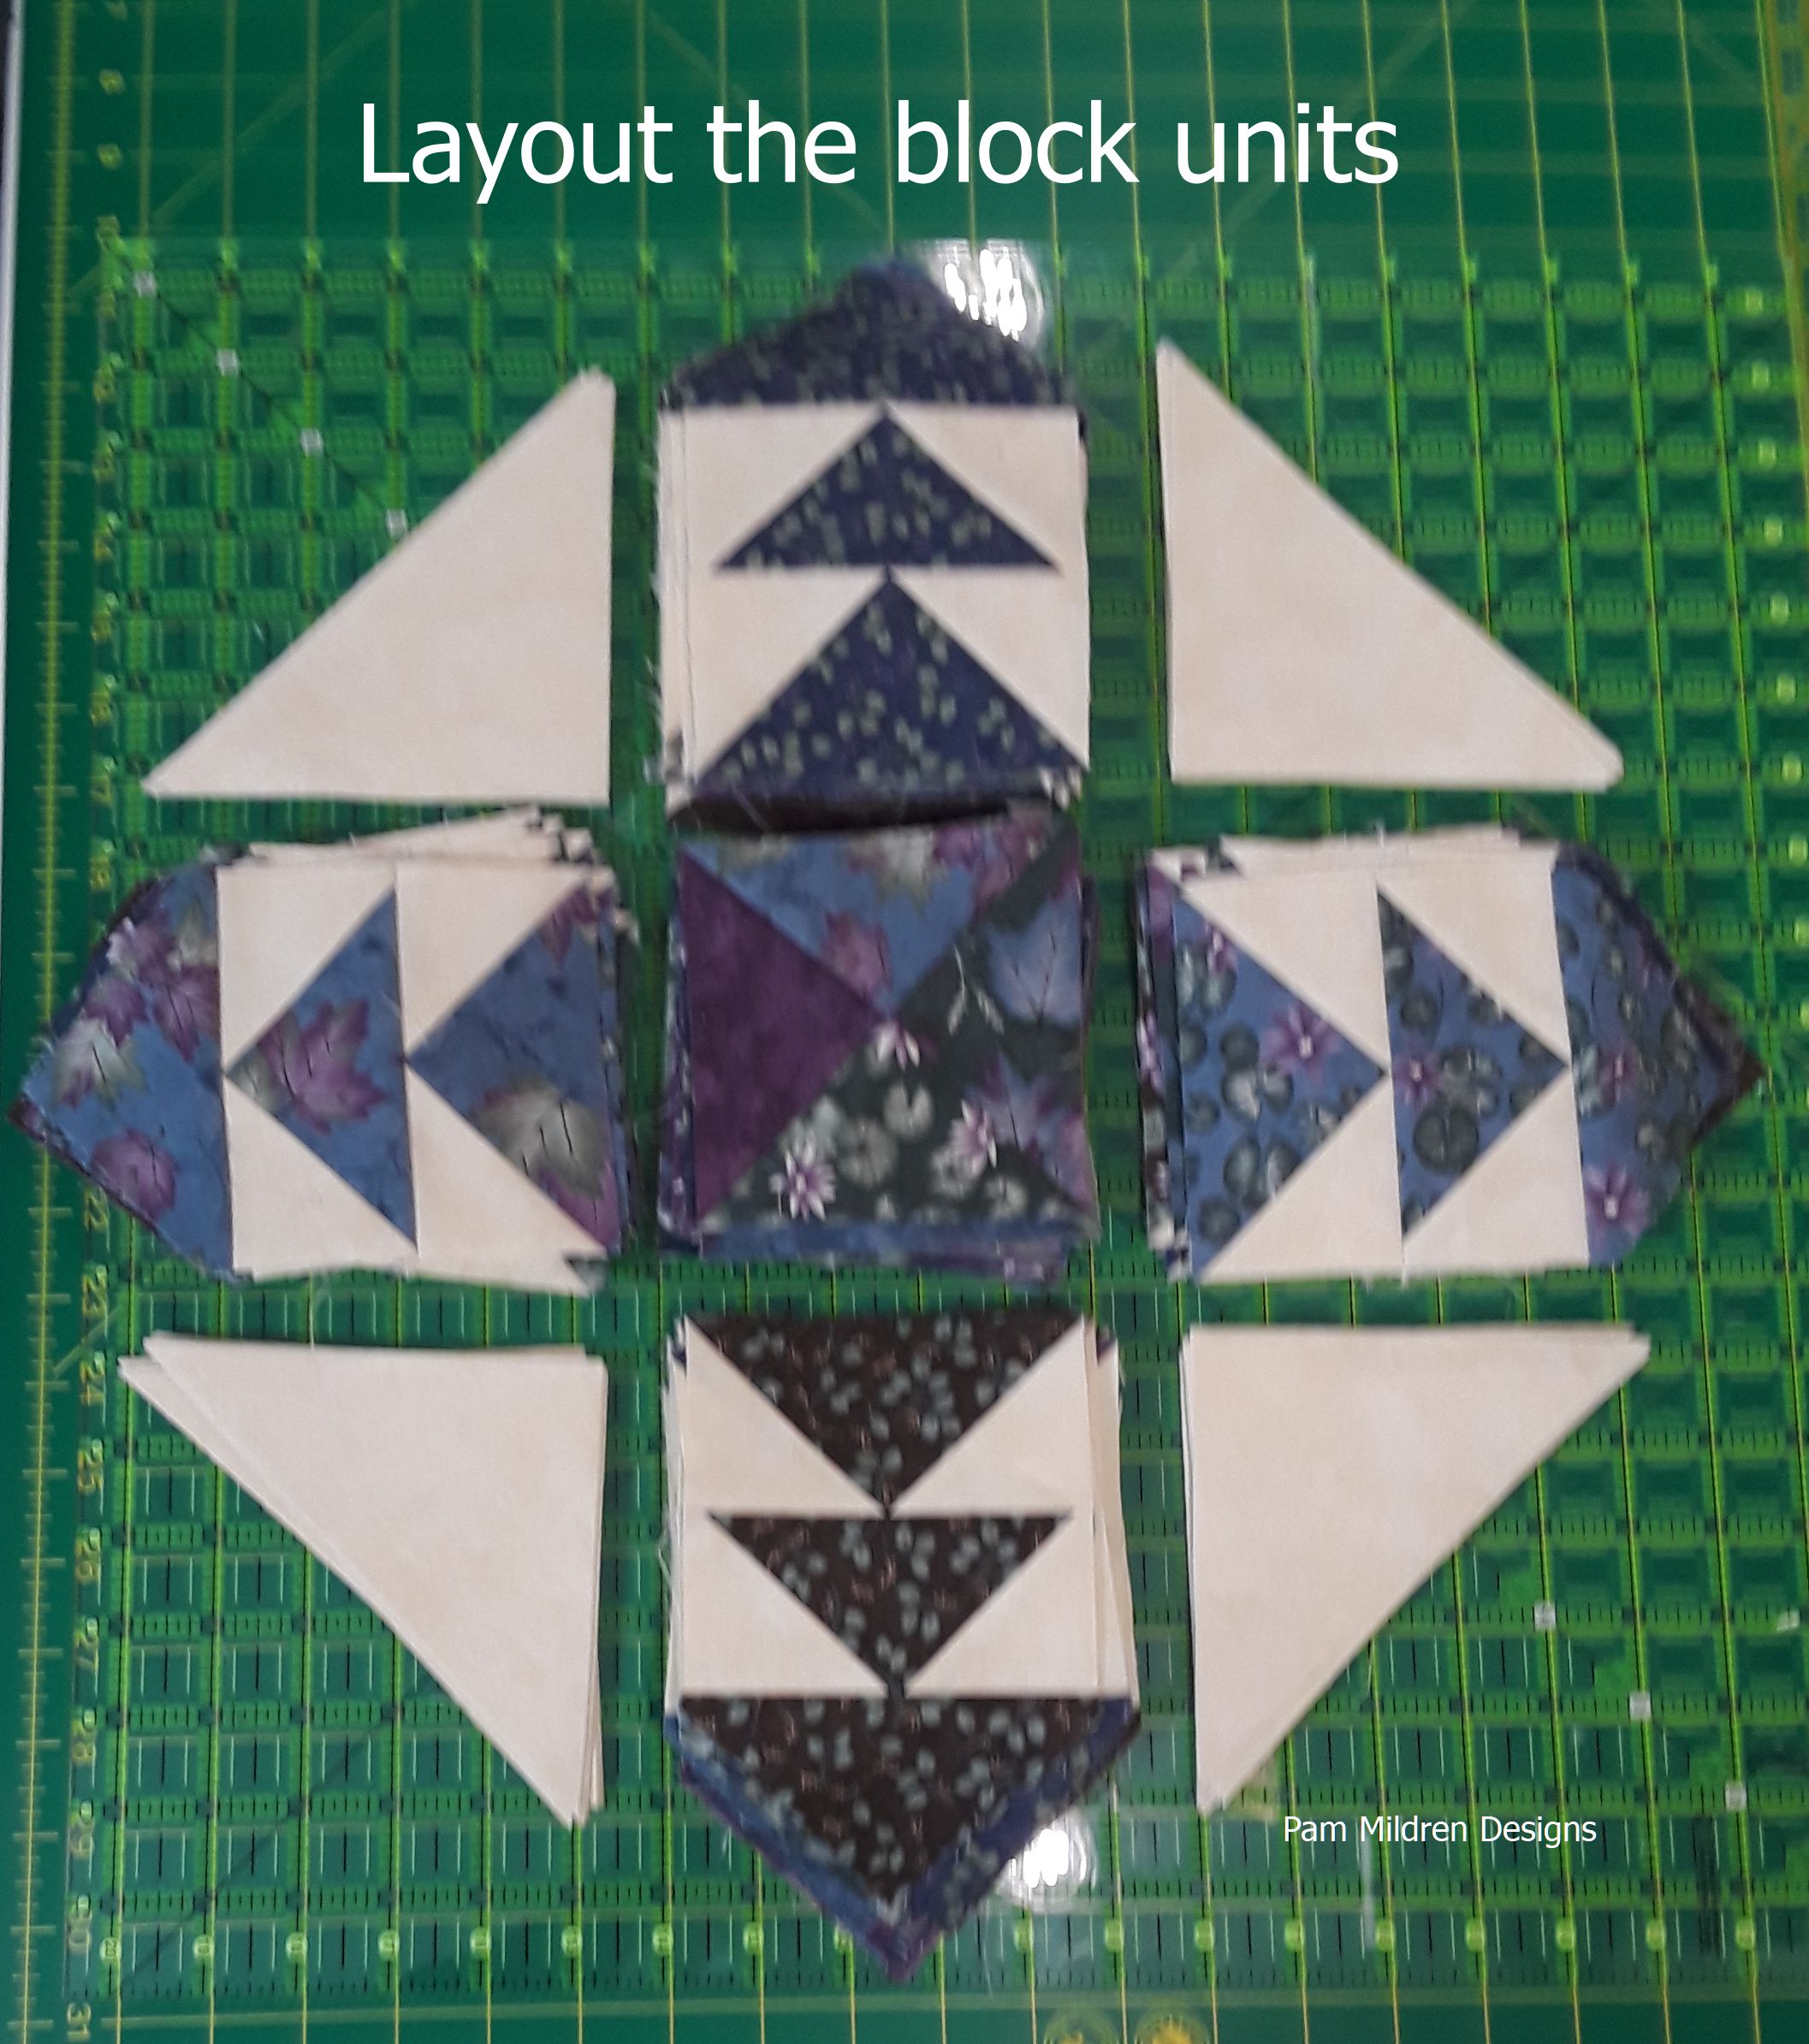
Block Construction (16):
Layout the block with 4-flying geese units, a quarter square triangle center, and 4 background setting triangles.
Stitch the setting triangles to the goose units. Press toward the setting triangle.
Stitch the goose units to the center quarter square triangle. Press toward the center.
Nest the opposing seams and pin a goose/setting triangle unit to the center/goose unit. Stitch and press the seam away for the center. Repeat to add the final goose/setting triangle unit to the center unit.
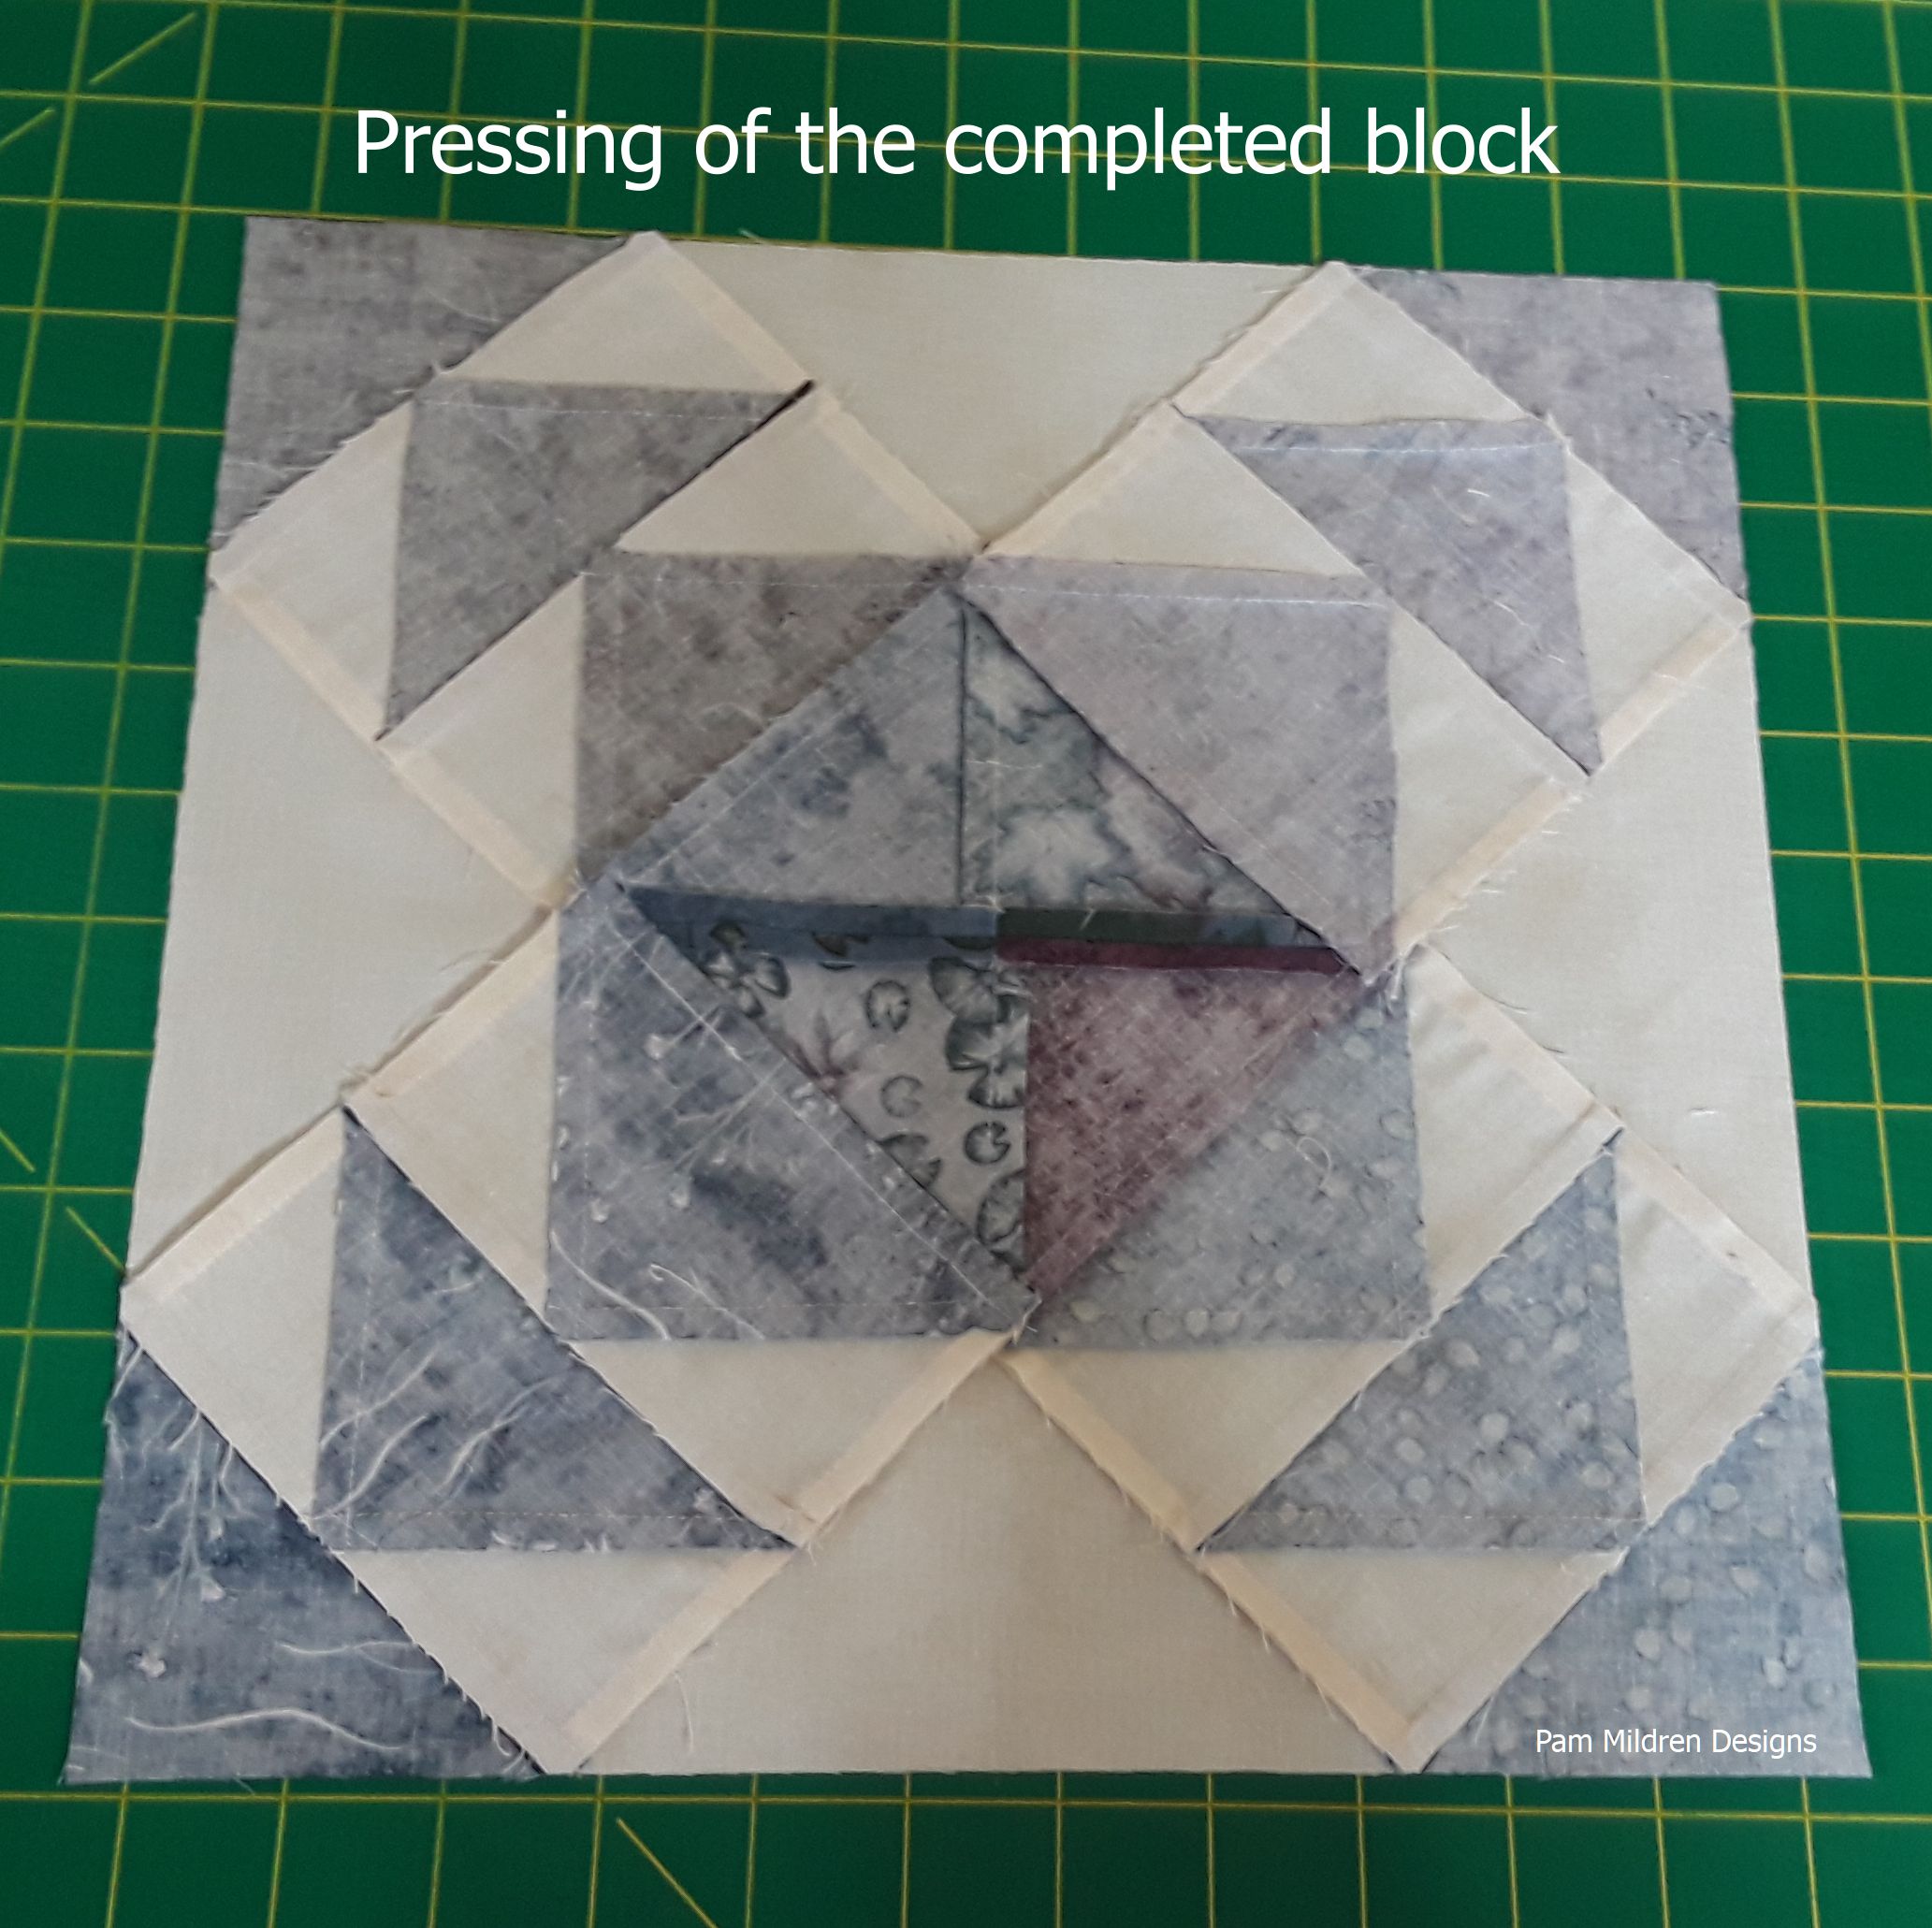
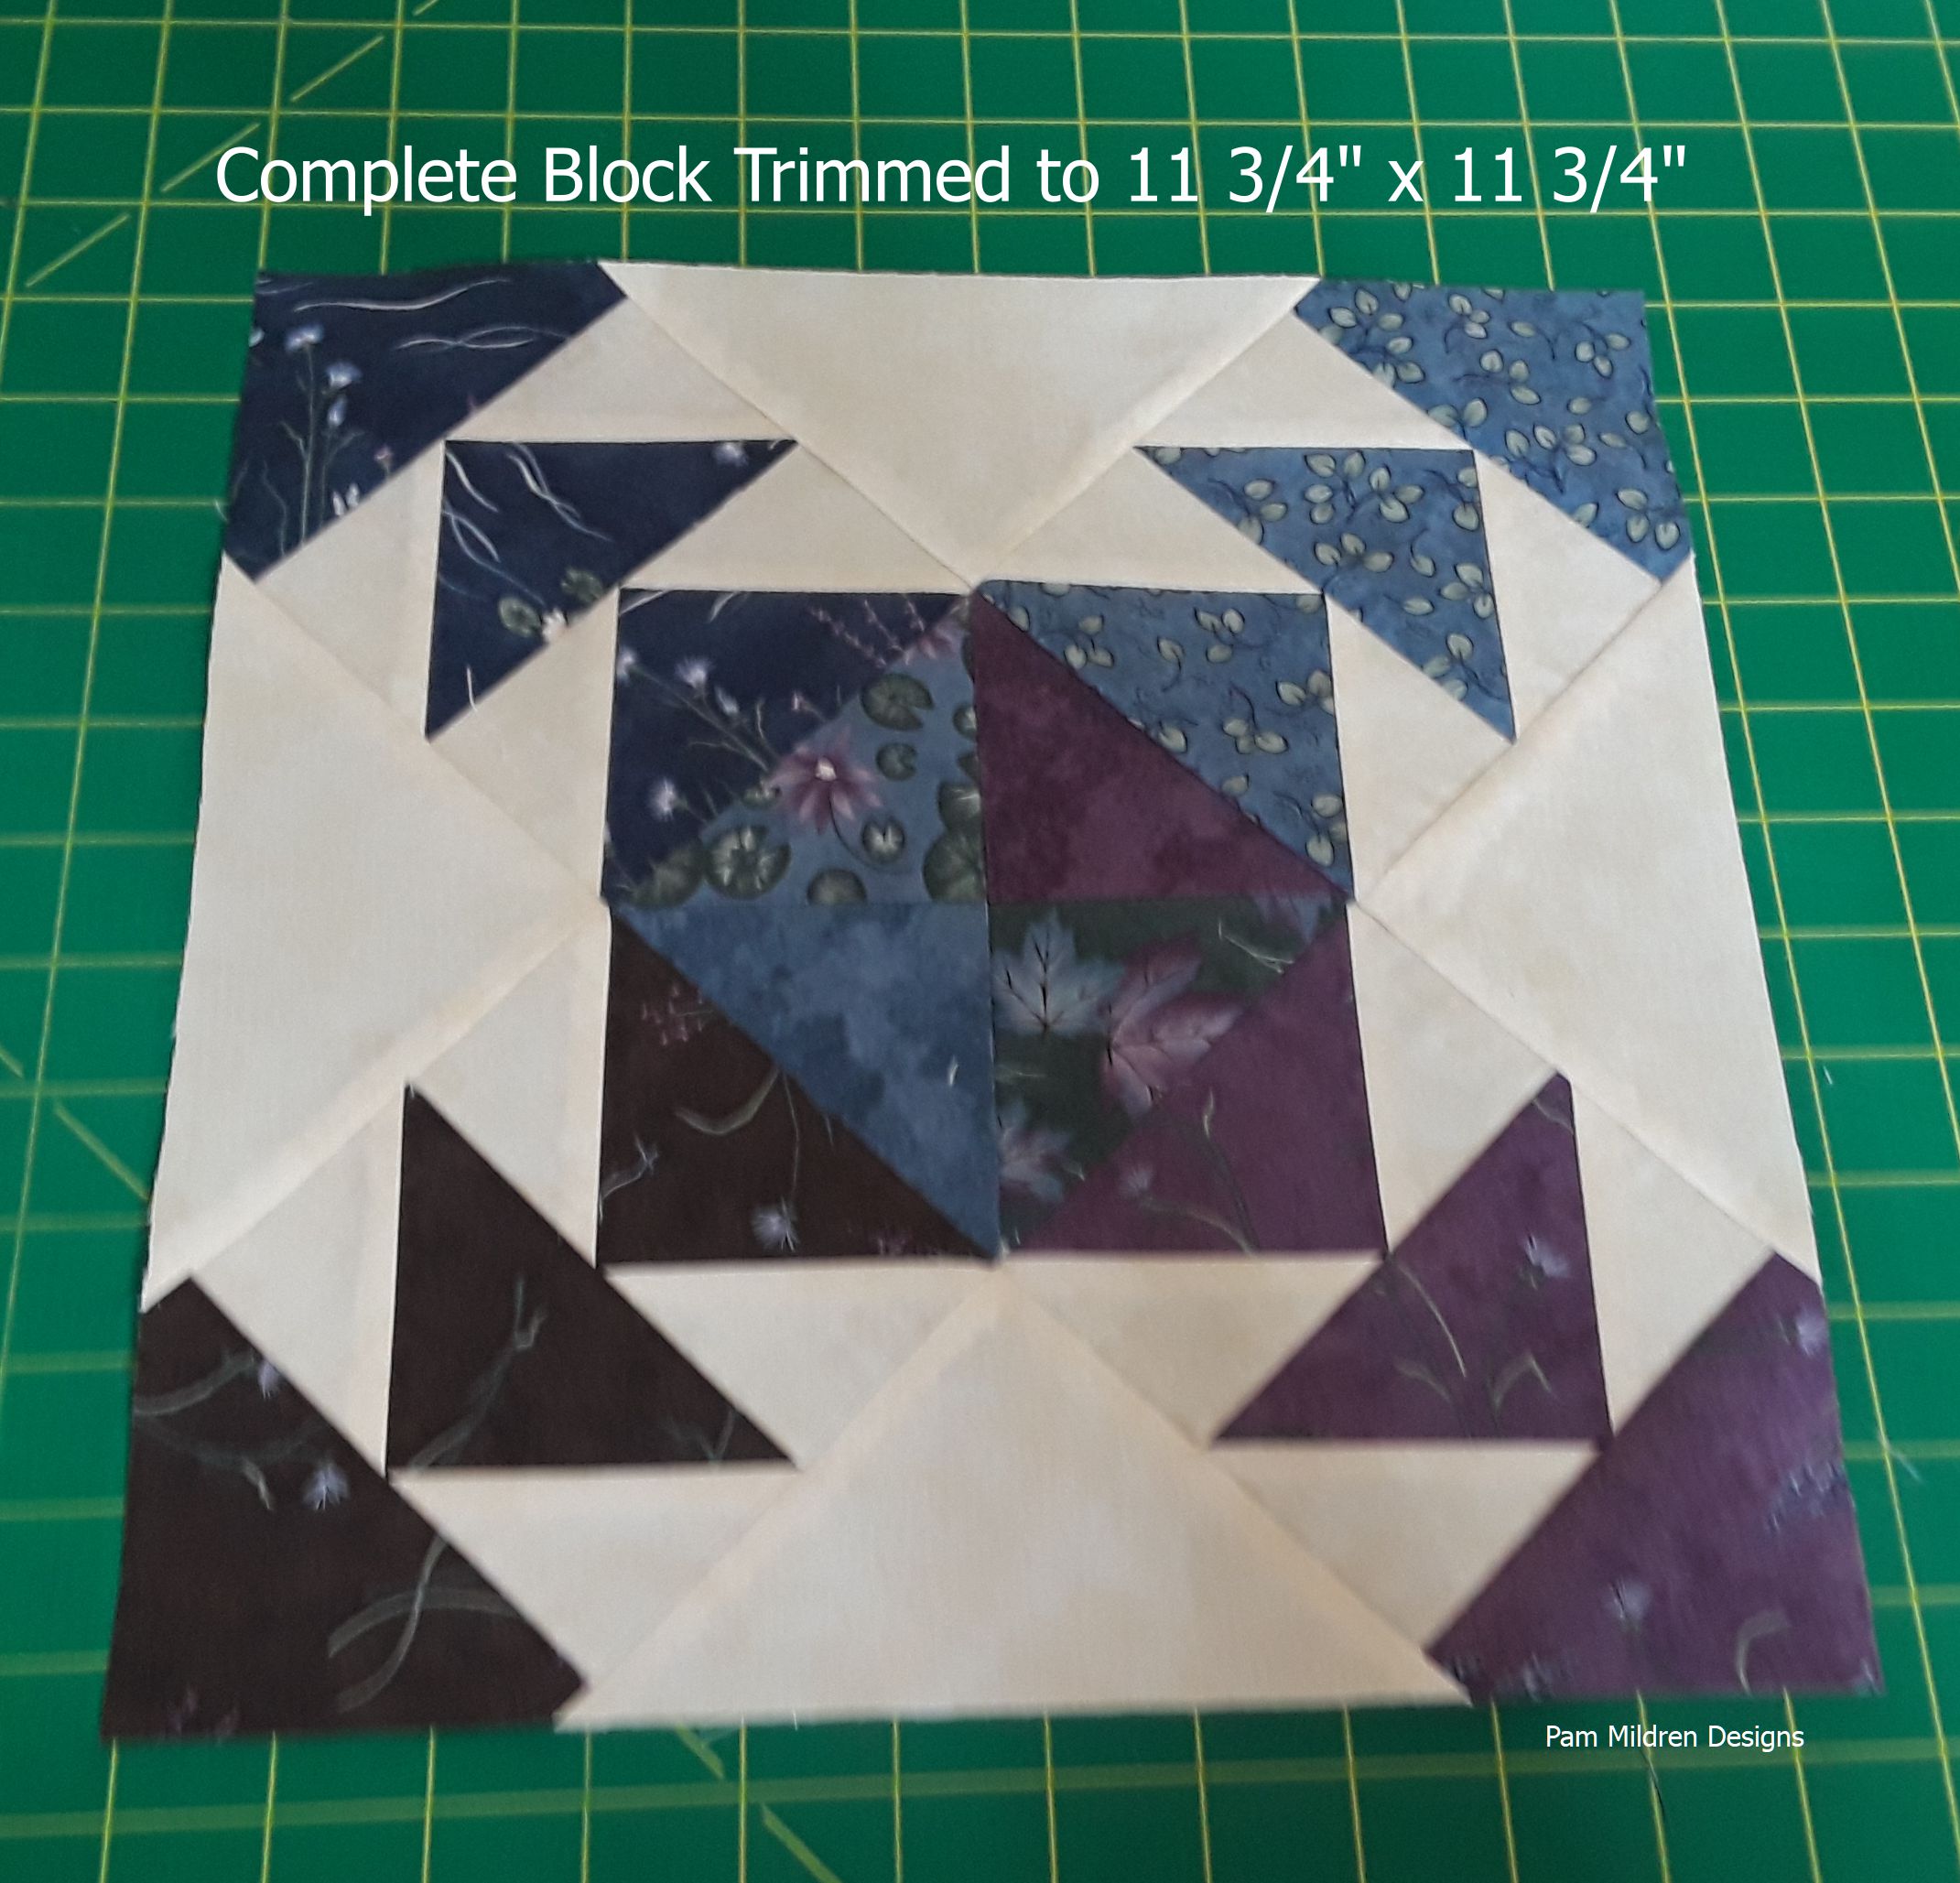
Measure and trim up each block to measure 11 3/4" x 11 3/4".
Quilt Center Construction:
Layout the blocks in a 4 x 4 grid. Move them around, turn them to obtain a pleasing arrangement. Stitch the rows horizontal together. Press the seams of rows 1 & 3 in one direction, and the seams of rows 2 & 4 in the opposite direction. Join the rows together by nesting the seams, pin, and then stitch. Press your seam in either direction or open. The final seams running the width of the rows I pressed open to reduce bulk. Give you quilt center a final press from the back and the front of the quilt top.
Adding the Borders:
Measure your quilt top width in 2-3 places, take the average. This is the measurement to use to cut your first 2 borders by 5 1/2". I like to cut my borders the length of the fabric to eliminate a seam in the border. However, if piecing the border fabric is necessary, do so on the 45 degree angle to have a smooth finish without bulk.
Pin the border to the quilt starting at the middle of the quilt and border, then the ends, then continue pinning to fit the border fabric to the quilt center. Stitch and press the seam toward the border.
Measure your quilt again with the attached border in 2-3 places and take the average. This is the measurement to cut your final 2 border by 5 1/2". Attach these border using the same process.
Preparing the Backing and Binding:
In order to piece the backing fabric, remove the selvage edges. Cut your backing into 2 pieces and join with a seam that will run horizontally across the quilt. Give the seam and backing fabric a good press to remove crease. The horizontal seam is especially important for longarm quilting. Vertical seams can easily result in puckers in the backing fabric.
The binding strips are best joined on the 45 degree angle. This reduces bulk in the final finish of the edging on the quilt. For this quilt you need about 240" of binding.
Quilting:
Up to you! I am a professional longarm quilter so I finished this quilt using a design called Wisteria by Patricia E. Ritter of Urban Elementz, and Superior So Fine Thread #434. My batting choice in this quilt is the Quilters Dream Cotton Select (throw size).
![]()
This quilt finishes at 56" x 56".
The traditional pattern of this block is called Flying away. Patterns can take on such a new look by changing up the fabric, give it a try! You can find me on Facebook at Longarm Quilting by Pam Mildren and see the fabulous quilts I finish for customer. Visit my website, www.pamslongarmquilting.com for patterns in print and information on my quilting services.
Pam Mildren
{www.pamslongarmquilting.com}
![]()
Posted in:
Comments