Welcome to Moda Fabrics!
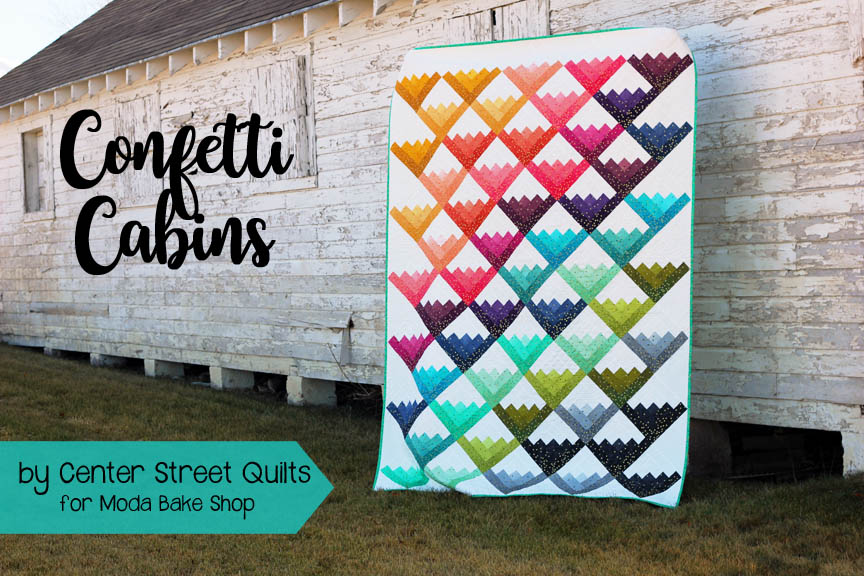
Confetti Cabins Quilt
Confetti Cabins Quilt
Published:
Jan 9 2018 - 23:00
![]()
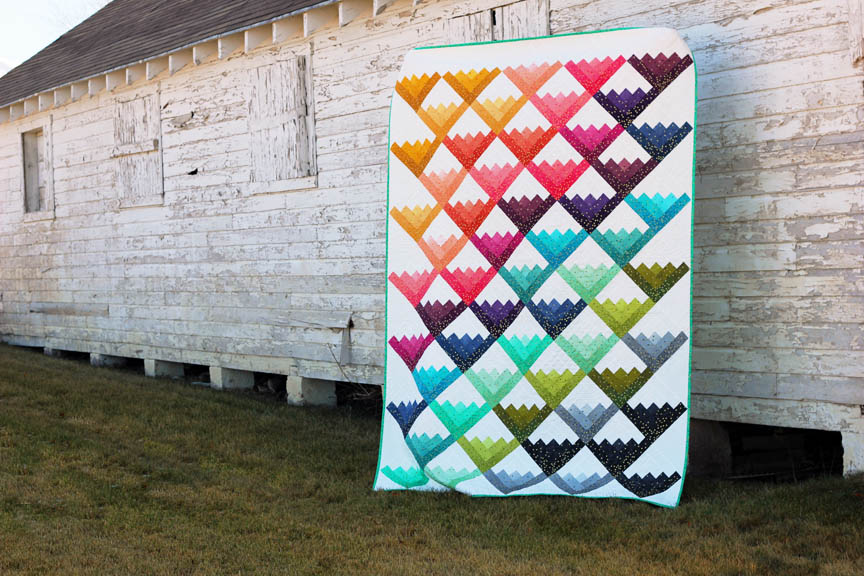
Hi quilters! This is Kristina from Center Street Quilts and I'm delighted to be sharing my Confetti Cabins quilt tutorial with you today. When I saw Vanessa Christenson's new Ombre Confetti Metallic line, I fell in love and knew it would be the perfect fabric to re-imagine a favorite traditional block--the log cabin! My quilting preferences are a mix of traditional and modern and I particularly enjoy using classic blocks combined with fun, new elements. Confetti Cabins does just that by merging the beloved log cabin quilt block with sparkly fabric and an unconventional block setting. I hope you'll enjoy following along with this tutorial and please let me know if you make your own Confetti Cabins quilt!

This quilt finishes at 70" x 98".
![]()
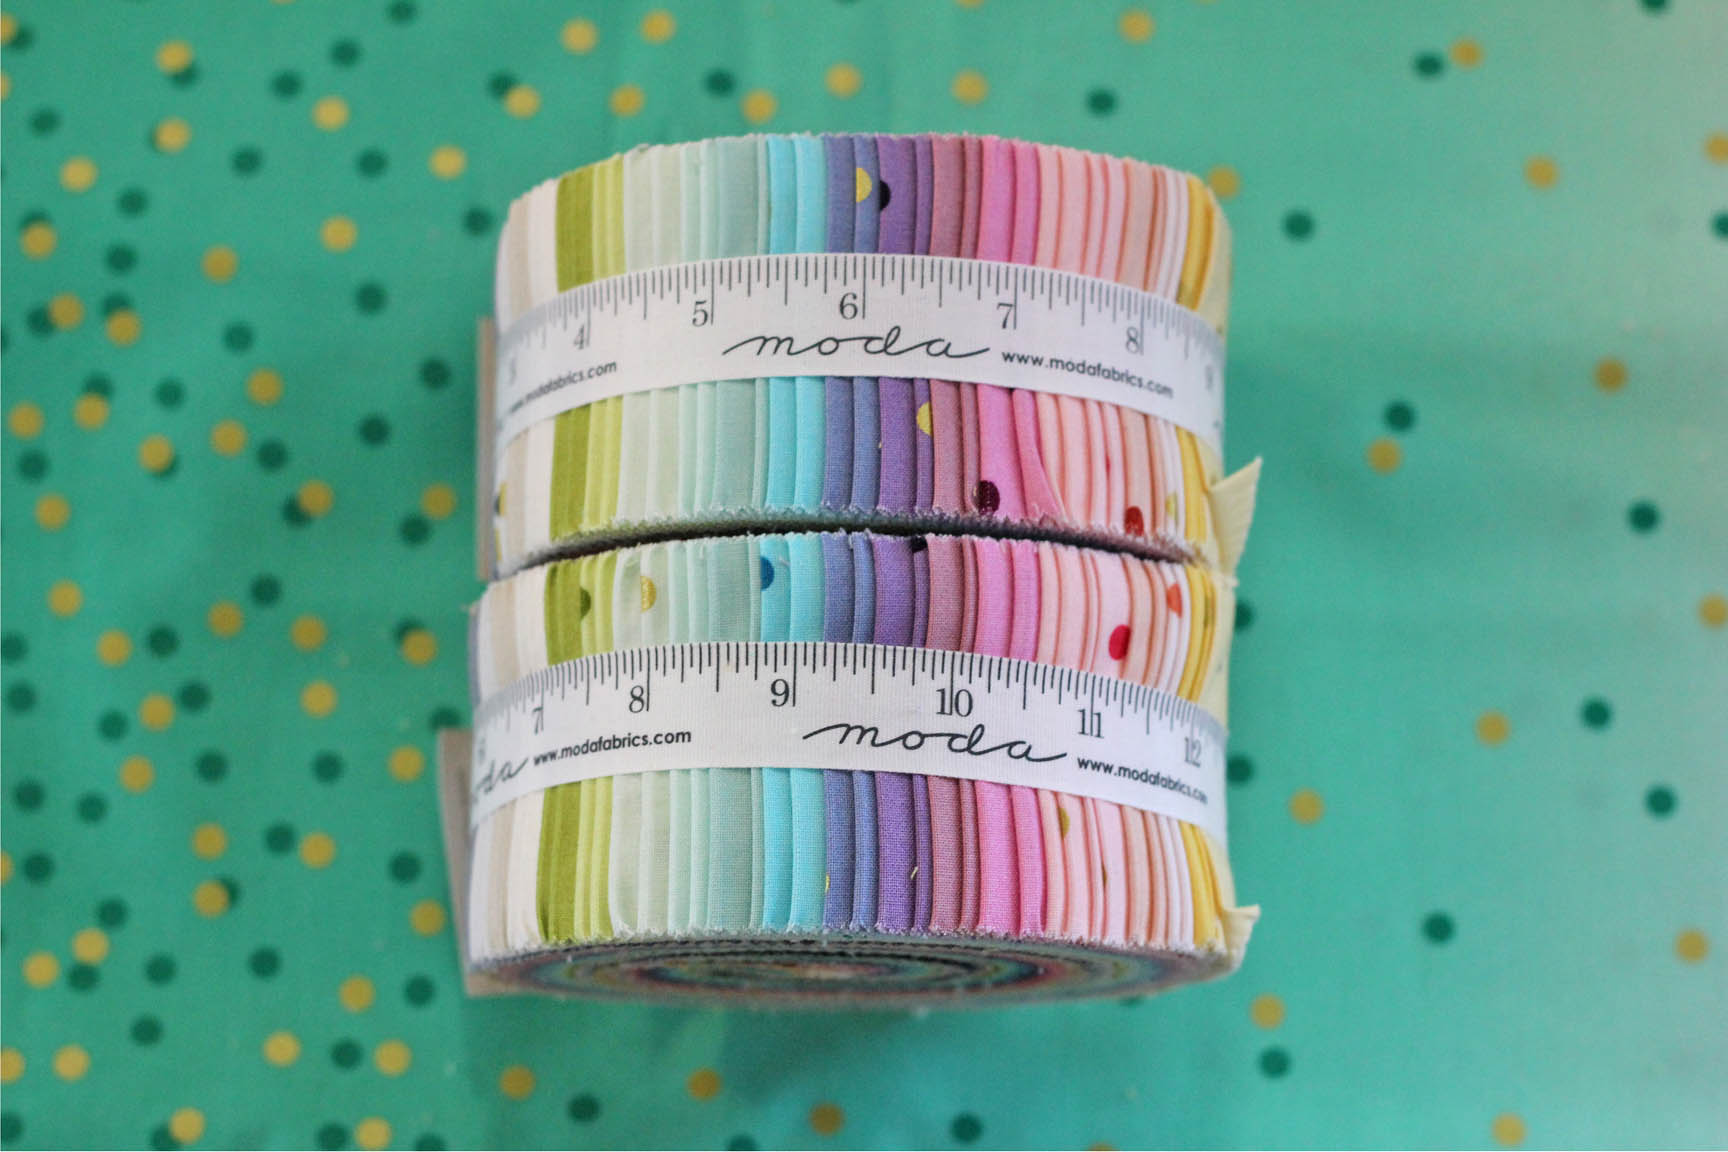
2 Jelly Rolls (Ombre Confetti Metallic by V and Co.)
4.25 yards background fabric (Bella Solid 9900 200)
6 yards backing fabric (pieced with a vertical seam)
2/3 yards binding fabric
![]()
Before you begin:
- Read through the entire tutorial
- Width of Fabric is abbreviated as WOF
- The WOF is assumed to be 42"
Each log cabin block is made of (5) printed pieces and (4) background pieces, and finishes at 10" x 10" (10.5" x 10.5" unfinished).

Cutting the Jelly Roll Strips
From the (2) Jelly Rolls, choose (59) 2.5" x WOF jelly roll strips for your log cabin quilt.
Cut your first Jelly Roll strip according to the image below to yield the five cut pieces for your first block, plus one extra piece.
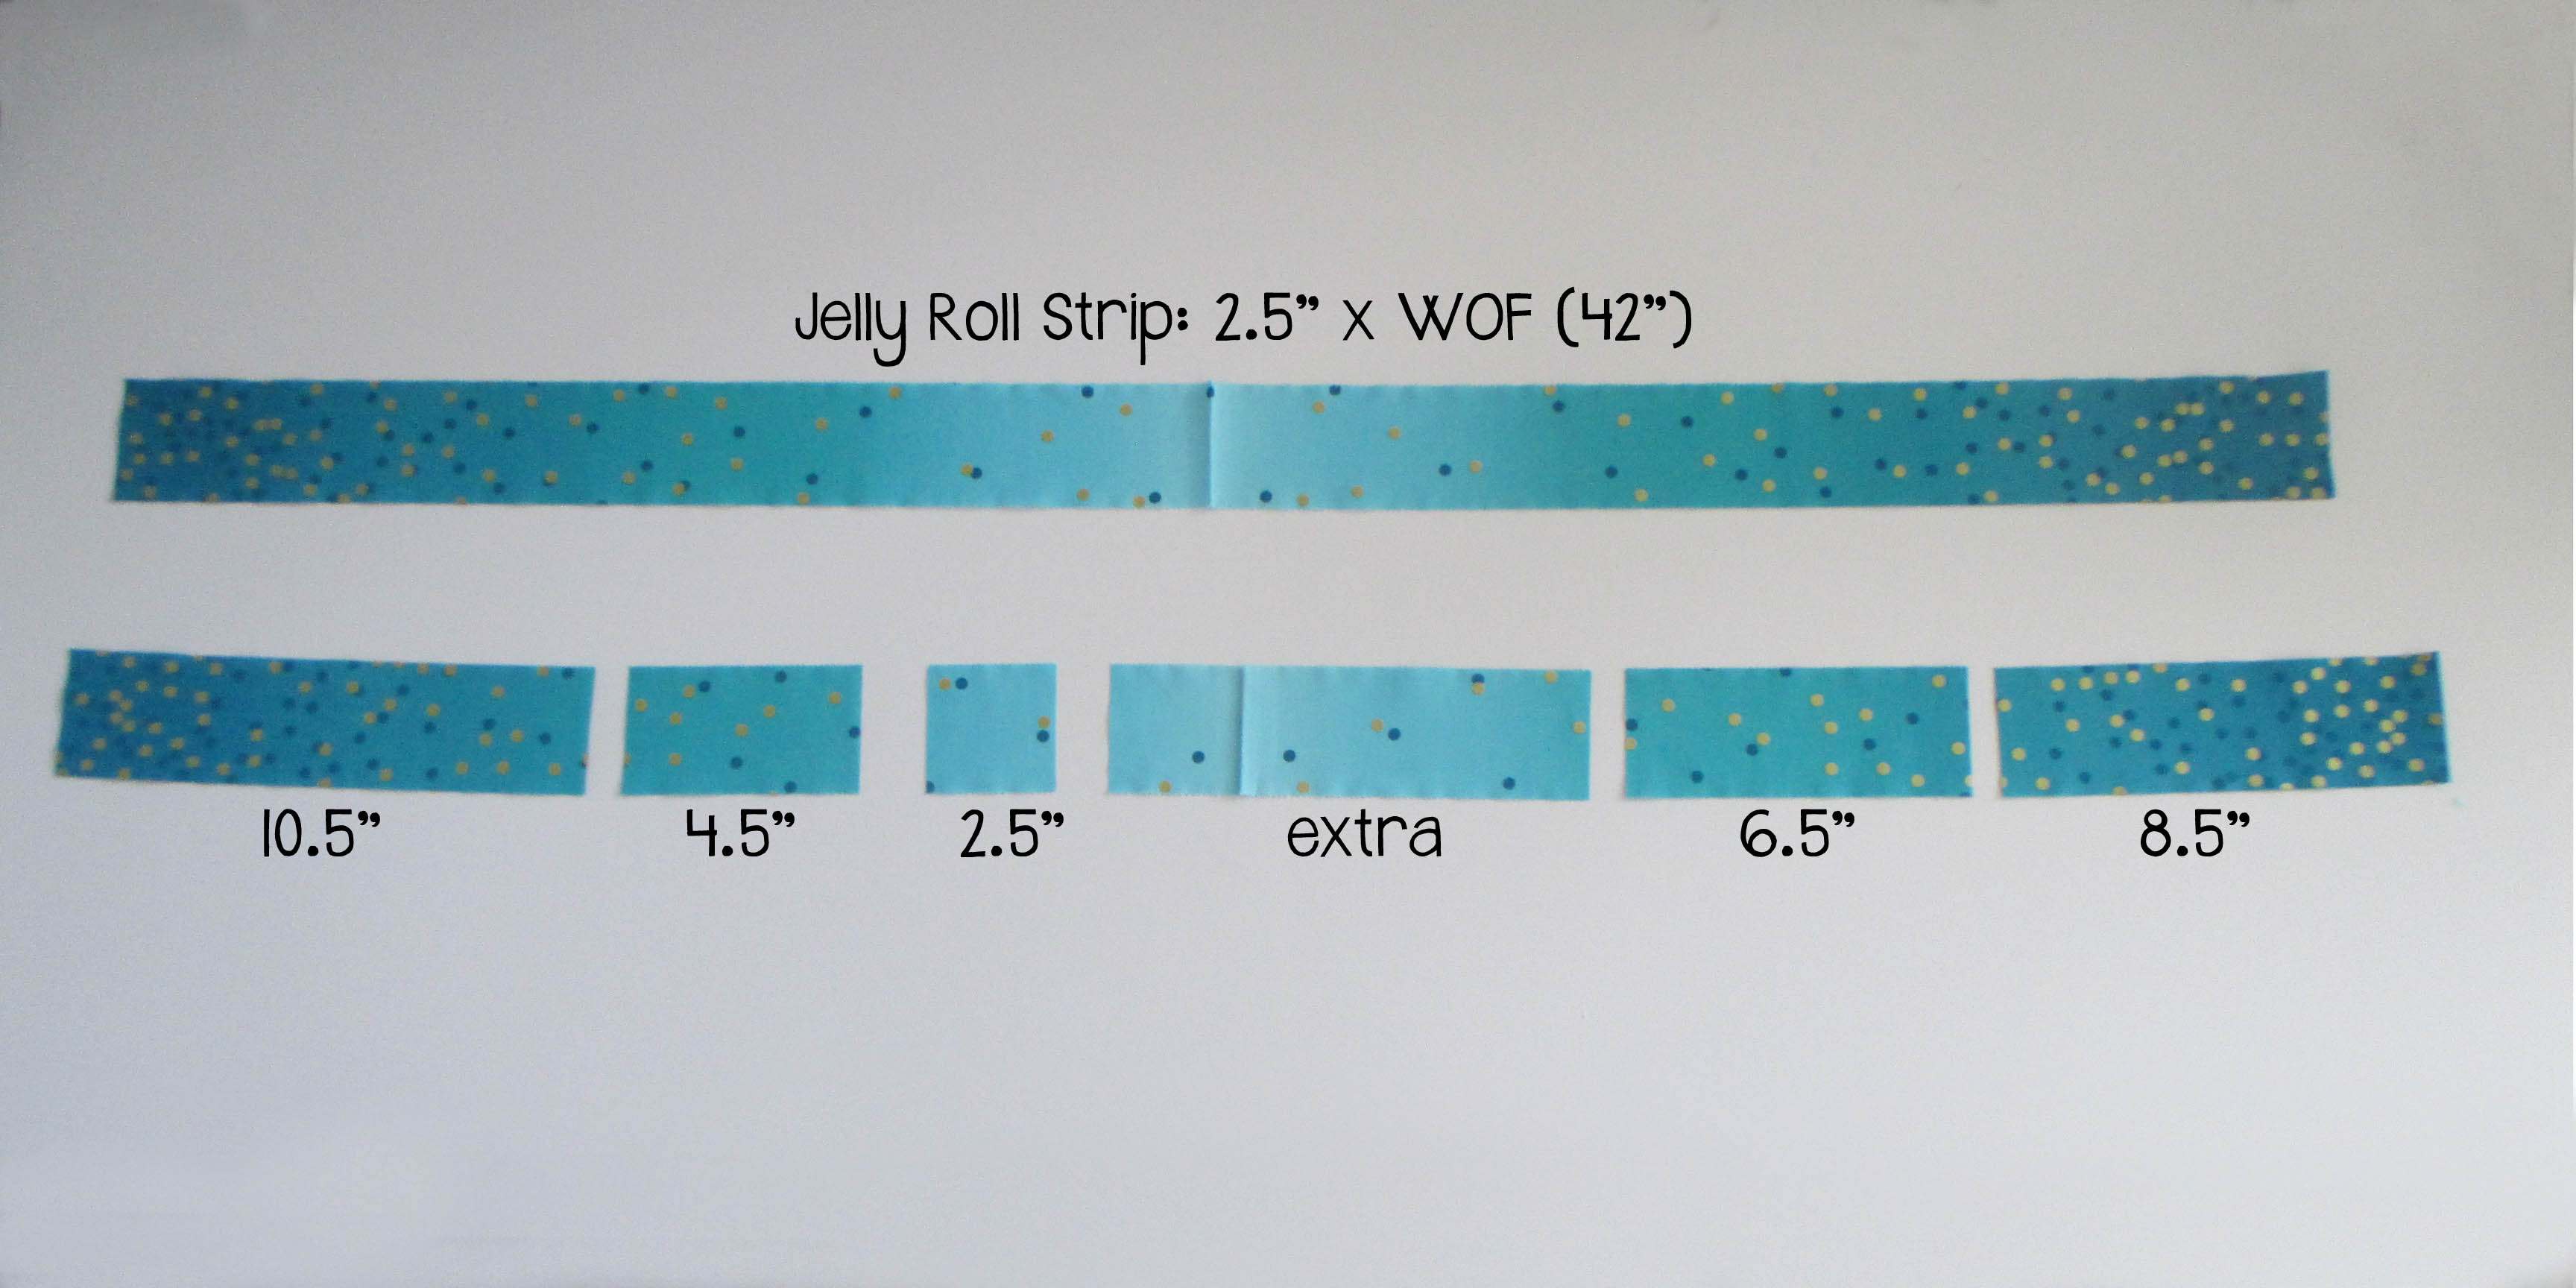
From each jelly roll strip, you should have:
- (1) 2.5" x 10.5"
- (1) 2.5" x 8.5"
- (1) 2.5" x 6.5"
- (1) 2.5" x 4.5"
- (1) 2.5" x 2.5"
- plus one extra piece
As a side note: To take full advantage of the ombre effect of the fabric, I started by cutting the longer log cabin pieces (10.5" and 8.5") on the left and right ends of the jelly roll strip where the gradient is the darkest. I then worked my way into the middle of the jelly roll strip and cut the shorter pieces toward the center where the gradient is lighter. Once the log cabin blocks are assembled, this cutting method will help keep the ombre effect noticeable as the outer edges of the blocks will be darker and the color will fade lighter toward the inside of the blocks. If you are using a different fabric line or scraps, then you can cut the log cabin pieces in a row starting at one end of the jelly roll strip.
Repeat the cutting instructions from the above image for the remaining jelly roll strips. Each jelly roll strip contains the printed pieces for one log cabin block. As you cut each jelly roll strip, you'll want to keep the pieces separated from the next jelly roll strip so you can easily assemble the blocks without searching for the right pieces.
Cutting the Background Fabric
Cut (3) 16" x WOF strips. From these strips:
- Cut (5) 16" x 16" squares. Cut each of the squares in half diagonally twice to yield (20) side triangles.
- Use the extra fabric from the 16" x WOF strips to cut (2) 8.5" x 8.5" squares. Cut each square in half diagonally once to yield (4) corner triangles. Keep any remaining fabric close by for cutting squares as instructed below.
Cut (32) 2.5" x WOF strips. From these strips:
- Gather (15) of the 2.5" x WOF strips and subcut them into (59) 2.5" x 8.5" pieces (each strip yields (4) 8.5" x 2.5" pieces).
- Gather (10) of the 2.5" x WOF strips and subcut them into (59) 2.5" x 6.5" pieces (each strip yields (6) 6.5" x 2.5" pieces).
- Gather the final (7) 2.5" x WOF strips and subcut them into (59) 2.5" x 4.5" pieces (each strip yields (9) 4.5" x 2.5" pieces).
- Use all of the extra strips from cutting the pieces and triangles above to cut a total of (59) 2.5" x 2.5" squares.
Cutting the Binding
Cut the binding fabric into (9) 2.5" x WOF strips
Assemble the Log Cabin Blocks
Now, let's lay out our first block according to the image below.

You can see how the ombre printed strips are placed so the longer, darker strips are on the outside of the block and the ombre fades to a lighter shade in the center of the block.
Use the series of photos below to assemble the log cabin block. Pressing directions are indicated by the black arrow in each image.


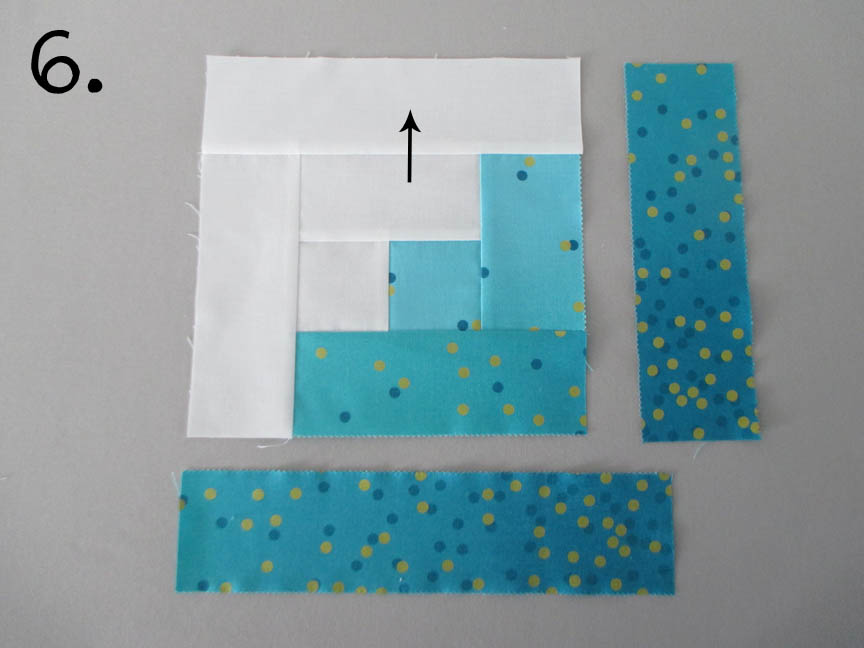
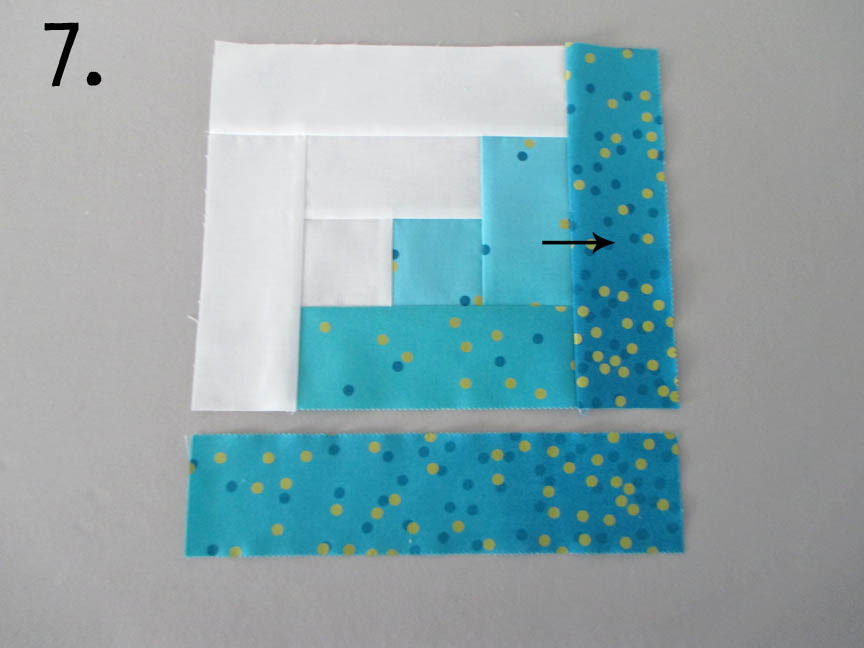
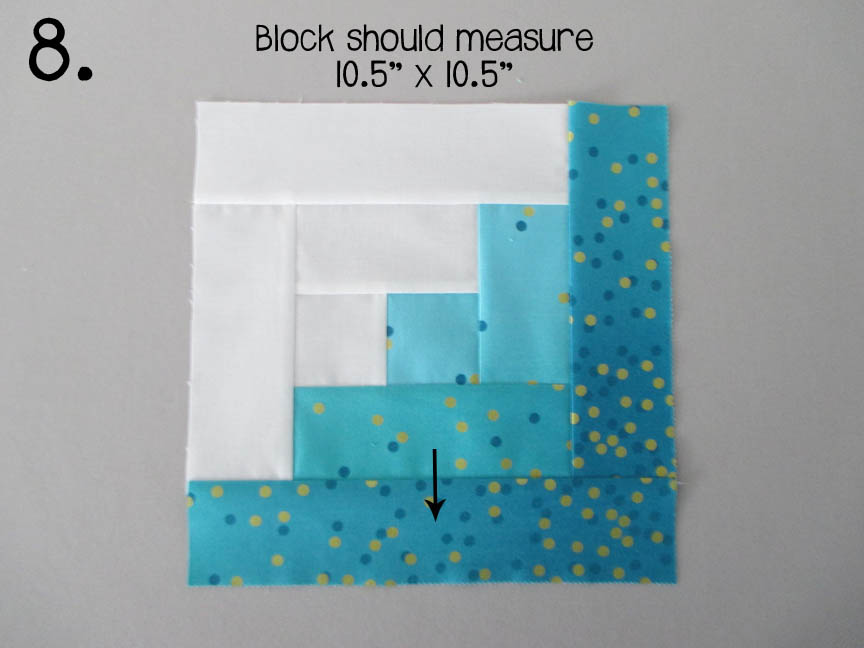
Repeat with the remaining cut pieces to yield 59 total log cabin blocks.
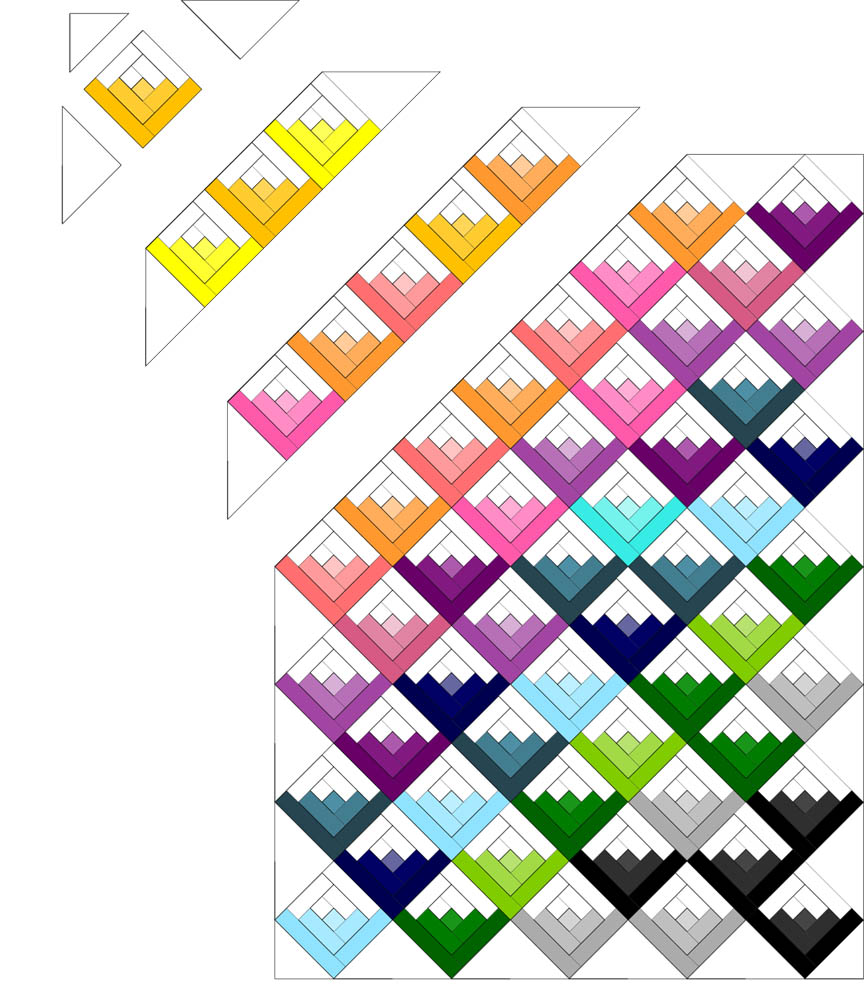
Once you have finished all 59 blocks, it's time to sew them together! Follow the quilt layout diagram below to assemble the quilt row by row. The four smaller corner triangles will be placed on each corner, while the twenty larger side triangles go along the top, bottom, left, and right sides of the quilt. As you assemble each row, alternate the direction that you press the seams (left, right, left, right, etc.) so the seams nest nicely when the rows are sewn to each other.
After the rows are assembled, sew them together and press the seams in one direction.
Quilt and bind as desired.

![]()
This quilt finishes at 70" x 98".


Thanks for following along with my Confetti Cabins tutorial! Please share your own Confetti Cabins quilt on social media using the hashtag #confetticabins and #centerstreetquilts so I can see your lovely creations! You can see more of my quilting adventures on my Center Street Quilts blog, instagram (@centerstreetquilts), or Facebook.
Kristina Brinkerhoff
![]()
Posted in:
Comments