Welcome to Moda Fabrics!
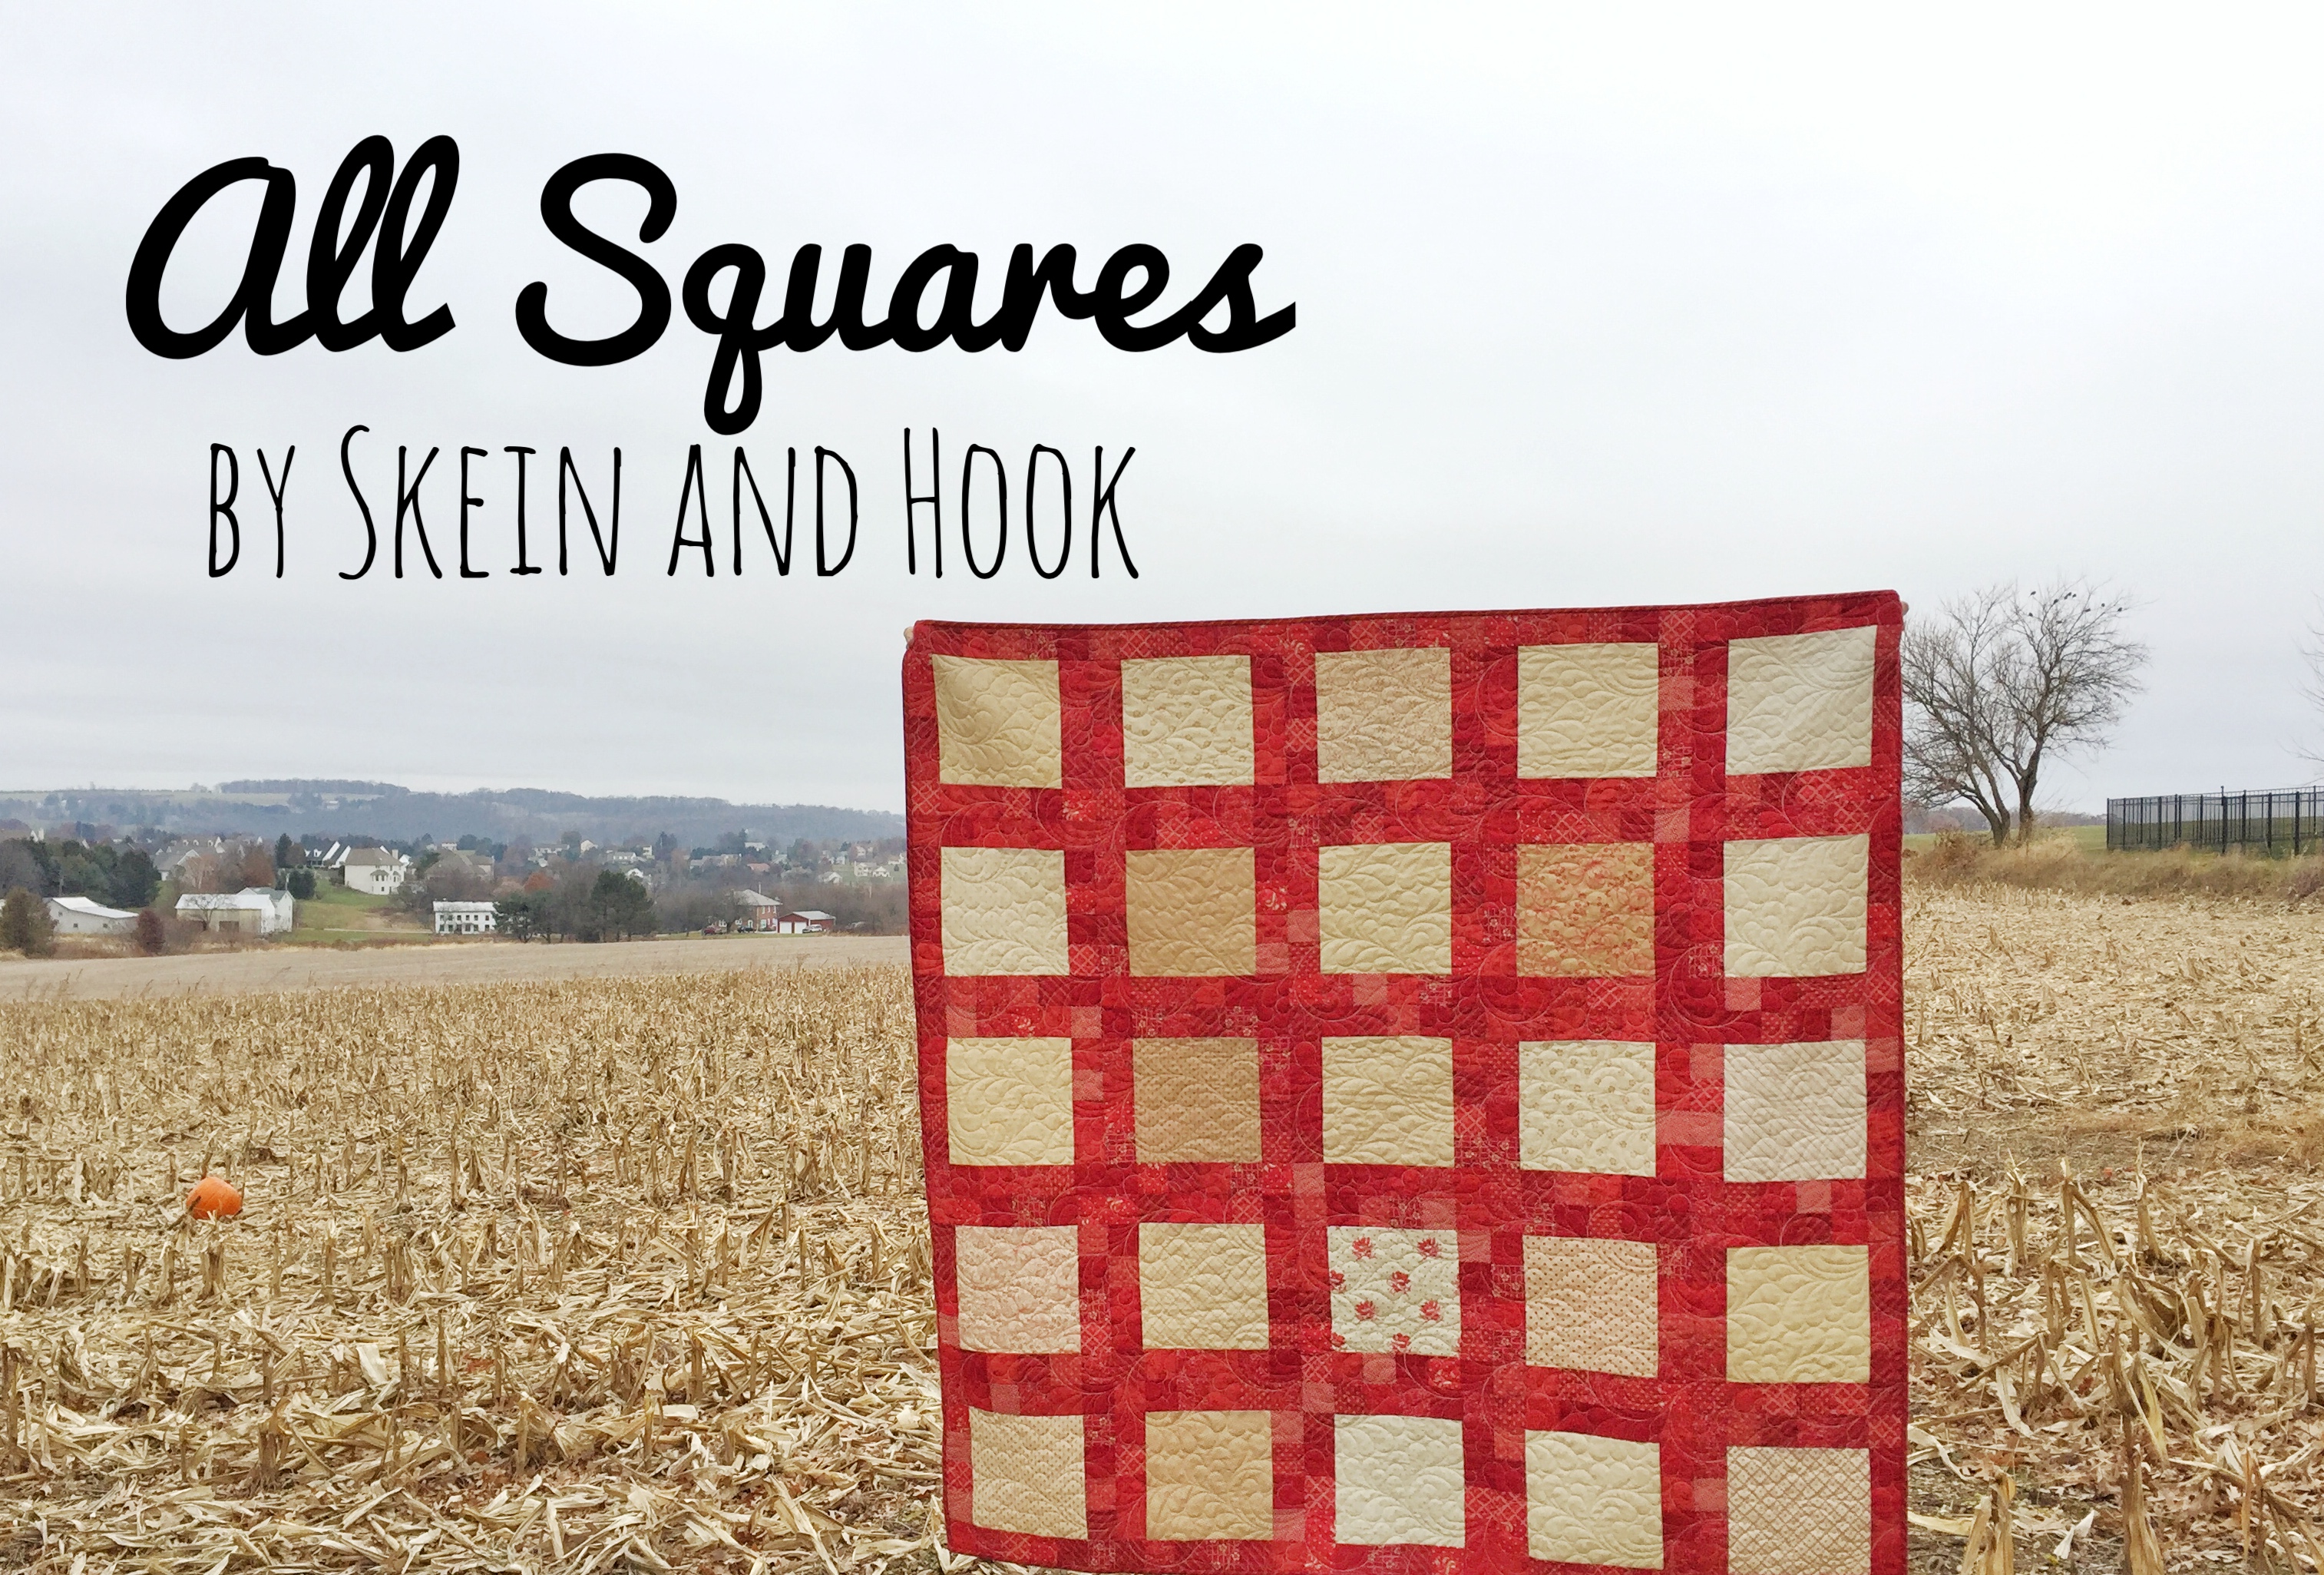
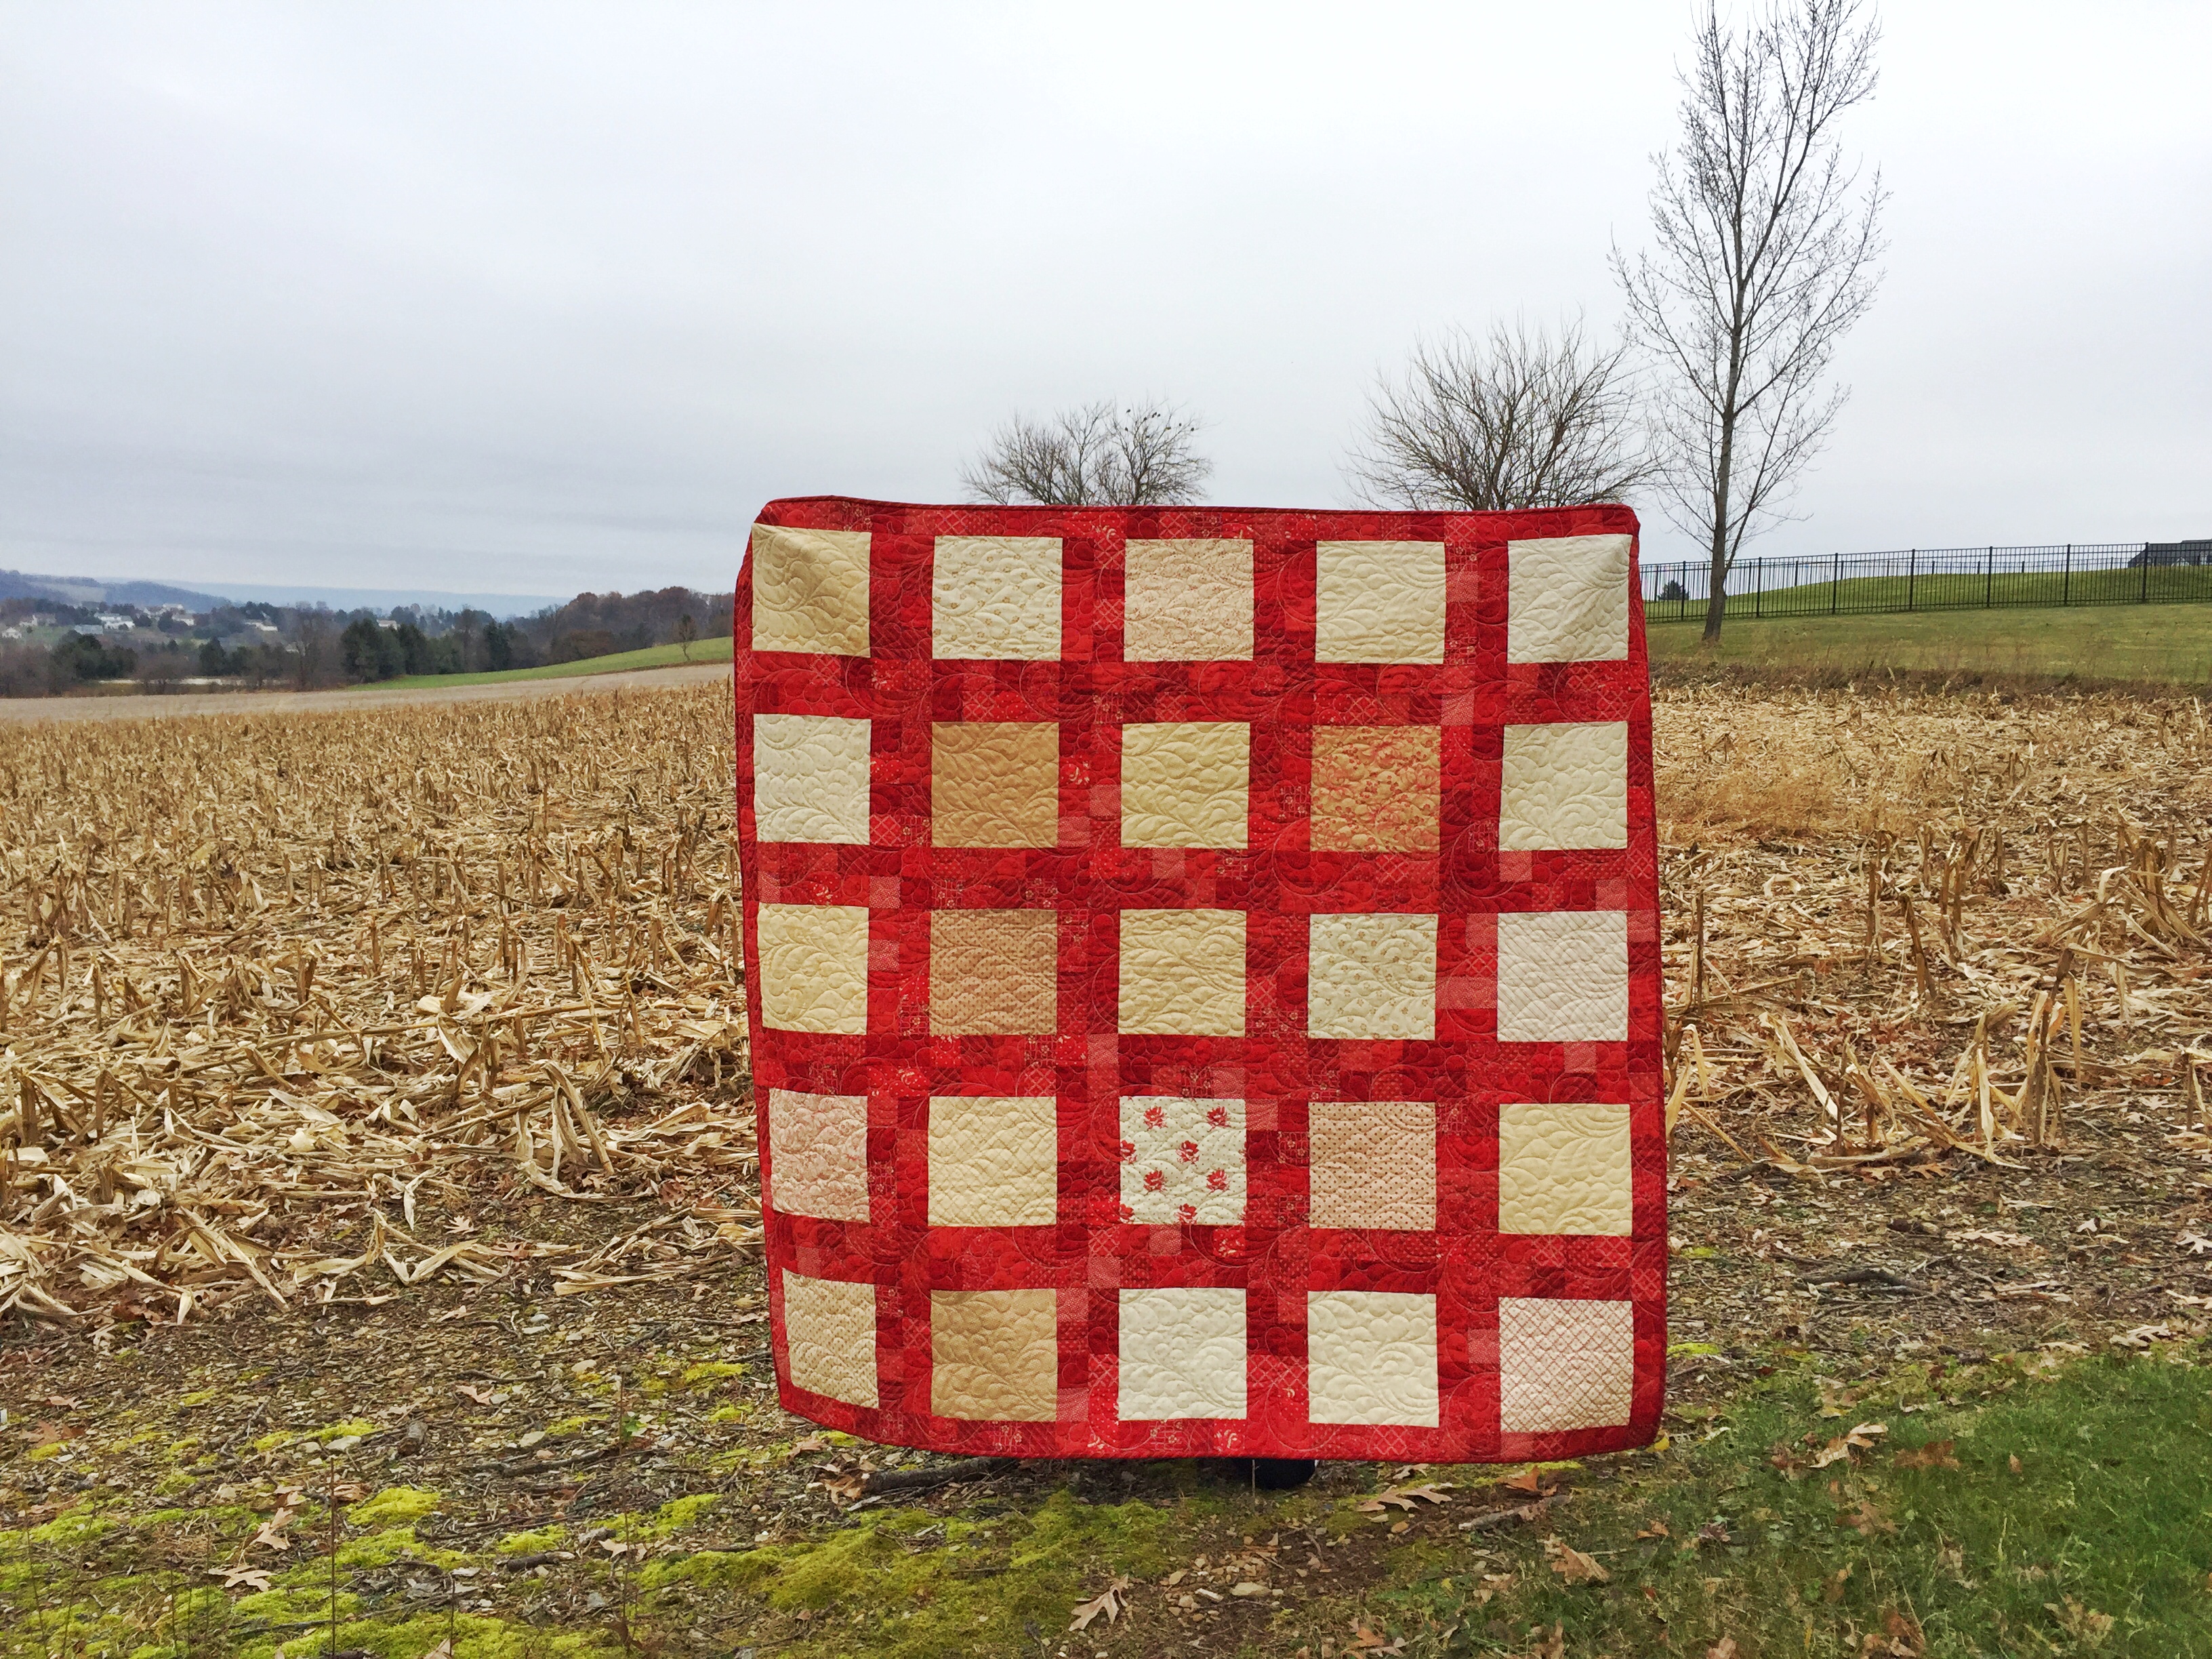
All Squares Quilt
All Squares Quilt
Published:
Jan 15 2018 - 23:00
![]()
Hello! My name is Jessica Dayon and I am so excited to be sharing this quilt with you at the Moda Bake Shop. You can follow me on my adventures of quilting and crafting on Instagram @jessicadayon and also on my blog at jessicadayon.blogspot.com.
I had such a fun time designing this layer cake pattern. I designed this quilt pattern for Farmhouse Reds by Minick and Simpson. I love how this collection is all reds and creams. I thought it would be so beautiful to show off the creams in the larger center squares and frame them out with the reds. This quilt top uses 2 Layer Cakes and is a breeze to make! You can also use 1 Layer Cake for the mini squares and a 1.75 yards of a background fabric to make the larger, middle squares.
This quilt finishes at 60" x 60".
![]()
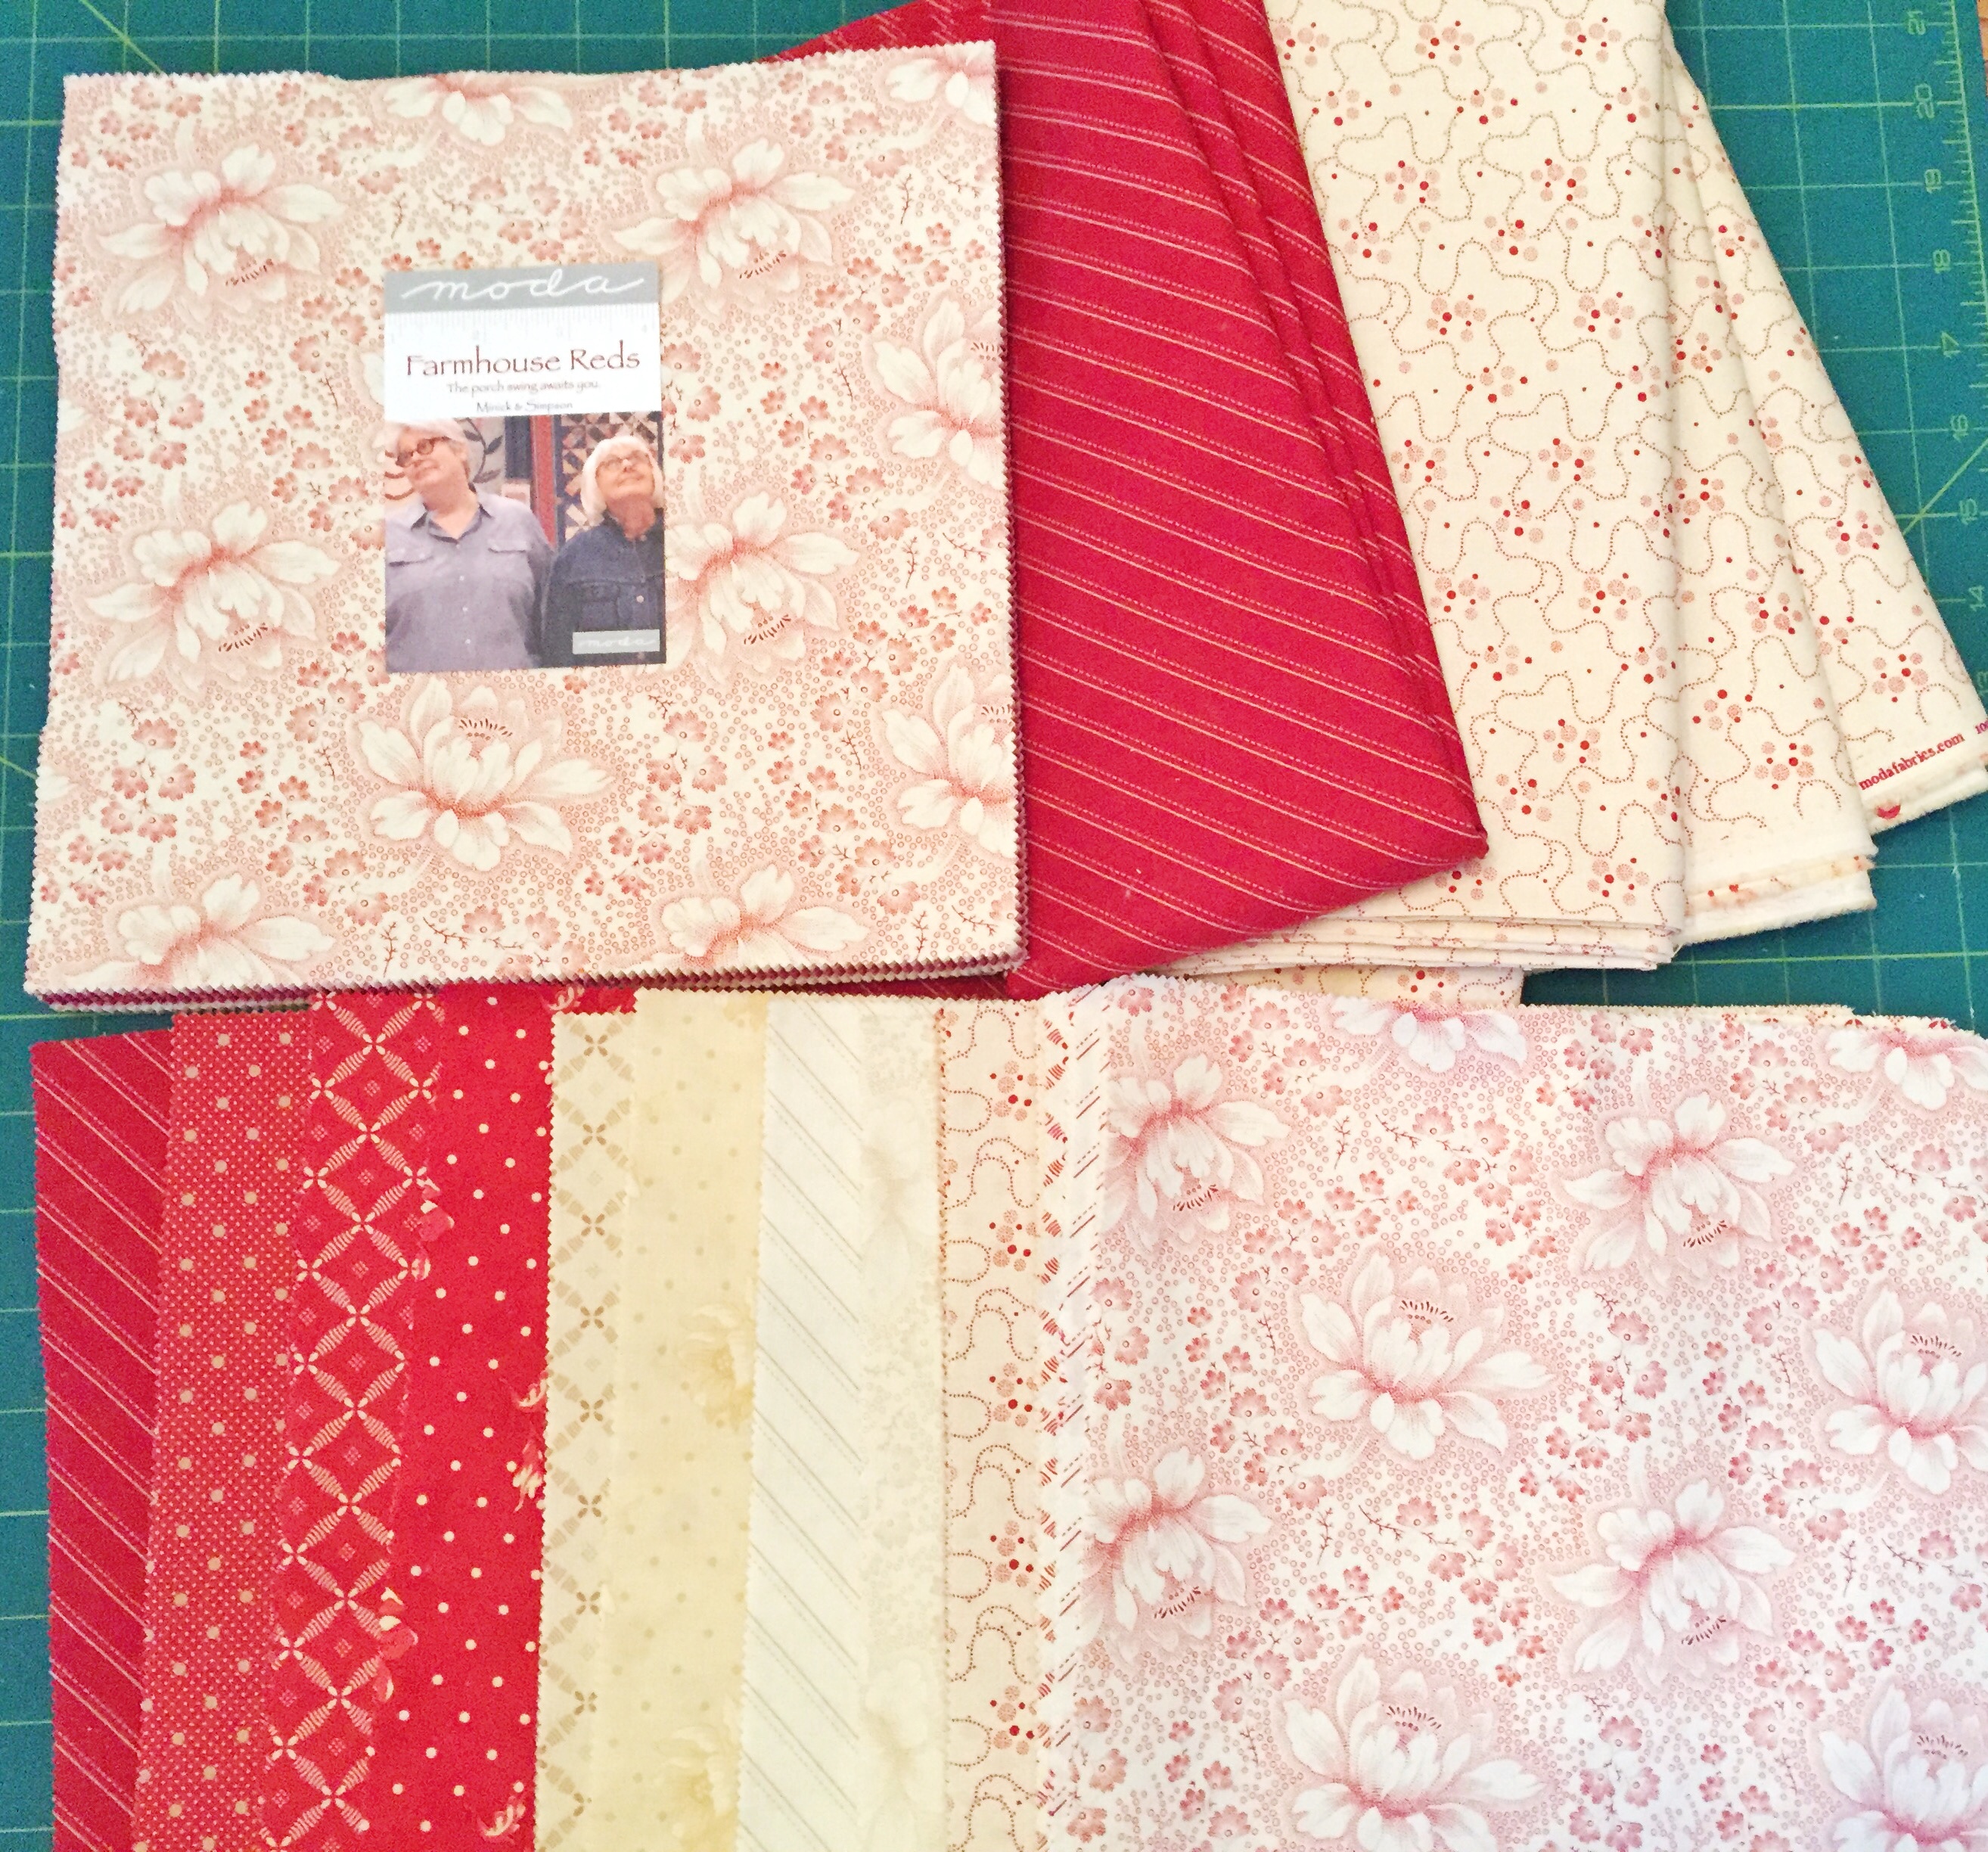
2 Layer Cakes® {Farmhouse Reds by Minick and Simpson}
4 yards backing fabric {SKU 14858 13}
1/2 yard binding fabric {SKU 14853 11}
![]()
Open the Layer Cakes and separate into 2 piles: reds and whites/creams. You'll need 32 red squares and 25 white/cream squares.
Cut each of the RED squares into:
- (4) 2.5″ strips, subcut to (16) 2.5″ squares
For each of the WHITE squares:
- Cut down the 10" square so that you are left with an 8.5" square. Set aside the white squares.
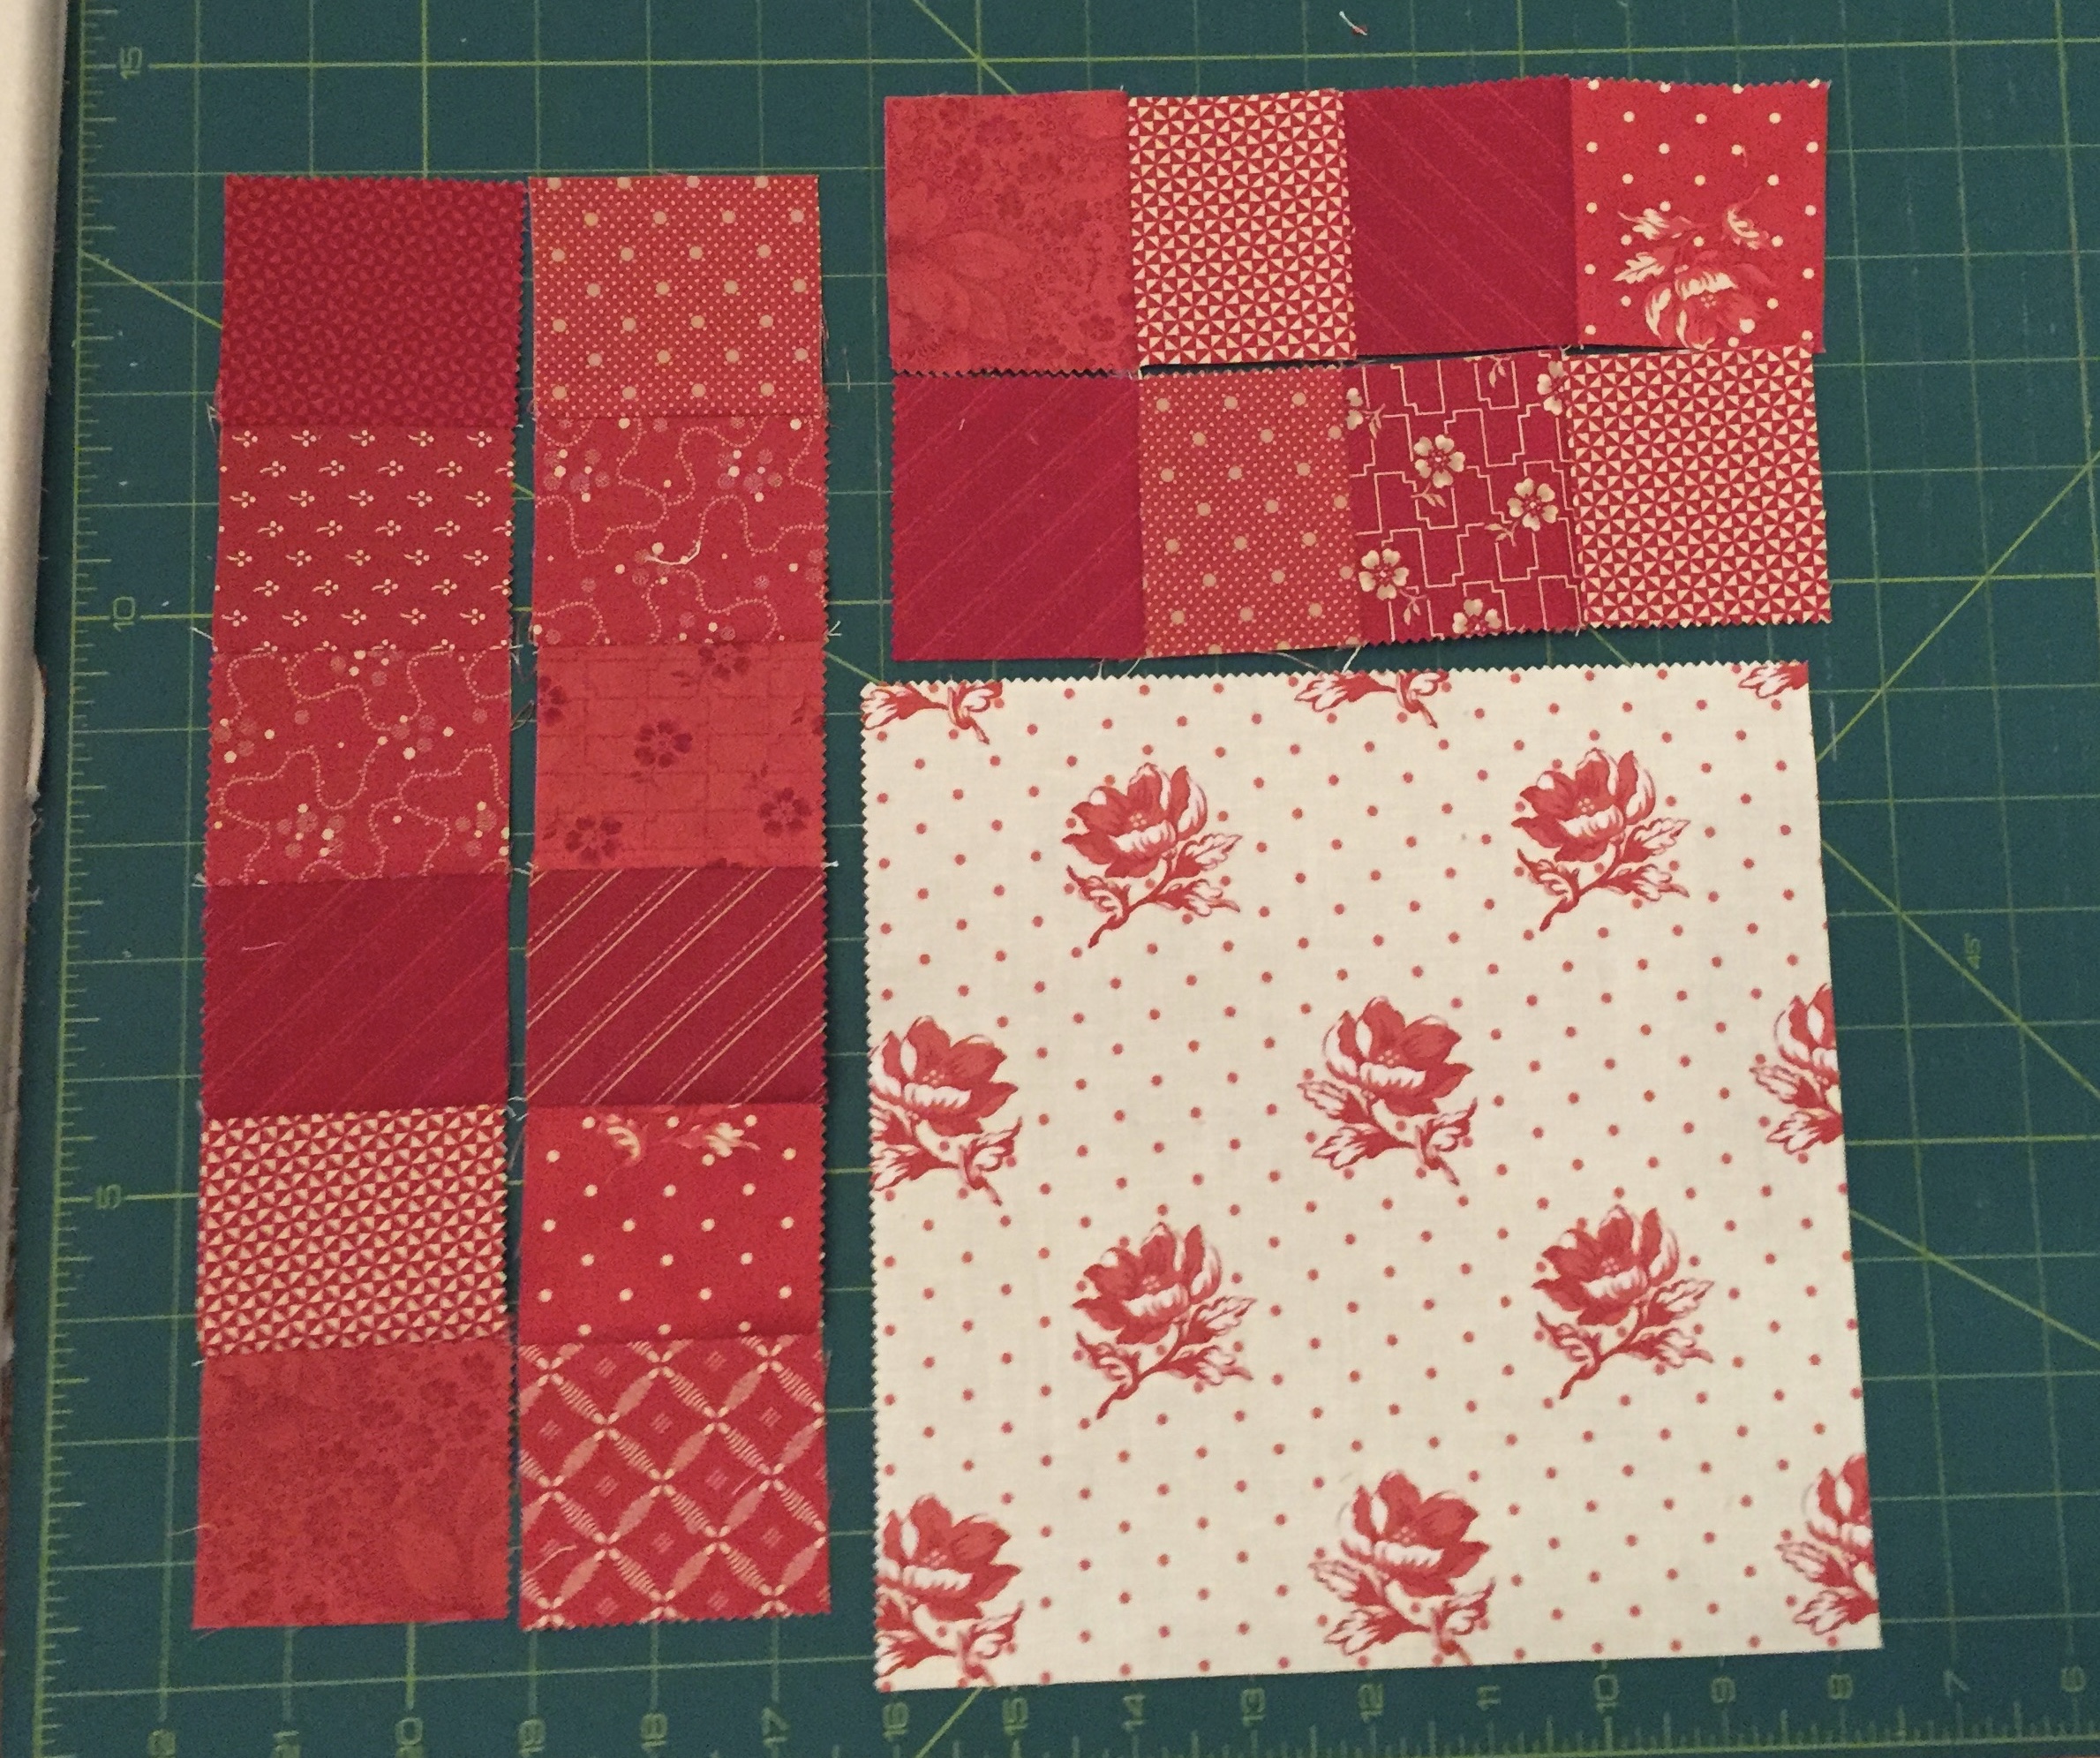
You are going to start to sew your red squares together. You will need (50) 4 square strips and (50) 6 square strips. Here is how I did it:
I separated each red print into a its own pile.

Then, I chose 2 squares and sewed them together. I chain pieced all of the squares like this (into 2 squares together).

After that I took, two of the chain pieced units and sewed them together to make a strip of 4. I did this until I had (100) 4 square strips. Then I took the remaining 2 piece units and sewed them onto a 4 piece unit to make a 6 piece unit.
I didn't get too concerned about placement of each patterned red square. I wanted the patterns to be random. When I was making 2 piece units, I didn't grab 2 of the same patterned red square. But, if when making 4 piece units, two of the same patterned red squares were next to each other, I let that be.
Next I pressed all of the strips. Nesting seams is a little difficult here because you are so many squares that are meeting each other from different directions. I pressed all the seams of my four piece strips to one direction (either left or right is fine) and then on my 6 piece units, I pressed all the seams to one direction except an end seam which I pressed the opposite way.

When making the squares, this will allow you to nest the vertical row with the horizontal row. However, you can also press the seams open to reduce bulk, if you'd like.
To begin block assembly, sew (2) 4 piece units on opposite side of a white square. Press the seams to the red squares.

Next sew (2) 6 piece units on the remaining 2 sides. Press the seams to the red squares. Repeat this until you have 25 blocks.
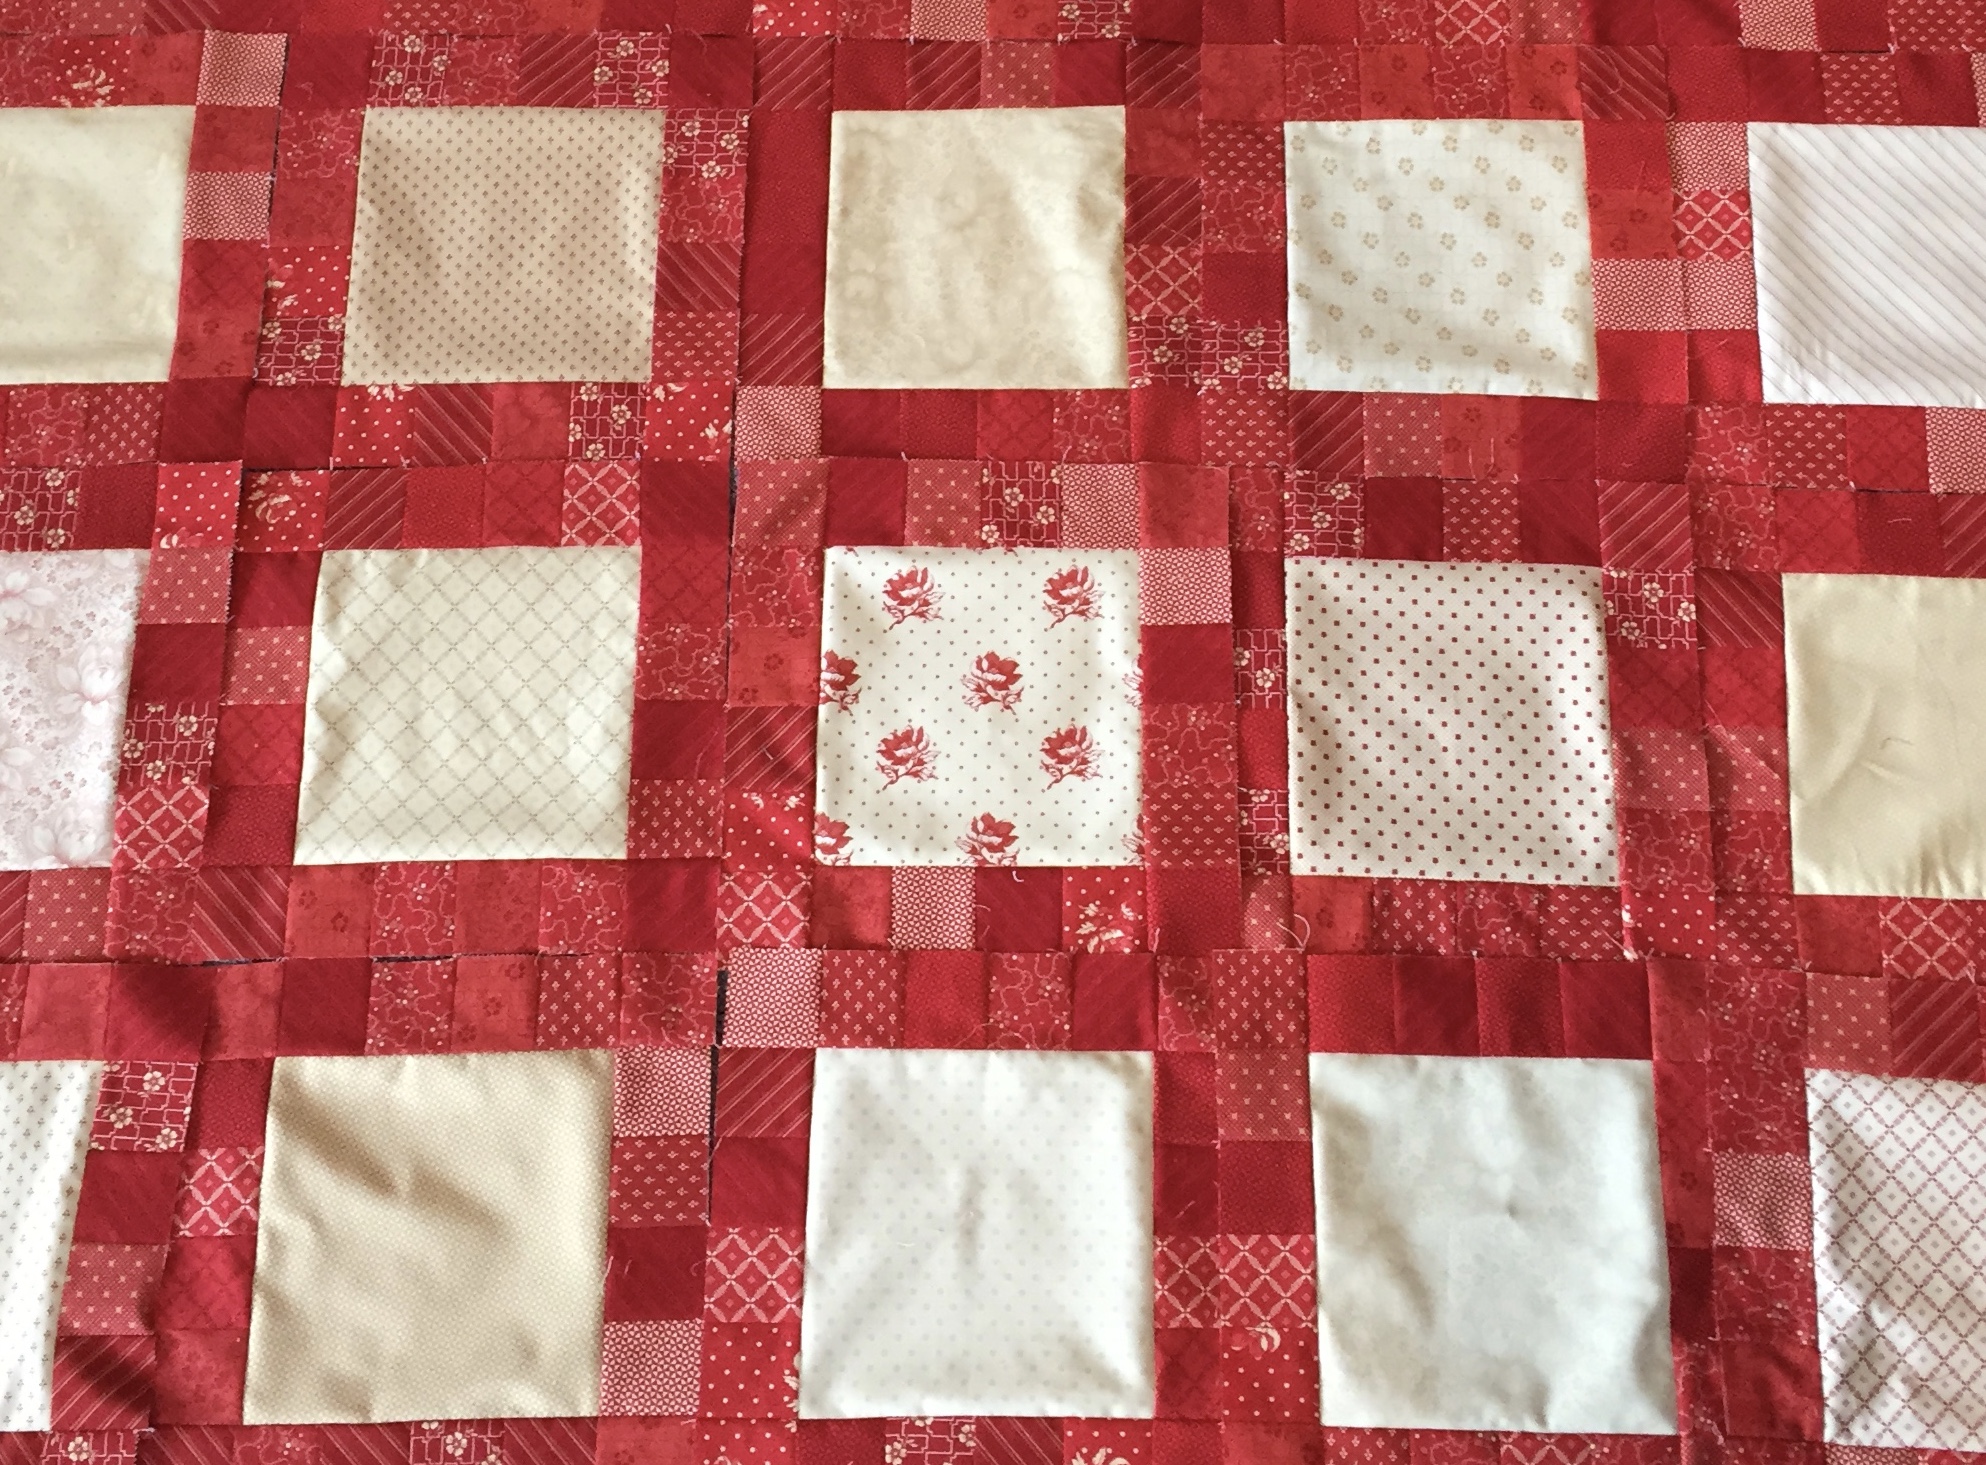
Assemble your quilt top by making (5) rows of (5) squares each. Then sew the (5) rows together into your finished top.

I had mine quilted with feathers.

![]()
This quilt finishes at 60" x 60".
Thank you for following along with my All Squares quilt pattern! I hope have enjoyed this pattern! Tag me on instagram
@jessicadayon if you make one. I’d love to see your version!
Jessica Dayon
{blog: Jessica Dayon}
![]()
Posted in:
Comments