Welcome to Moda Fabrics!
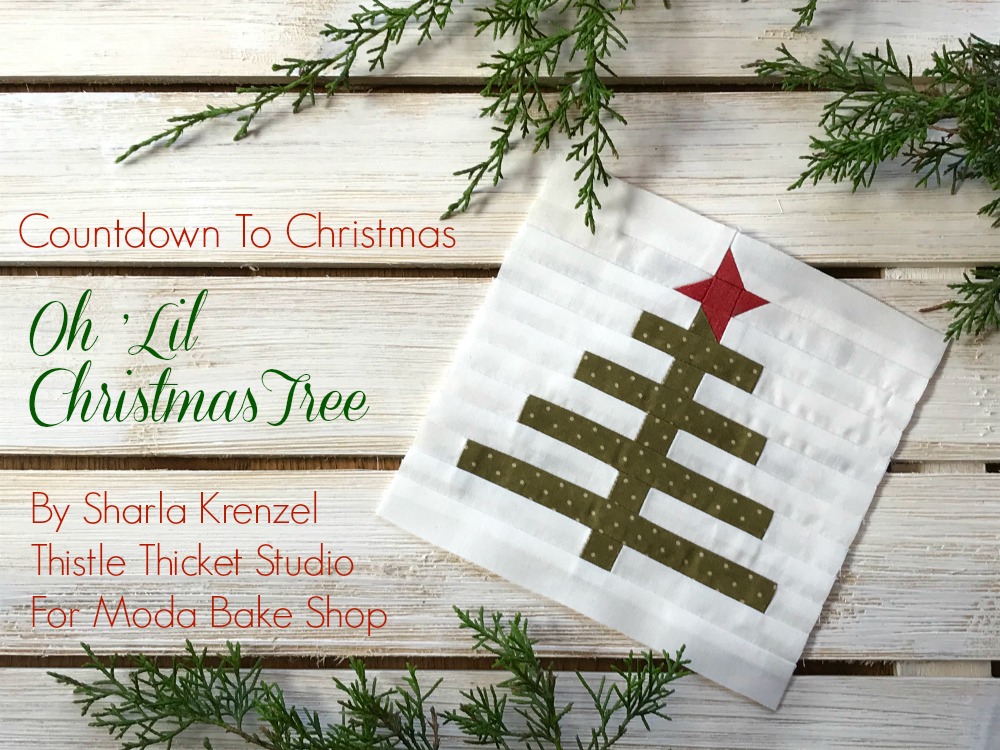
Countdown to Christmas: Oh Lil Christmas Tree
Countdown to Christmas: Oh Lil Christmas Tree
Published:
Dec 11 2017 - 23:00
![]()
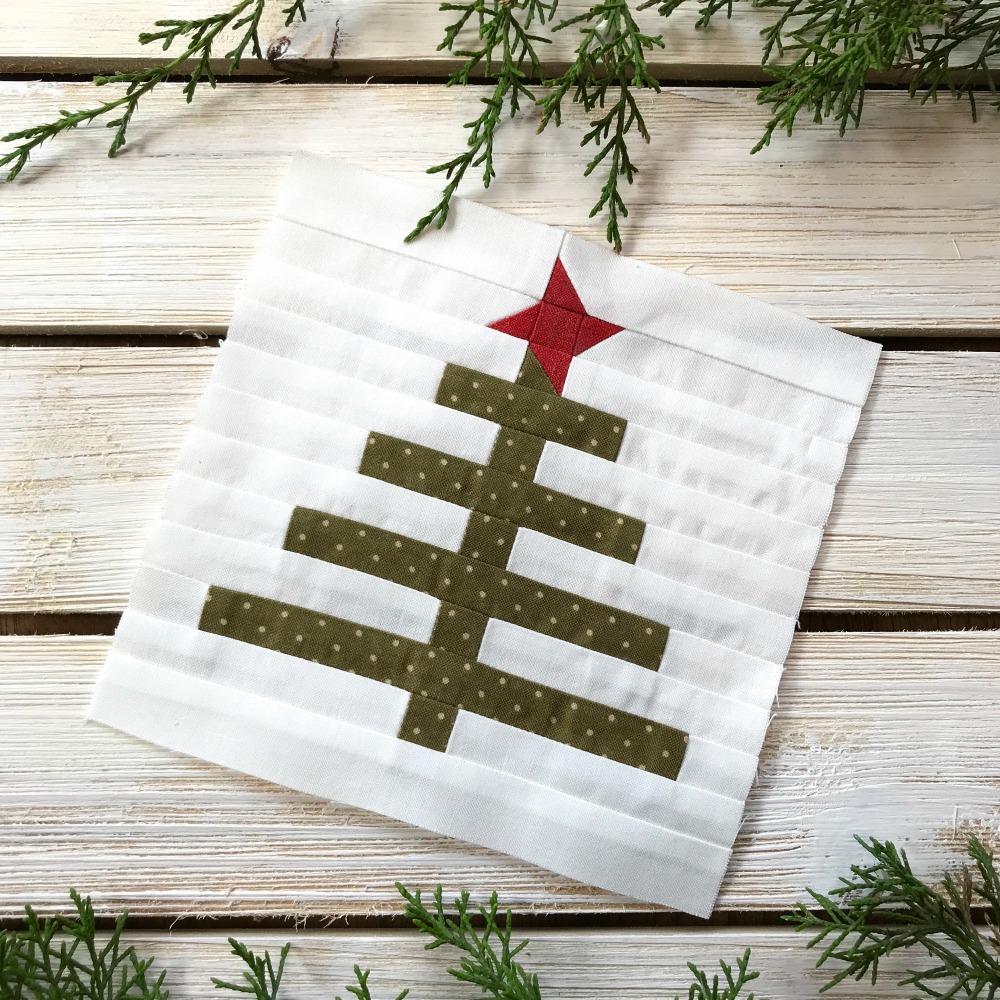
Merry Christmas, Feliz Navidad, Joyeux Noel! I’m Sharla Krenzel of Thistle Thicket Studio and I blog about my quilting adventures at www.thistlethicketstudio.com. I’m so happy to share my “Oh Lil Christmas Tree” block as part of Moda Bake Shop’s Countdown To Christmas. The days until Christmas are counting down quickly, so let’s jump right in and get started before time runs out!
This block finishes at 6" (6 1/2" unfinished). Cutting instructions are also included for a 12" block in (parenthesis).
![]()
{Optional Photo of Ingredients}
1 fat quarter each of red, green and background fabric or your favorite Moda scraps.
![]()
Cutting:
For a 6 ½” (12 ½”) unfinished block, cut from background fabric:
- 13 – 1” x 3 ¼” strips (1 ½” x 6”)
- 1 – 1” x 3 ¾” strip (1 ½” x 7”)
- 2 – 1” x 2 ½” strips (1 ½” x 4 ½”)
- 2 – 1” x 2” strips (1 ½” x 3 ½”)
- 2 – 1” x 1 ½” strips (1 ½” x 2 ½”)
- 2 – 1” x 1” squares (1 ½” x 1 ½”)
- 1 – 1” x 6 ½” strip (1 ½” x 12 ½”)
From red fabric:
- 5 – 1” x 1” squares (1 ½” x 1 ½”)
From green fabric:
- 5 – 1” x 1” squares (1 ½” x 1 ½”)
- 1 – 1” x 2 ½” strip (1 ½” x 4 ½”)
- 1 – 1” x 3 ½” strip (1 ½” x 6 ½”)
- 1 – 1” x 4 1/2” strip (1 ½” x 8 ½”)
- 1 – 1” x 5 ½” strip (1 ½” x 10 ½”)

Assembly:
Sew using a ¼” seam allowance. Sew all pieces with right sides together. Trim seams to ¼”. Arrange cut fabrics in rows, as pictured, to aid in the ease of sewing.
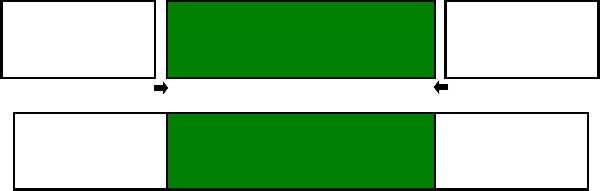
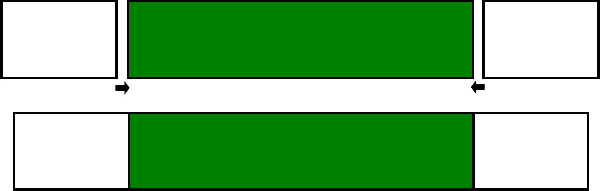
Row 1: Layer a 1” (1 ½”) red square on the left end of the 1” x 3 ¾” (1 ½” x 7”) background strip, making sure edges are even. Sew at an angle from the top left corner of the red square to the bottom right corner of the red square. Trim and press towards the red. Sew a 1” x 3 ¼” (1 ½” x 6”) background strip to the red end of the previous strip. Press towards the background.
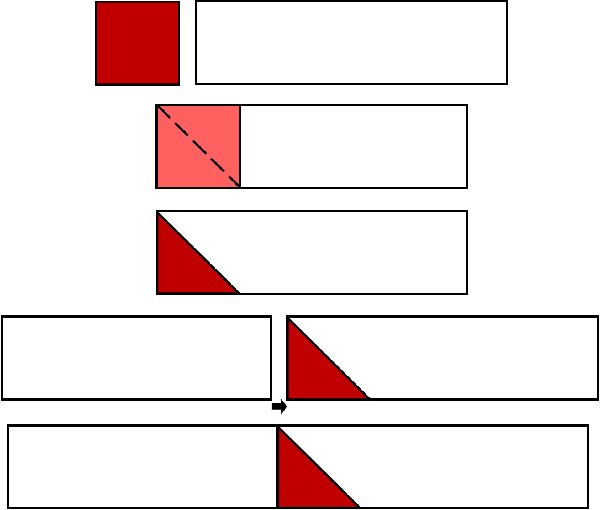
Row 2: Layer a 1” (1 ½”) red square on the right end of a 1” x 3 ¼” (1 ½” x 6”) background strip, making sure edges are even. Sew at an angle from the top right corner of the red square to the bottom left corner of the red square. Trim and press towards the red. Repeat to make a total of 2 strips. Sew a red 1” (1 ½”) square to the red end of the first strip. Press towards the red. Sew the red end of the second strip to the red square. Press towards the red.

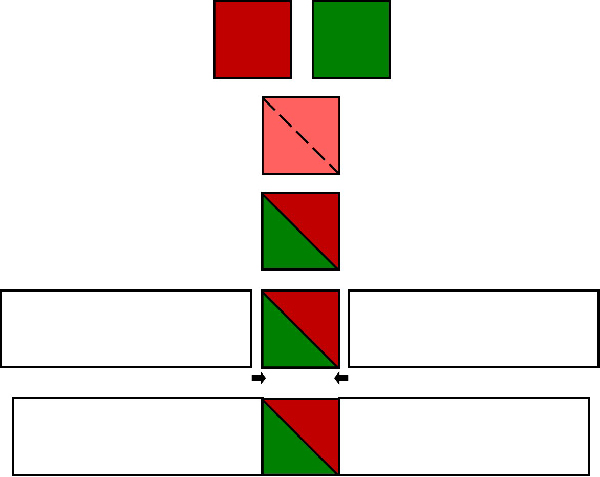
Row 3: Layer a 1” (1 ½”) red square on a 1” (1 ½”) green square, making sure edges are even. Sew diagonally from corner to corner. Trim and press seam open. Sew a 1” x 3 ¼” (1 ½” x 6”) background strip to the right and left side of the half square triangle unit, noting position of the HST in the diagram. Press both seams toward the background.
Row 4: Sew a 1” x 2 ½” (1 ½” x 4 ½”) background strip to each end of a 1” x 2 ½” (1 ½” x 4 ½”) green strip. Press towards the green.

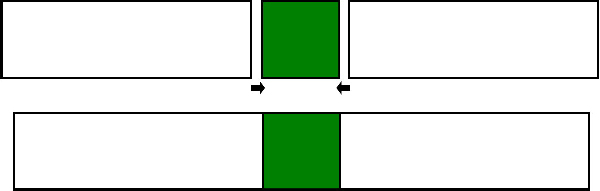
Rows 5, 7, 9, 11: Sew a 1” x 3 ¼” (1 ½” x 6”) background strip on either side of a 1” (1 ½”) green square. Press towards the green.
Row 6: Sew a 1” x 2” (1 ½” x 3 ½”) background strip to each end of a 1” x 3 ½” (1 ½” x 6 ½”) green strip. Press towards the green.
Row 8: Sew a 1” x 1 ½” (1 ½” x 2 ½”) background strip to each end of a 1” x 4 ½” (1 ½” x 8 ½”) green strip. Press towards the green.
Row 10: Sew a 1” (1 ½”) background square to each end of a 1” x 5 ½” (1 ½” x 10 ½”) green strip. Press towards the green.

Sew rows together starting at the top. Alternating sewing strips from left to right and from right to left will help to keep the block square. Press seams open after each new strip is added. Sew the 1” x 6 ½” (1 ½” x 12 ½”) background strip to the bottom of the block. Square block to 6 ½” (12 ½”).

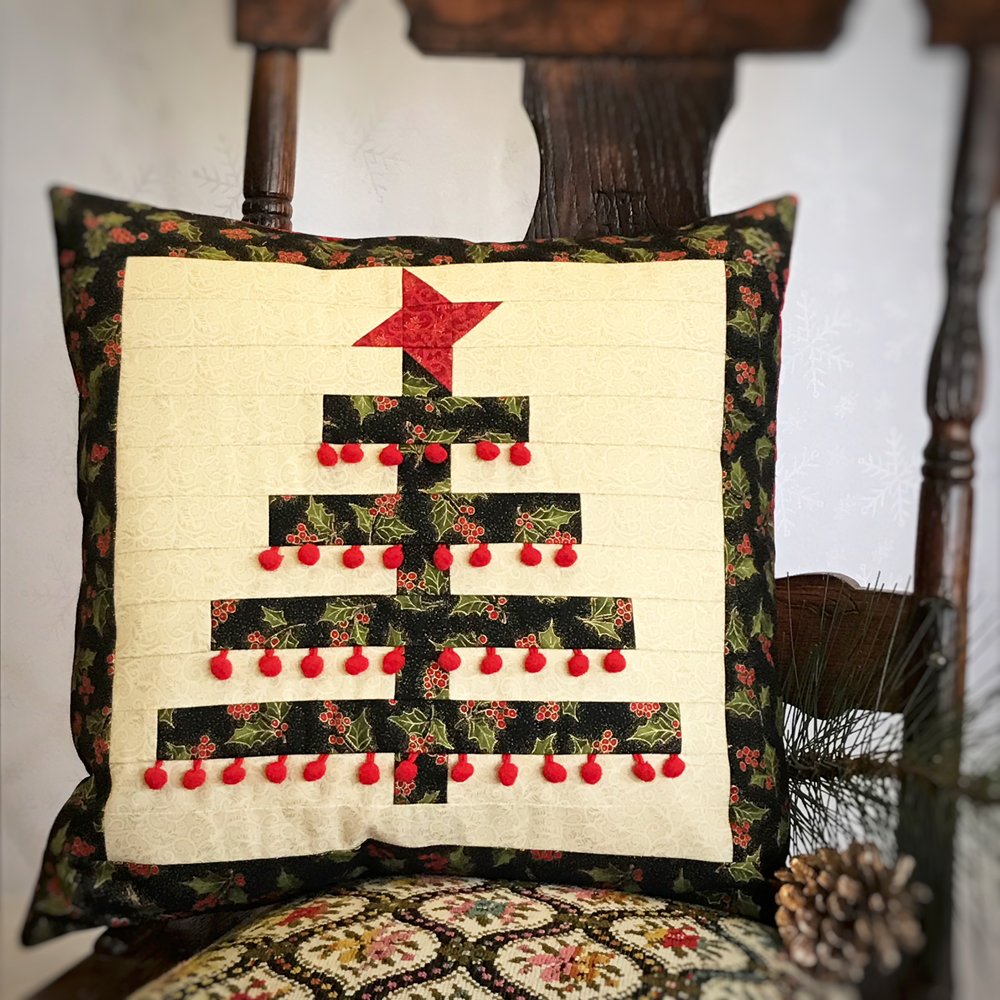
This block would be fun to make into a variety of festive items, such as mug rugs, hot pads, pocket on an apron, doorknob hanger, and pillows. It would make a cute mini advent calendar quilt, just add ribbon bows to tie peppermint candies or miniature ornaments. I made this 16” pillow using the 12” finished block and adding a 2” finished border. I used Moda’s Magnolia Metallics (I love the gold metallic sparkle) and added red ball fringe on the branches of the tree.
![]()
This block finishes at 6" x 6" (12" x 12").
This block was so fun to design and sew, and I hope you enjoy it too. Thanks for stopping by to visit my block for the Countdown To Christmas! You can follow me and my quilting adventures on Instagram (@thistlethicketstudio), Facebook (Thistle Thicket Studio), Twitter (@StudioThicket), and on my blog at www.thistlethicketstudio.com.
Sharla Krenzel
![]()
Posted in:
Comments