Welcome to Moda Fabrics!
Big Sky Quilt
Big Sky Quilt
Published:
Aug 8 2017 - 23:00

"Big Sky" was inspired by a photo taken by a friend near her Nebraska farm. It was a small unused barn, in the middle of nowhere, but someone had decorated it with a little wooden quilt block. It's a traditional block and when I learned that it's called "Anna's Choice", I had to make one!
This 64" x 84" quilt features 16" blocks, with a 4" upper border. That border is there to make the quilt long enough for a twin bed.
![]()
 Two Layer Cakes® , plus one yard of a coordinate for the upper border and binding. I used the Creekside collection, designed by Sherry & Chelsi. My border/binding fabric is 37530-16.
You will also need a small rotary cutting mat. A 12" rotating mat is ideal. a 12" x 18" standard mat will do.
You will need an 18"-24" long rotary cutting ruler, and a square ruler (at least 4.5") that has a diagonal line from corner to corner.
![]()
Step 1 is to combine your Layer Cakes®, then pair up prints that work well together.
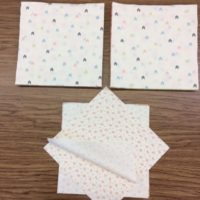 1-A: Unwrap the two Layer Cakes® and lay them side-by-side. Take the top square from each stack (they should match) put them together and lay them on the table in front of you. Take the next square from each stack, put them together, and lay them on the first pair, rotating 45°. Repeat until you have one stack in front of you, with 42 pairs of squares.
1-B:  Next we want to divide our pairs into three stacks by value. One stack will be darks, one will be lights, and the third stack is for those that could go either way. In the photo, you can see that the green print would be the darker fabric if paired with a white print, but it would be the lighter fabric if I put it with the navy print.
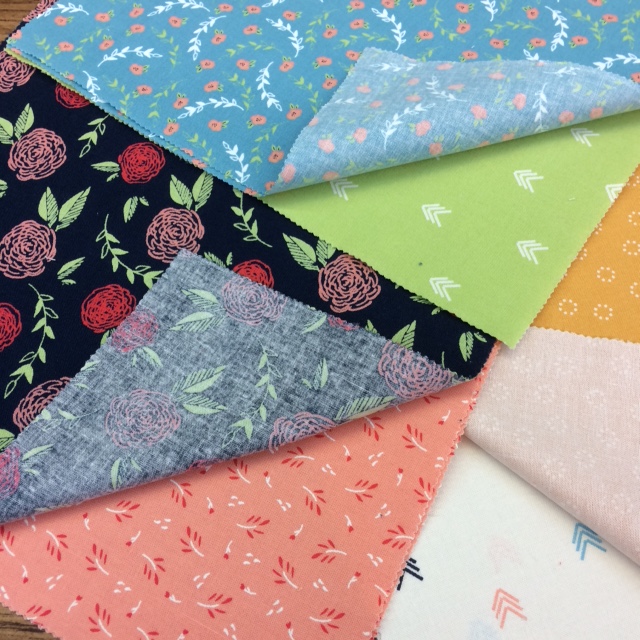 1-C: Now we need to match up pairs of squares. You need two pairs for each block- one darker and one lighter. Since all of the fabrics are from the same line, we know the colors will work together, so concern yourself with scale. Try to mate large prints with small prints, and "busy" prints with "calm" prints. You will need a total of twenty sets of squares. You will have a couple of pairs leftover.
Step 2 is the part that tends to become tedious. We are going to make a lot of half-square triangles (HSTs). 320, if we're counting (and sometimes it's better not to count). I admit, I have a very low tolerance for tedium, so I often play little mind games with myself. I will work this quilt block-by-block...sixteen HSTs at a time...and I will count the blocks I have finished, not the number I have left to do.
Enough with the pep talk...let's do this!
 2-A: Choose a block set from step 1-C, and stack them as shown in the photo. The light fabrics are face-up, and the dark fabrics are face-down. Be sure the edges are straight.
Align the left and bottom edges of the stack with a vertical and horizontal line on your mat. You may discover that your squares are not perfectly square, and your top and right edges actually hang over a line. It's okay. Die cutting machines are only human, it seems.
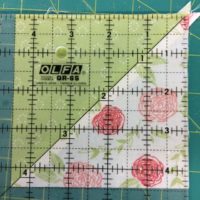
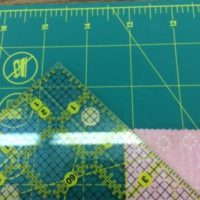 2-B: You could trim your stack so it is exactly 10" square, but you really don't need to. Instead of cutting from corner to corner on my fabric, I just line up my ruler on the first intersection I can see on the mat. In this case, it was the one on the 14" line on the mat. Cut both diagonals. DO NOT MOVE THE FABRIC STACK. After you make the first diagonal cut, rotate your mat to make the second cut. DO NOT MOVE THE FABRIC STACK YET.
 2-C: Now cut the stack in half vertically, and then horizontally. Again, rotate the mat between cuts.
You now have sixteen pairs of light and dark triangles, all paired up face-to-face and ready to sew into half-square triangles (HSTs).
Note: If you prefer, you can draw two diagonal lines on the back of each light square, sew a 1/4" seam along both lines and then do the cutting indicated.
I like to press my seams open, but you can press toward the darker fabric if you'd rather.
Step 3 is to trim our HSTs to 4.5" square. For this step, you need a square ruler 4.5" x 4.5" or larger, with a diagonal line that runs from corner to corner.
 3-A: Lay your ruler on an HST, with the diagonal line on the seam. The left and lower edges of the HST should extend past the 4.5" lines on the ruler.
Trim the right and top edges of the HST.
 3-B: Rotate the HST and line up the diagonal line on the ruler with the seam again. This time, the sides you just cut will be under the ruler, and should line up with the 4.5" vertical and horizontal lines on the ruler.
Trim the right and top sides again.
You now have a perfect 4.5" HST...and no dog ears to trim off later!
Step 4 is to assemble the block.
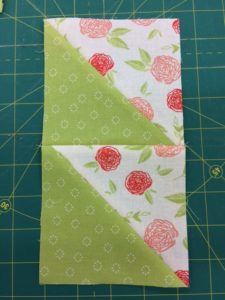 4-A: Sew eight of the HSTs into four pairs that look exactly like this.
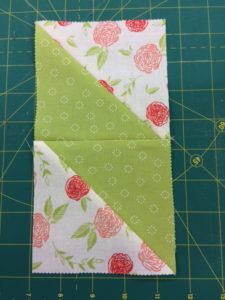 4-B: Sew eight HSTs into four pairs that look exactly like this.
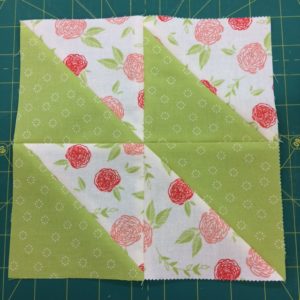 4-C: Sew the pairs into four quarter units that look exactly like this.
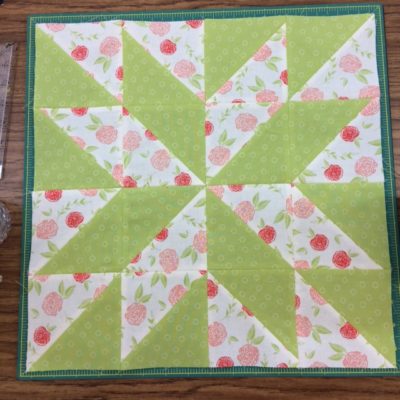 4-D: Now sew the four quarter sections together as shown to complete your block!
One block down...19 to go!
Step 5 is to lay out your twenty blocks, four blocks across and five blocks down.  When you have an arrangement that pleases you, sew the blocks into rows and sew the rows together.
Step 6 is to add the top border. As I mentioned, I added this border simply to make the quilt a little longer for use on a twin-size bed. On a made-up bed, this border would be under the pillows and out of sight. You have the option of leaving it off, or purchasing an extra 5/8 yard of the coordinate fabric and extending the border all the way around the quilt.
6-A: Measure the width of quilt top. Ideally, it will be 64.5". If yours is slightly larger or smaller, don't fret. Just go with the number you got.
6-B: Cut two 4.5" by Width of Fabric strips. Trim off the selvedges and sew the strips together end-to-end. Trim the length to the width of your quilt top.
6-C: Sew the border to the top edge of your quilt top.
Step 7: Layer the top, batting and backing. Quilt as desired and bind with the remainder of your coordinate fabric.
![]()
This quilt finishes at 64" x 84".
Anne Wiens
Follow my blog, Seams Like a Plan, for scrap quilt and block patterns that use my "Thrifty Quilter" system of self-made precuts!
My next "recipe" for the Moda Bake Shop is baking now. It will be ready to share on September 10th.
![]()
Posted in:
Comments