Welcome to Moda!
Starry Sky Quilt
Starry Sky Quilt
Published:
Jun 22 2017 - 23:00
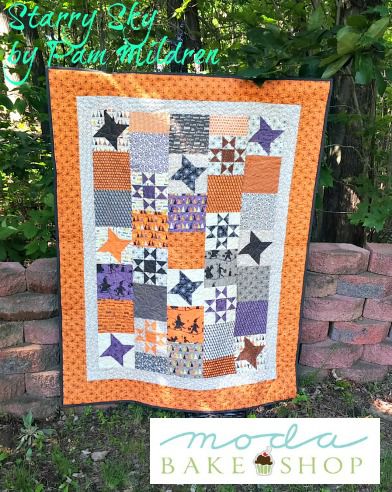

Starry Sky is a fun and "spooky" Halloween quilt using the Hocus Pocus Collection by Sandy Gervais for Moda.
This quilt/project finishes at 43" x 55".
![]()

Hocus Pocus by Sandy Gervais Fat Quarter Bundle {17930 AB}
1/2 yard border #1 fabric {17936 13}
1 1/4 yard border #2 fabric {17932 12}
3 yards backing fabric {17933 17}
1/2 yard binding fabric {17939 11
![]()
1.Selecting Fabrics
For this quilt we will be making 14 star blocks. Select various light and dark fabrics so the stars have contrast.

The remaining fabrics I used for the setting blocks and half blocks.

2. Cutting the fabrics:
Friendship Star Blocks
Cut one set for each of the 8 blocks:
Background fabric: 4- 2 1/2" X 2 1/2"
2- 3" X 3"
Contrast fabric: 8 - 2 1/2" X 2 1/2"
2- 3" X 3"
Ohio Star Block
Cut one set for each of the 6 blocks:
Background fabric: 4 - 2 1/2" X 2 1/2"
2 - 3 1/2" X 3 1/2"
Contrast fabric: 6 - 2 1/2" X 2 1/2"
2 - 3 1/2" X 3 1/2"

Setting Blocks:
Cut 19 - 6 1/2" X 6 1/2"
Cut 4- 3 1/2" X 6 1/2"

3. Making the Star Blocks
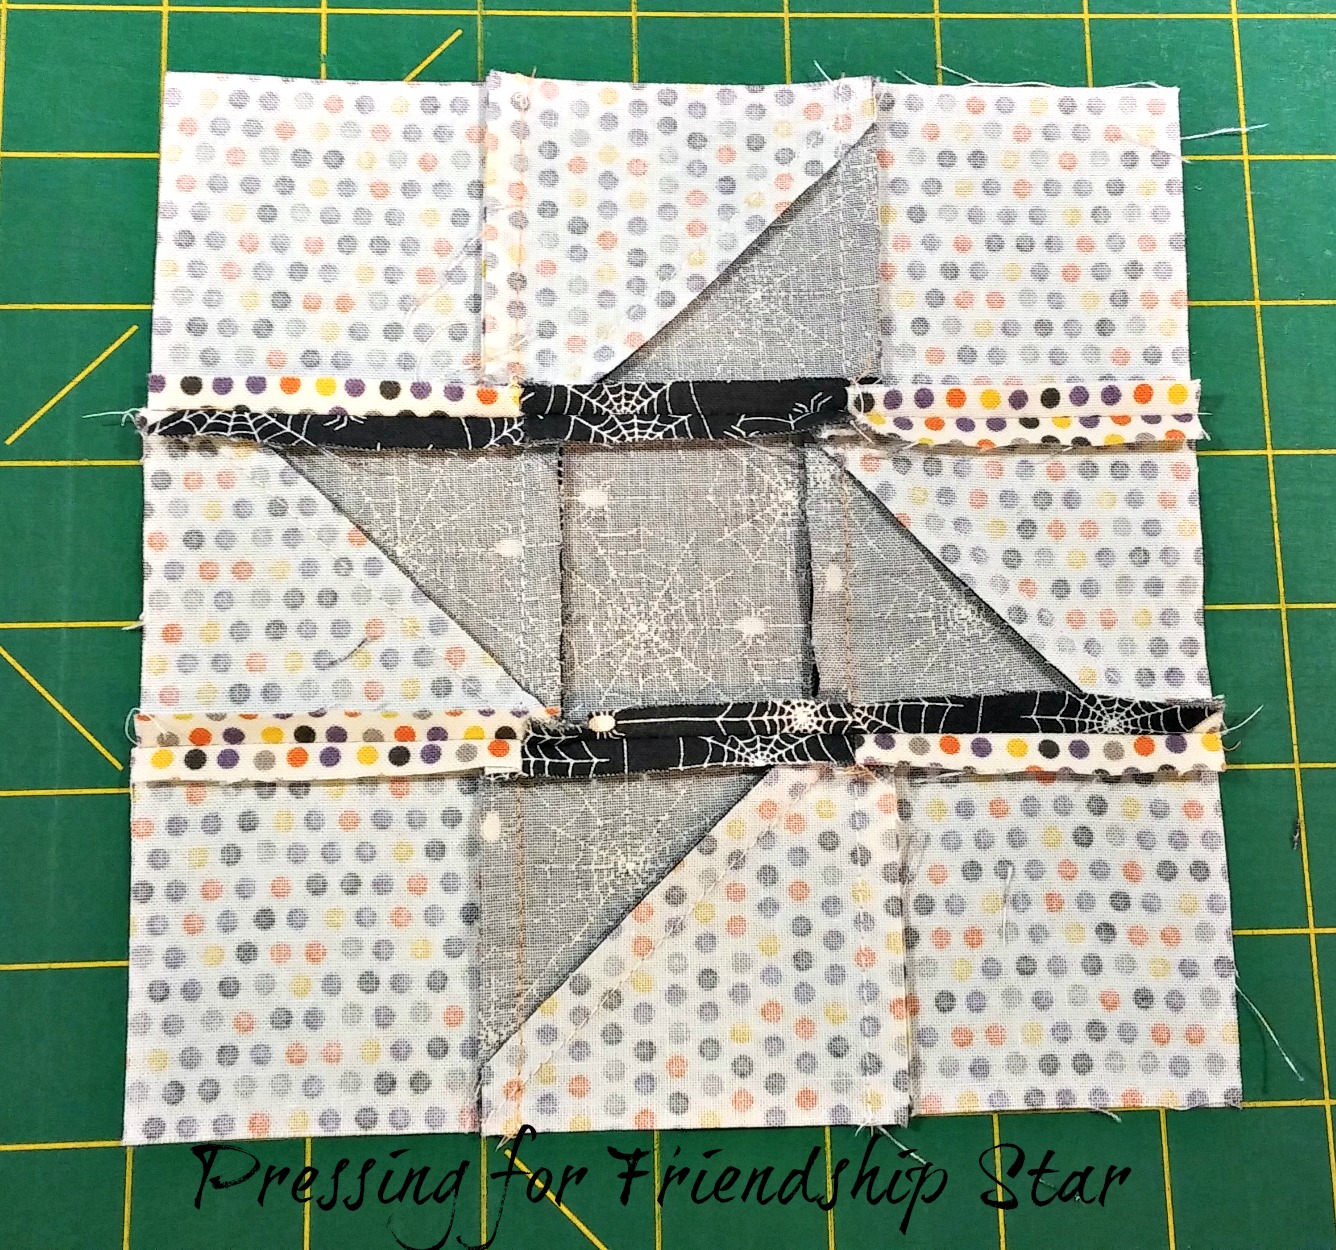
Friendship Star blocks make 8- (6 1/2" X 6 1/2"):
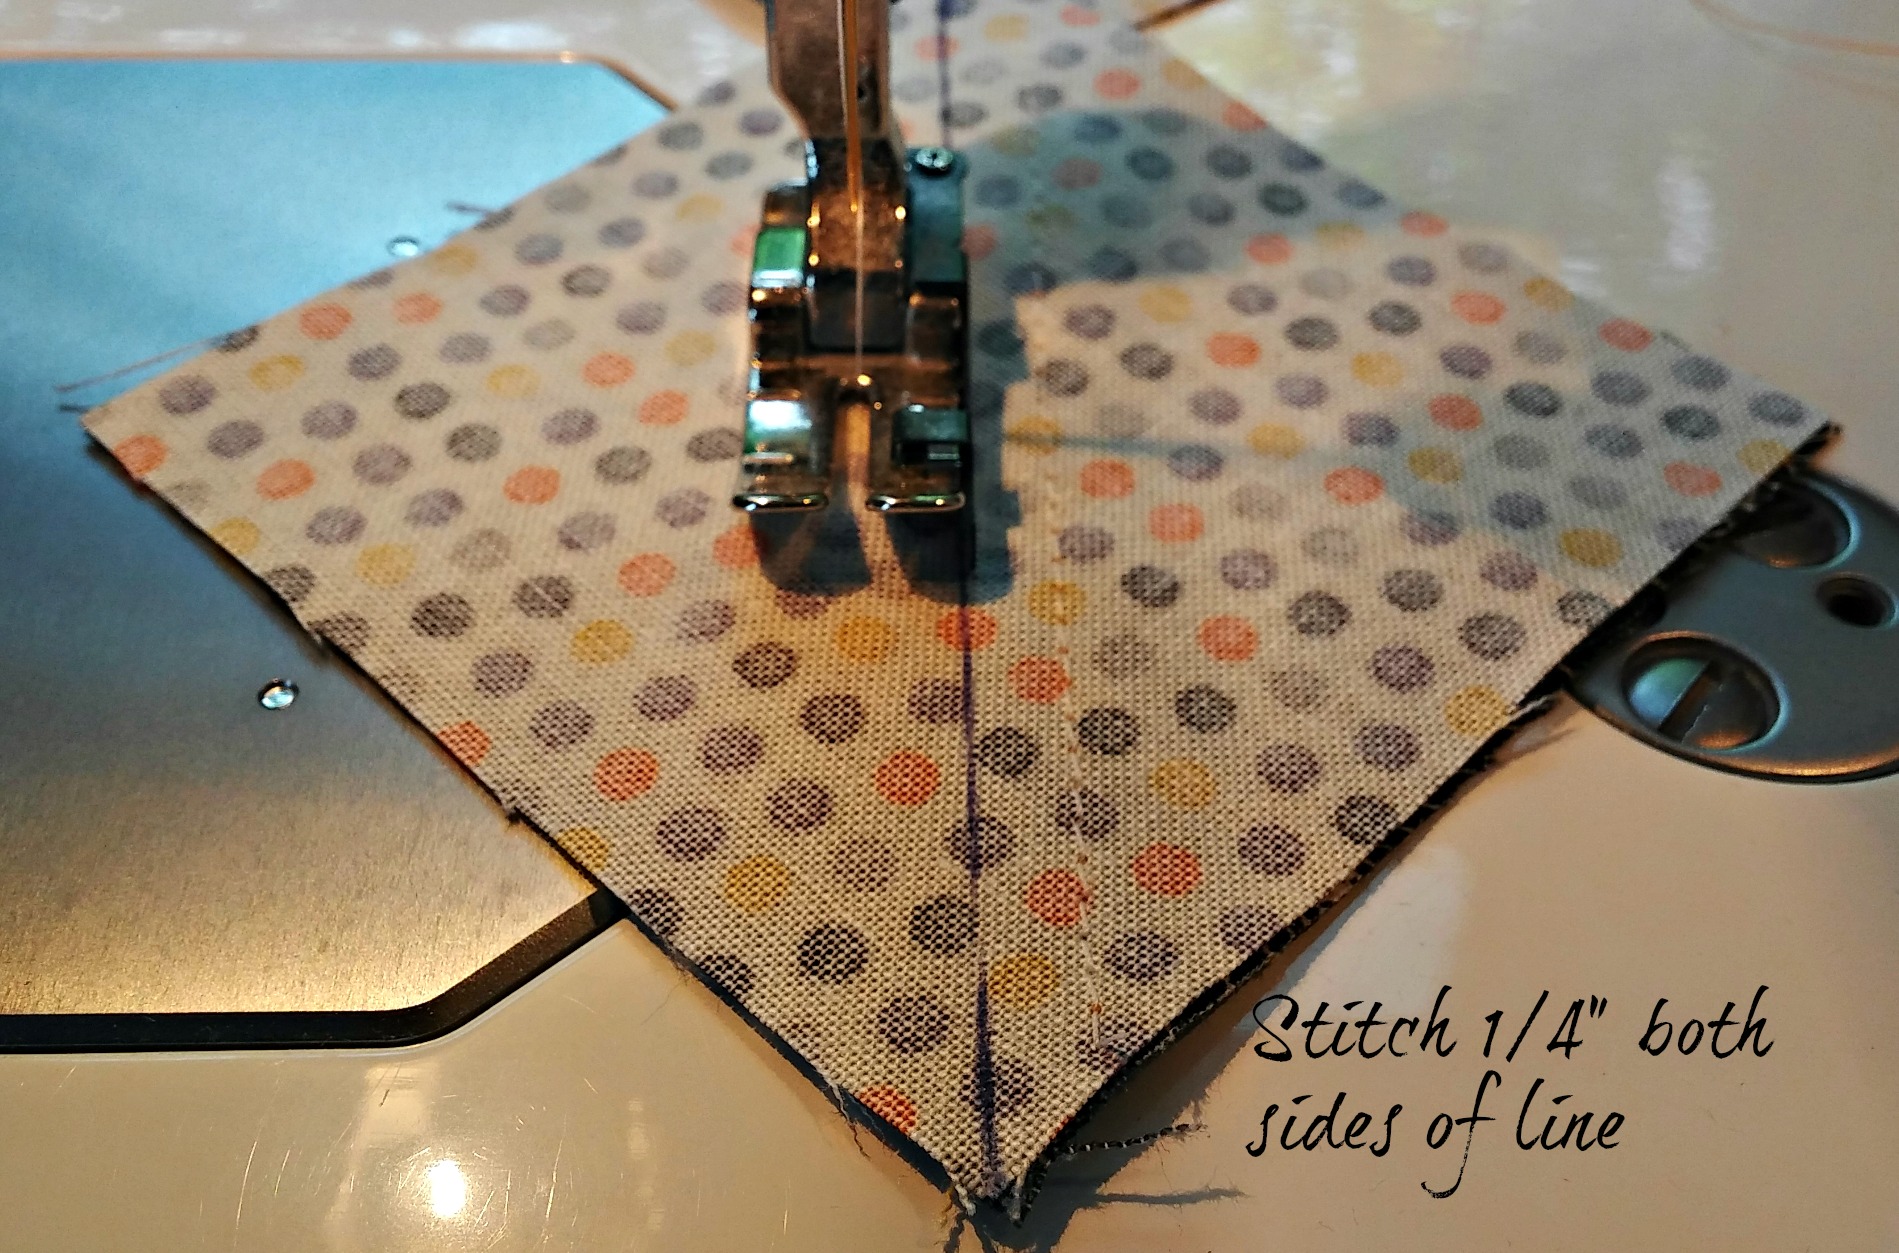
Using the 3" X 3" background and contrast fabric, place them right sides together and draw a diagonal line on the background square. Stitch 1/4" on each side of the diagonal line. Cut on the diagonal line, and press the seam to the dark. Your units should measure 2 1/2" X 2 1/2", trim as needed. Layout your block with the 2 1/2" X 2 1/2" background and contrast squares. Stitch horizontal rows together. Press to the 2 1/2" X 2 1/2" squares. Nest seams and pin row and stitch. Pressing the final seams open reduces bulk. You may press to one side if you prefer.


Ohio Star Block make 6 -(6 1/2" X 6 1/2"):
This block is the same process as the friendship star with one additional step to make the quarter square triangle units. Using the 3 1/2" X 3 1/2" background and contrast fabric, place them right sides together and draw a diagonal line on the background square. Stitch 1/4" on each side of the diagonal line. Cut on the diagonal line, and press the seam to the dark. Place the cut units right sides together, nesting the seams. Draw a diagonal line, nest the seams and stitch 1/4" on each side of the drawn line. Cut on the line. Press the seam open to reduce bulk. Your units should measure 2 1/2" X 2 1/2", trim as needed.


Layout your block with the 2 1/2" X 2 1/2" b
Background and contrast squares. Stitch horizontal rows together. Press to the 2 1/2" X 2 1/2" squares. Nest seams and pin row and stitch. Pressing the final seams open reduces bulk. You may press to one side if you prefer.

4. Quilt Top Layout and Completion:
Using the layout diagram, using all of your star blocks, half and whole solid fabric blocks construct your quilt on a design wall or floor. This is a great top to piece, there are no seams to match! Stitch the vertical rows together and press seams toward the solid color blocks. Then join the vertical rows together. I suggest pinning the end of the rows , the center, and continue pinning and easing in as needed. Press the seam in one direction.

5. Borders, Binding & Backing:
Border 1 fabric Cut 6- 2 1/2" X 42"
Border 2 fabric Cut 8 - 4 1/2" X 42"
Binding Cut 6 - 2 1/4" or 2 1/2" X 42"
Measure the quilt top length and width. Piece the border strips on the 45° angle to obtain the length needed, and cut to fit. Add border 1 - top & bottom, and sides, press seams toward the toward the outside edge of the quilt. Measure your quilt top again, piece border 2, and cut to the length needed for your quilt. Stitch all borders, pressing the seams toward the outside edge of the quilt.
Piece the binding strips continuously on a 45° angle. Trim the seam leaving a 1/4", and press the seam open. Press the 198" of binding with the wrong sides together.
Piece the backing fabric to obtain at least a 48" X 60" piece. Using a horizontal seam to piece the backing is best for a longarm quilter. This will reduce the risk of creases on the backing because the seam will run the length of the polls of the longarm frame.
6. Finishing:
This quilt was longarm quilted using a Spider N Web design, Superior So Fine Threads #532 on top and #402 on the back, and Quilters Dream Select Poly Batting.
![]()
This quilt finishes at 43" x 55".
I love the challenge of taking many fabrics and incorporating them into one quilt. Using the Fat Eighth & Fat Quarter Bundles allows me the pleasure of working with all the fabric in one collection. Scrap quilts & traditional blocks are my favorite! Come and check out other patterns in print by Pam Mildren Designs on my website www.pamslongarmquilting.com or at your local quilt shop.
Pam Mildren Designs
www.pamslongarmquilting.com
www.facebook.com/longarmquiltingbypam
![]()
Posted in:
Comments