Welcome to Moda Fabrics!
Smile at the Rain Quilt
Smile at the Rain Quilt
Published:
Feb 3 2017 - 23:00


Hello again baking friends. Robin at Craft Sisters here with an easy recipe using Me and My Sister Design's - "Rainy Day". It's a simple quilt that is big enough to use on a twin bed. I hope you'll have fun with it.
![]()
1 Jelly Roll® {Rainy Day by Me and My Sister | 22290JR}
2 Charm Packs {Rainy Day by Me and My Sister | 22290PP}
2 Charm Packs background fabric {Bella Solid Porcelain 9900PP182}
1¼ yards background fabric {Bella Solid Porcelain 9900-182}
⅝ yard {Rainy Day by Me and My Sister | Puddle Turquoise 22298-13}
⅝ yard {Rainy Day by Me and My Sister | Puddle Blue Skies 22298-12}
5¼ yards backing
8 - 2½" strips binding {Use Jelly Roll Strips or Backing Fabric}
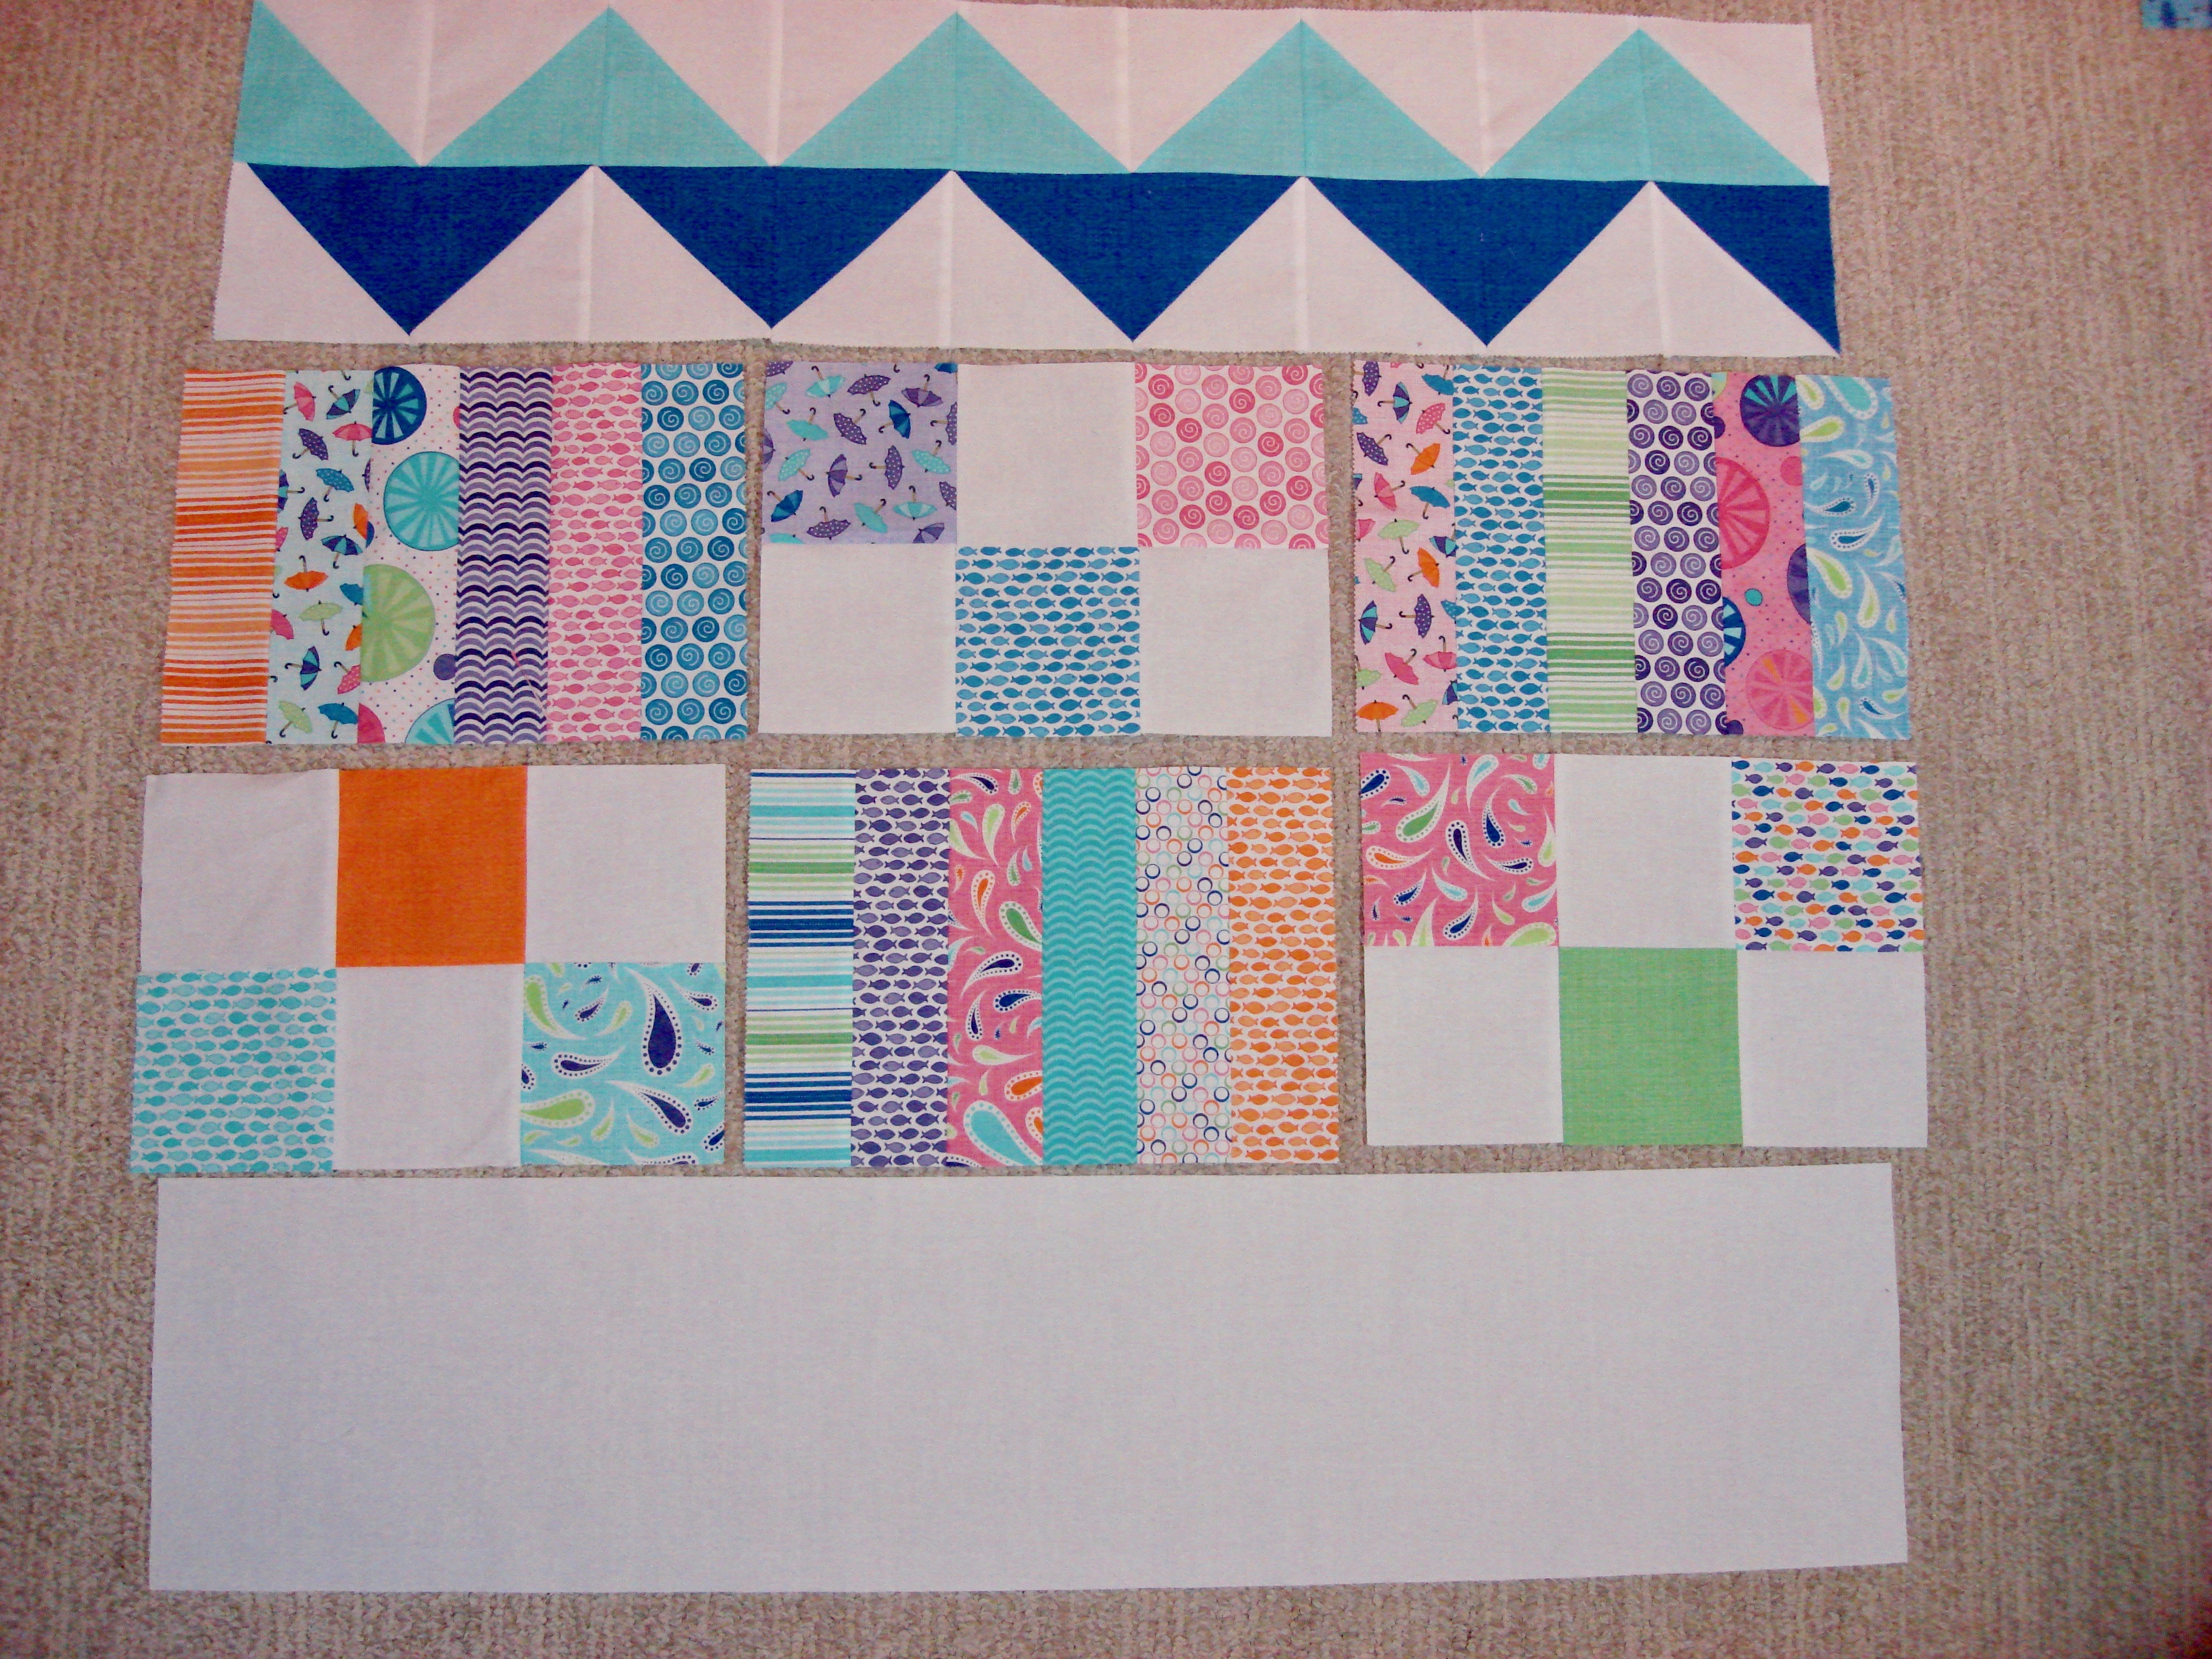
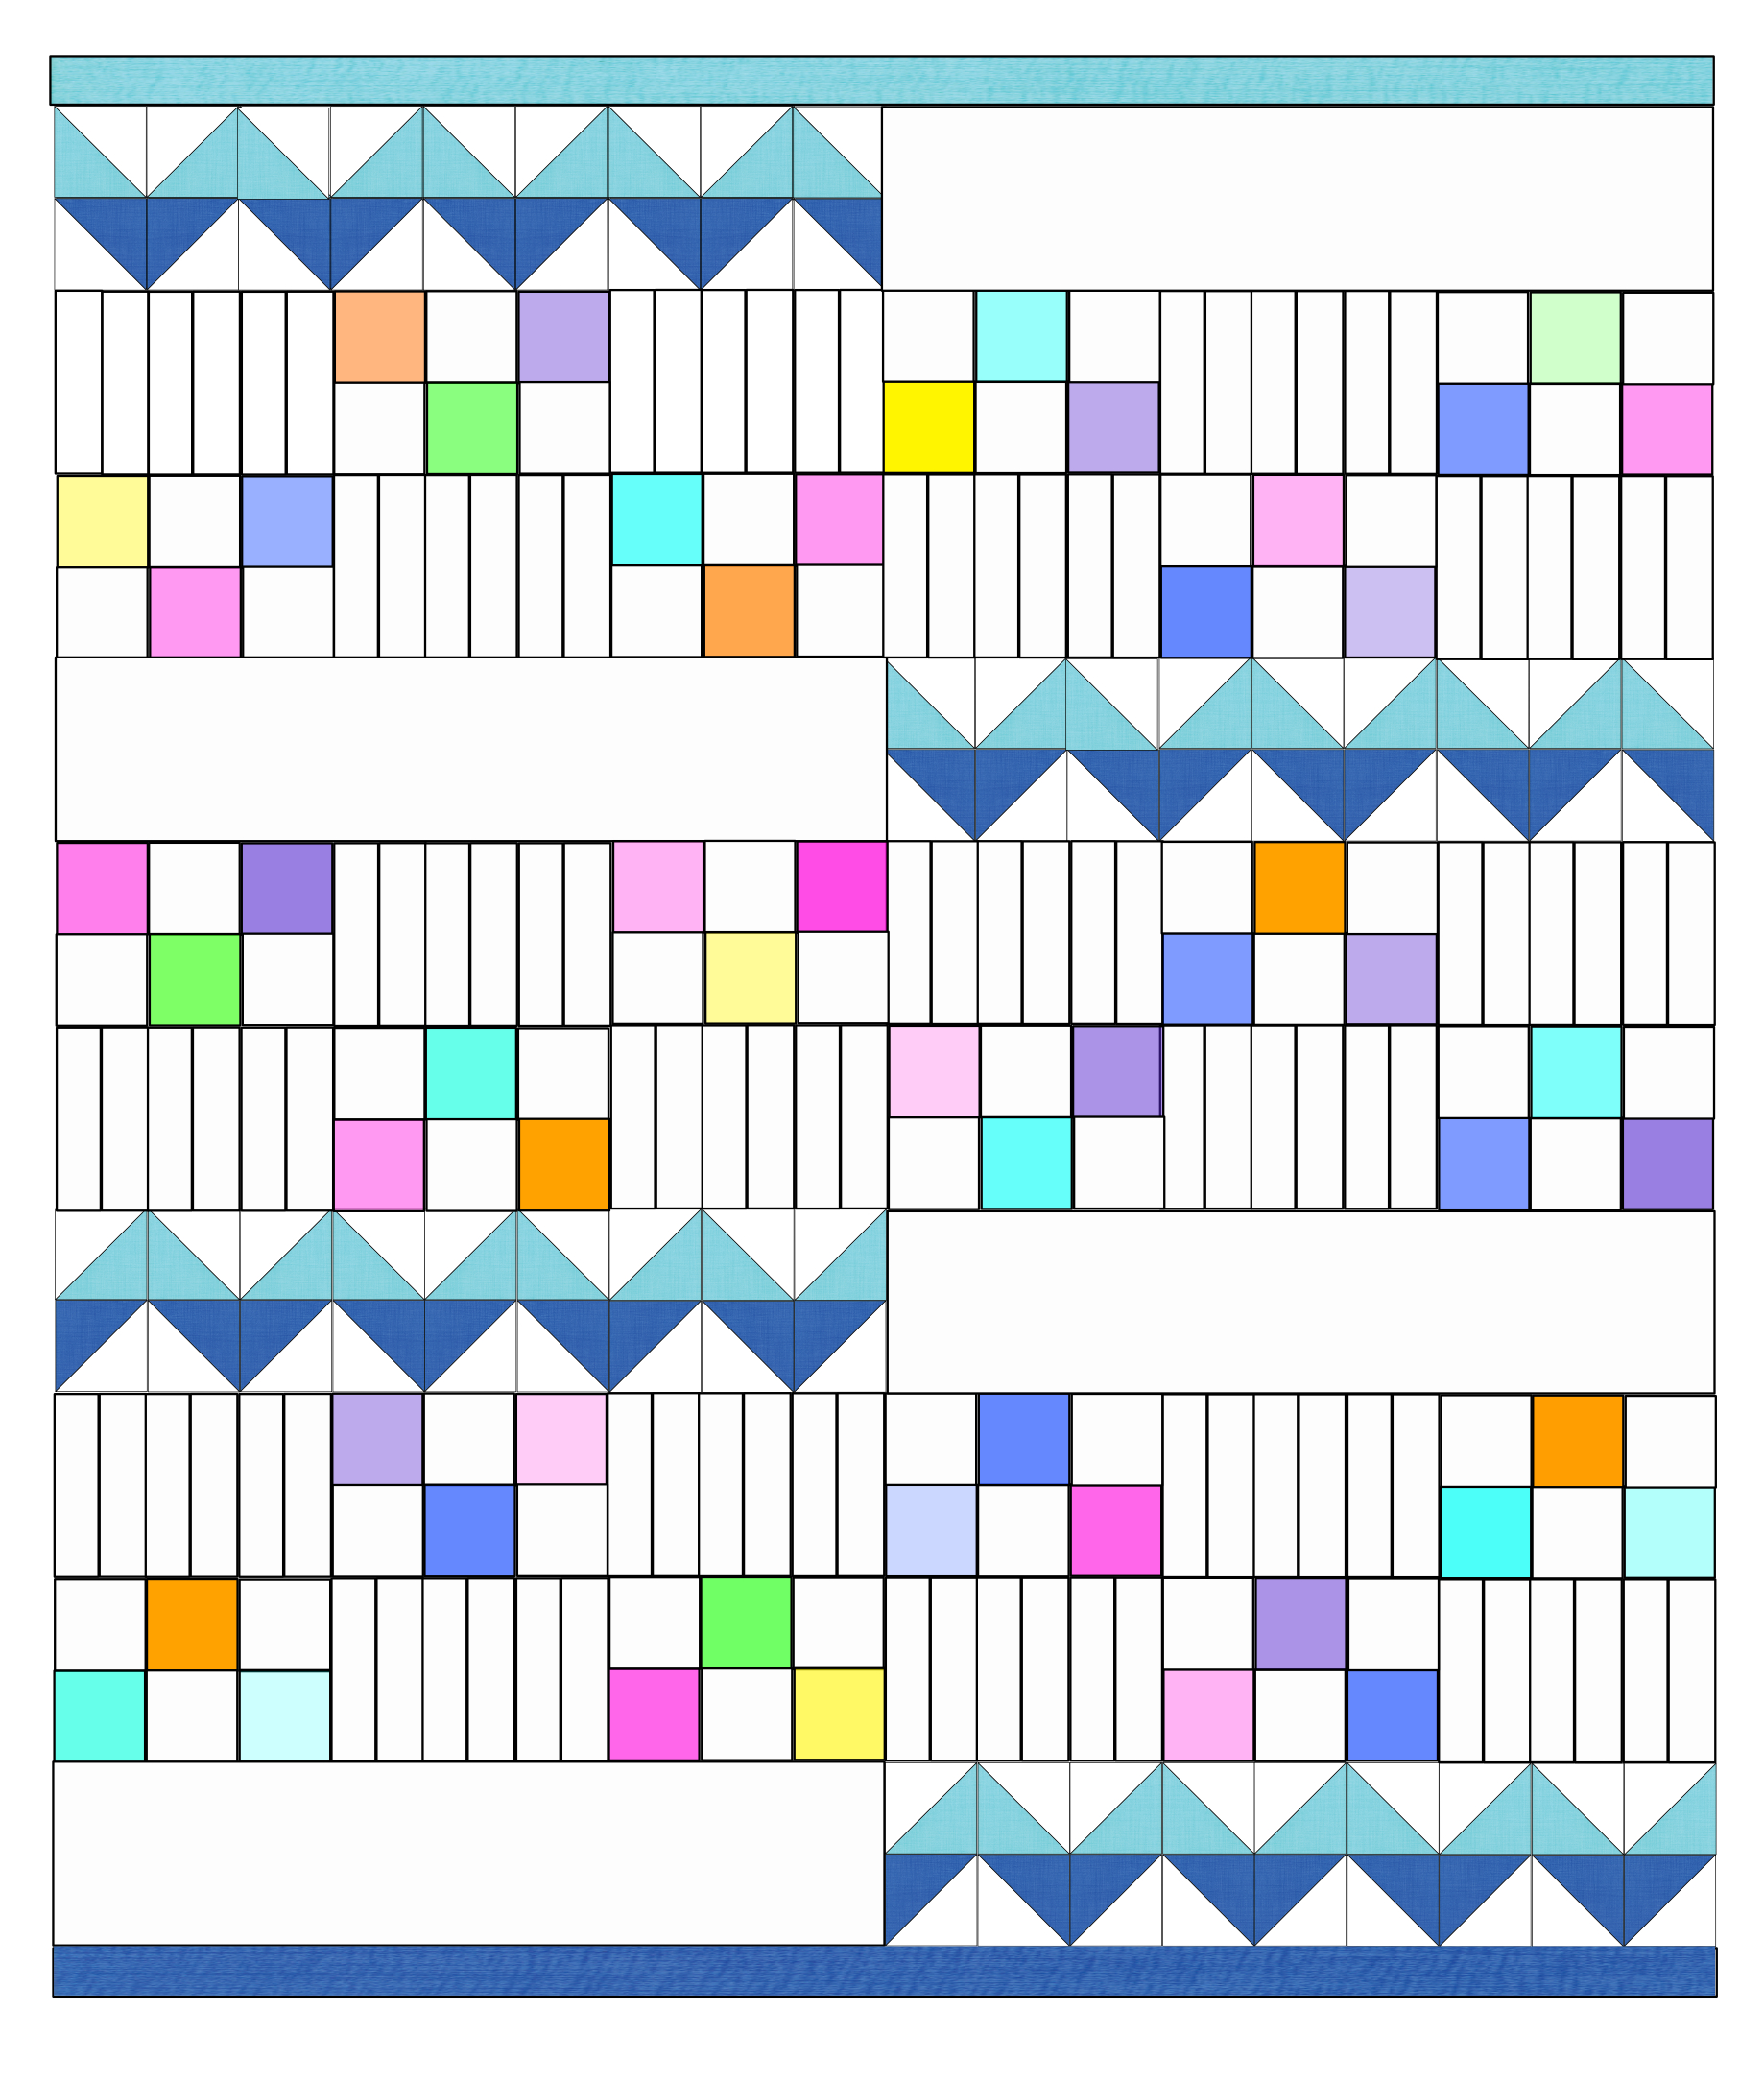
NOTE: The quilt is made up of four parts. You'll make multiples of each part.
- One - Half Square Triangles (HST)
- Two - Strip Sets
- Three - Rectangles made up of 6 squares for each rectangle
- Four - Large cut rectangles
Cutting:
Bella Solid Porcelain yardage
Cut 4 strips - 8.5" x 37"
Cut 6 squares - 4.5" x 4.5"
Bella Solid Porcelain Charm Packs
Trim 48 squares to 4.5" x 4.5"
Turquoise Puddle and Blue Skies Puddle yardage
Cut 18 - 5" x 5" squares of each color
Cut 2 strips of each color 2.5" by WOF (width of fabric)
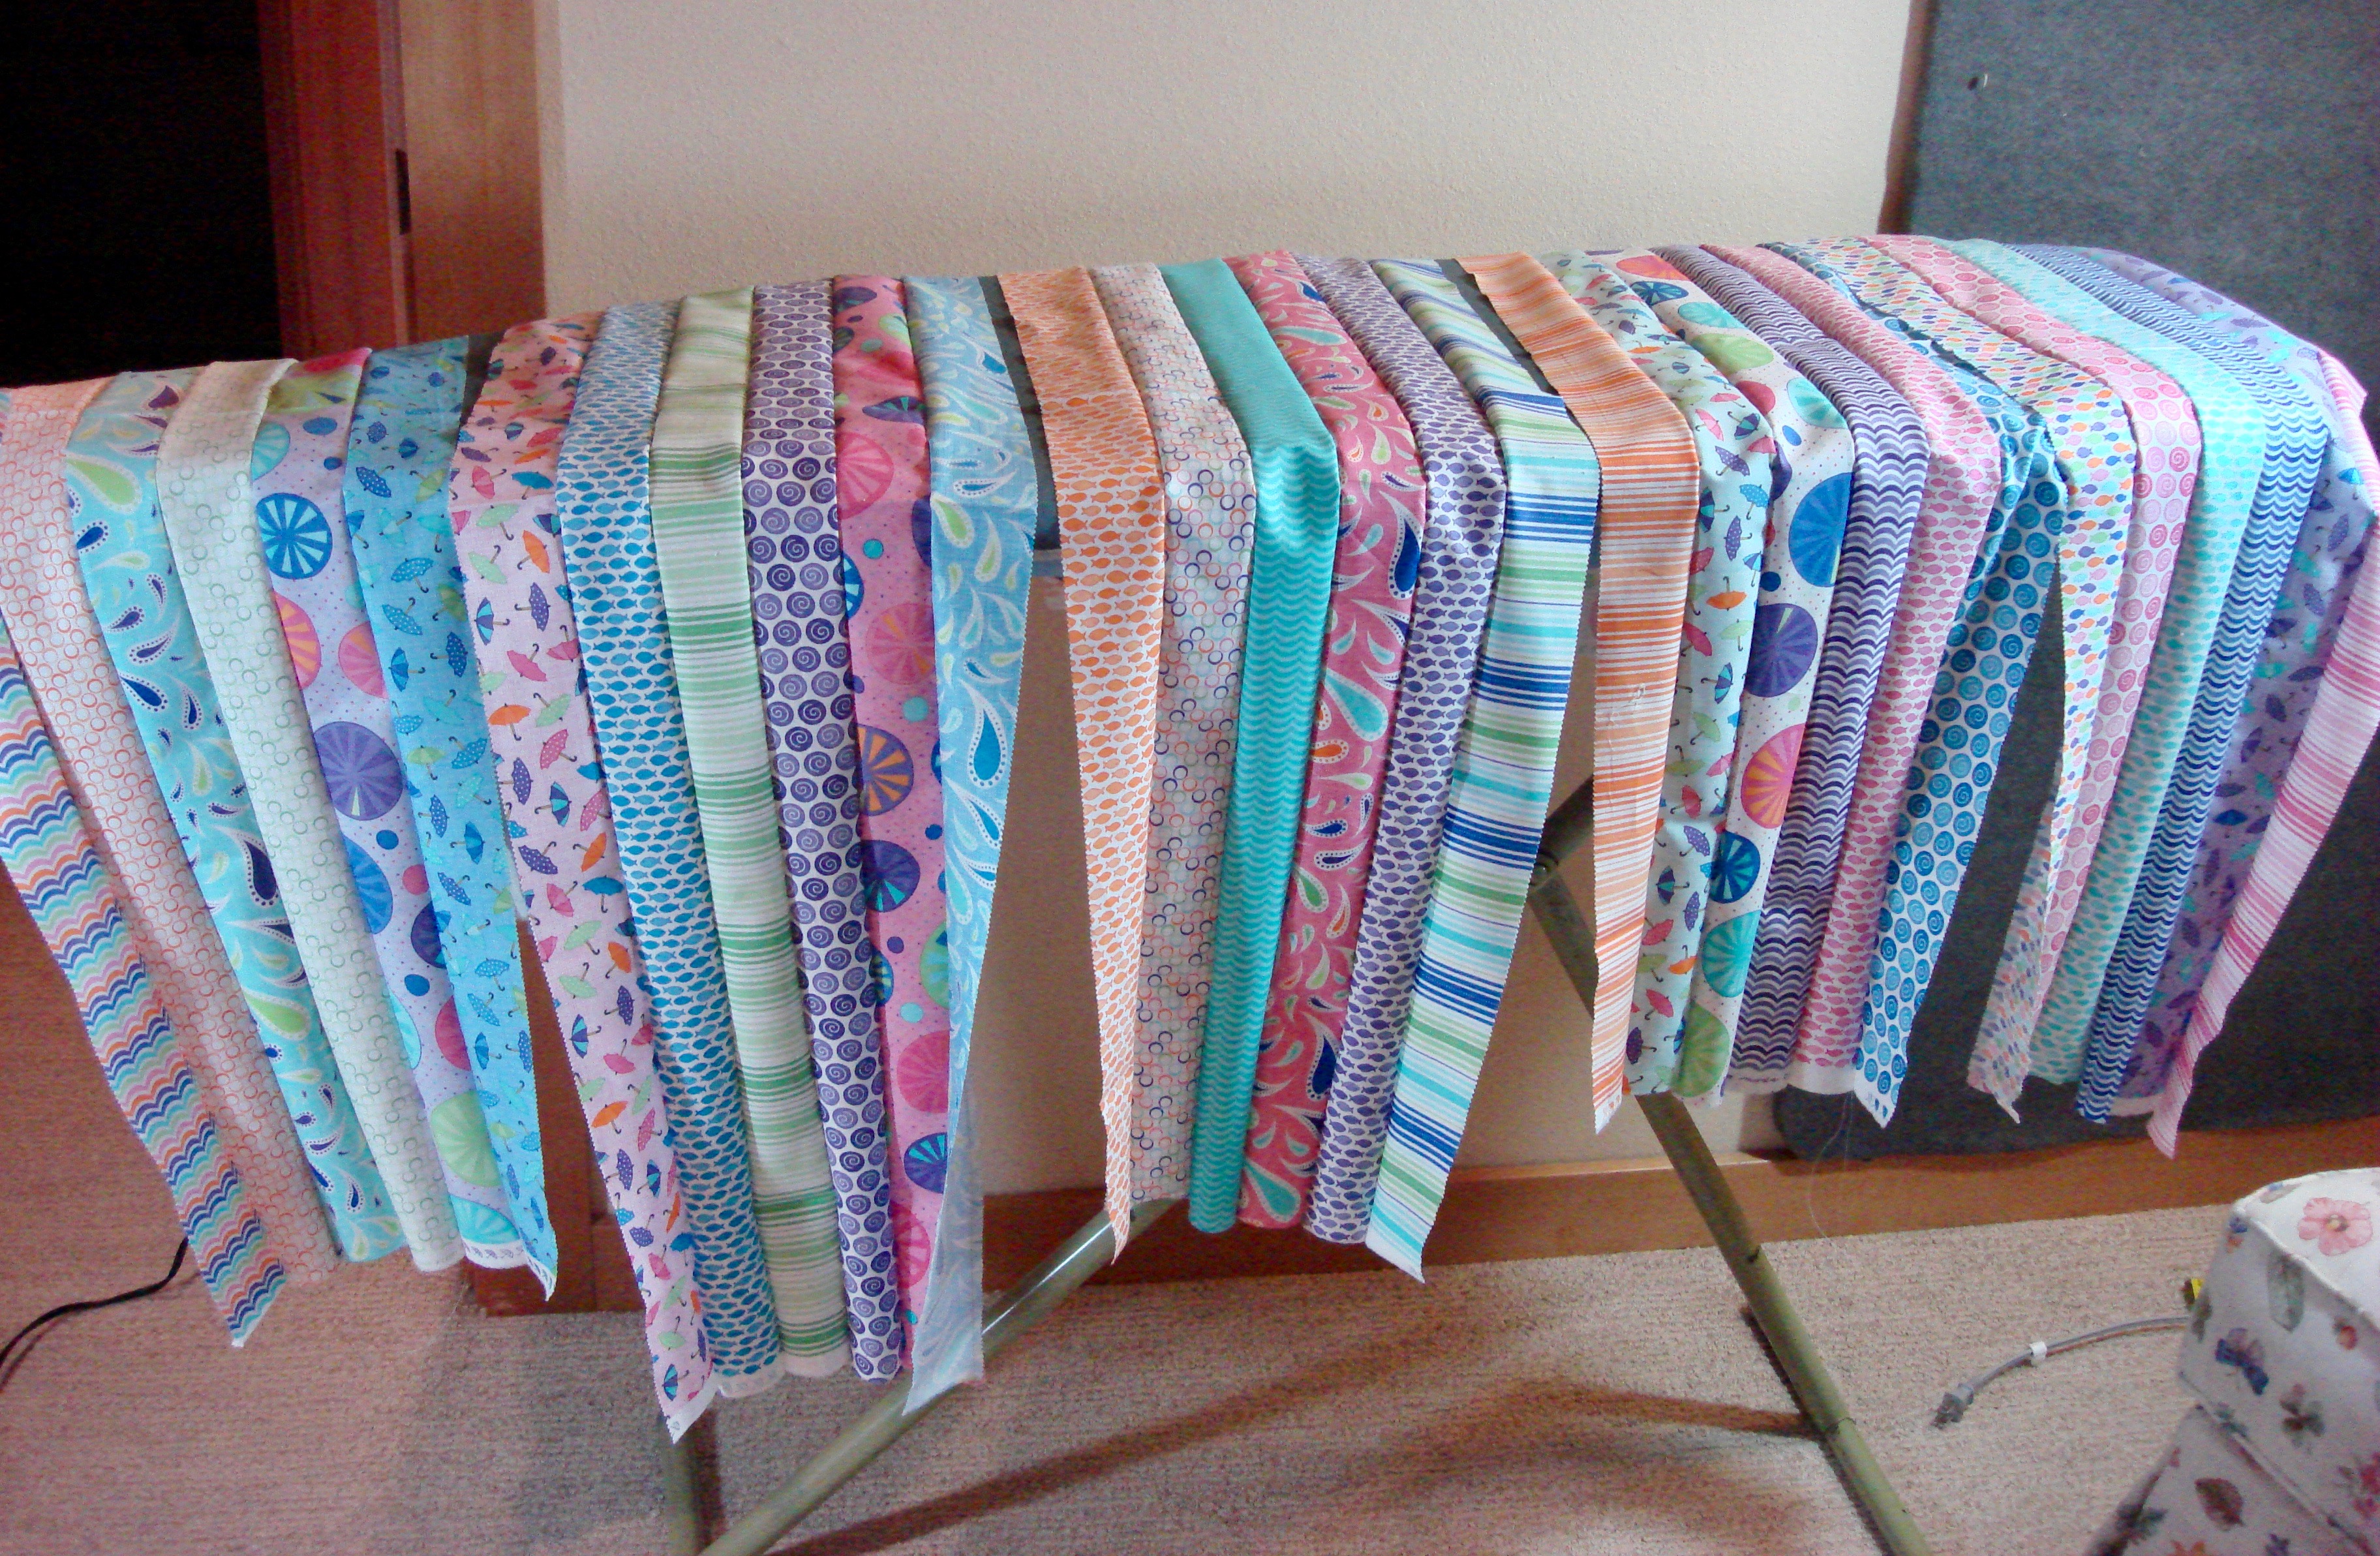
Rainy Day Charm Packs
Choose 54 Charm squares and trim each to 4.5" x 4.5"
![]()
Part One - Half Square Triangles
Draw a diagonal line, corner to corner, on each of 36 - Bella Solid Charm Squares. Match up a white square with each of the turquoise and blue skies 5" squares, right sides together.
Sew a 1/4" seam on either side of the drawn line.
Cut apart on the drawn line. Open each square and press seam towards darker fabric. Total of HSTs each color = 36. Trim each using a 4.5" ruler to 4.5" x 4.5"

Lay out 9 HSTs of each color in rows as shown with the lighter color on top. Match seam interactions by nesting or pinning, whichever is best for you. 18 squares make one row.
Make 4 rows - two of the rows should end "down" and two rows end "up" (see row ends in picture) if you are following the quilt layout diagram. If you make your own layout, no worries about how rows end. Press seams open to help avoid bulk.
Part Two - Strip Sets
Choose 30 strips from the Jelly Roll. Audition color and divide strips into 5 sets.
Sew the strips together (long side) in sets of 6. Start sewing at the opposite end each time you add a strip. This will help strip sets lay flat. Press seams to one side.
From the 6 strip sets, sub cut 18 pieces 8.5" long/tall. Save remaining fabric for other projects.
Part Three - Charm Square Rectangles
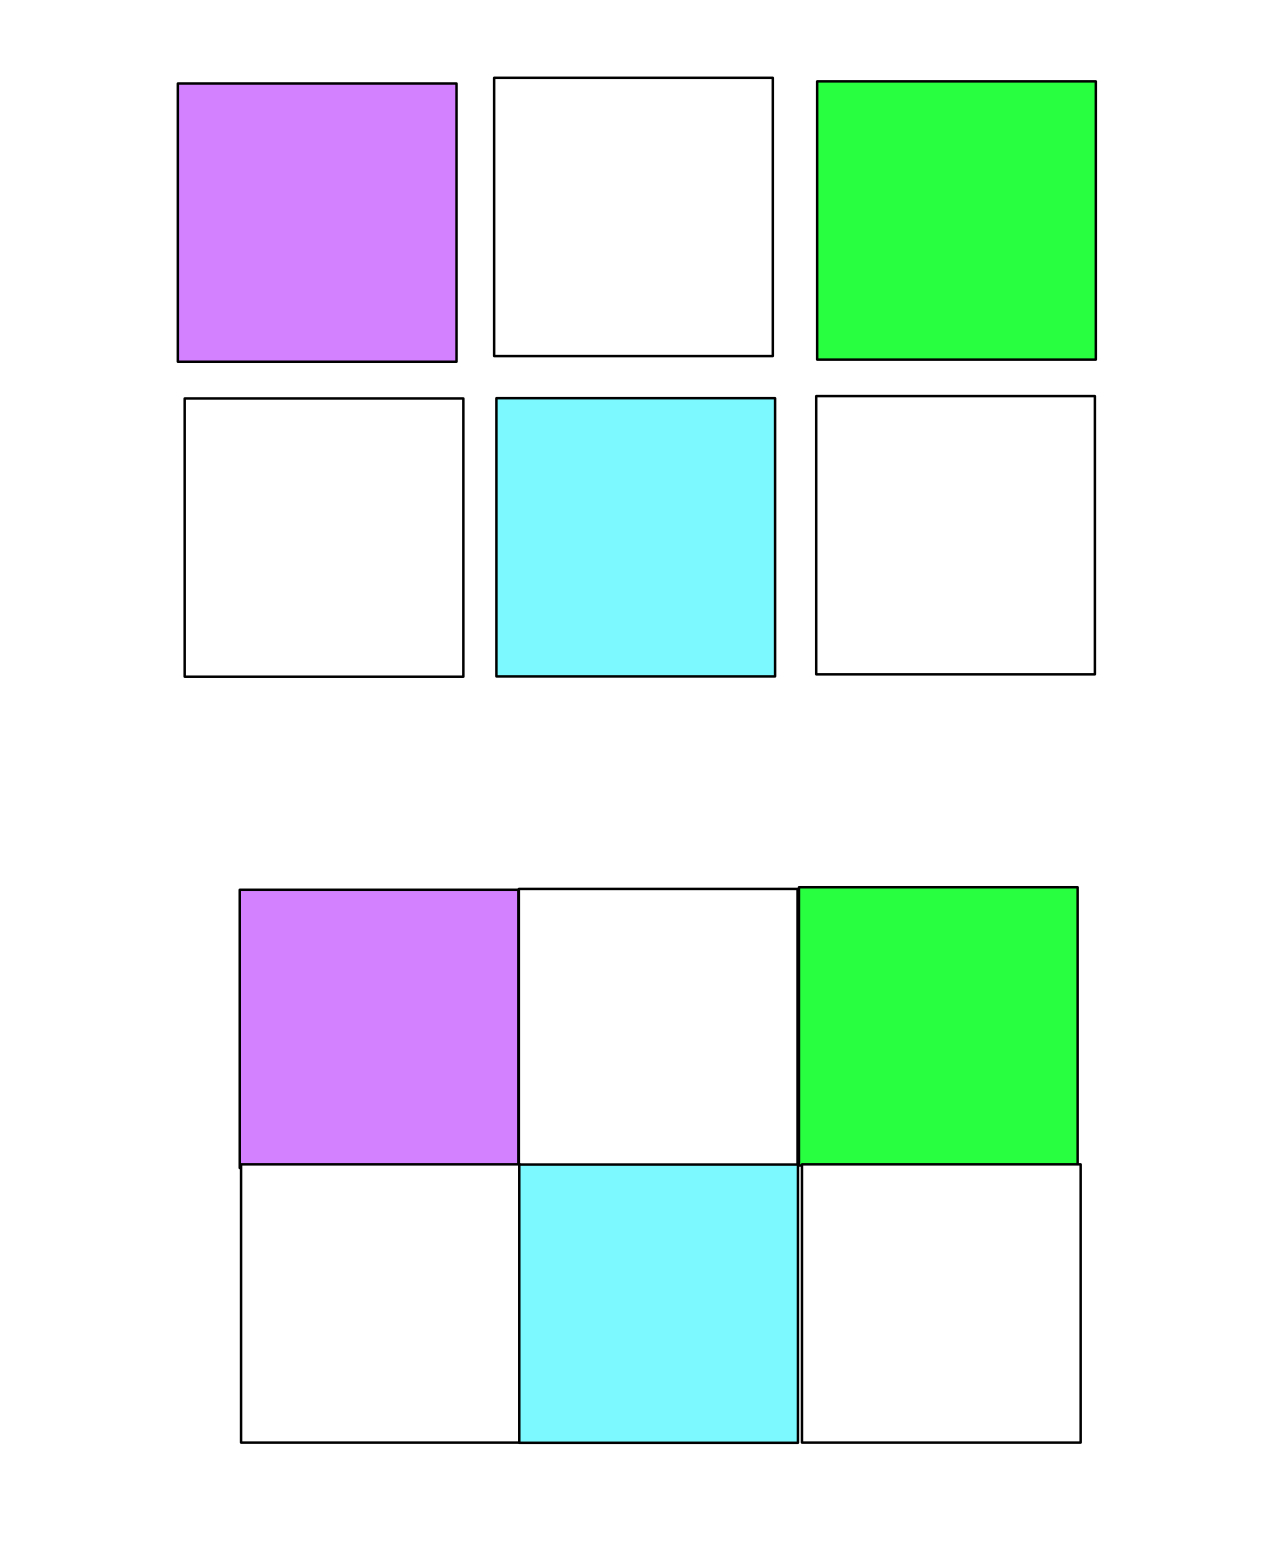
Sew charm squares together to make rectangles. Use the 54 Rainy Day charm squares and 54 Bella Solid charm squares (48 + the 6 you cut from yardage).
Part Four - Rectangles
These are the 4 large rectangle strips you cut from Bella Solid Porcelain yardage. Each one is a row. Save for row assembly. Trim if needed later to match lengths of other pieced rows.
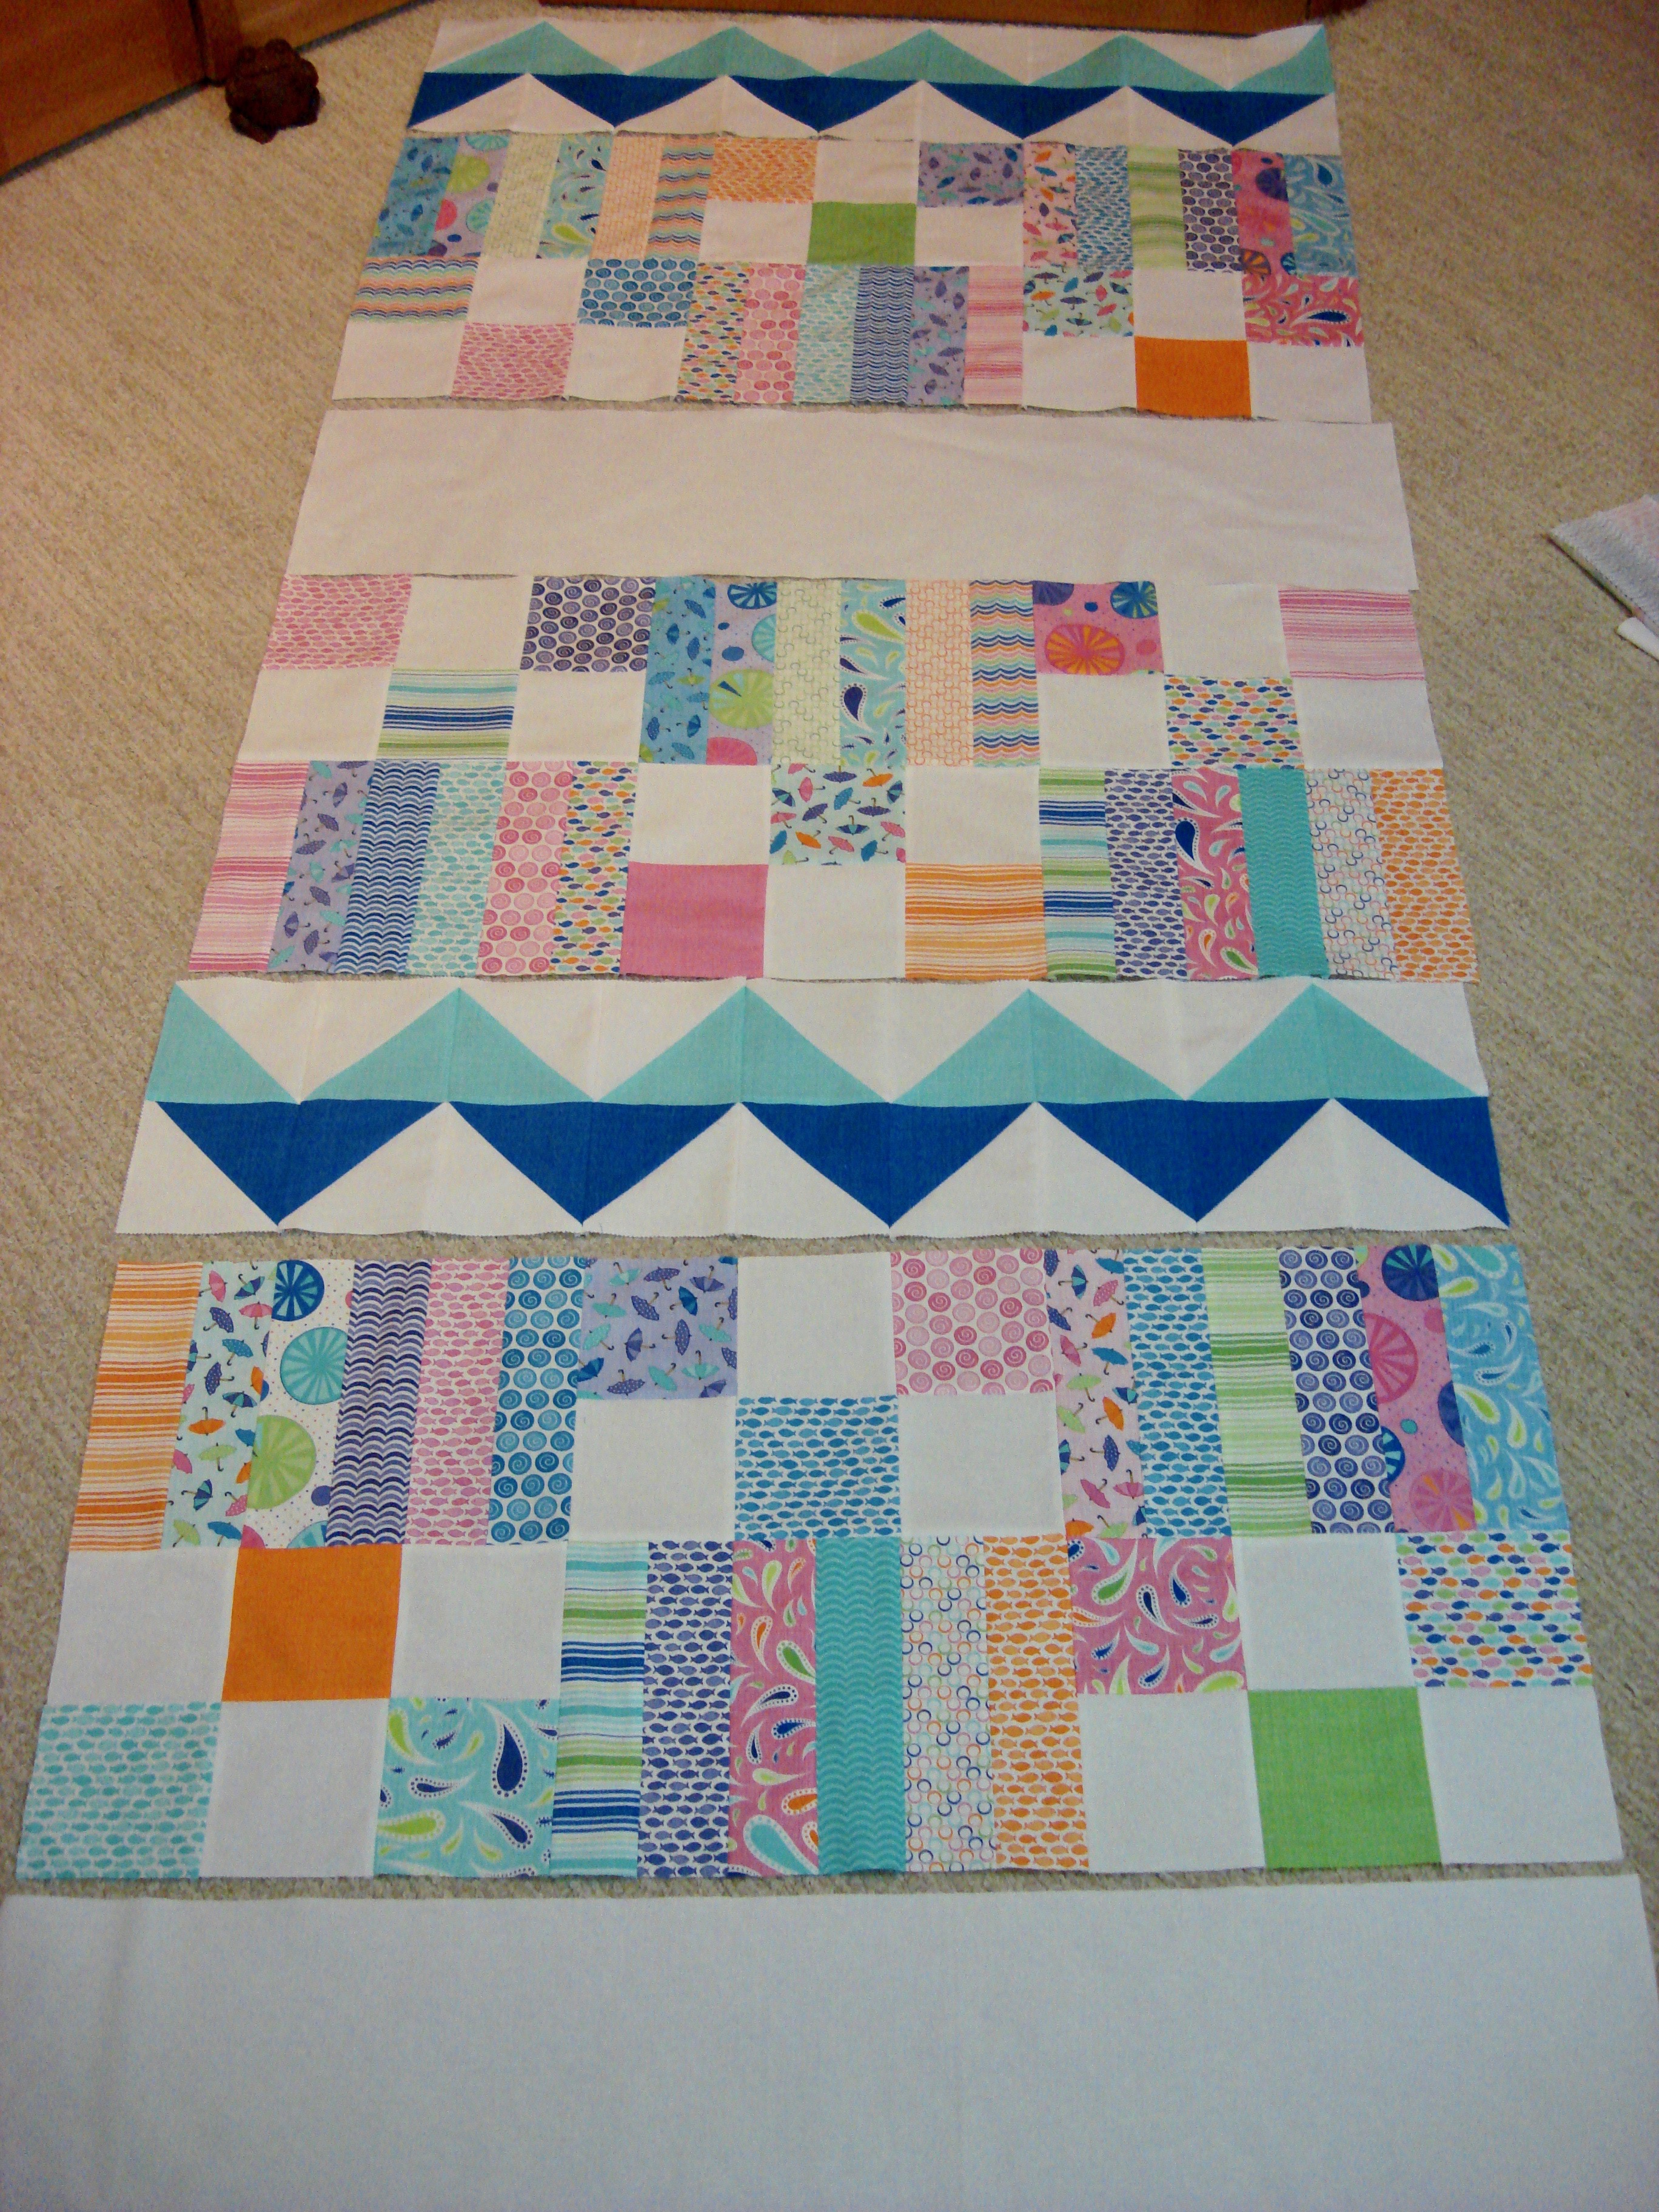
Now that you have sewn all the parts, lay out the quilt. I needed to lay this out on the floor to be able to see everything. Taking pictures, moving things around before the final sew can be really helpful for balancing color. And... making sure everything is where you'd like it to be.
Sew half of the rows together (ten as above) for each half of the quilt and then the two halves together. Match seam intersections in the way that works best for you. Press all of these seams open.
Add the top and bottom strips. Sew the two turquoise strips together end to end like you would when joining binding strips. Measure across center of quilt and trim strip to that length. Sew strip to top of quilt. Repeat this step with the darker blue strip and sew to bottom of quilt. Press seams out.
Make a quilt sandwich. Baste, quilt, bind and enjoy it. I chose a curvy quilting pattern to compliment the angles and straight lines in this quilt. Loops, swirls, raindrops, clouds could all be fun. Or what ever you like best.
![]()
A bright and cheerful quilt that I hope you enjoy making. It could be a fun scrap quilt too. ~ Robin
This quilt finishes at 72" x 84".

Robin Nelson
![]()
Posted in:
Comments