Welcome to Moda Fabrics!
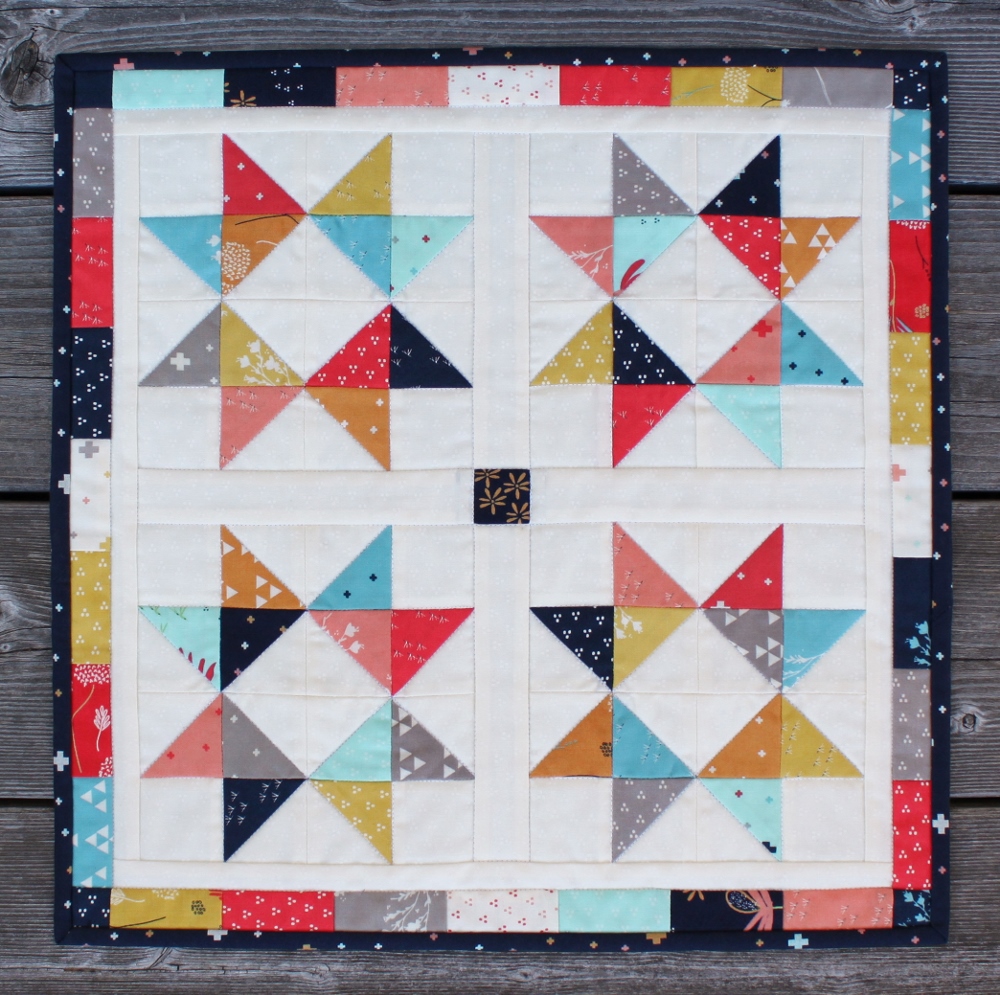
Candy Stars Mini Quilt
Candy Stars Mini Quilt
Published:
Nov 4 2016 - 23:00
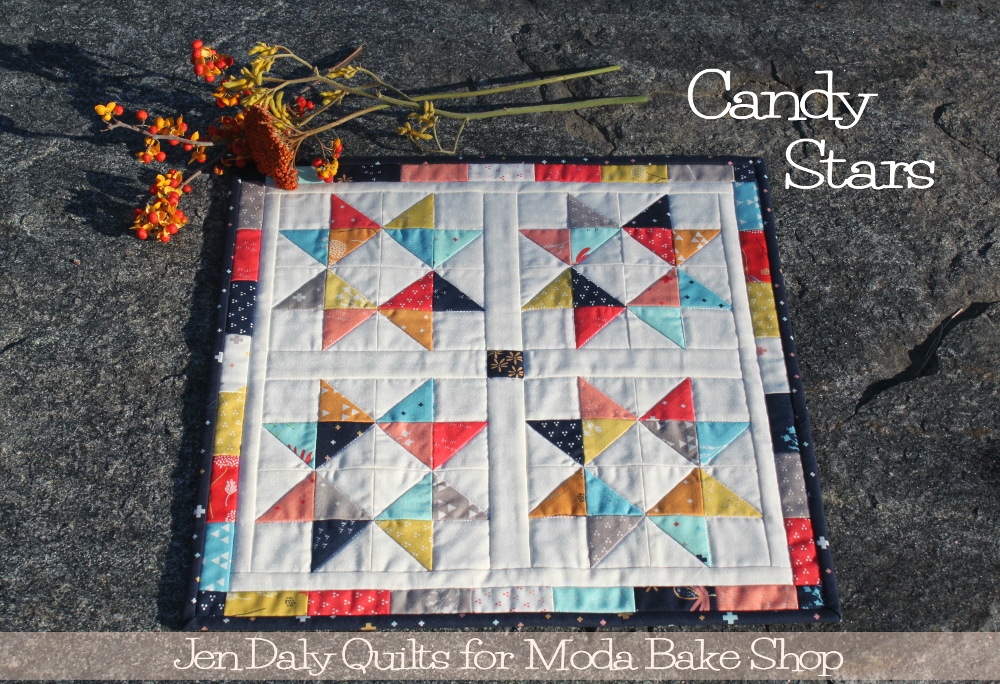

Hi there! I'm Jen Daly and I'm thrilled to be back at the Moda Bake Shop today with a new project for my fellow Moda Candy lovers! Candy Stars is a sweet little quilt that's made with one mini charm pack and a bit of yardage. I made my quilt with "Desert Bloom" by Sherri and Chelsi of a Quilting Life and it was a treat to work with such gorgeous colors!
This little quilt finishes at 16" x 16".
Now let's get started!
![]()
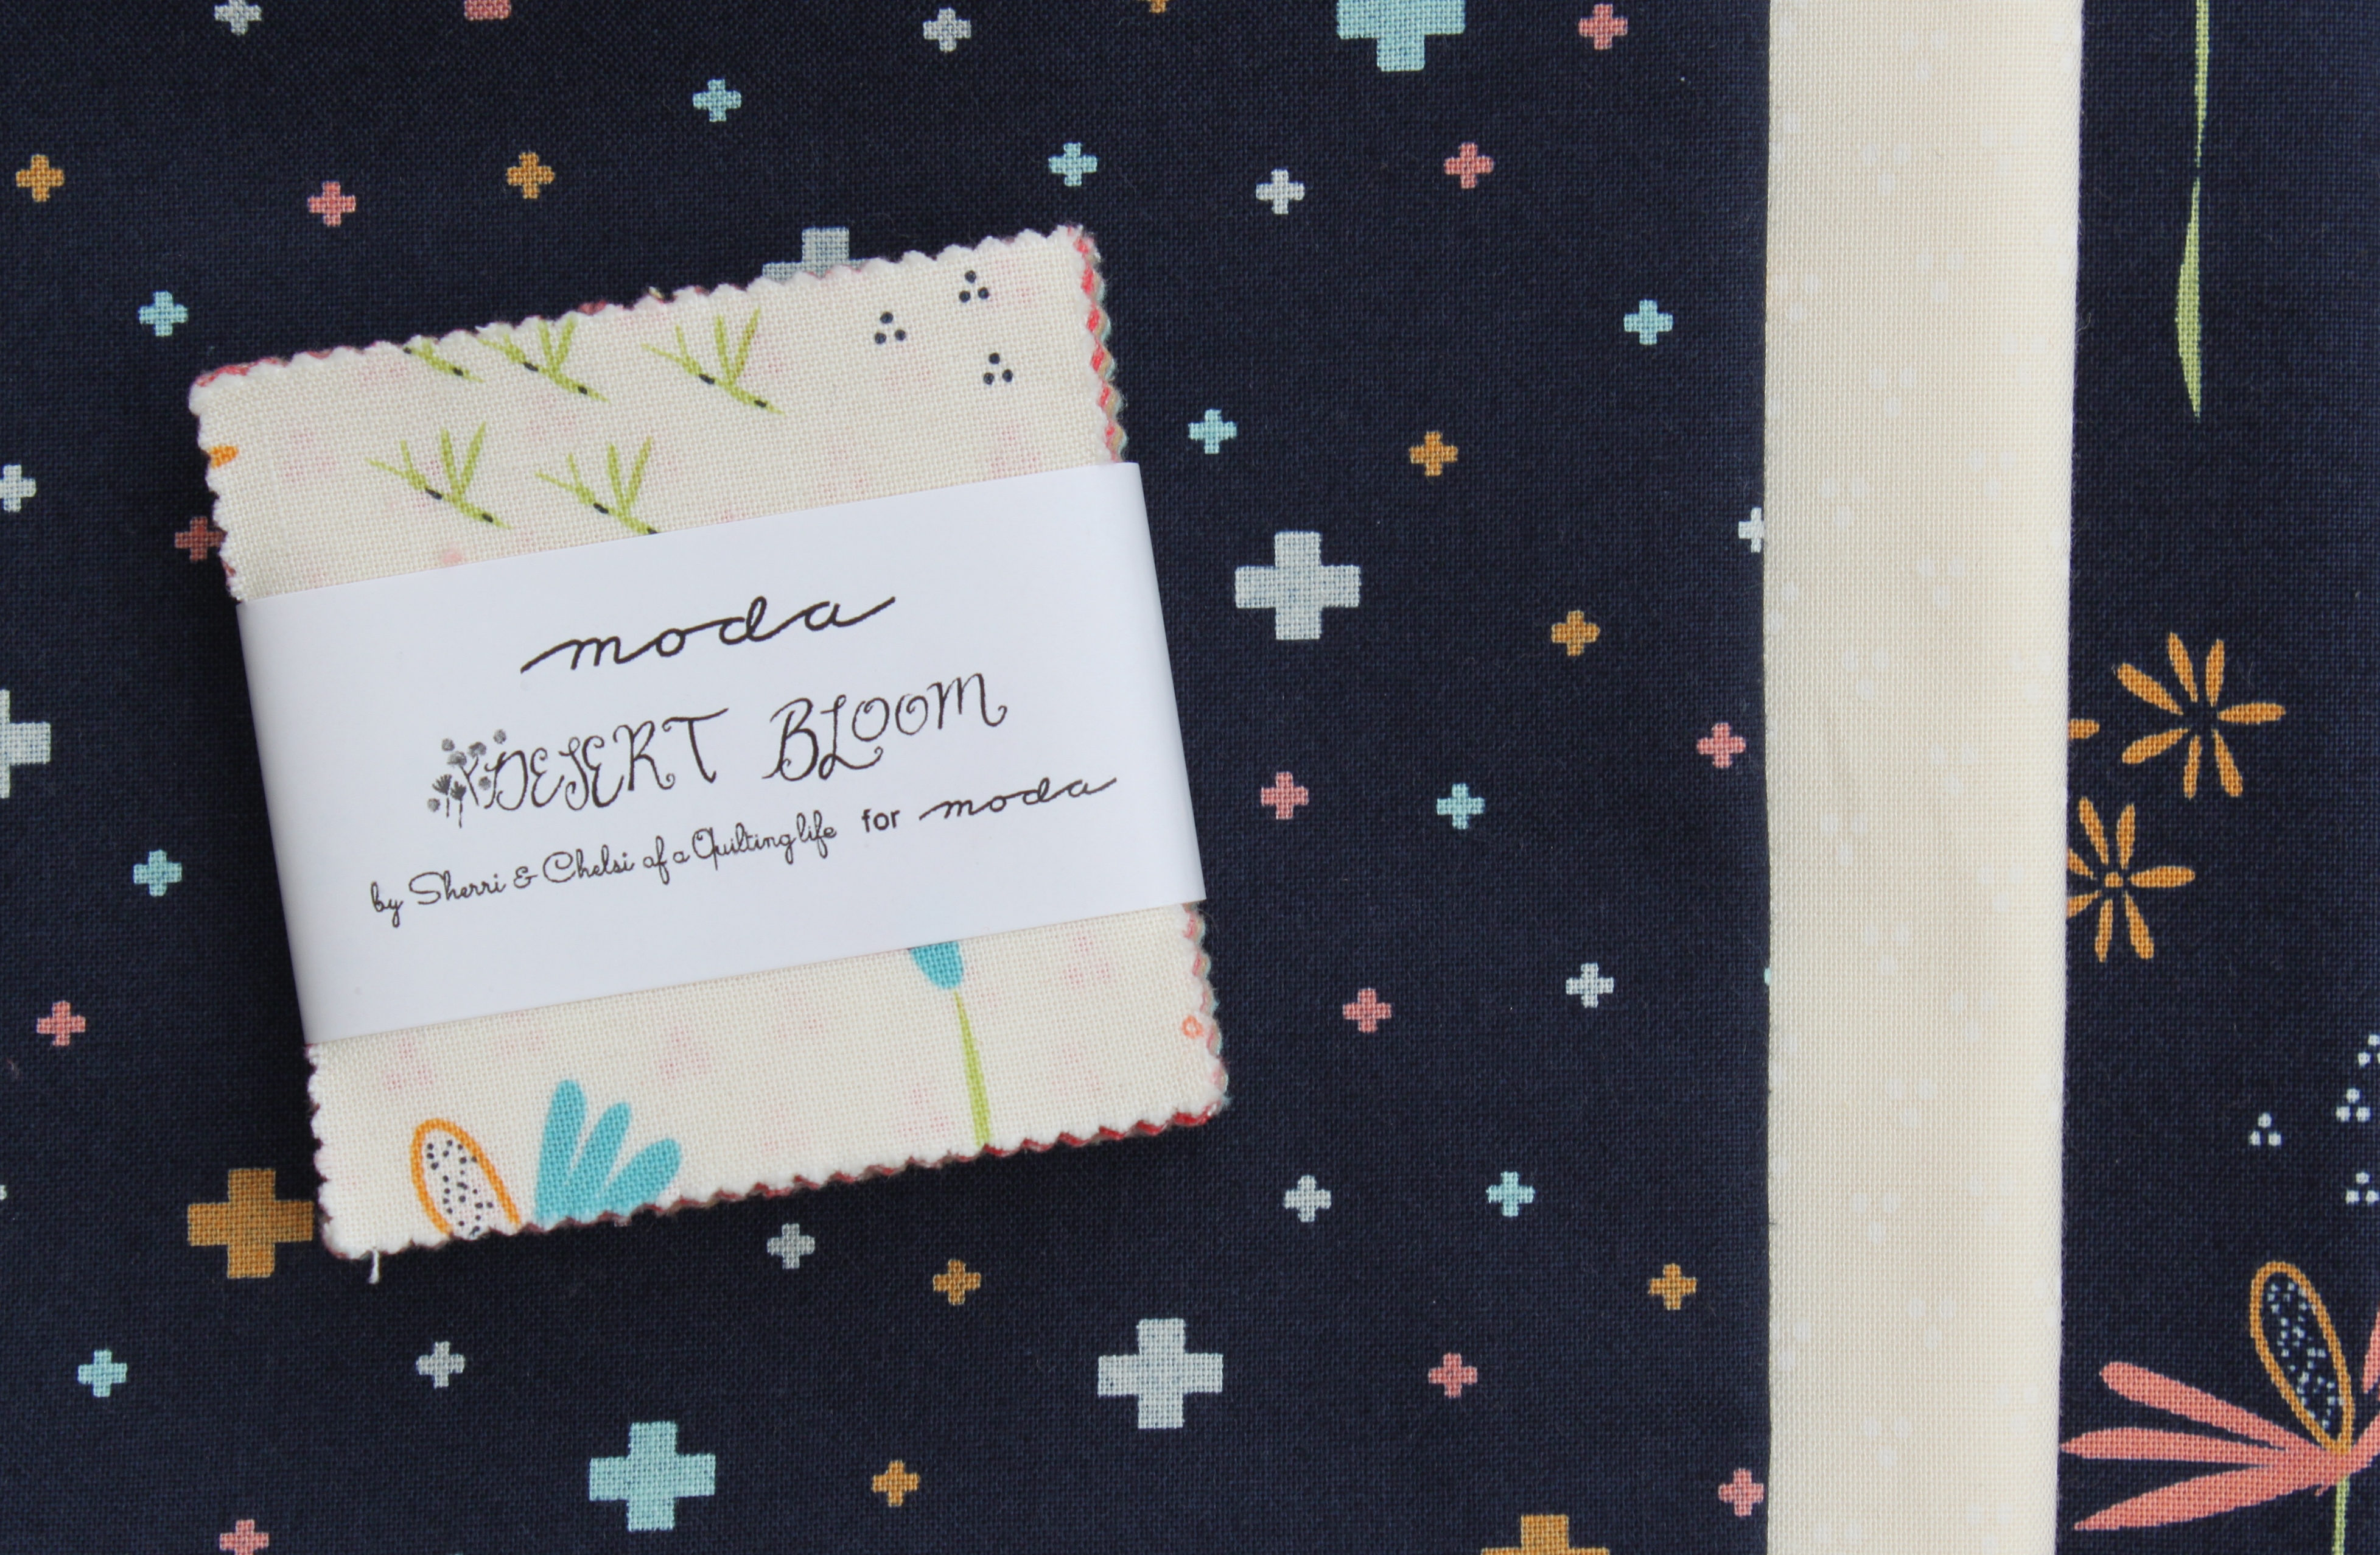
1 Mini Charm Pack (shown in Desert Bloom by Sherri and Chelsi of a Quilting Life)
1/3 yard background fabric (shown in Desert Bloom Spring Ivory)
1/2 yard backing fabric (shown in Desert Bloom Wildflower Midnight)
1/4 yard binding fabric (shown in Desert Bloom Mesa Midnight)
batting measuring 18" x 18"
![]()
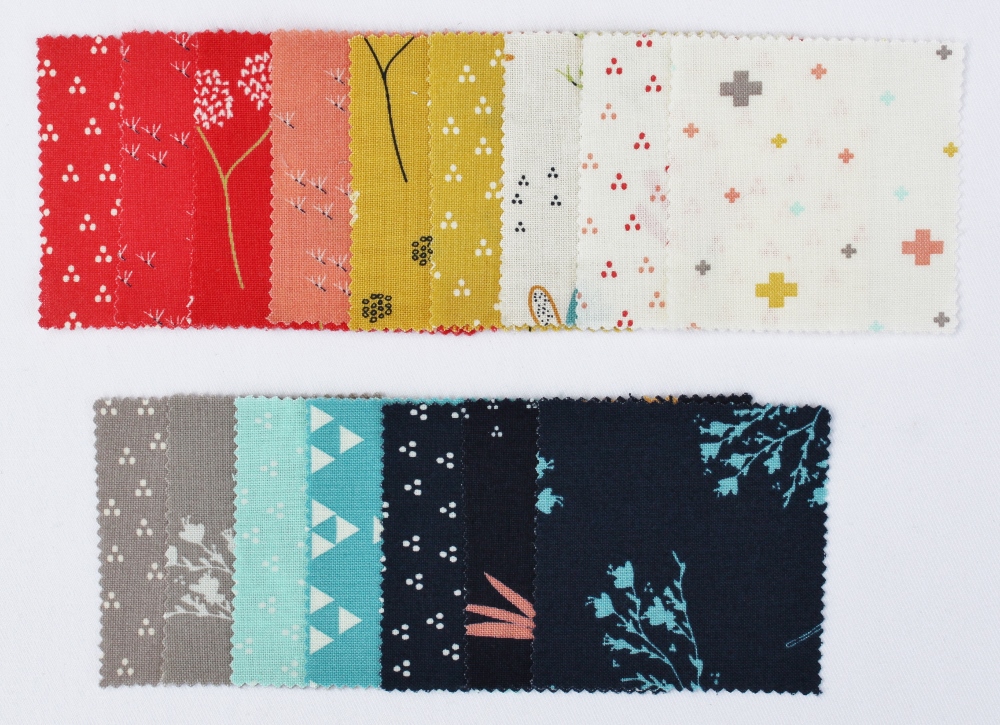
First take a few minutes to sort your mini charm squares. You'll need 24 for the star blocks and at least 15 for the pieced border.
I chose these charm squares for my stars (yum!):

And these for my pieced outer border:
Cutting:
From your background fabric, cut the following strips:
- 2 strips—2½" x WOF (WOF=width of fabric, selvage to selvage)
- 1 strip—2" x WOF
- 1 strip—1½" x WOF
- 2 strips—1" x WOF
Cross cut the above strips as follows:
- From the 2—2½" x WOF strips, cut 24—2½" x 2½" squares
- From the 2" x WOF strip, cut 16—2" x 2" squares
- From the 1½" x WOF strip, cut 4—1½" x 6½" sashing strips and cut 1—1½" x 1½" square
- From the 2—1" x WOF strips, cut 2—1" x 13½" inner border strips and cut 2—1" x 14½" inner border strips
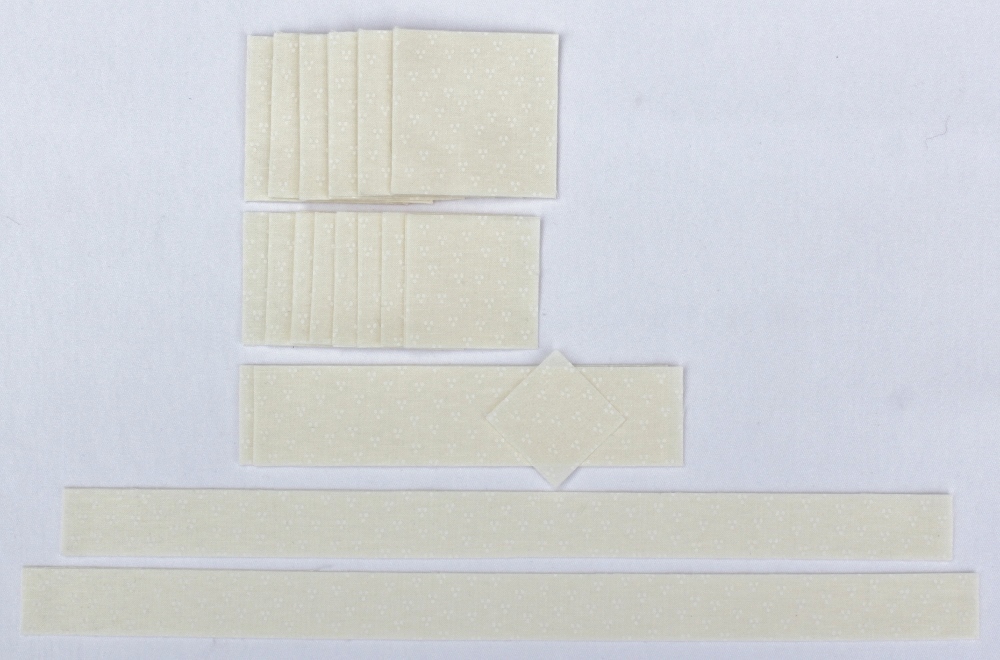
You'll also need to cut:
- From your backing fabric: 1—18" x 18" panel
- From your binding fabric: 2 strips 2¼" by WOF
Making the half square triangles:
- On the wrong side of each of the 24 background 2½" x 2½" squares, lightly draw a diagonal line from corner to corner. Then draw a line ¼" on either side of the center diagonal line.

In the alternative, if you have a quarter-inch seam marking tool, place the tool on the wrong side of your background fabric 2½" x 2½" square so that its center line extends from corner to corner and draw a line on either side of the tool.
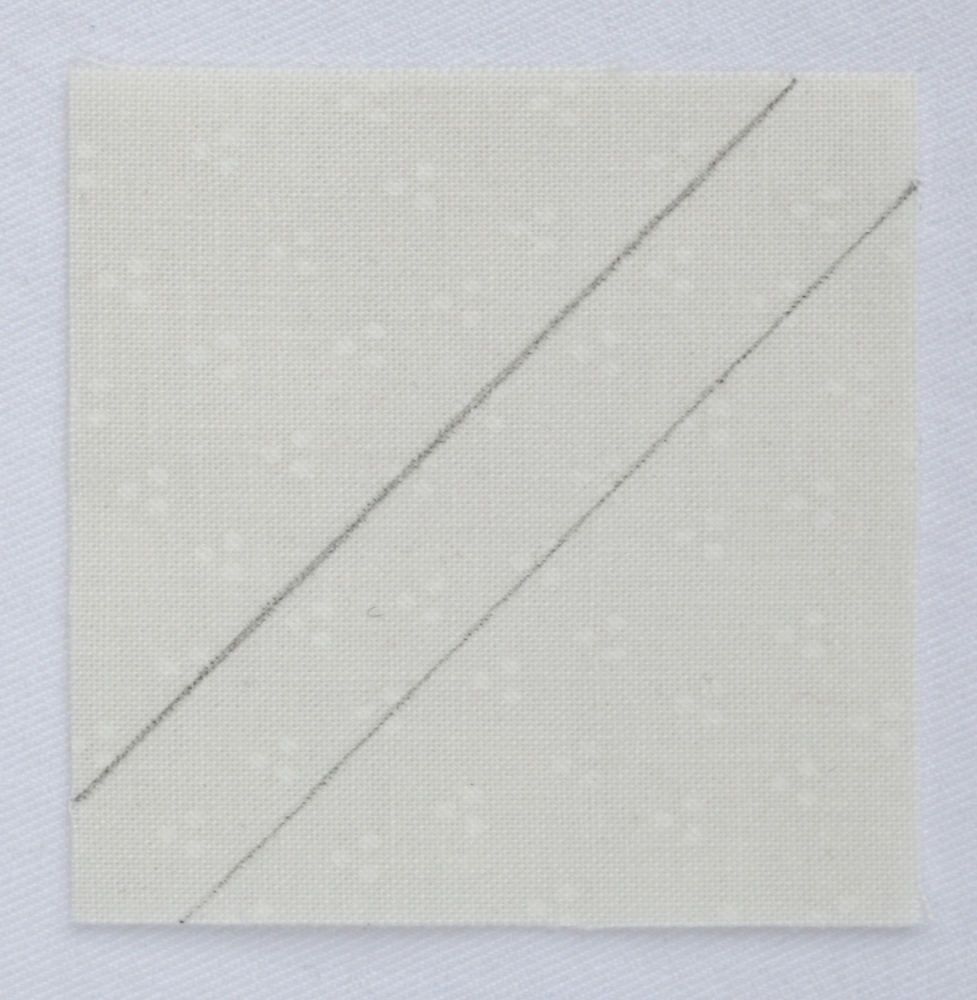
2. Layer a marked background fabric 2½" x 2½" square atop one of the charm squares you chose for your star blocks with right sides together.

3. Stitch on drawn lines. If you use the first method to mark your squares, do not stitch along the center drawn line.
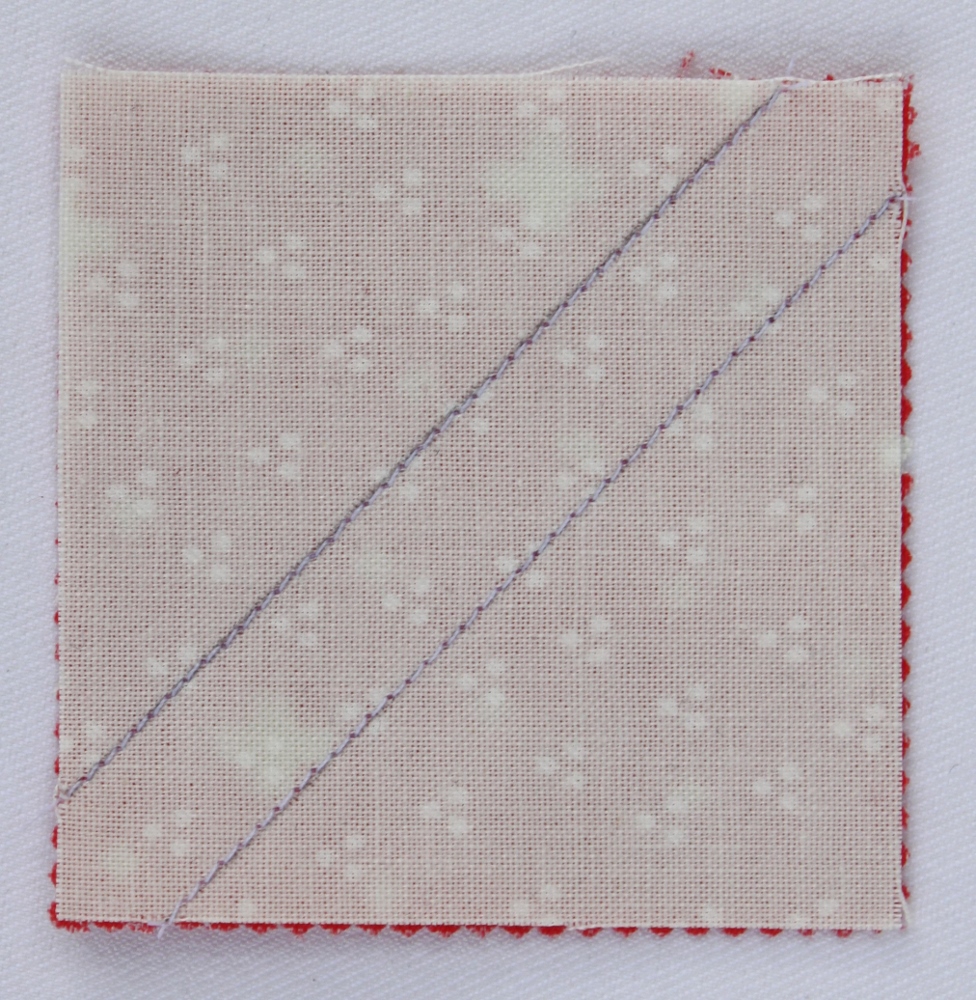
4. Cut above unit in half diagonally between stitched lines (or on center drawn line if you used the first method to mark your squares).

5. Press above units open to create two half square triangles. Note: seam allowance should be pressed to the darker fabric, or away from the background fabric.

6. Trim half square triangle units to 2" x 2" unfinished. It helps to use a ruler with a 45° line on it. Before trimming, make sure that the 45° line runs along the diagonal seam of the half square triangle unit. Trim the right and top edges of the half square triangle unit.
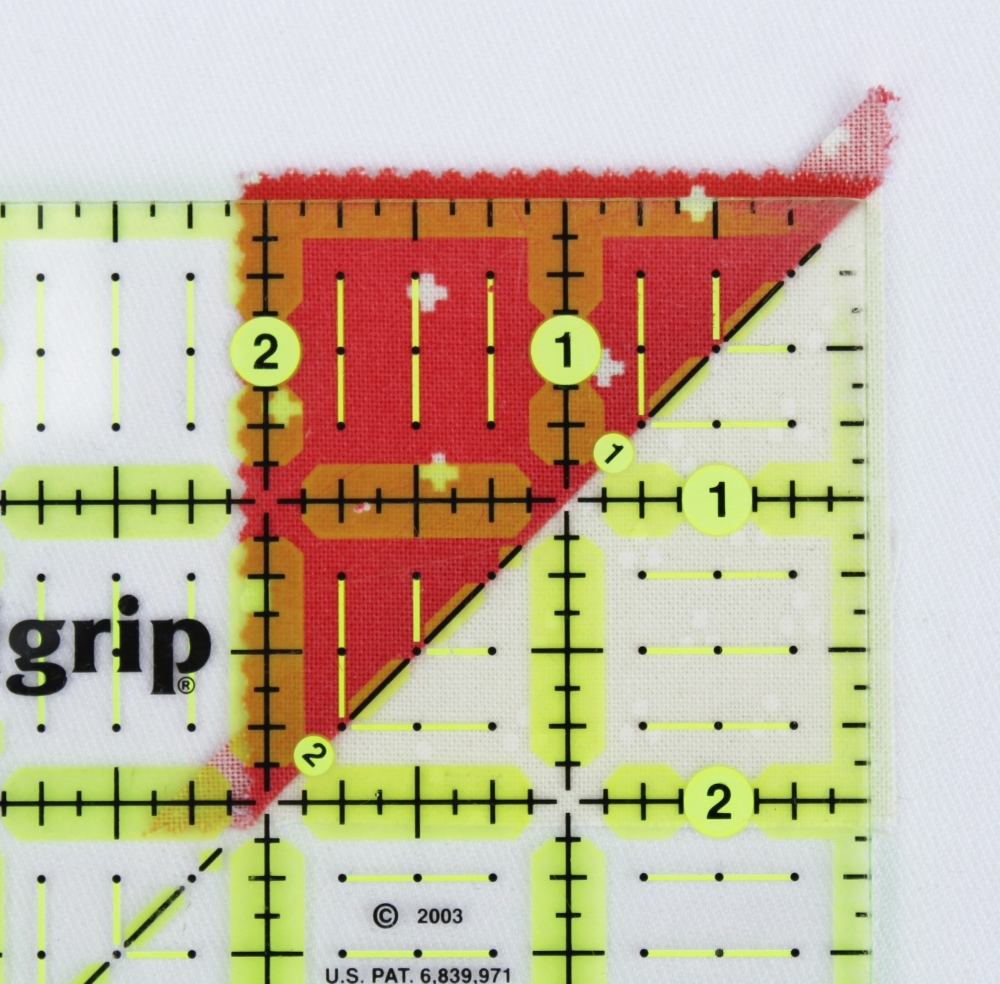
Then turn the half square triangle unit 180° and trim the remaining two edges in the same manner as above, again aligning the ruler's 45° line with the diagonal seam.
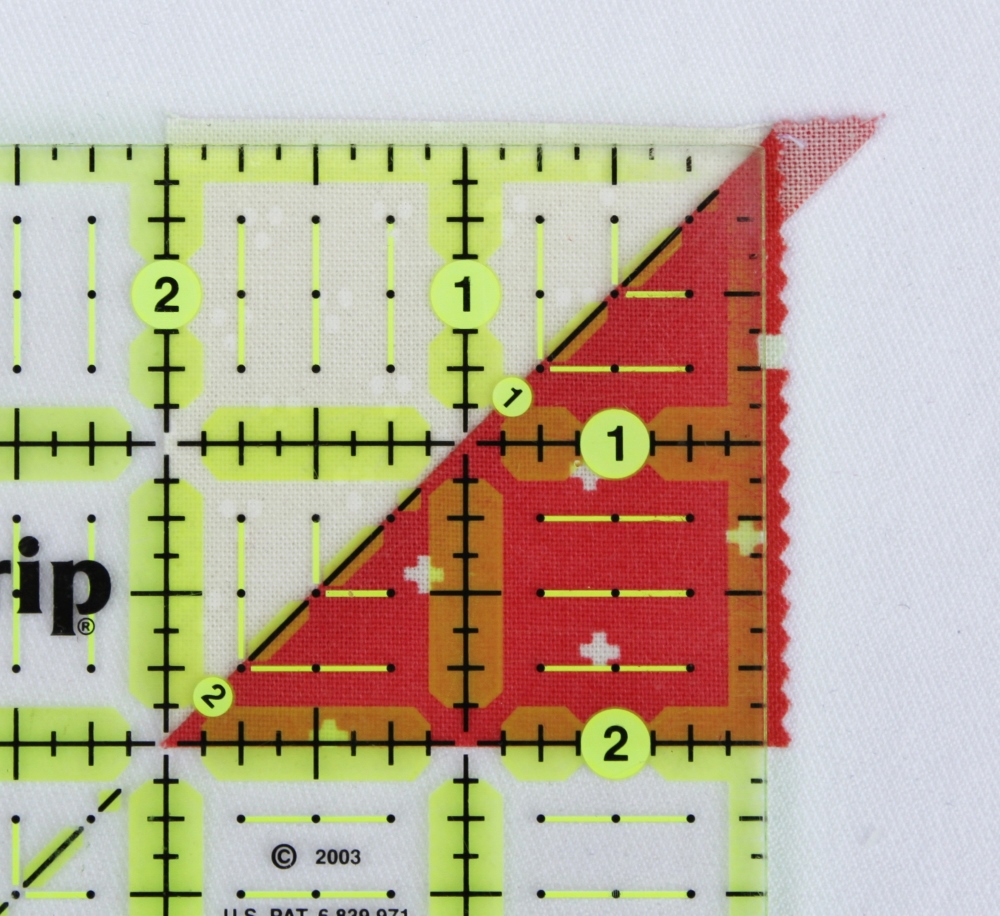
7. You should end up with 2—2" x 2" unfinished half square triangle units. Repeat with remaining 23 mini charm squares and 23 background fabric 2½" x 2½" squares to make 48—2" x 2" half square triangle units.

Assembling the Star Blocks:
- For each of the 4 star blocks, you'll need to lay out 12 half square triangles and 4 background fabric 2" x 2" squares as follows:
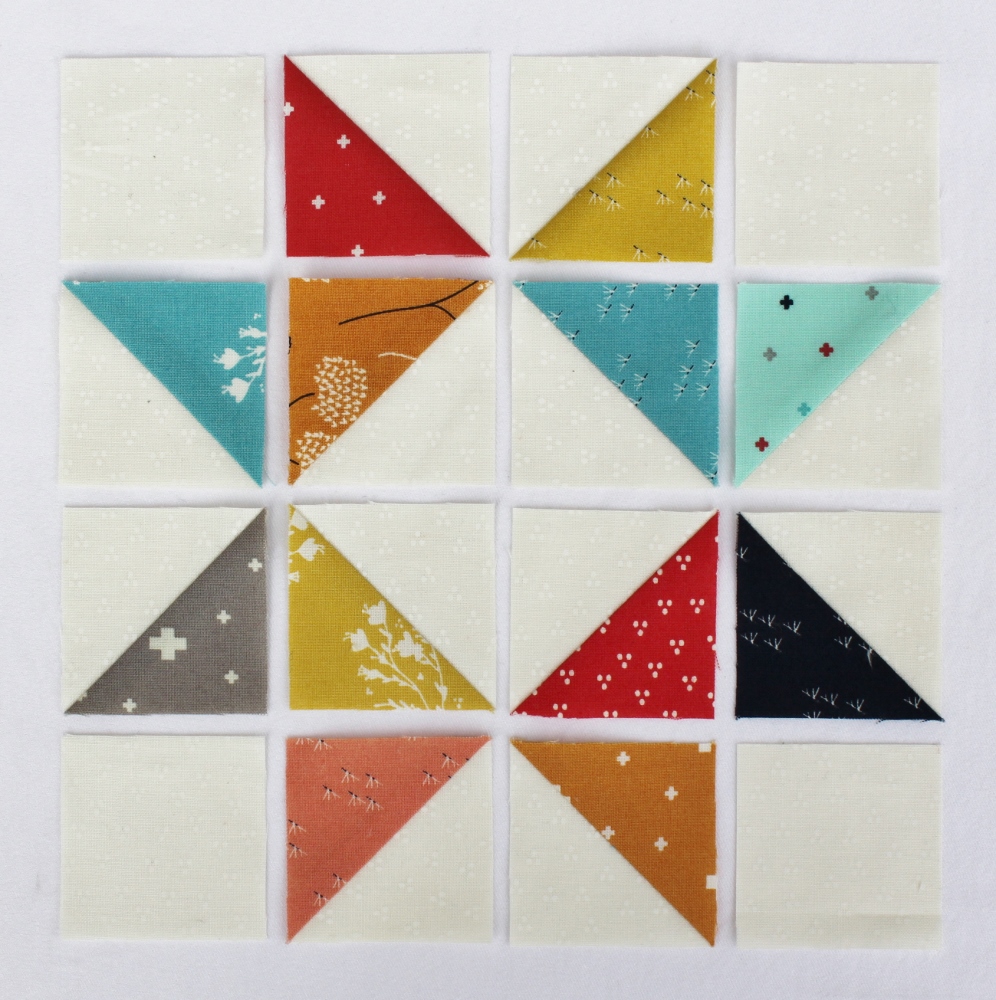
2. Stitch half square triangles and squares together into 4 rows, pressing seam allowances open.
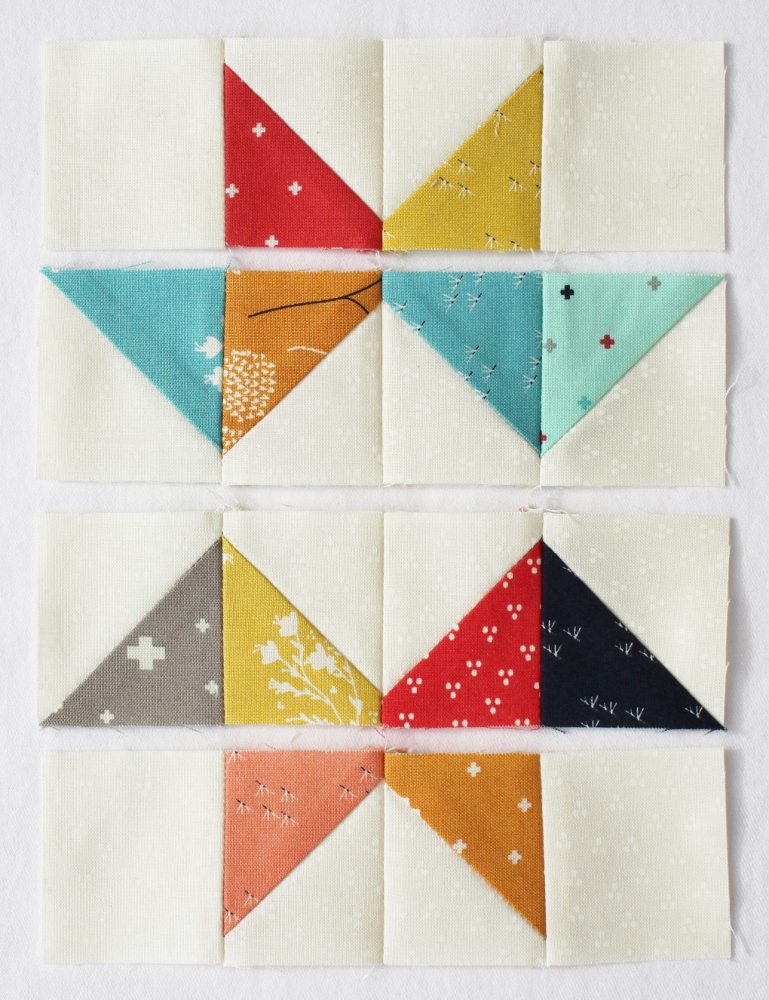
3. Stitch 4 rows together, pressing seam allowances open, to make a star block that measures 6½" x 6½" unfinished. Repeat with remaining half square triangle units and background fabric squares to make 4 star blocks.

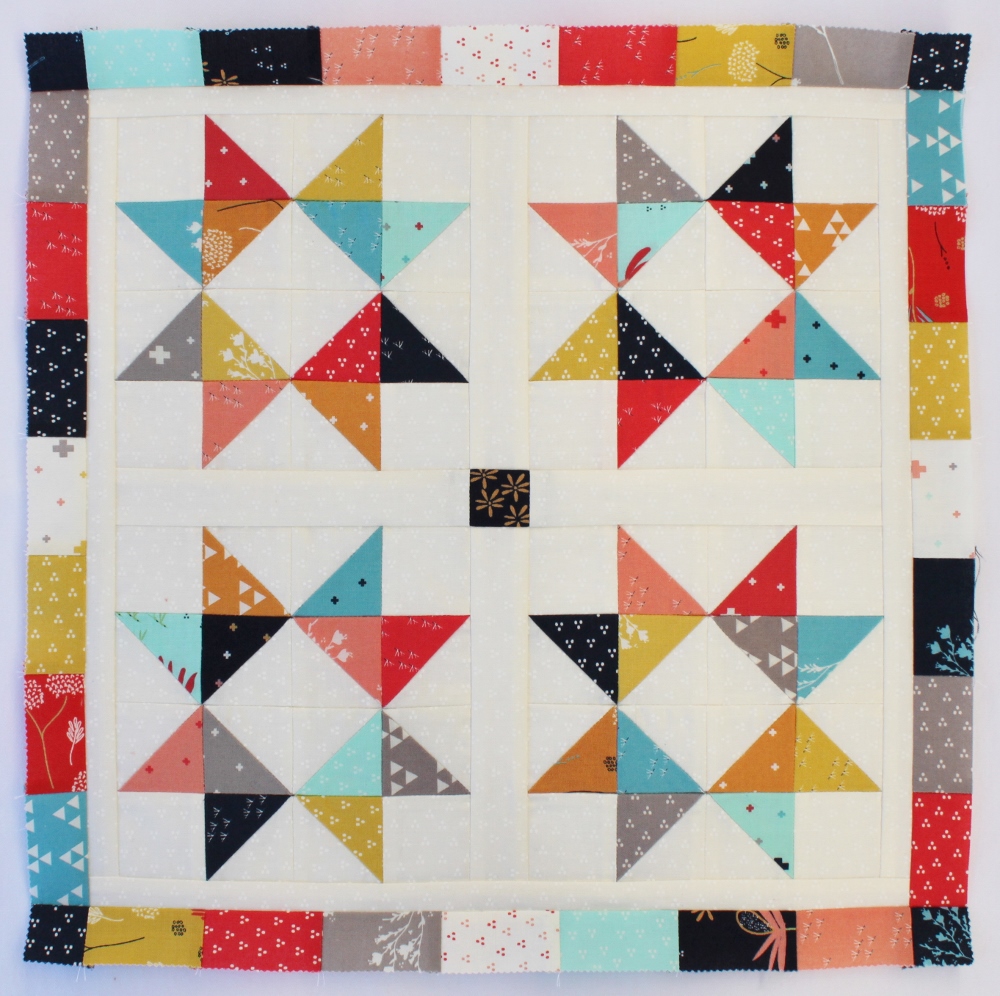
Assemble Quilt:
- Lay out 4 star blocks, 4 background fabric 1½" x 6½" sashing strips, and 1 background fabric 1½" x 1½" square as follows:

2. When I laid out my little quilt center, I decided to experiment with substituting a more colorful center square for the background fabric 1½" x 1½" square that I had originally planned to use. So I cut a 1½" x 1½" square out of a corner of my leftover quilt backing fabric and ended up with an arrangement that I preferred. If you choose, you can do the same with either a leftover mini charm square, or your extra binding or backing fabric.

3. Stitch star blocks, sashing strips and center square together in rows. In the star block rows, press the seam allowance towards the sashing strips. In the center sashing strip row, press the seam allowance away from the center square and towards the sashing strips.

4. Stitch above rows together to make a quilt center that measures 13½" x 13½". Next, stitch 1—1" x 13½" inner border strip to either side of quilt center, pressing seams towards border. Then stitch 1—1" x 14½" inner border strip to top and bottom of quilt, again pressing seams towards border.

Adding Pieced Border:
- First you'll need to gather the mini charm squares that you reserved for your pieced border. Cut each mini charm square in half to form a 1¼" x 2½" rectangle. Select 2—1¼" x 2½" rectangles to cut in half again to measure 1¼" x 1¼" and to use for the pieced border corners.

2. Lay out 2 pieced borders of 7—1¼" x 2½" rectangles each and 2 pieced borders of 7—1¼" x 2½" rectangles and 2—1¼" x 1¼" squares each.
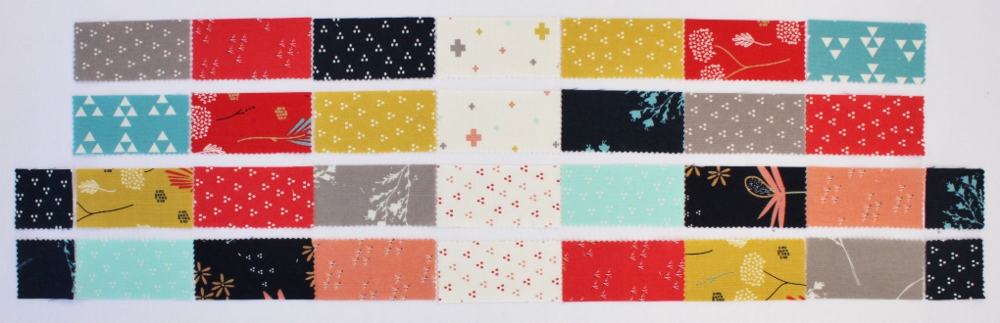
3. Stitch pieced border strips together, pressing seam allowances all in one direction.

4. Stitch one short pieced border to either side of quilt center, pressing seams towards the pieced borders. Stitch one long pieced border to top and bottom of quilt, pressing seams towards the pieced borders. And voilà!
Finish Quilt:
Layer the quilt top with batting and backing fabric. Baste, quilt as desired, and bind. I machine quilted my little quilt by stitching in the ditch along both the inside and outside of each star, along the sashing strips, and in between the inner and pieced borders.
![]()
This fun litte quilt finishes at 16" x 16", which just so happens to be a great size for a pillow! Check out my blog to see a pillow version of this project that I made for Christmas using Kate Spain's "North Woods" fabric. I'll also be posting a photo of the pillow alternative on Facebook and Instagram @jendalyquilts.
Happy Quilting!
Jen Daly
{jendalyquilts.blogspot.com}
![]()
Posted in: