Welcome to Moda Fabrics!
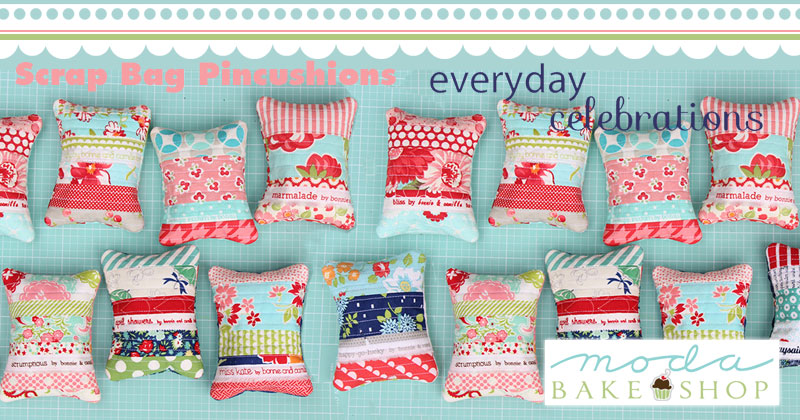
Scrap Bag Pincushions
Scrap Bag Pincushions
Published:
Oct 21 2016 - 23:00

Hi Moda Bake Shop fans! I'm LeAnne from Everyday Celebrations (come see me on Instagram or my blog) and I'm excited to share one of my favorite quick and easy projects with you today!
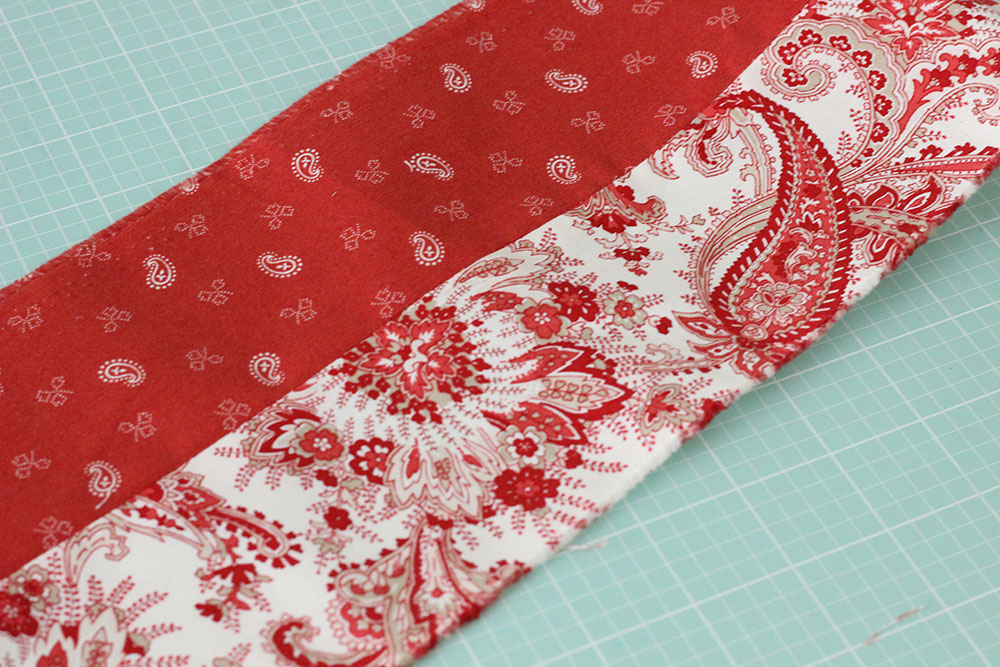
A couple of years ago, I started making these cute and scrappy pincushions using the darling printed selvedges that Moda creates. There are two ways to get a great stash of printed selvedges: cut selvedges off yardage as you cut for projects or purchase a Scrap Bag! I have a Ziploc bag full of printed selvedges that I constantly add to as I am cutting. (I cut mine about 1.5" to 2" wide by at least 5" lengths.) I've also purchased Scrap Bags which are available both online and from your favorite quilt shop! Scrap Bags are sold by line and measure between 2" to 3" wide and are approximately 30" long. Scrap Bags always have selvedges; some are the fabric selvedge and some are the the selvedge with the line, designer, and other cute stuff.
This project finishes at 3 1/2" x 4 1/2".
![]()
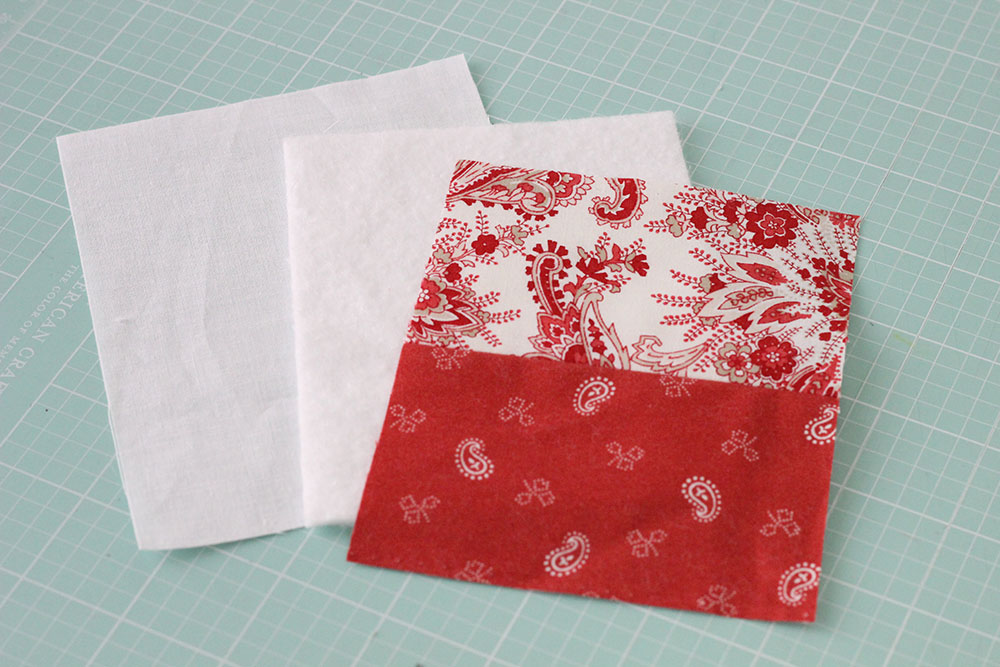
scrap bag or scraps of selvedges
{2} scraps of cotton batting 4" x 5"
{2} scraps of cotton for backing 5" x 6" (won't be seen)
{1} 5" x 6" rectangle of fabric for back of pincushion (will be seen)
approximately 1/2 cup fill for pincushion, I prefer to use crushed walnut shells
funnel and measuring cup
basting spray, I prefer 505
You will essentially be making two mini-mini quilt sandwiches, one for the front and one for the back. I like making two full quilt sandwiches for the pincushions because they are super durable and I think they look great!
![]()
Front Quilt Sandwich
Tip: I love making these pincushions as gifts and as a fun, quick project. To help this project go even faster, I have a Ziploc bag full of batting and backings precut to the above sizes. That way, I can just grab what I need and get sewing!
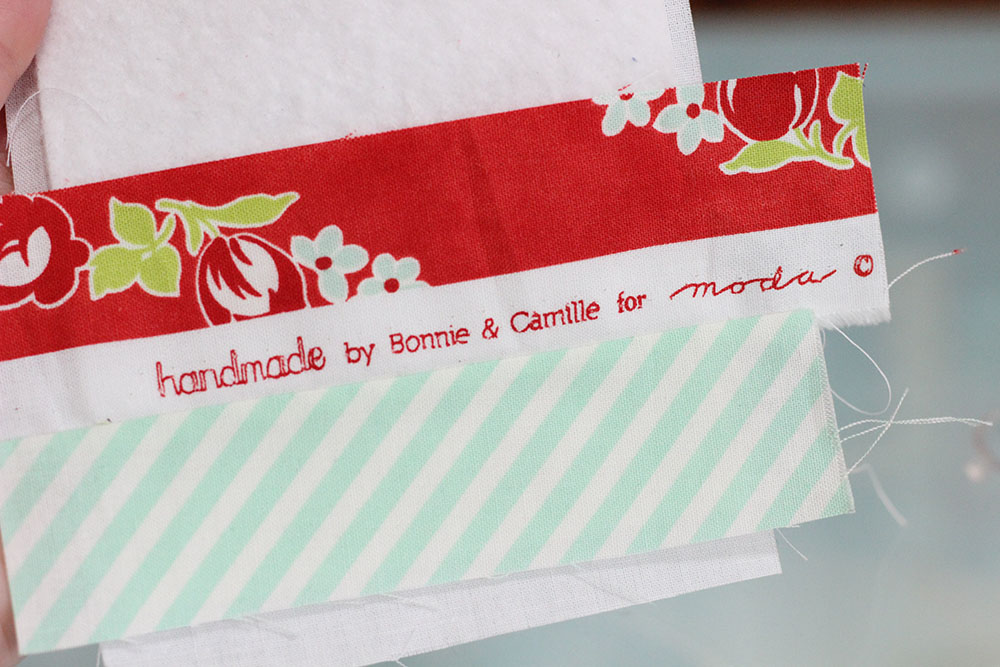
1.Layer a backing piece and batting piece. Place selvedge scraps on top of the batting as desired, I usually use about four per pincushion. Remember to cut your scraps wide enough to account for seam allowances. You can always trim any excess at the end. Remove pieces and remember the placement.
2. Spray baste the backing piece and batting together. I don't worry about taping my backing down. I just put a scrap piece of paper on my cutting table, and lightly spray the backing (two quick sprays is plenty) then top with the batting. Make sure everything is nice and smooth.

3. Spray the top of the batting lightly with basting spray and place the a scrap, right side up, on the batting. (I usually like putting a selvedge with words in this position so I always start with this piece.) Make sure the scrap is straight and smooth. You can also begin with the bottom piece and work your way up if that makes more sense to you.

4. Place the next scrap, right side down, on top of the first scrap. (In this case, it is the scrap that will go below my first scrap.)

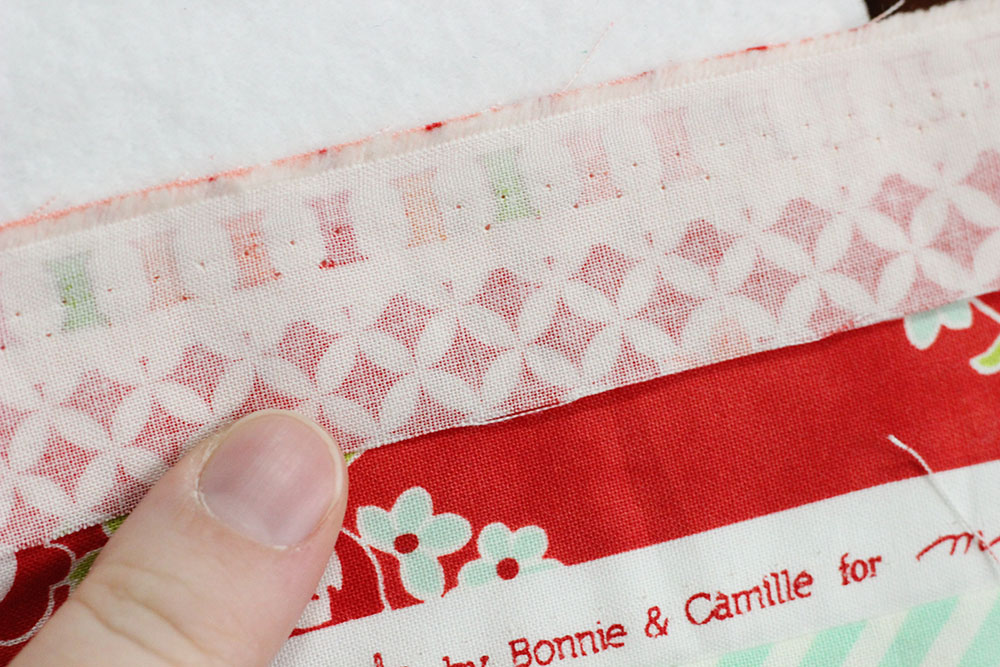
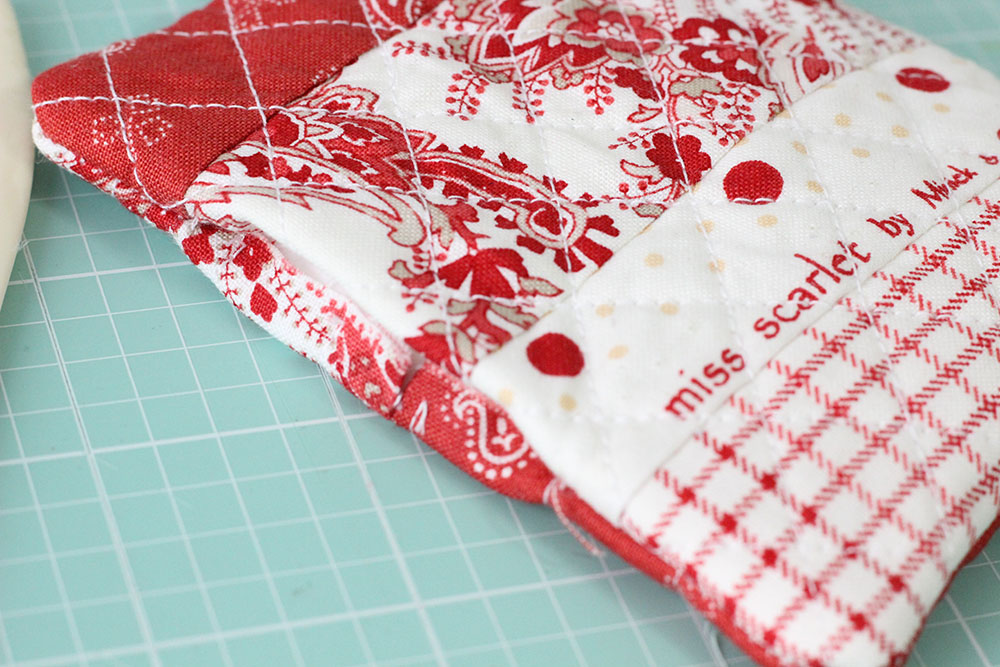
5. Sew the pieces together, sewing through all the layers. (the two scraps, batting, and backing) Tip: The type of scrap will determine the seam allowance. For scraps with text, you will use a very very narrow seam allowance. On pieces where that isn't an issue you can use a regular 1/4". In my picture below, you can see that my seam allowance runs just below text. It's probably about 1/8".

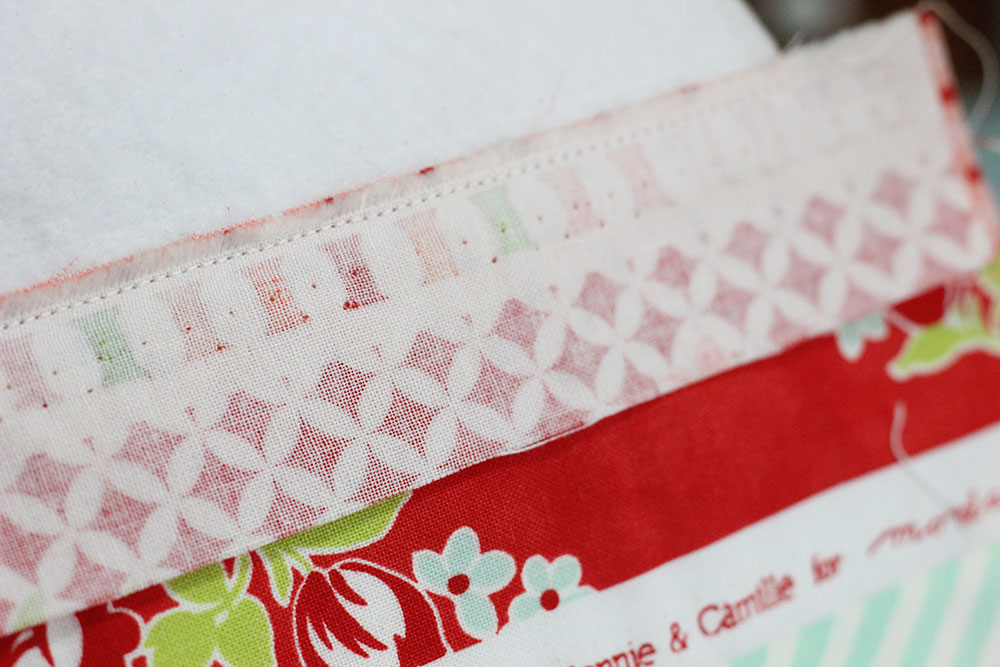
6. Finger press the pieces open. You can also press using an iron, I've done it both ways. You just want everything to be nice and smooth.
7. Add your next scrap, again, right sides together, lining everything up and sew through all the layers. Finger press or press the pieces open.


8. Continue for remaining scraps. For my next scrap, I used a scrap with a printed selvedge. See again the process for lining up the edges and sewing close to the edge.
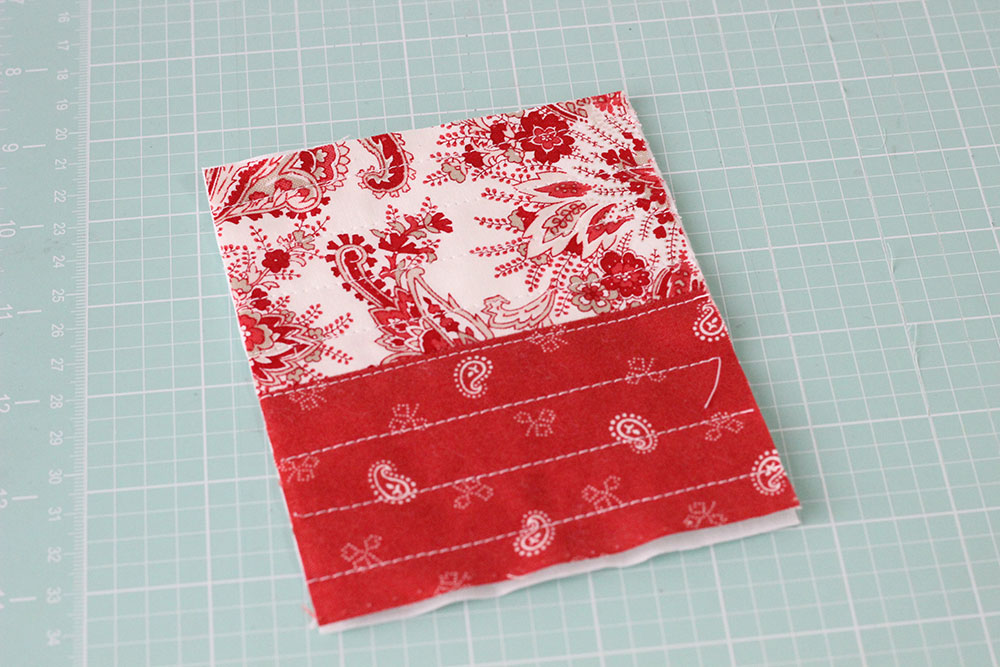
9. Once all your pieces are attached, trim the quilt sandwich down to the size of the batting, 4" x 5". Try not to cut off any batting.


10. If you desire, you may quilt your little quilt sandwich. I always like to, so at this point I mark any quilting lines using a Hera marker. Tip: Since these are so little and everything is already sewn through all the layers, I just use my 1/4" foot to quilt. I don't worry about switching out to my walking foot.


11. Little itty bitty quilt tops!

Back Quilt Sandwich
- You can either use a scrap for your backing that will be seen or piece together two scrap bag strips to make a backing piece.
Tip: If I know I'm making a bunch of pincushions, I'll actually just quilt a whole 5.5" x WOF or half a WOF strip. Then I subcut the strip into 5" x 4" pieces for backing. I actually have a pre-quilted strip in my Ziploc bag with my batting and batting pieces and I just cut off how much I need for a pincushion. Again, makes the project super quick!
2. Create a quilt sandwich just like you did for the front using a scrap of fabric, batting, and backing.

3. Quilt as desired and trim to 4" x 5".
Assembly
- Place the front sandwich and back sandwich right sides together. Clip pieces together.

2. Sew beginning about 1" from the bottom on one of the long sides, backstitch and using 1/4" seam allowance. Sew around the entire pincushion, leaving a decent opening for turning and backstitch. Tip: Instead of pivoting at the corners, I prefer to sew off the edge of the pincushion then begin sewing again coming on to the pincusion. Make sense? It makes for strong corners and helps just incase your pieces aren't perfectly lined up.

3. Turn pincushion right sides out and poke out corners. Corners will be rounded.
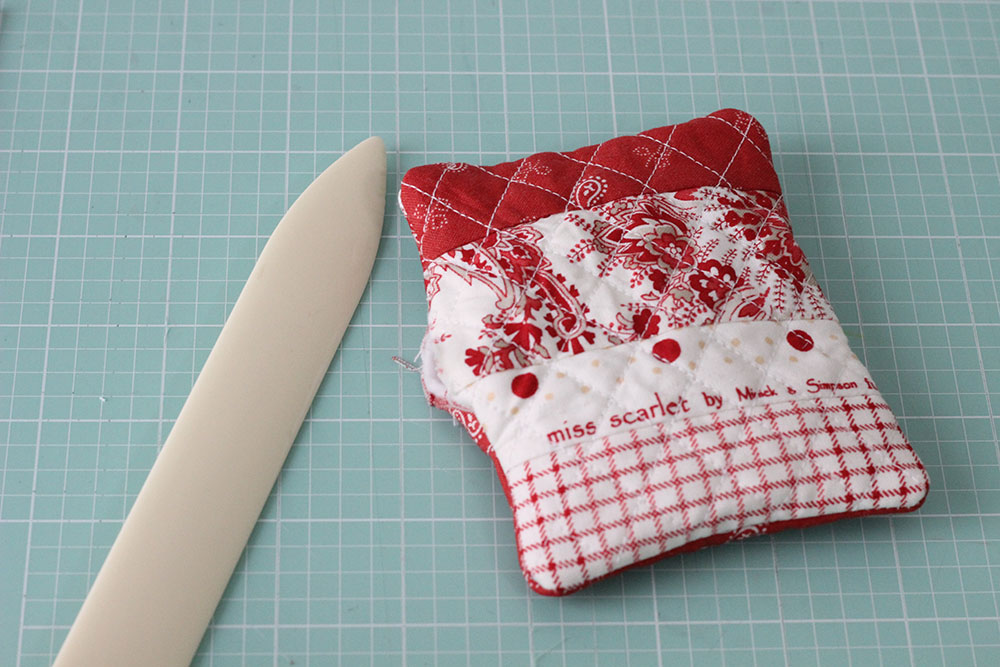
4. Turn in opening about 1/4" and press. This will help for when you sew it shut.
5. Fill as desired. I love to use crushed walnut shells. You can purchase this at a pet store or online at Amazon. Pet stores typically sell huge huge bags, so split with a friend or just make lots of pincushions. (In pet stores, it's with the lizard habitat supplies.) This 5 qt bag I just got on Amazon and it will last me a long time. If you just want to try some, try your local quilt shop. Mine sells it by the cup.

6. A few tips on using crushed walnut shells. For this size of pincushion I use about a 1/2 cup plus a little more. I use a funnel to fill the pincushion with 1/2 cup of crushed walnut shells. Then I tap the filling down into the puncushion and add a little bit at a time until it is truly full. Then I clip the opening. You want to make sure it's filled well because crushed walnut shells do settle over time. The first pincushions I made are definitely a little "low" on filling as I've realized I need to add more filling to account for settling.
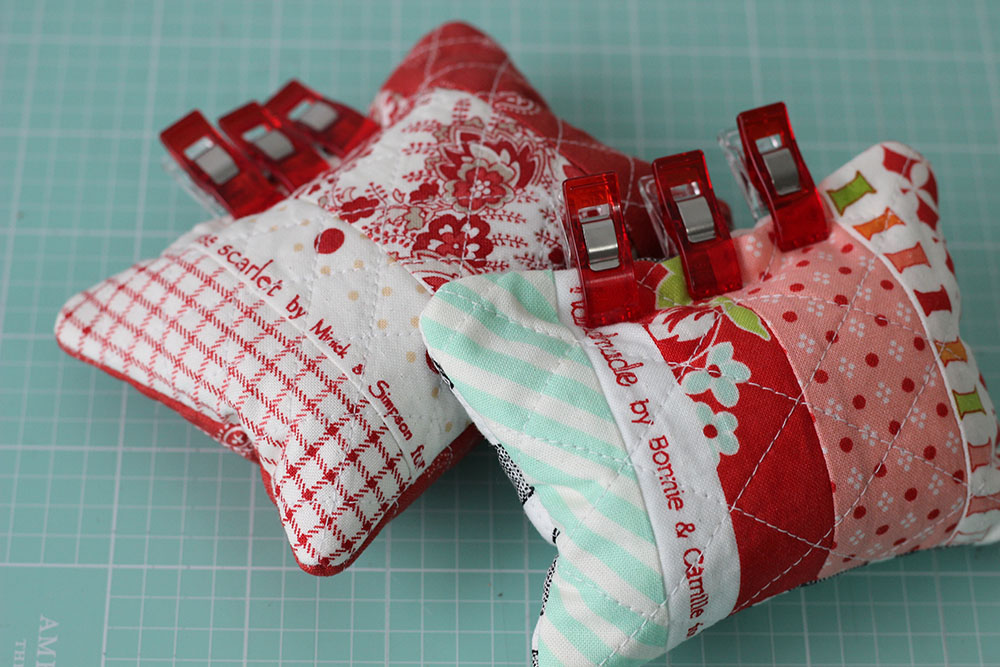
7. Sew the pincushion closed using a ladder stitch.
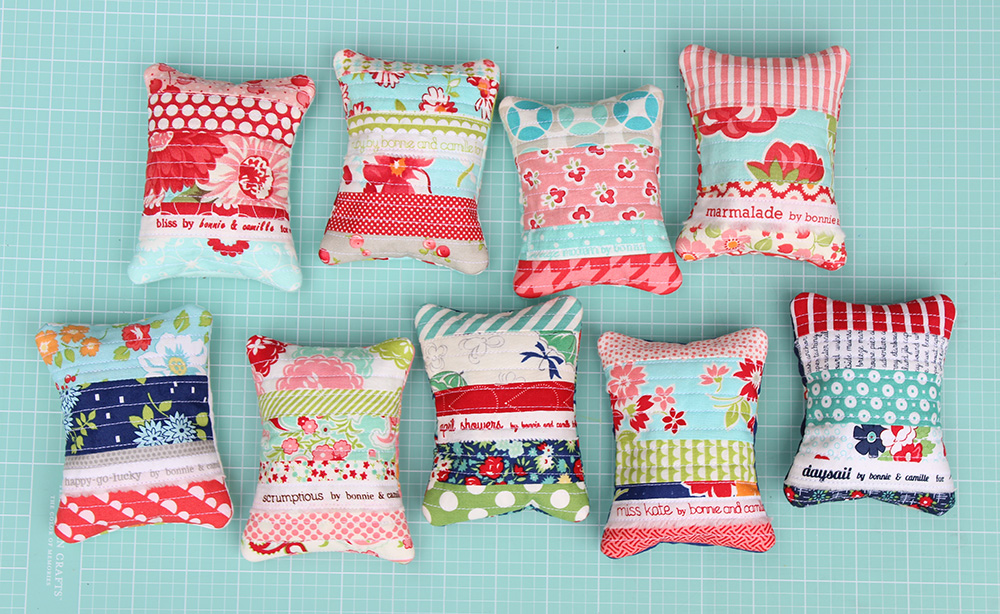
All done!
![]()
All done! This project finishes at 3 1/2" x 4 1/2".
Here's the first set I made a couple years ago! Happy Sewing!
LeAnne Ballard
{everydaycelebrate.blogspot.com}
![]()
Save
Save
Save
Save
Save