Welcome to Moda Fabrics!
Bows and Arrows Quilt
Bows and Arrows Quilt
Published:
Oct 17 2016 - 23:00

Hands up if you love the Aztec trend?!
Me!Me!Me! I love the colours, I love the geometric patterns, I love it all! This quilt fits right in with the trend. To me it looks like arrow heads but depending on the colours you use, it could easily be a girly bow blanket. You can also switch the placement of the accent boarder to play up the other look. Maybe even bow-ties for the dapper man in your life! But if you're like me and love all things Aztec, Sherri & Chelsi's Desert Bloom fabric is the way to go. Perfect for snuggling around the campfire, this one finishes up at 48"x64". So get on your cutest moccasin slippers and start sewing!
![]()
1 Charm pack {Desert Bloom by Sherri and Chelsi}
1 3/4 yards background fabric {Desert Bloom Spring Ivory}
3/4 yards accent fabric {Desert Bloom Mesa Sunglow}
3 yards backing fabric {Desert Bloom Delta Stone}
1/2 yards binding fabric {Desert Bloom Spring Midnight}
Other useful tools: cutting mat and rotary cutter; disappearing fabric marker
![]()
(Note: Pattern assumes a 1/4" seam allowance)
Step 1
From your fabric cut the following:
Background Fabric: (36) 5” squares; and (18) 8 ½” squares
Accent Fabric: (3) 8 ½” x width of fabric strips (salvages removed)
Binding Fabric: (6) 2 ½” x width of fabric strips (salvages removed)
Backing Fabric: (2) 1 ½ yard pieces
Step 2
Pair together a 5” background square with one of your charm pack squares. Place the squares right side together. On the back of one of the squares draw a line from one corner to the opposite corner.

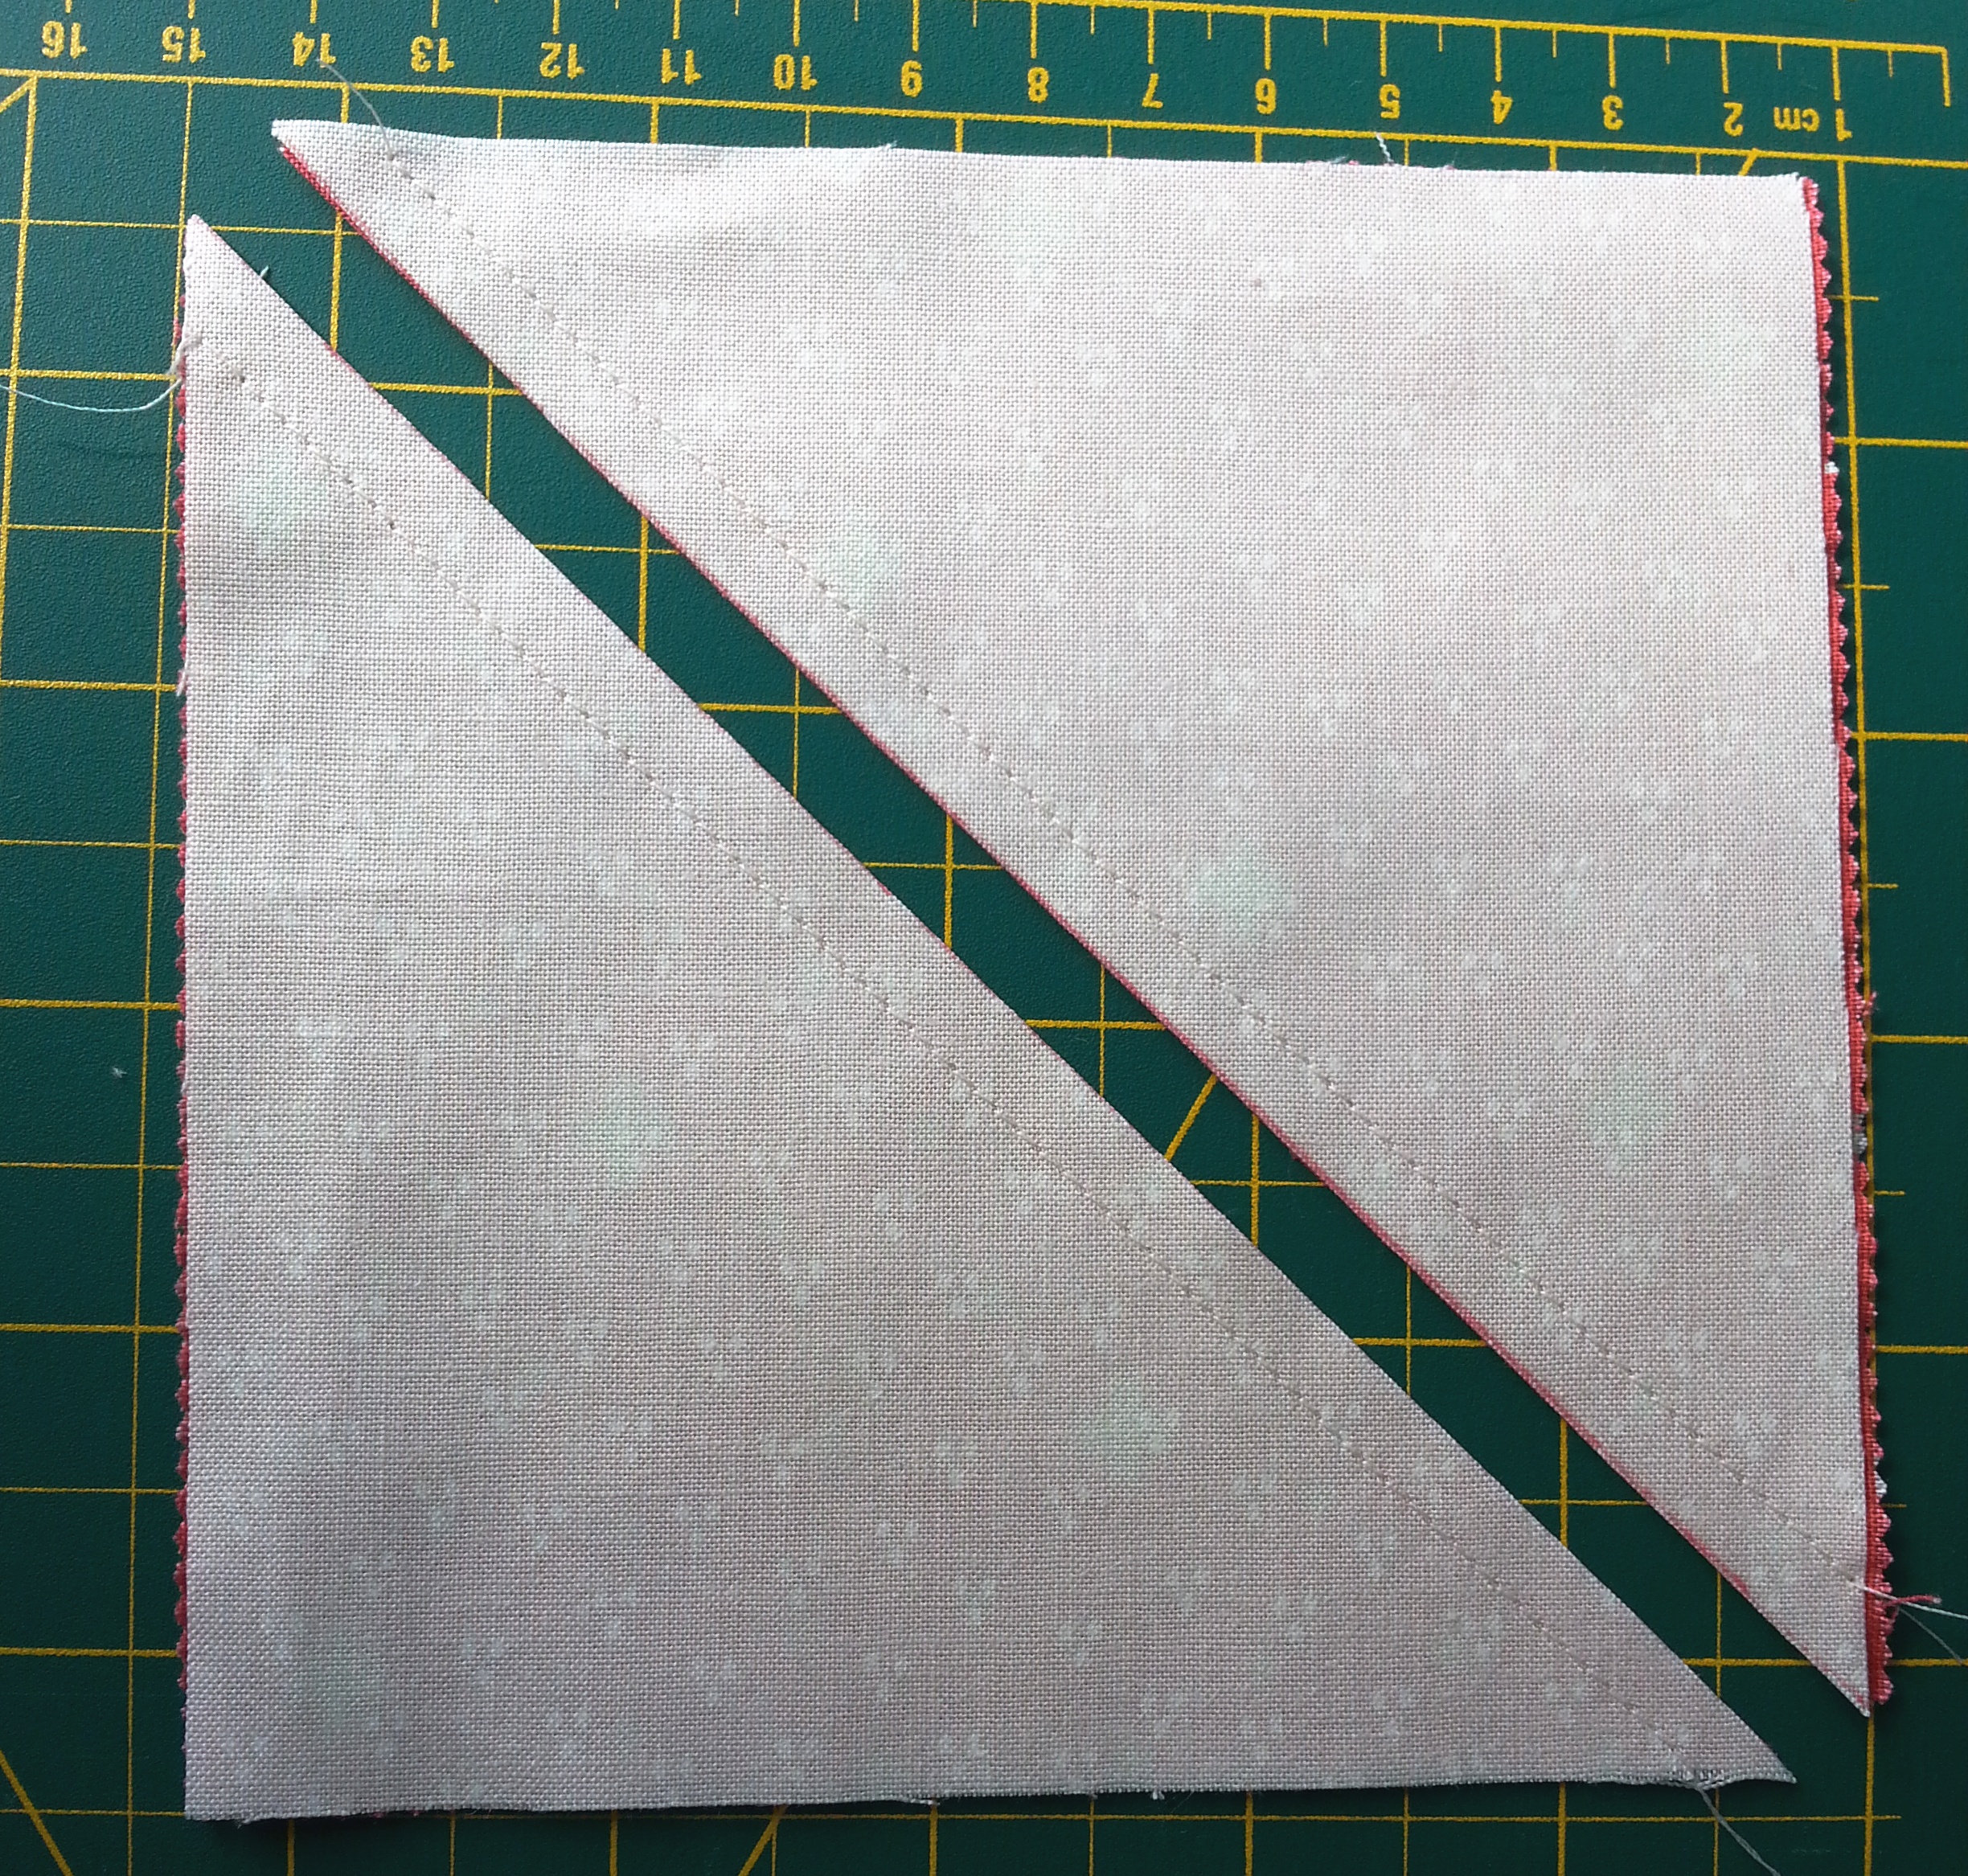
Step 3
Sew a line ¼ inch away from each side of the drawn line. You will sew a total of two seams.

Step 4
Iron over the entire square to set the seams. Now cut through the drawn line you marked in Step 2.
Step 5
With an iron, open the block, pressing the seam towards the darker fabric to give you a crisp 4 ½” square. If you’re like me, you may need to trim the blocks slightly to have a perfect 4 ½” square but make sure you keep the diagonal seam in the middle at a 45° angle. (Pictured below)

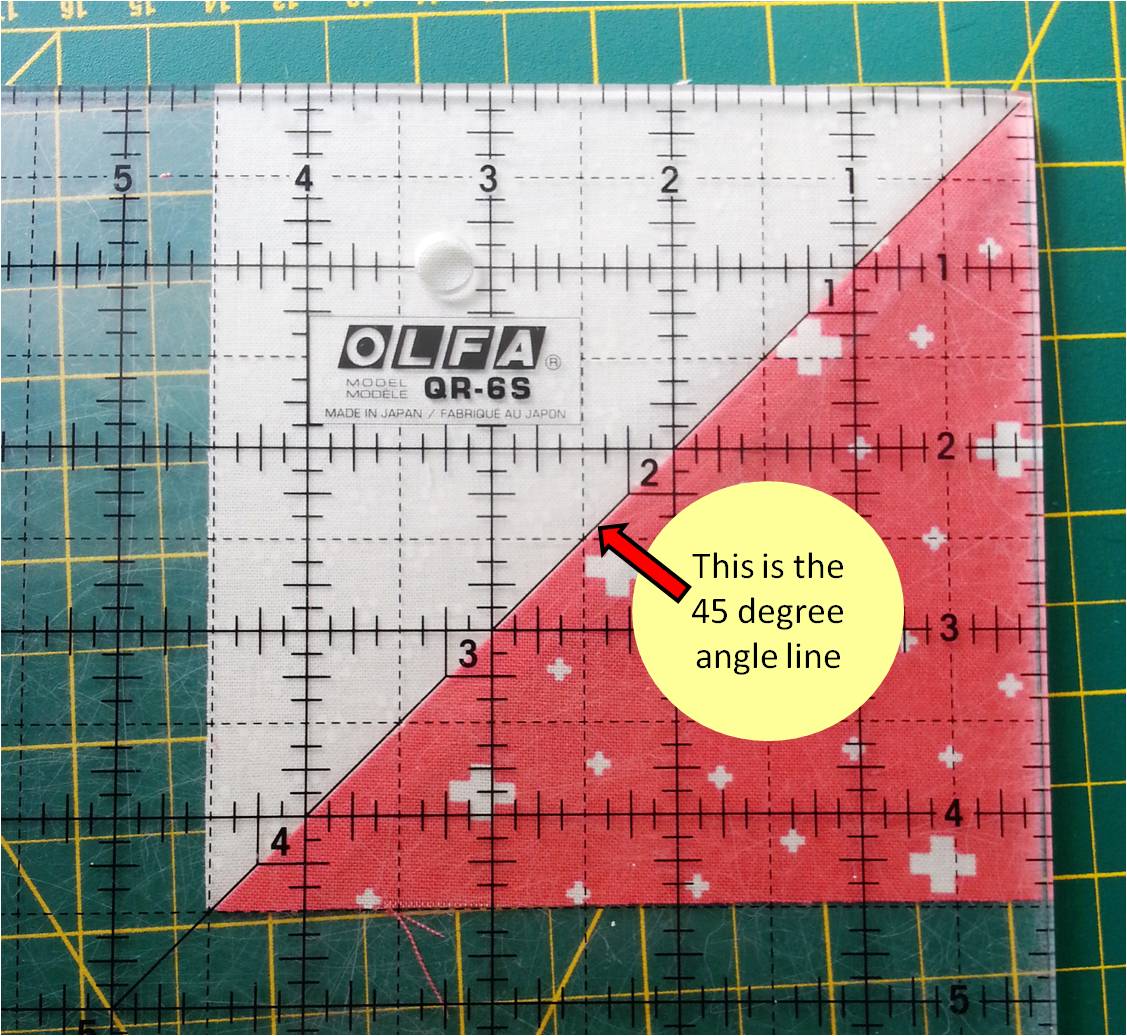
Repeat Steps 2-5 with remaining 5” square pairs. Upon completion you will have 72 half square triangles
Step 6
Sew two half square triangles together, along the background edge with the charm edge on the bottom as pictured below.
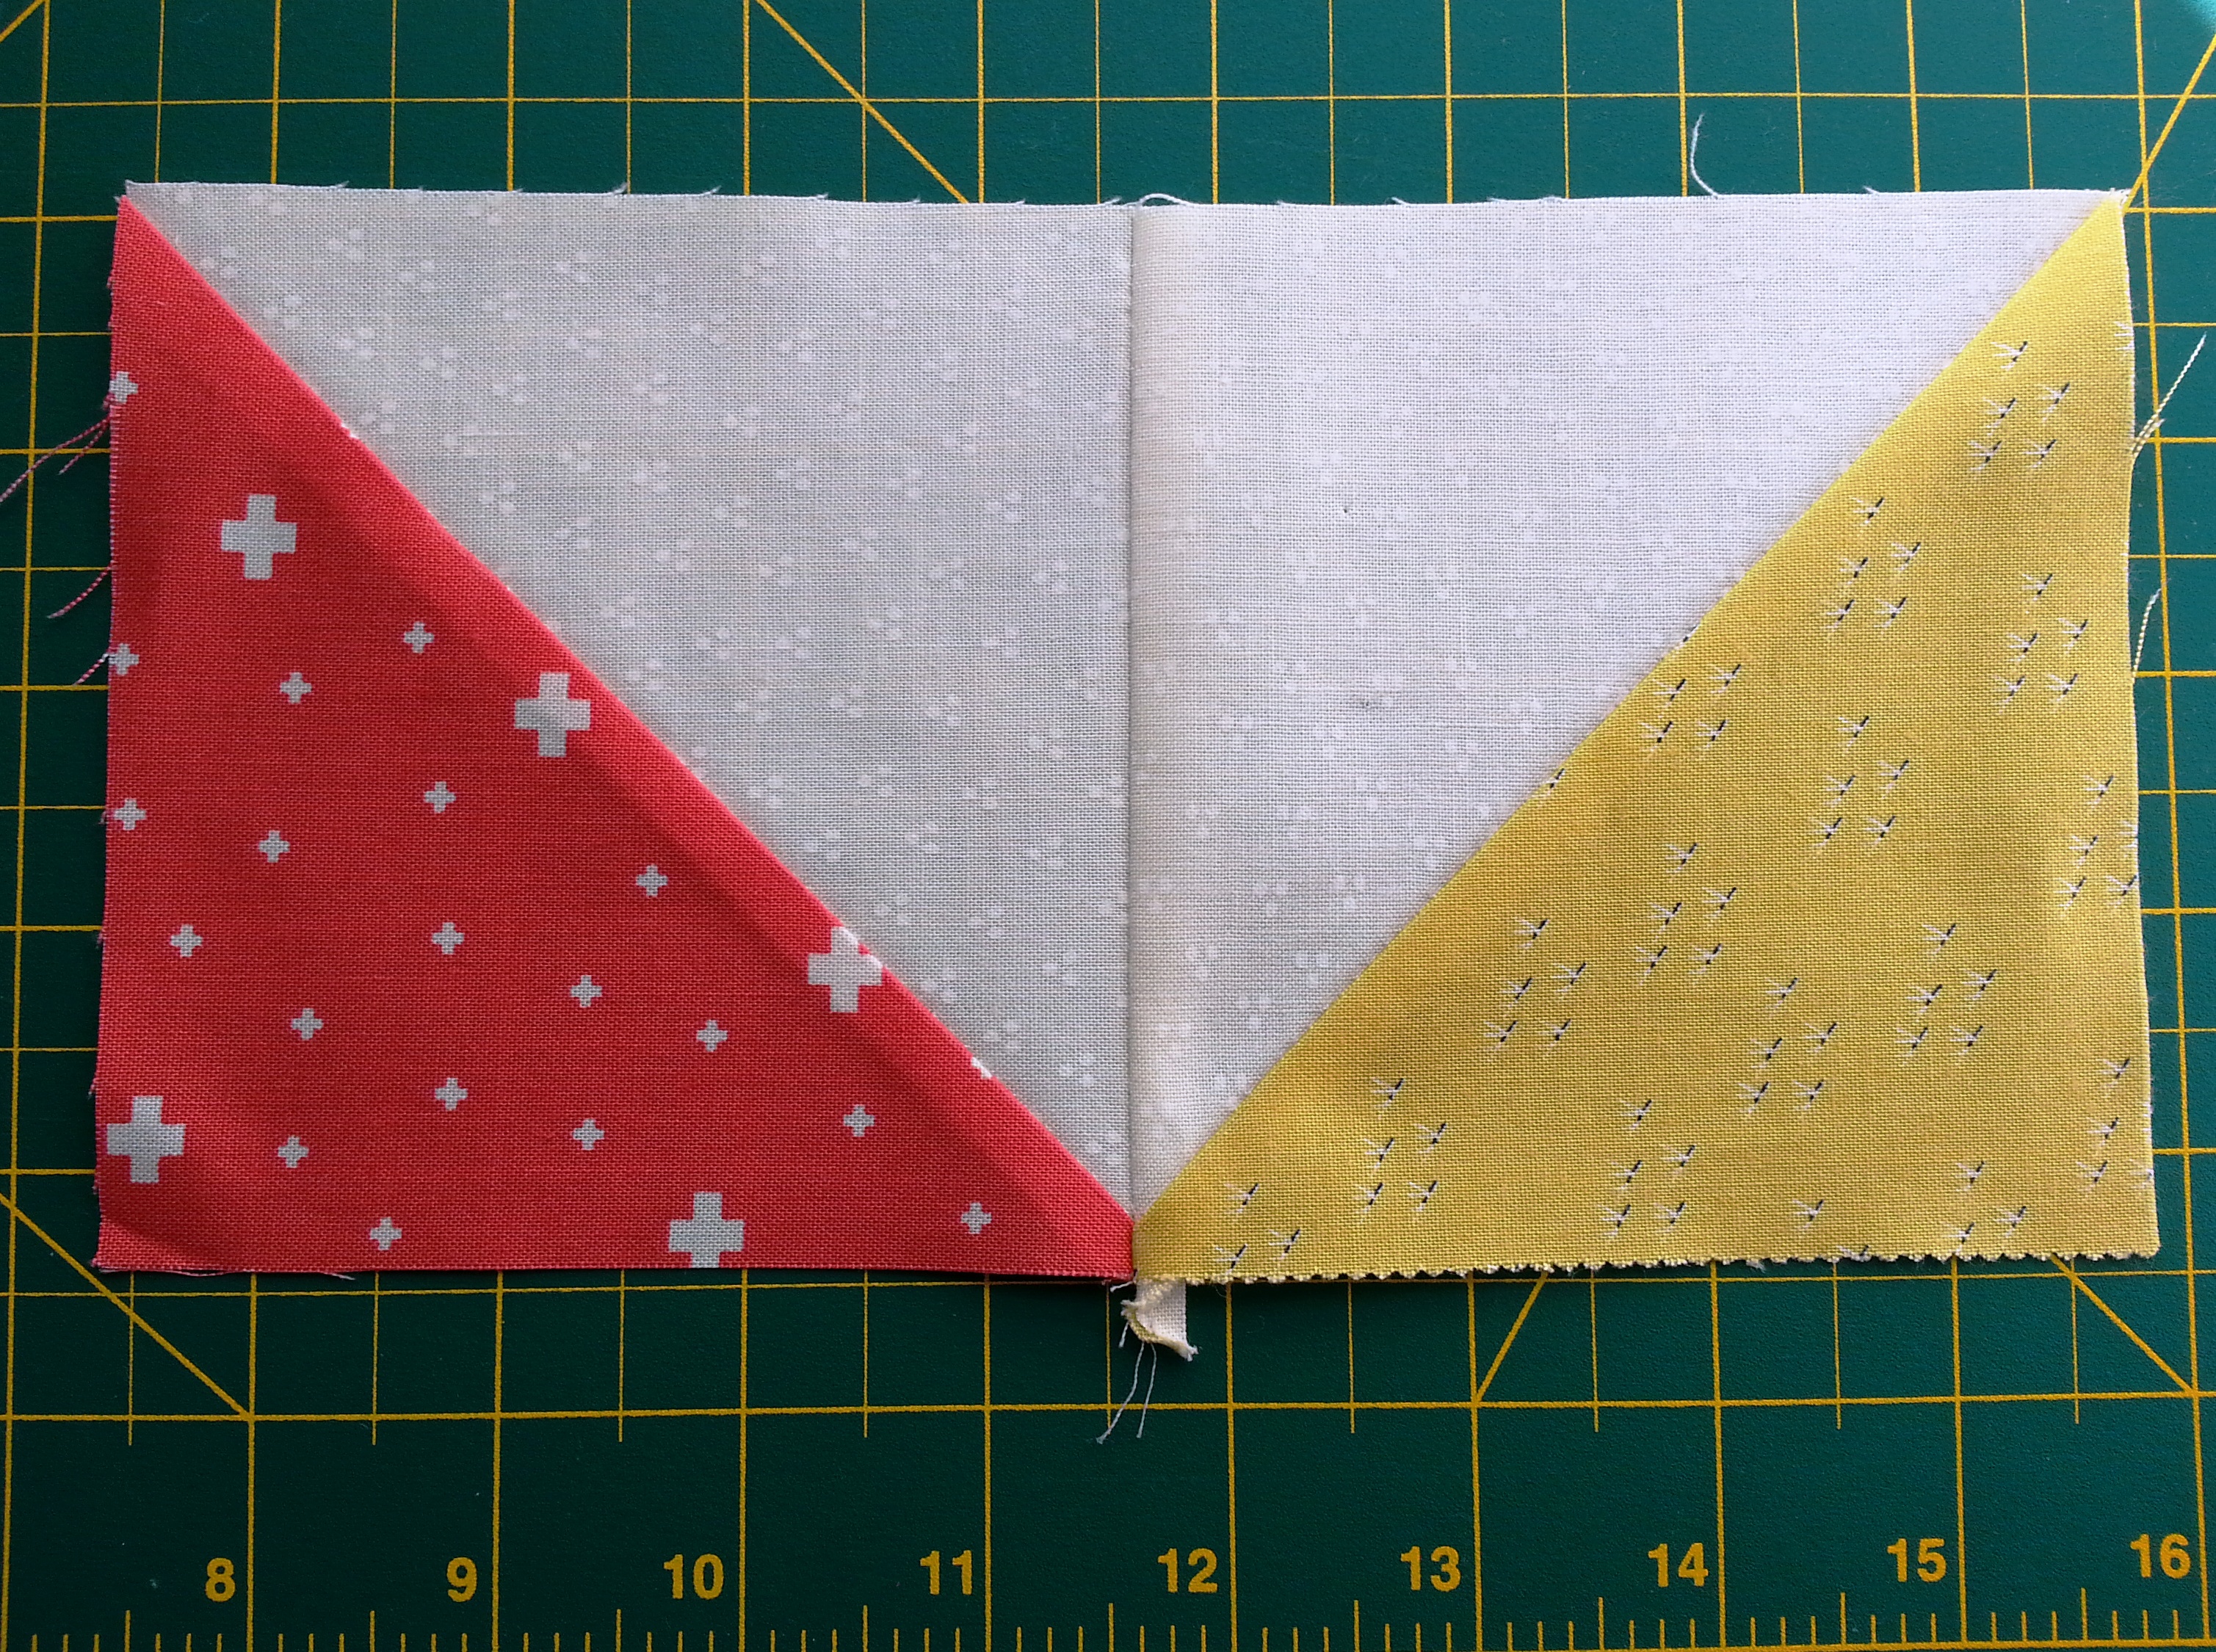
Step 7
Sew another two half square triangles together, along the charm edge with the background edge on the bottom as pictured below.

Step 8
Sew the pieces from steps 6 and 7, charm edges together, arranged as pictured below. With an iron, open the block, pressing the seams to give you a crisp 8 ½” quilt block.
Repeat this step using all of the half square triangles to create 18 quilt blocks.

Step 9
Using the quilt blocks from step 8 along with your background 8 ½” squares, sew together rows of six squares as follows:
(Hint: It may be helpful to label the rows numerically and directionally as you make them)

Step 10
Press all of your seams to one side (towards the darker fabric if possible). Sew rows together in numerical order. Don’t forget to line up/nestle your seams to get nice crisp points. Press all your new seams to one side. Set aside your quilt top.
Step 11
Using the 8 ½” strips of accent fabric, sew two strips right sides together, on the short end. Repeat this process, sewing the third strip (right sides together) to the new longer strip. This will give you one long 8 ½” strip of fabric
Step 12
Using the long strip from step 11, cut two 48 ½” pieces. (There will be some left over fabric.) Sew one strip above row 1 of the quilt top and one strip below row 6.
Step 13
Baste your backing/batting /quilt top together as desired. Quilt and bind as desired.
For help with binding, check out our free guide on Craftsy.
![]()
This quilt finishes at 48" x 64".
We’d love to see what you have made! Contact us by email at [email protected]
Follow us on Instagram @softdayquilts. Be sure to tag us in your photos! #bowsandarrowsquilt
Pattern can be used for personal use only. Please do not sell products using this pattern.
Britney Walsh
{SoftDay Quilts}
![]()
Posted in: