Welcome to Moda Fabrics!
Double-Sided Diamond Quilt
Double-Sided Diamond Quilt
Published:
Jun 1 2016 - 23:00
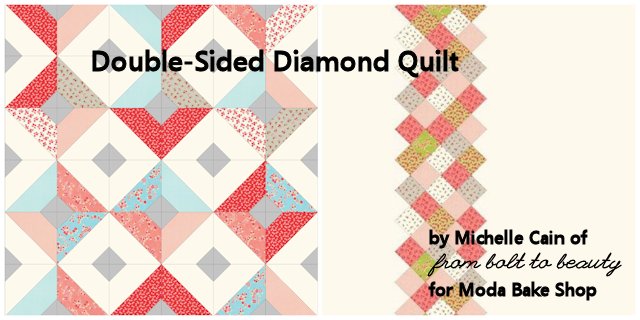

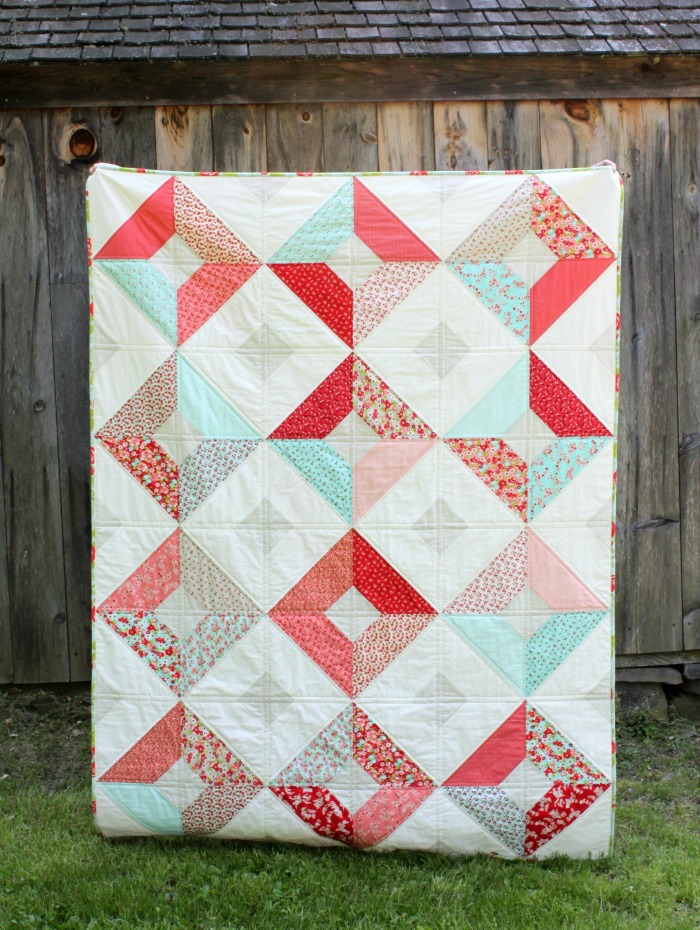
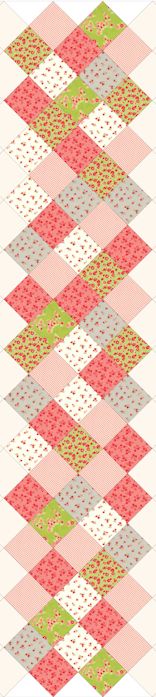
Hello, Moda Bake Shop readers! It’s Michelle, of From Bolt to Beauty, back with another precut project. This throw-size quilt uses a single layer cake to pack twice the punch. One side features gorgeous oversized diamonds, and the other showcases a cascade of smaller diamonds. It’s two designs in one!
![]()
1 layer cake for large diamonds (I used Little Ruby by Bonnie and Camille)
1⅔ yards background fabric
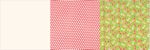
1 yard fabric for small diamonds
2¾ yards backing fabric
½ yard binding fabric
60” x 78” piece of batting (this provides approximately 3” of overhang on each side)
Thread to match
9½” square ruler
Finished size: approximately 54” x 72”
All seams are ¼”.
Cutting instructions presume 42” of usable fabric after selvages are removed.
WOF = width of fabric
HST = half-square triangle

![]()
Cutting
Please note: You will have a few extra cut pieces after sewing the quilt top together.
From the layer cake, select (24) 10” squares for the quilt top; set aside. The remaining (18) 10” squares will be used in the quilt back. Cut each of those 18 squares into:
• (4) 5” squares, for a total of (72) 5” squares
From the background fabric, cut:
• (6) 10” x WOF strips; subcut each strip into (4) 10” squares, for a total of (24) 10” squares
From the small diamond fabric, cut:
• (8) 3½” x WOF strips; subcut each strip into (12) 3½” squares, for a total of (96) 3½” squares
From the backing fabric, cut:
• (4) 5” x WOF strips; subcut each strip into (8) 5” squares, for a total of (32) 5” squares. Set the remaining backing fabric aside.
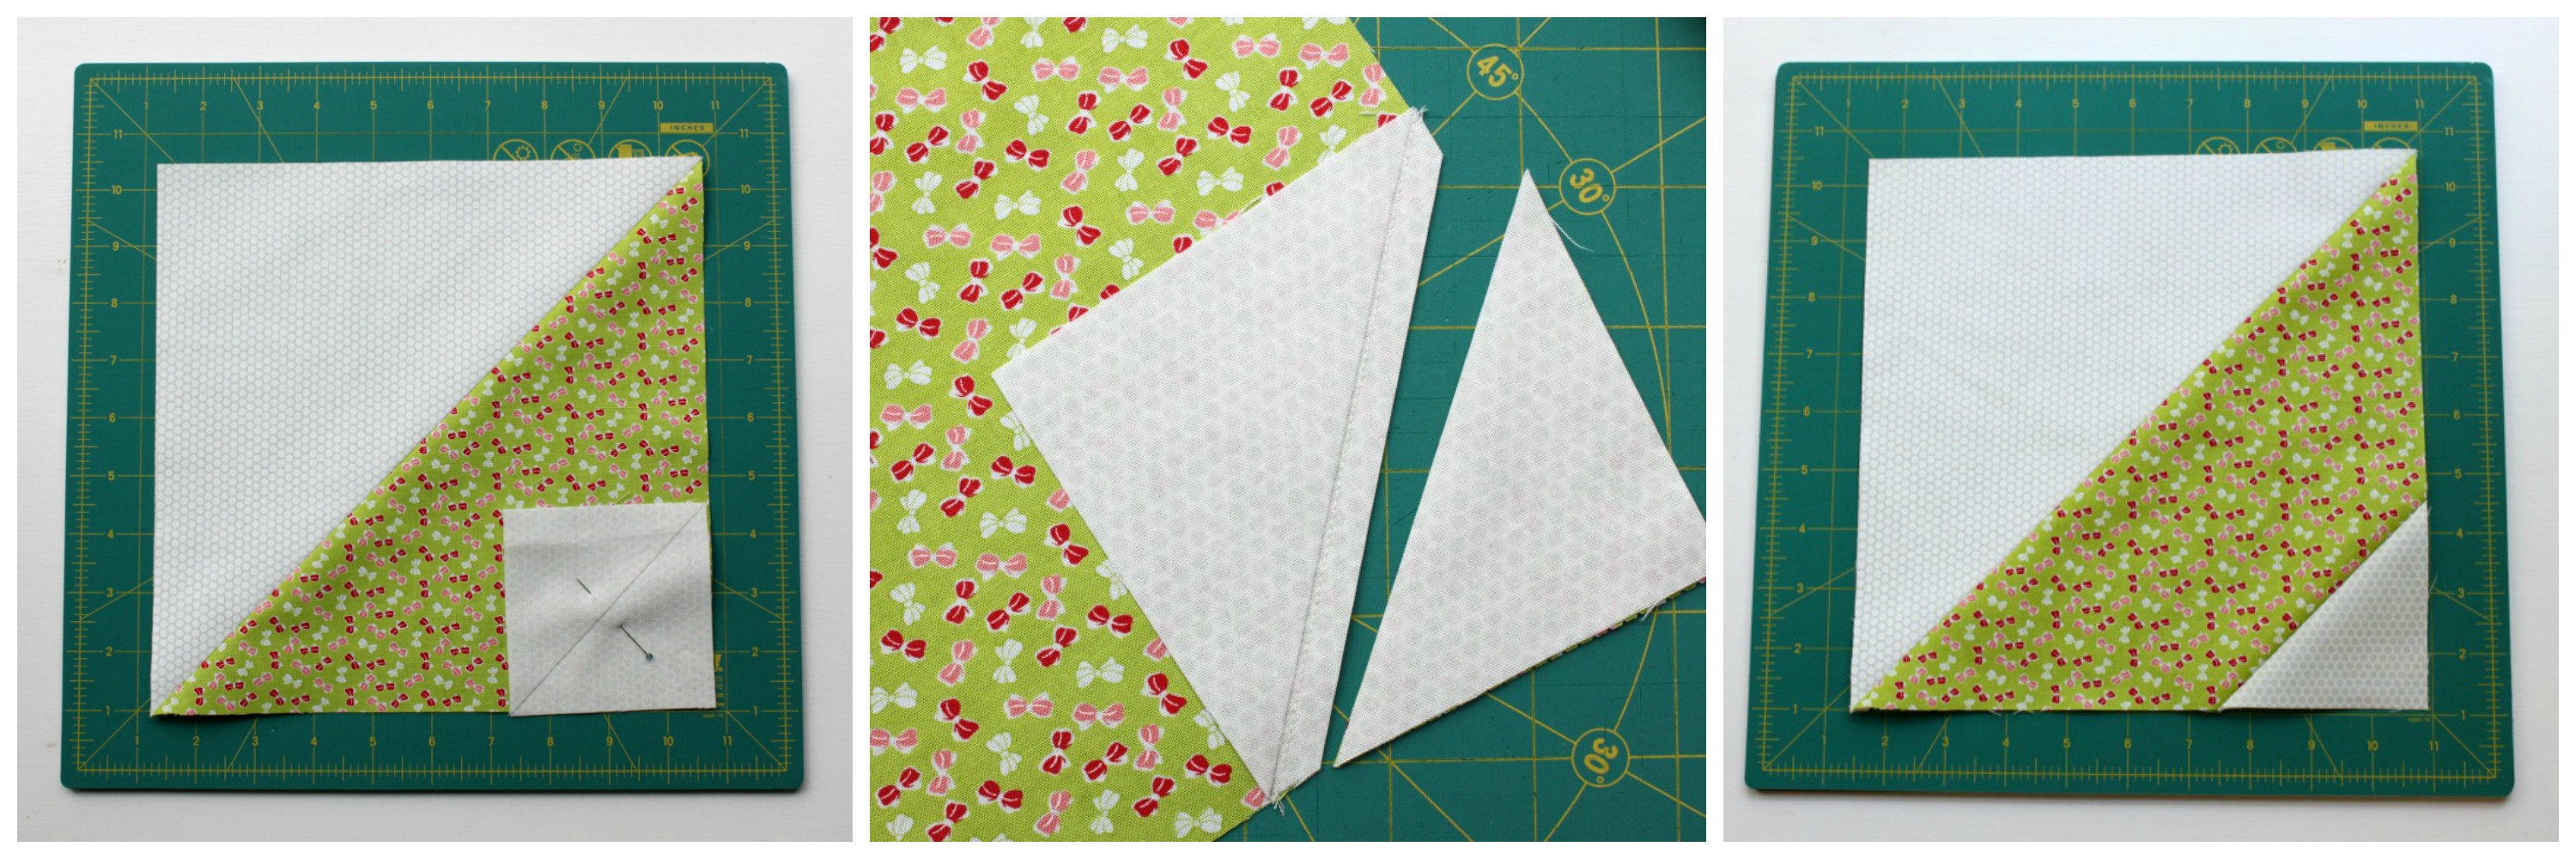
Making the Half-Square Triangles
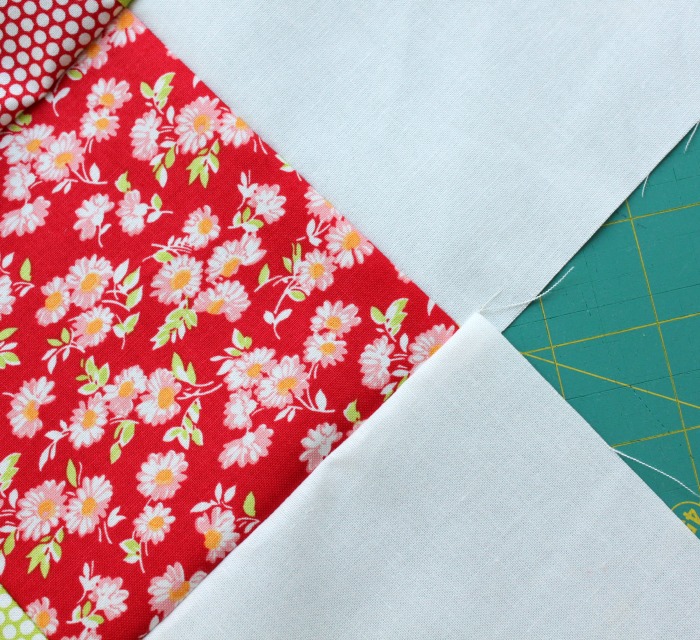
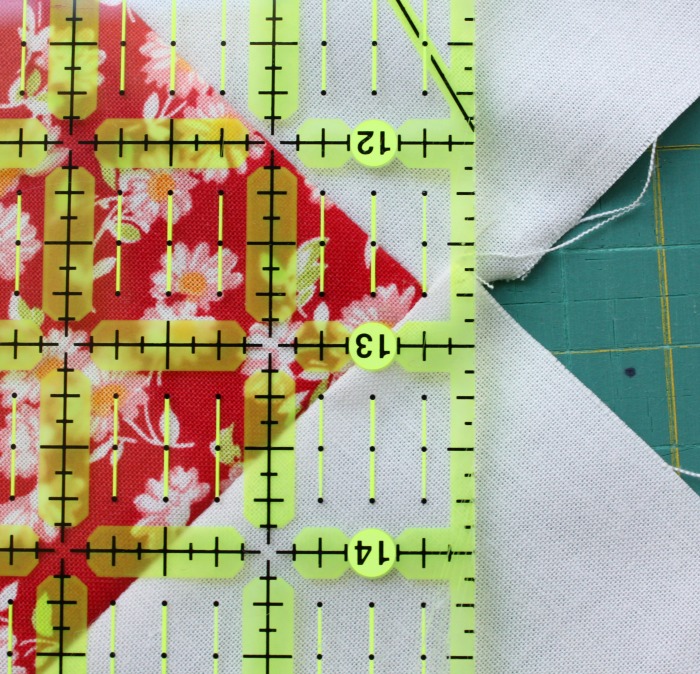
Draw diagonal lines on the wrong side of the (24) 10” squares in the background fabric. Match each of them to one of the (24) 10” squares from the layer cake, placing right sides together. Pin in place. Sew a scant ¼” on either side of the line. Cut the sewn pieces along the line. Press the seams open, and trim each to 9½” square. You will have a total of (48) 9½” HSTs.

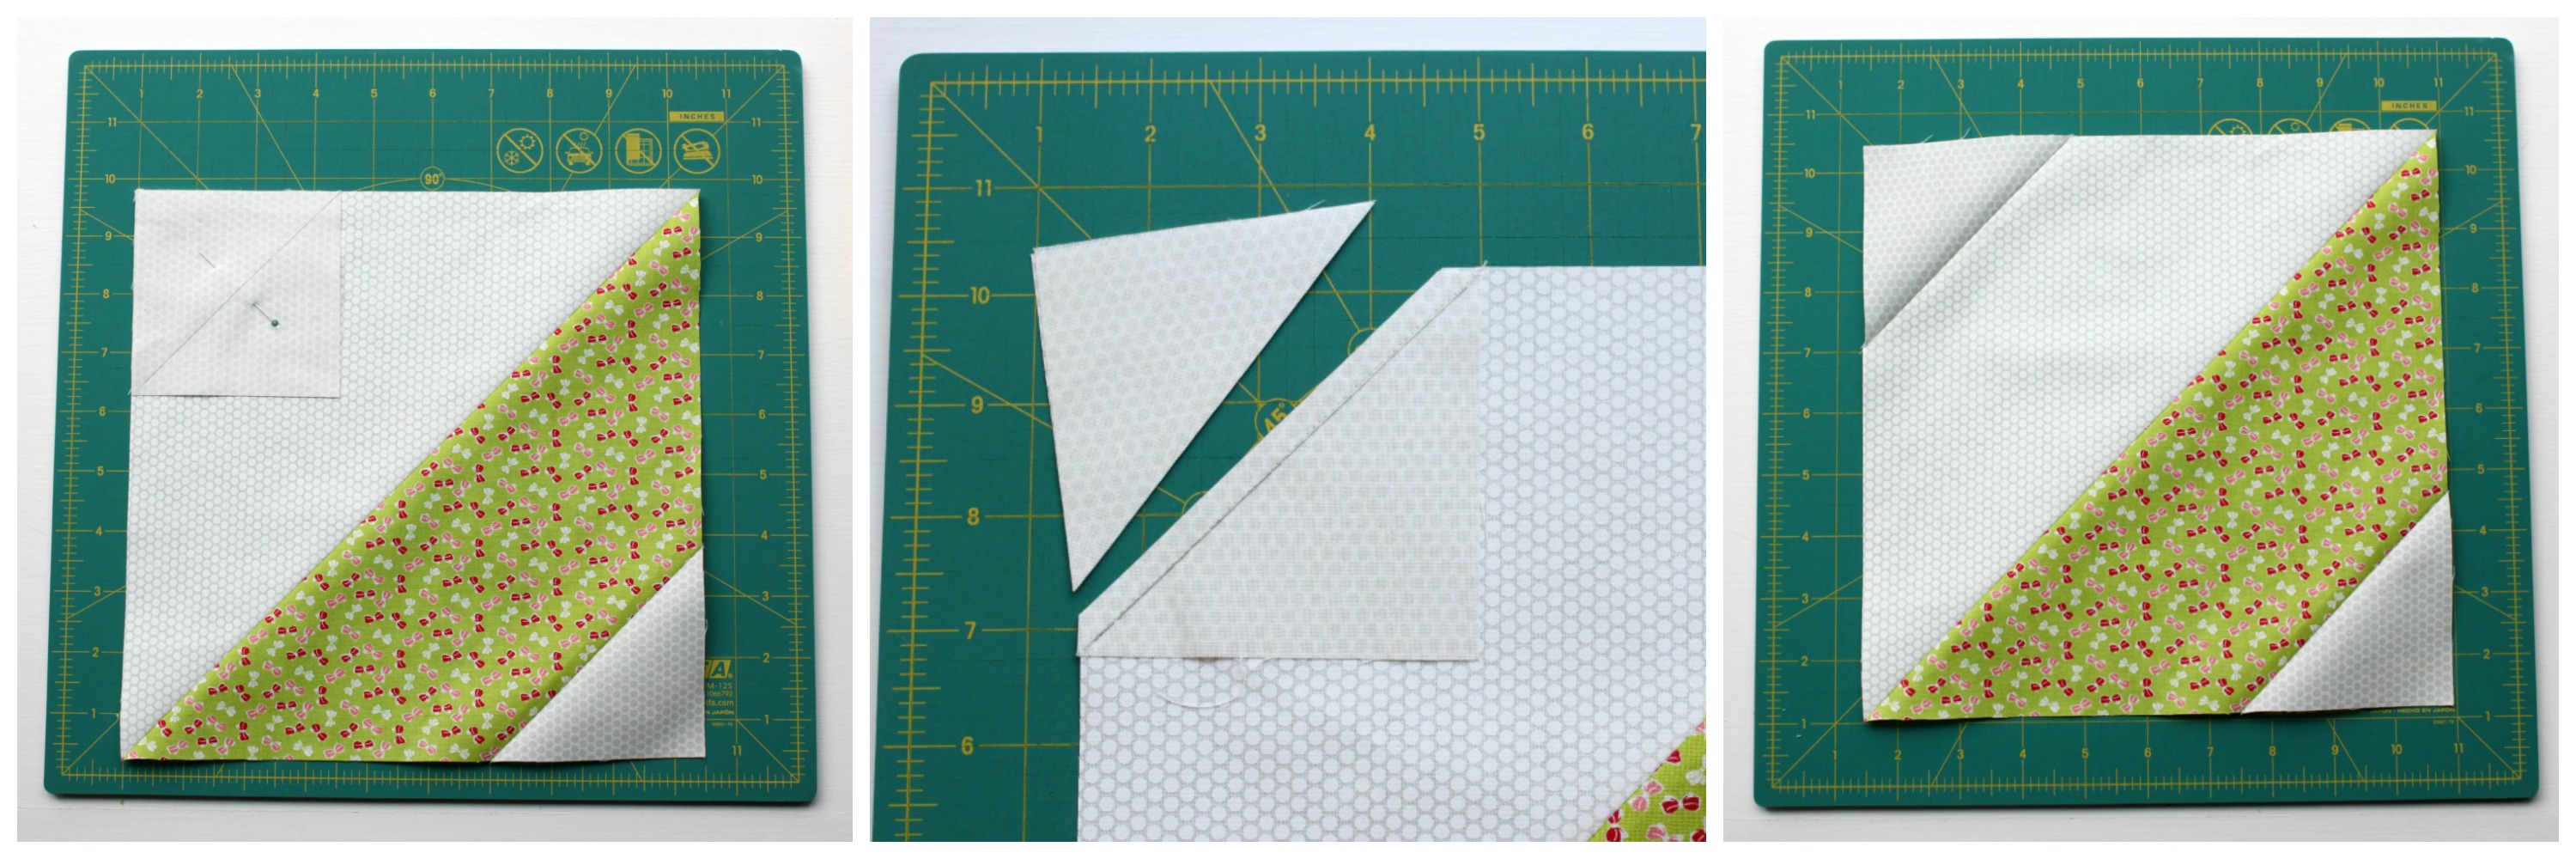
Attaching the Small Diamond Fabric
Draw diagonal lines on the wrong side of (92) 3½” squares in the small diamond fabric. Place one 3½” square on the print corner of each of the 48 HSTs, securing the fabric with a pin. Sew directly on the line. Trim ¼” from the seam, and press open.
Set 4 of these HSTs with small diamond fabric to the side. They will be used as the corner blocks in the final quilt top layout.
For the remaining 44 HSTs, sew another 3½” square to the background corner. Sew directly on the line. Trim ¼” from the seam, and press open.
Sewing the Diamonds
Sew the HSTs in pairs, matching seams and ensuring that no pair has more than one corner block. Press the seams open. Then sew the pairs together to make 12 diamonds, pressing the seams open and ensuring that no set of four blocks has more than one corner block.
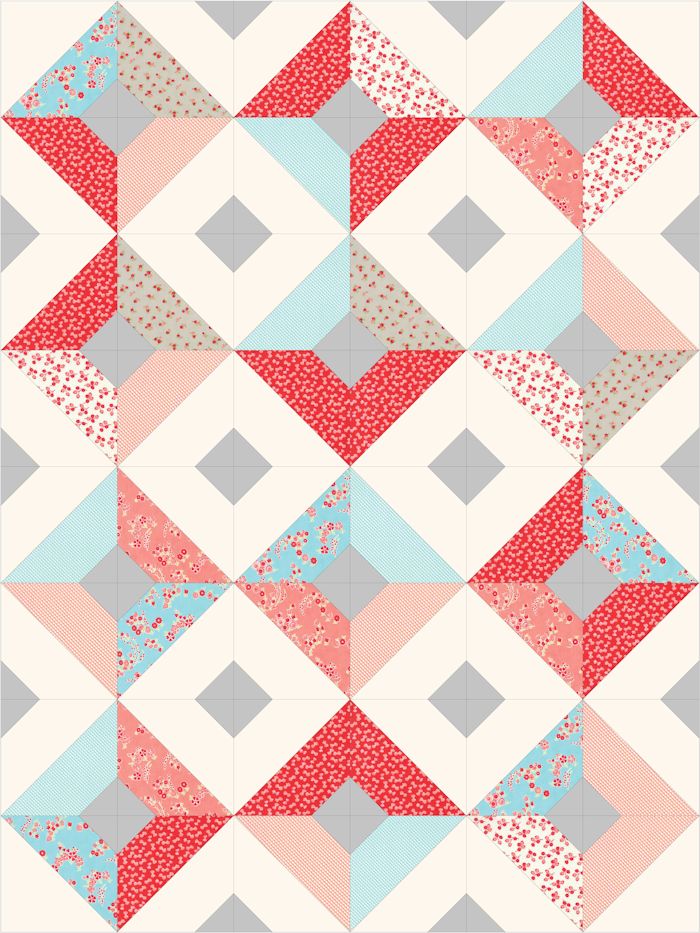
Determine the layout for your quilt top, placing the four corner blocks at the appropriate spots. Sew the diamonds into rows, and then sew the rows together, pressing the seams at each step open.
Sewing the Backing
Using the 5” squares from the layer cake and the 5” squares in backing fabric, sew:
• 11 strips that look like this:

• 2 strips that look like this:

• 2 strips that look like this:
Leave the seams unpressed for now.
Using the 15 units you just sewed and 2 additional 5” squares of backing fabric, lay out your strips like this:

Press seams in adjacent rows in alternating directions, and sew the rows together. These rows are offset; you will not sew the strips together edge to edge. Match the seams first, and you’ll see spots like this, where the end of one strip extends ¼” past the seam of the adjacent strip. Press the seams open.
To square up your column of diamonds, trim a generous ¼” from the edge of the diamonds on the left and right sides.
The trimmed column will look like this:
Trim from the top and/or the bottom so that the strip measures 79” in length.
To make the side panels of the backing, take the remaining 79” of backing fabric and cut it length-wise 15” from one selvage. Sew the 15” x 79” side panel onto the left side of the column of diamonds. Sew the 27” x 79” panel onto the right side of the column. Press seams toward the side panels.

Quilt and bind as desired.

![]()
One 54” x 72” double-sided throw quilt. Enjoy!
Michelle Cain
{frombolttobeauty.blogspot.com}
![]()
Posted in: