Welcome to Moda Fabrics!
Scrap Wraps
Scrap Wraps
Published:
May 15 2016 - 23:00


I am so excited to be here at the Moda Bake Shop to share this quick and easy little project with you. Sometimes after I finish a quilt or I am pressed for time, I need a relaxing little project and these wraps are so much fun to make and even more fun to give! I knew when I saw The Cookie Exchange fabric from Sweetwater that they would be perfect for jar wraps. (I also knew what all of my neighbor gifts would be for this holiday season!) The pint jars are perfect for filling with candy and the quart sized jars are perfect for "in a jar" gifts and would also be darling filled with notions for your favorite sewing friends, if you switch it up to a wide mouth jar you can really fit a lot in there!
This project yields three pint jar sized wraps and one quart jar sized wrap.
![]()

For the Pint Sized Jar Wrap:
2 Layer Cake Squares
1 Square of fusible fleece 10 1/4"x 10 1/4"
6" length of 1/8" wide elastic
2 buttons approximately 1/2" in diameter
Fat Quarter for binding
For the Quart Sized Jar Wrap:
1 Moda Candy
1 rectangle of fusible fleece 3 3/4"x 12 3/4"
6" length of 1/8" wide elastic
2 buttons approximately 1/2" in diameter
Fat Quarter for binding and backing
You will also need a sewing machine, handsewing needle, thread, a rotary cutter and mat. You may also choose to spray baste or pin your pieces together before quilting or binding.
![]()
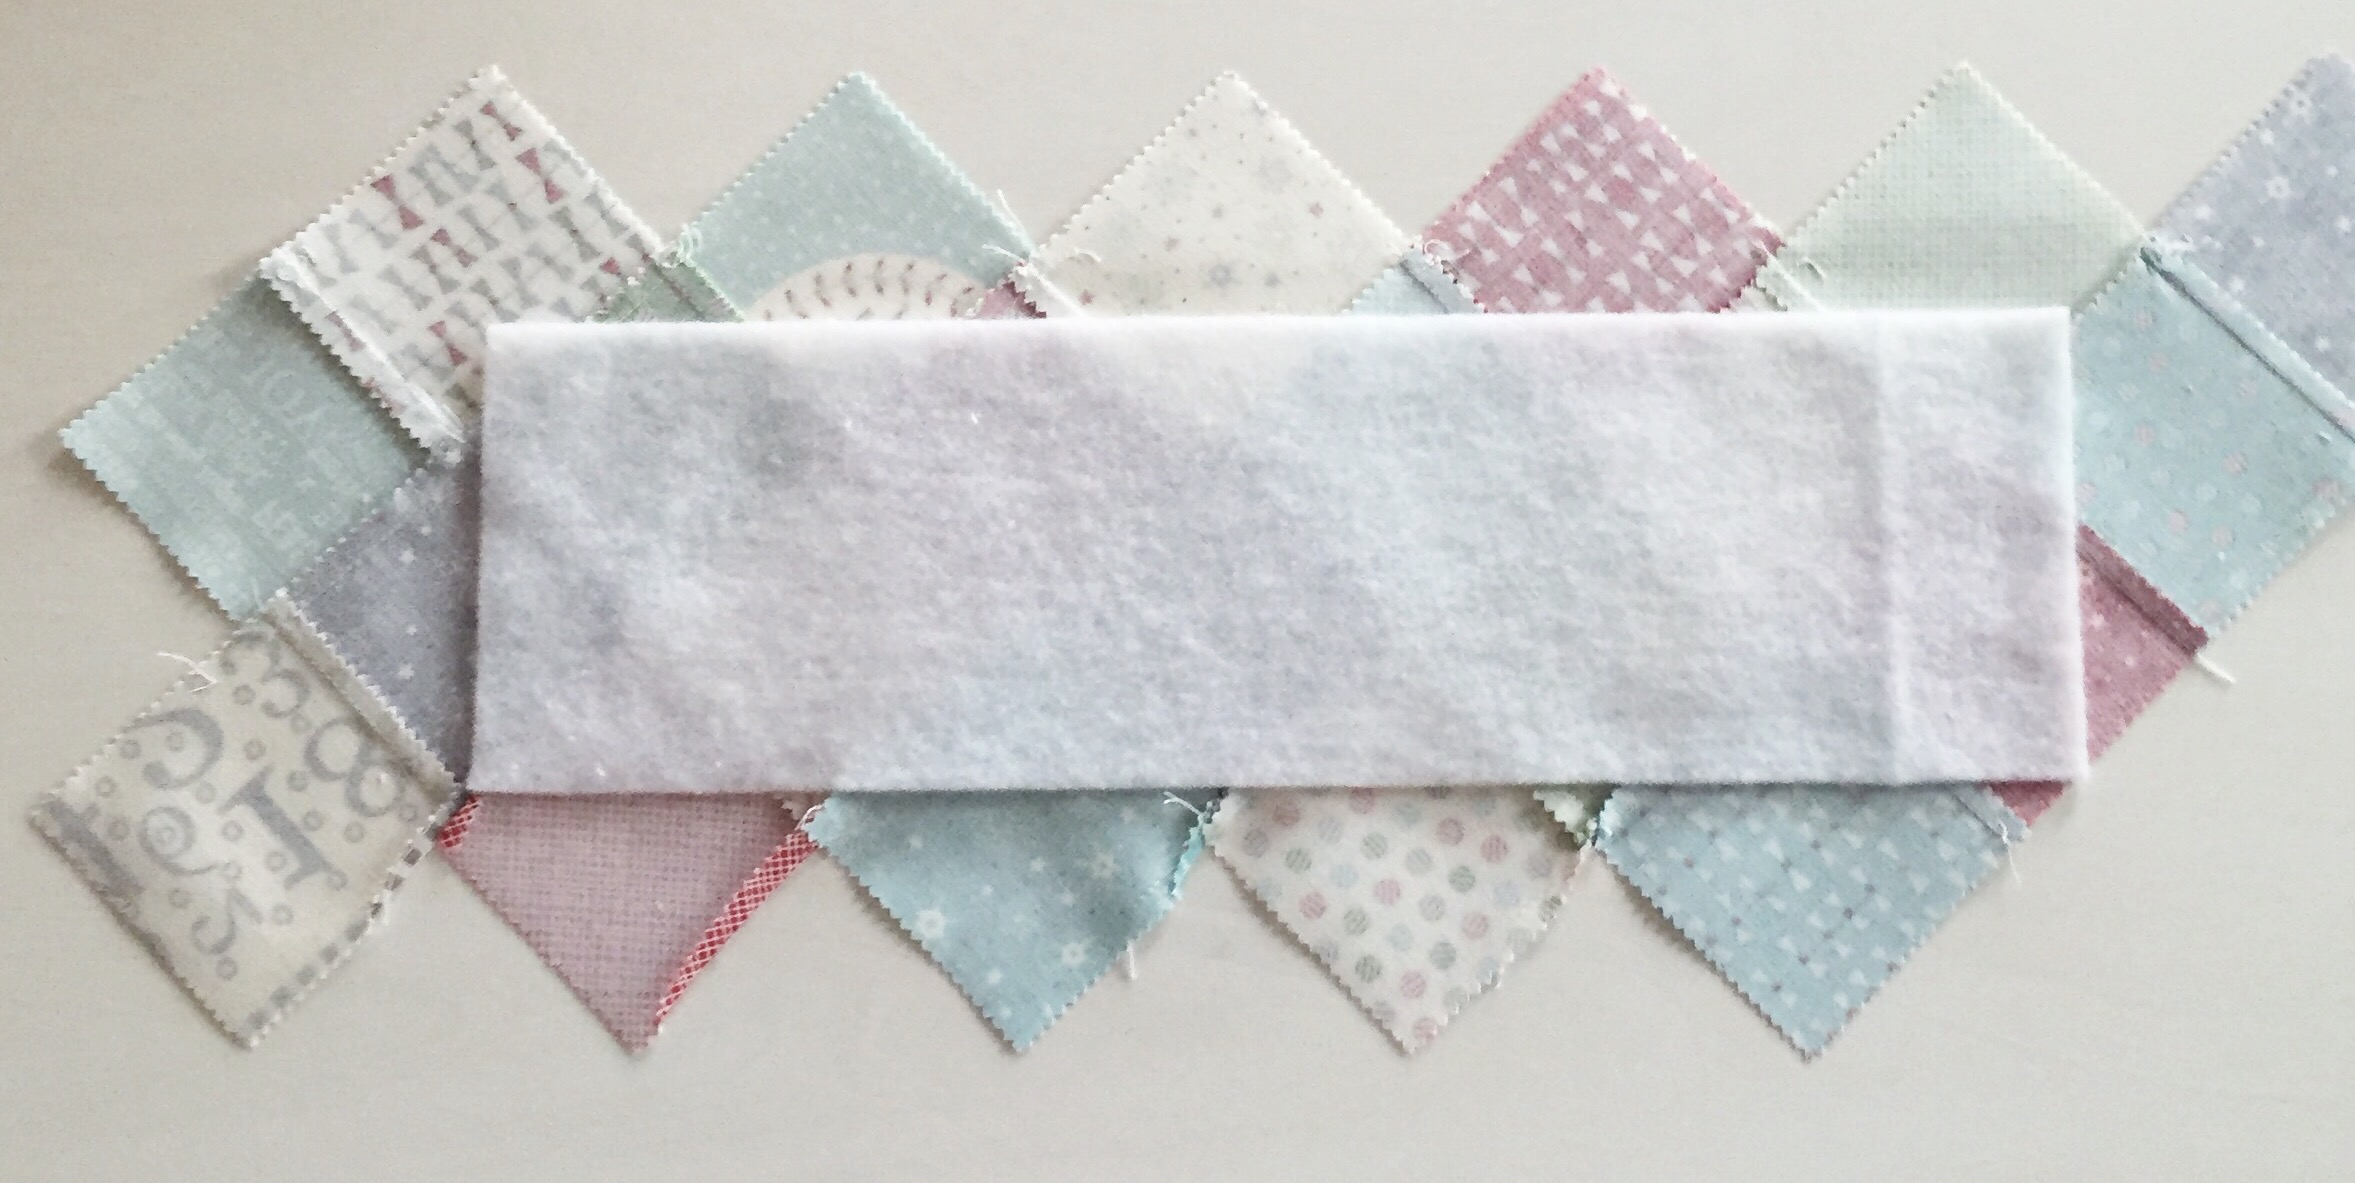
For the Pint Sized Jar Wraps:
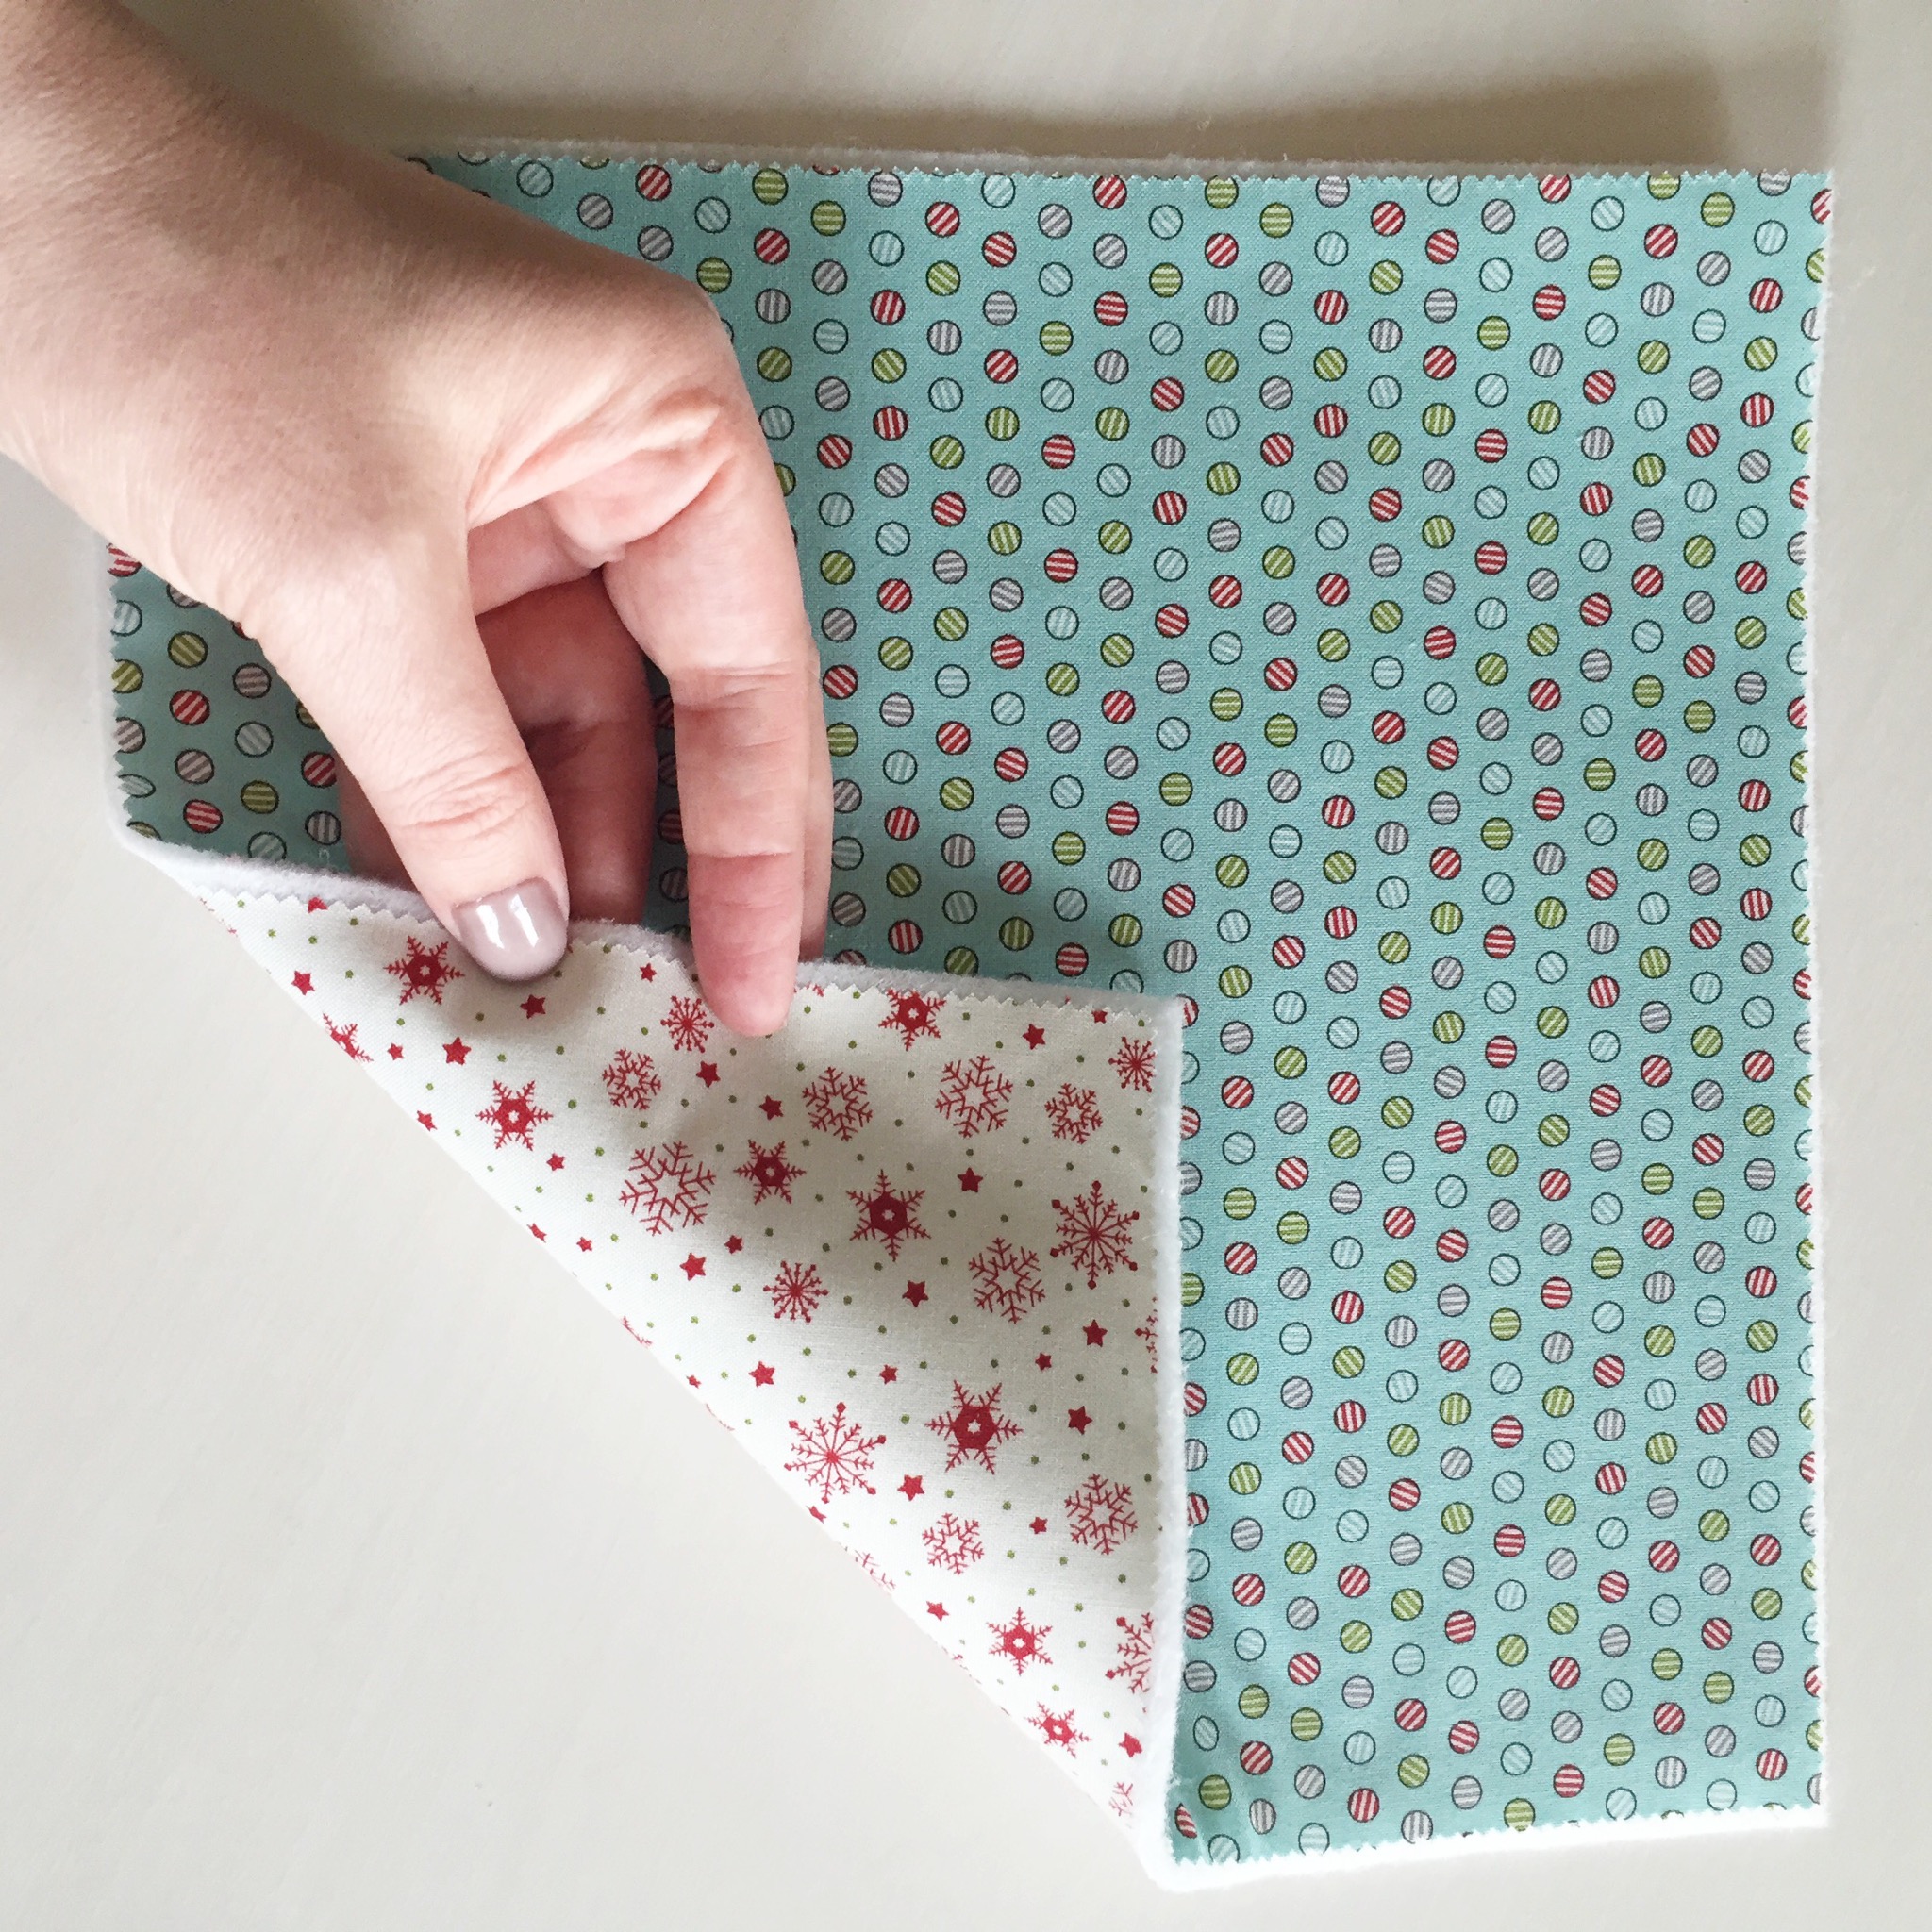
Step 1 - take your 2 layer cake squares and place the wrong sides against the fleece so that the right sides are facing out, the fleece should stick out 1/8" from all sides. Fuse the exterior fabric in place and baste the other fabric so that it will stay put during the quilting process.
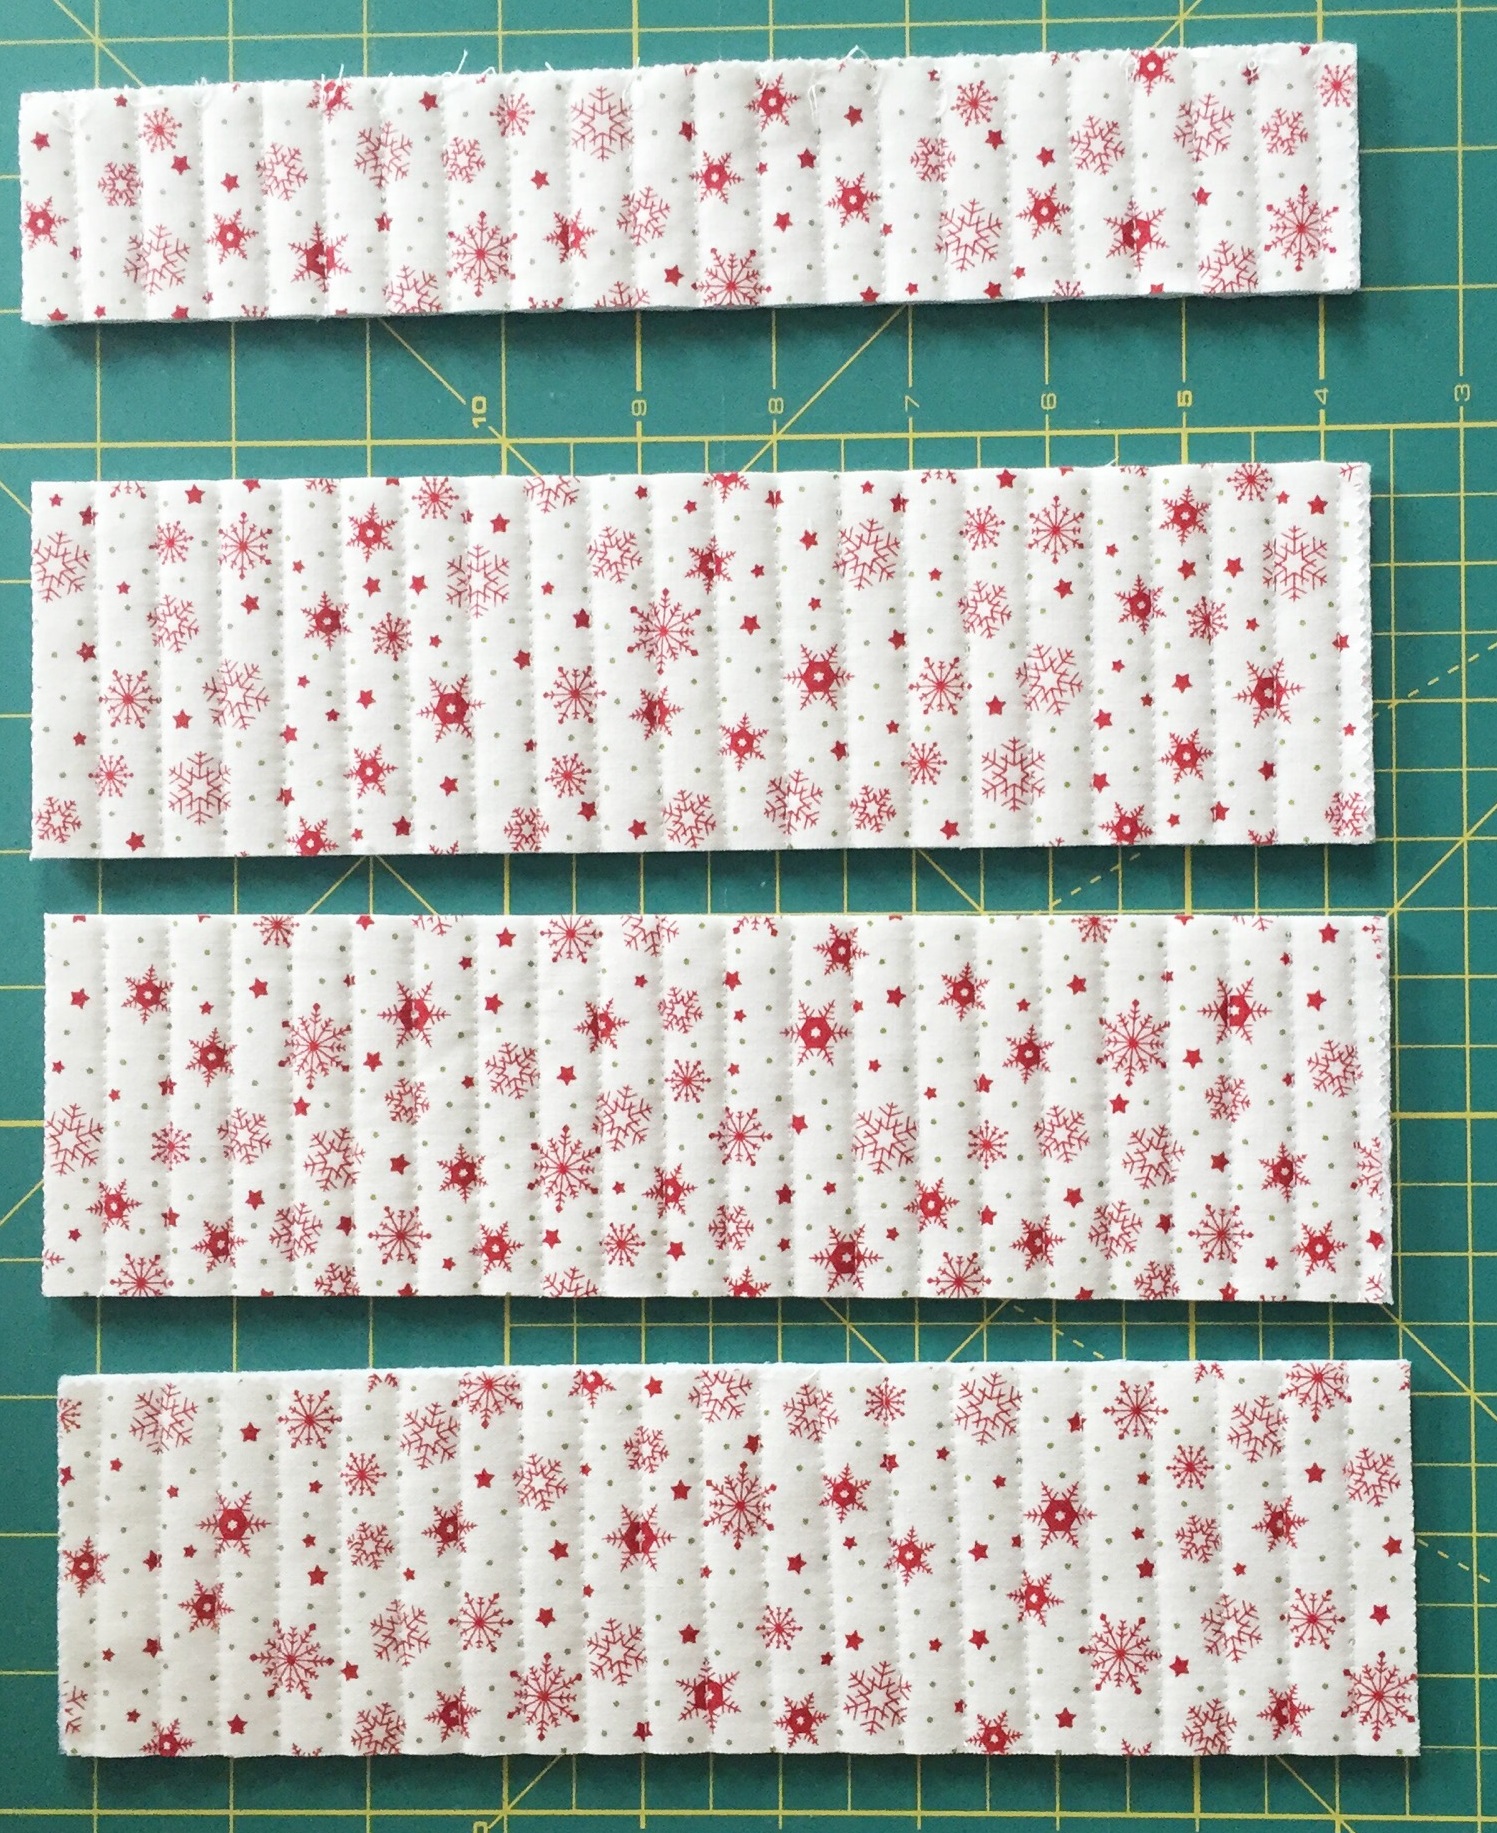
Step 2 - Quilt the piece as desired, I decided to quilt with straight lines. When you are finished quilting, trim 1/8" of the fleece off of each edge so that your piece measures 10" x 10"and should align with the edges of your Layer Cake Square. Then make cuts so that you have (3) 2 3/4"x 10" quilted rectangles.
Step 3 - Cut your piece of elastic into (2) 3" pieces and attach them to the short side of the lining of your rectangle with the raw edges aligned, 3/4" from the top and 3/4" from the bottom

Step 4 - Using a scant 1/4" on your sewing machine, sew the elastic loops in place. we will be covering them with binding later, so the stitching doesn't have to be perfectly neat as long as you keep your seam allowance at a scant 1/4" or less. Once your elastic loops are stitched down, it is time to prepare your binding. Using your preferred binding method, cut and join your binding strips from the Fat Quarter and bind your rectangle.
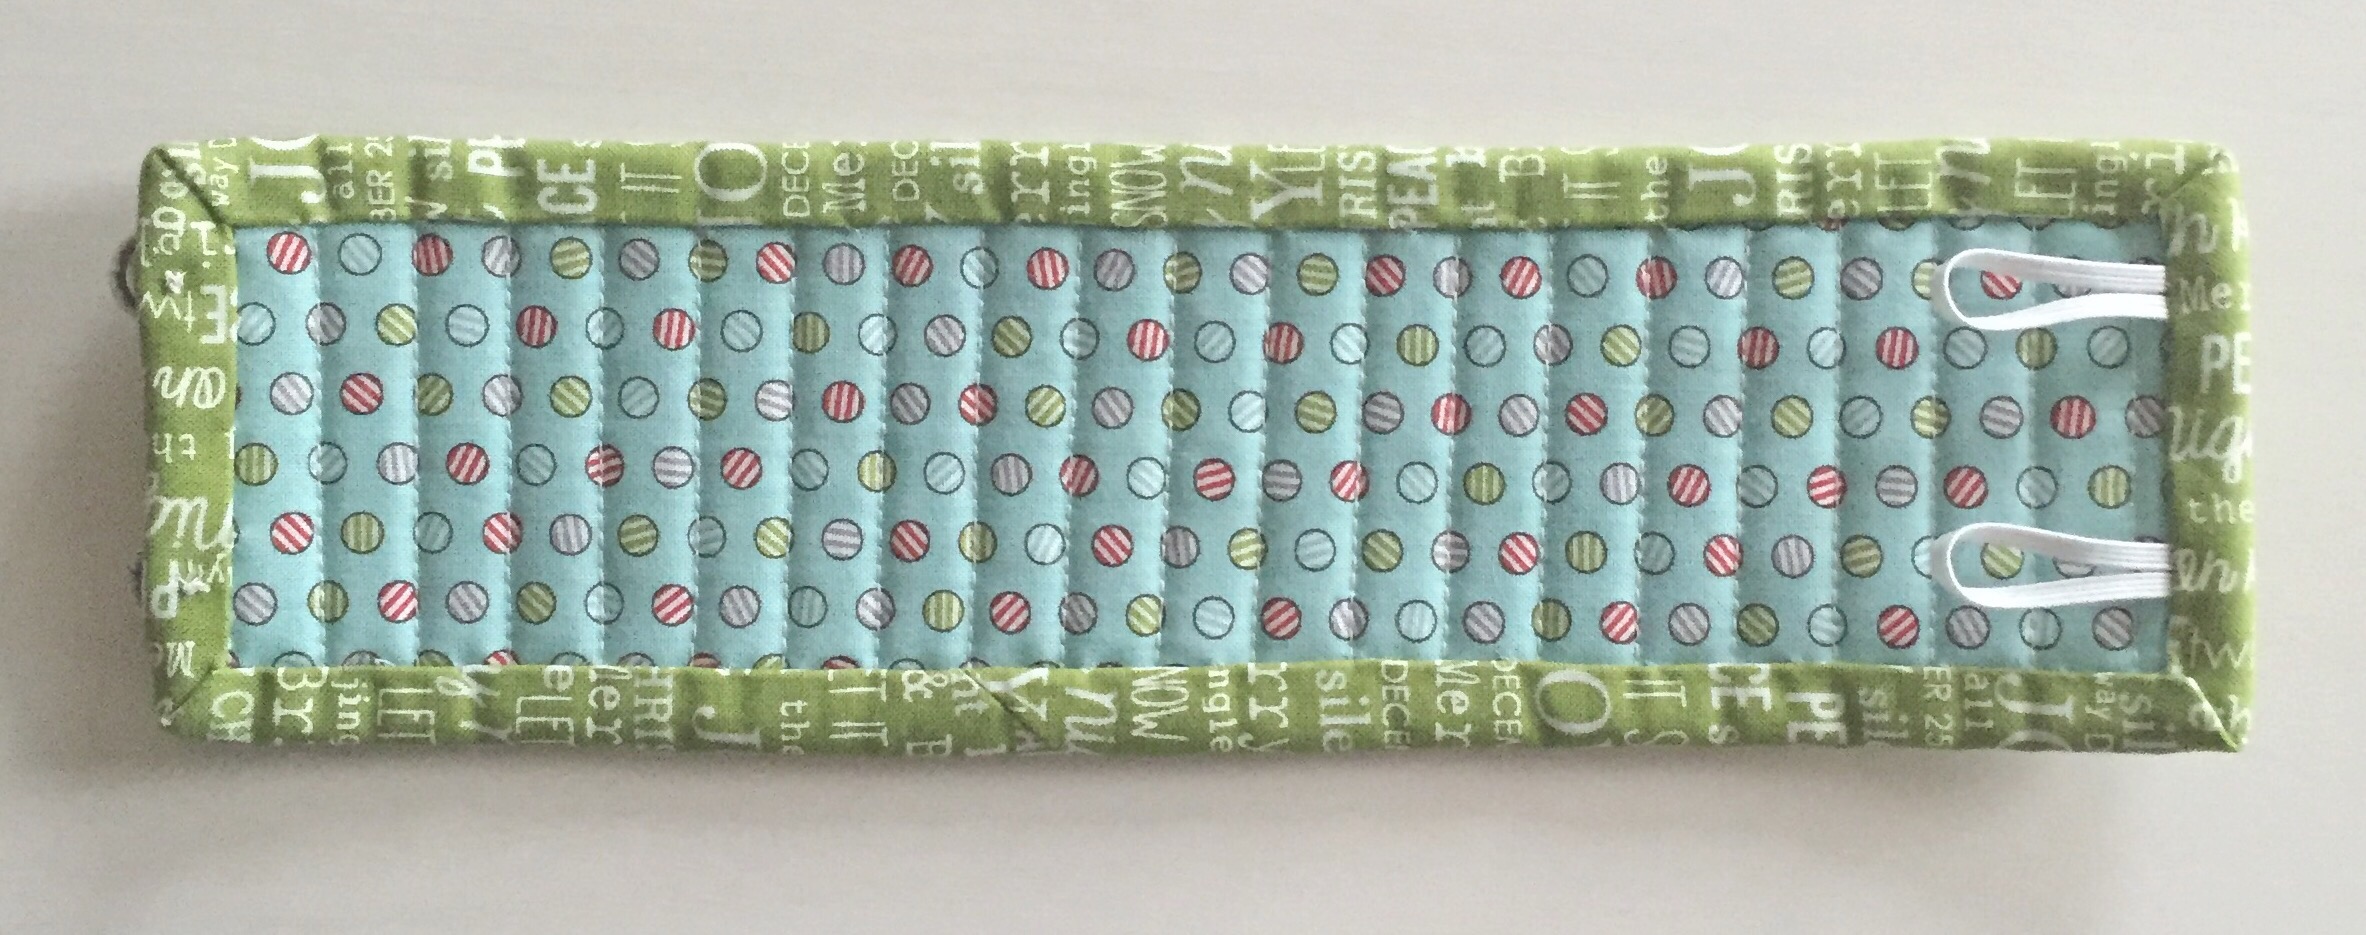
Step 5 - Place your buttons on the front side of the opposite edge, measuring down from the top and up from the bottom 3/4" and stitch in place.

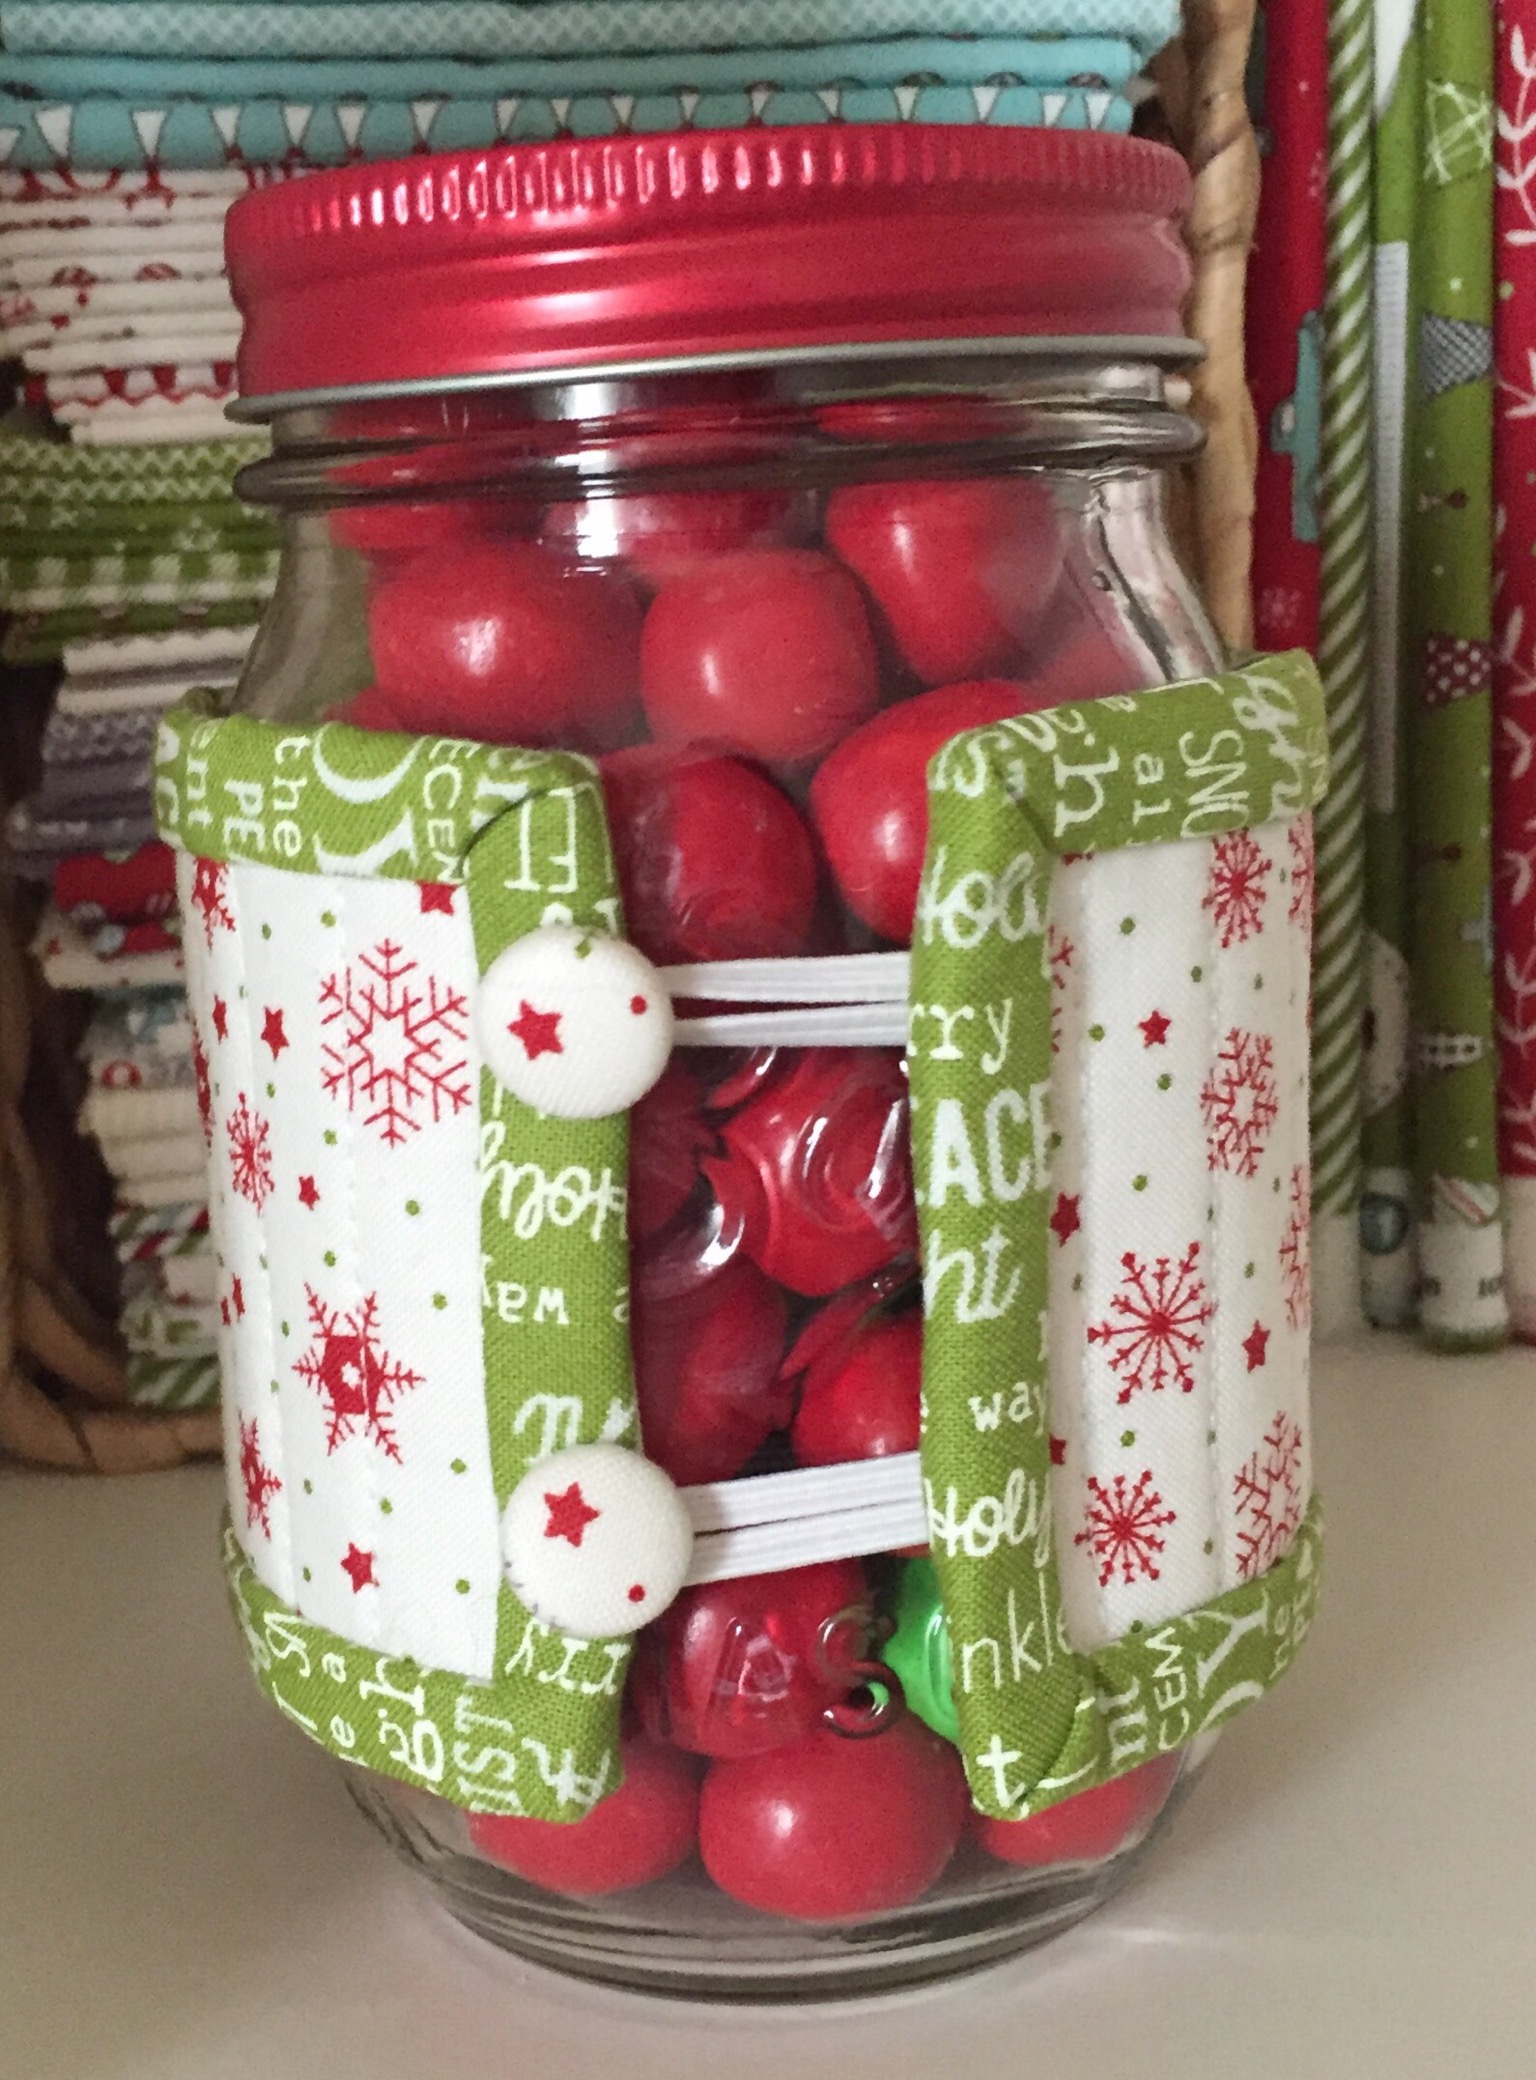
Your first Pint Sized Scrap Wrap is now complete, just fill with candy and enjoy!

*Don't forget you still have 2 more quilted rectangles from step 2, just repeat steps 3-5 and you will have 3 wraps!
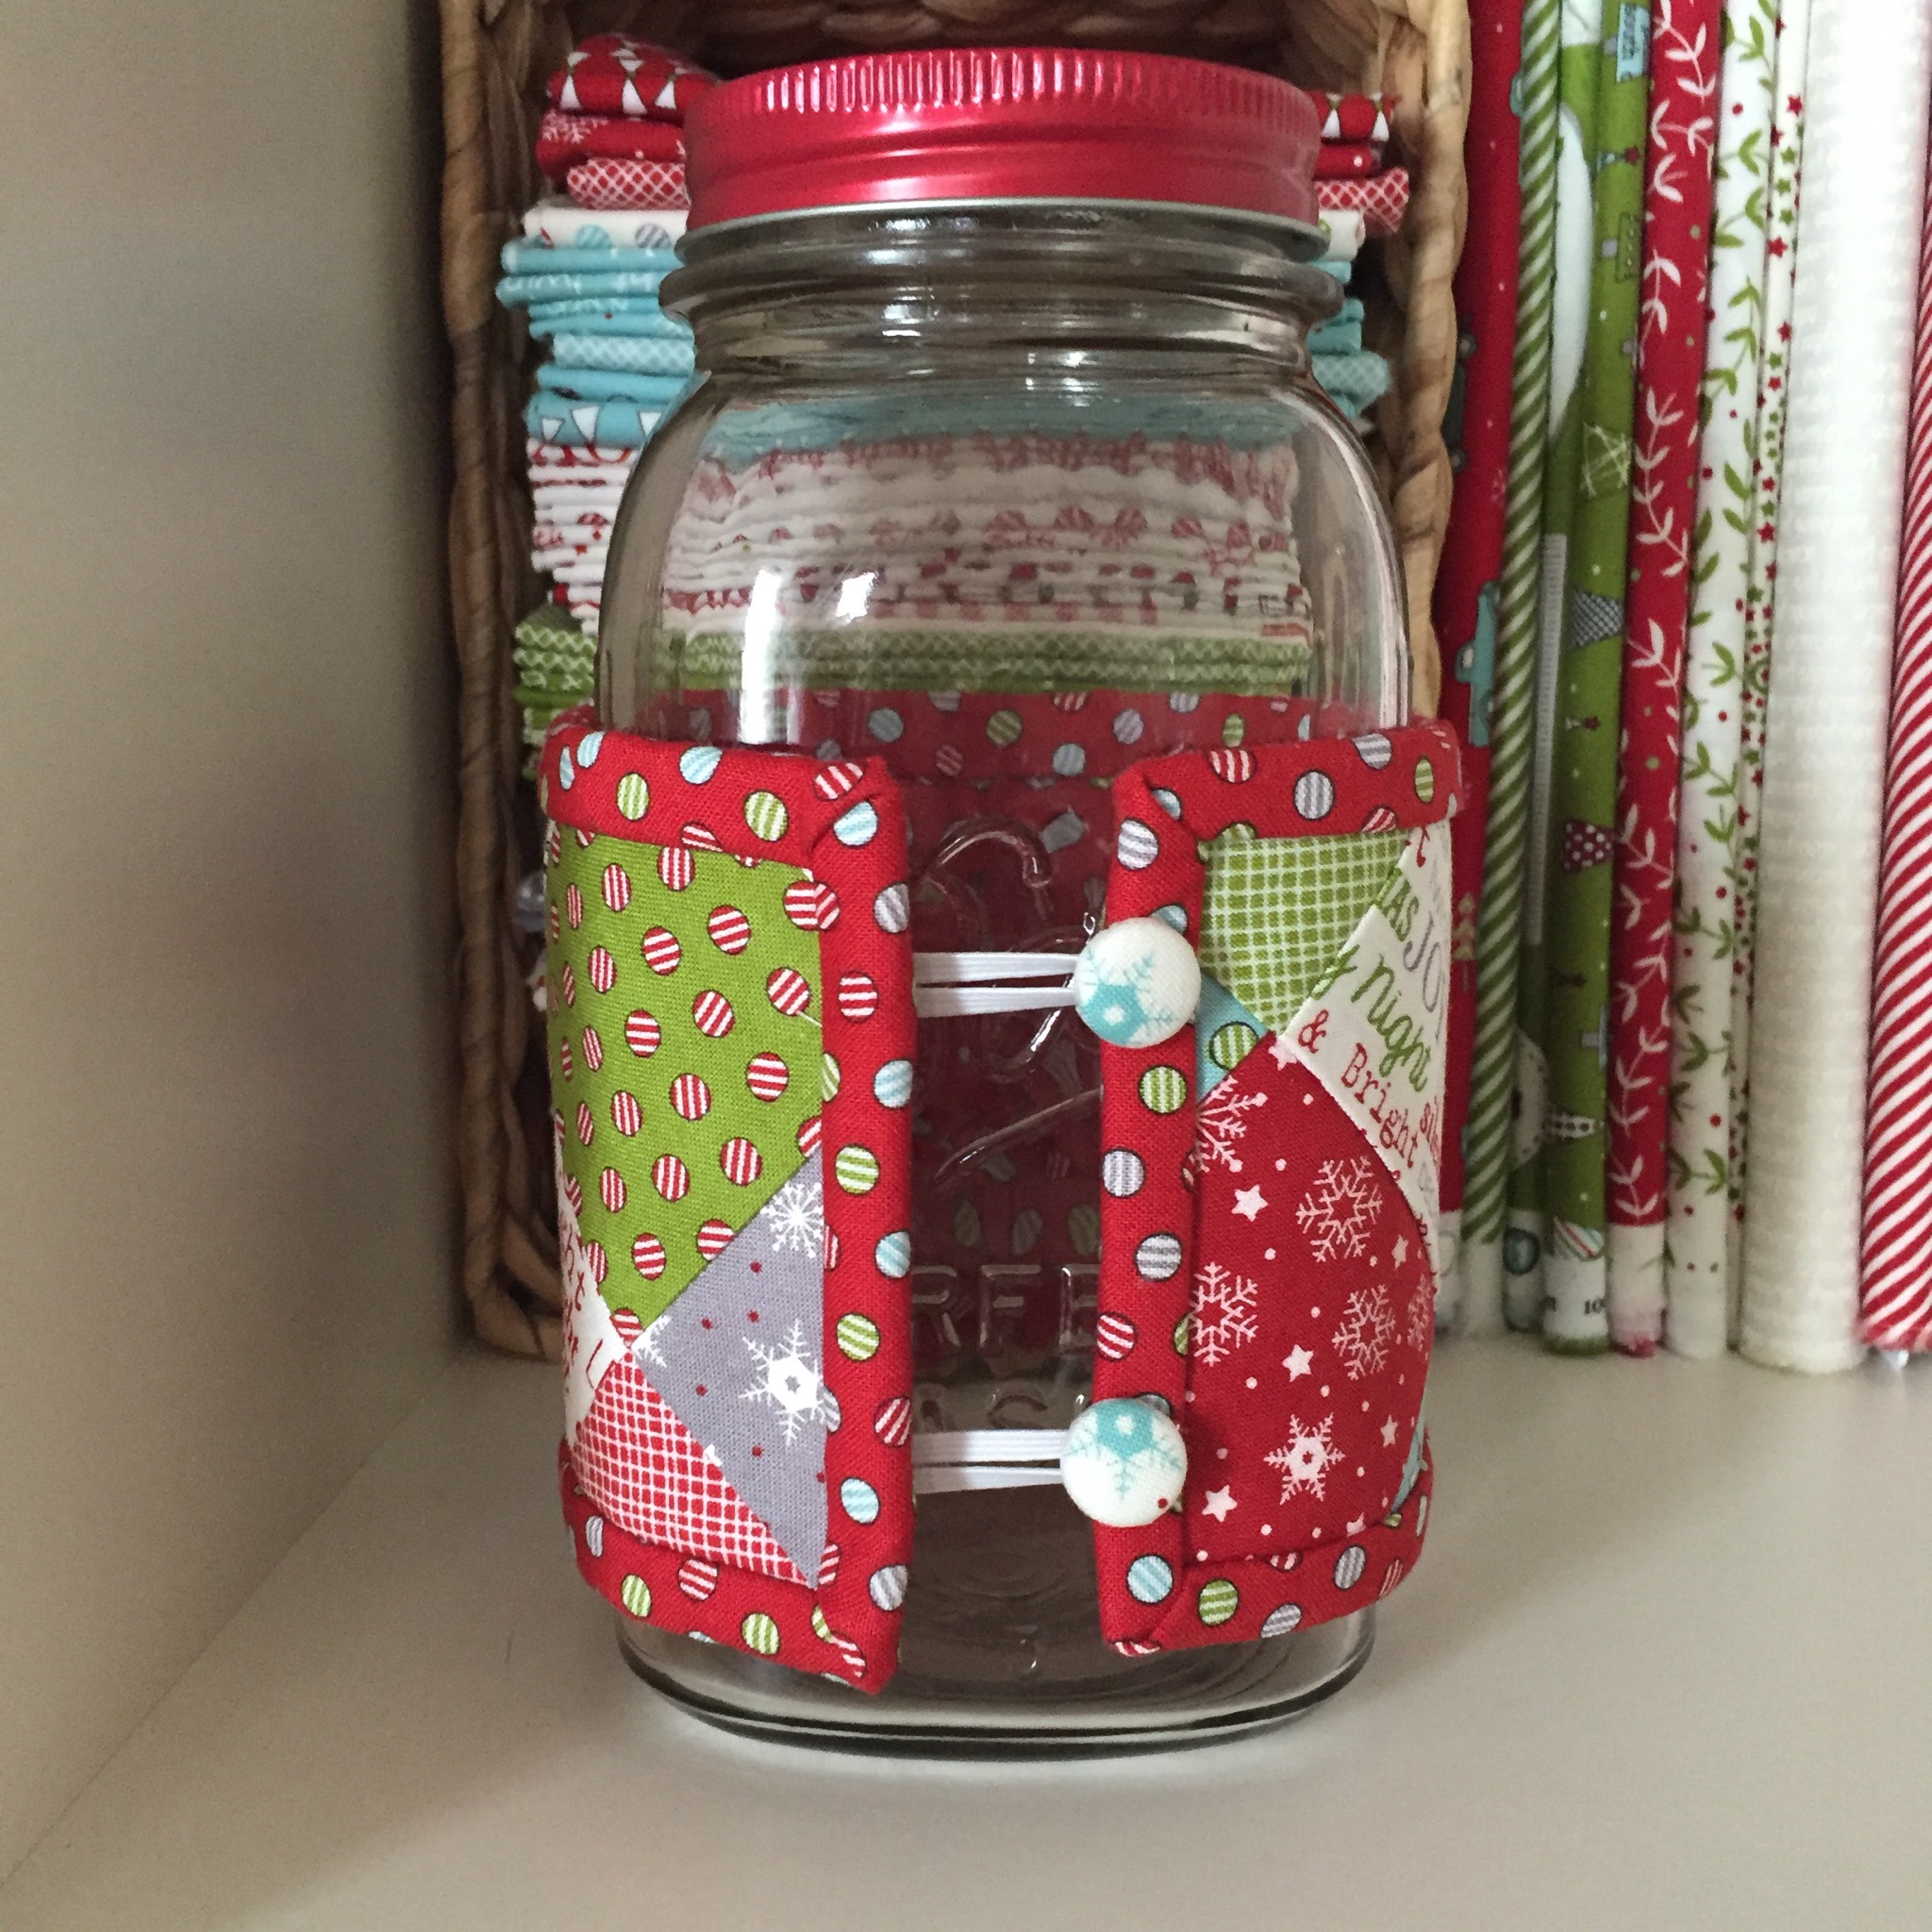
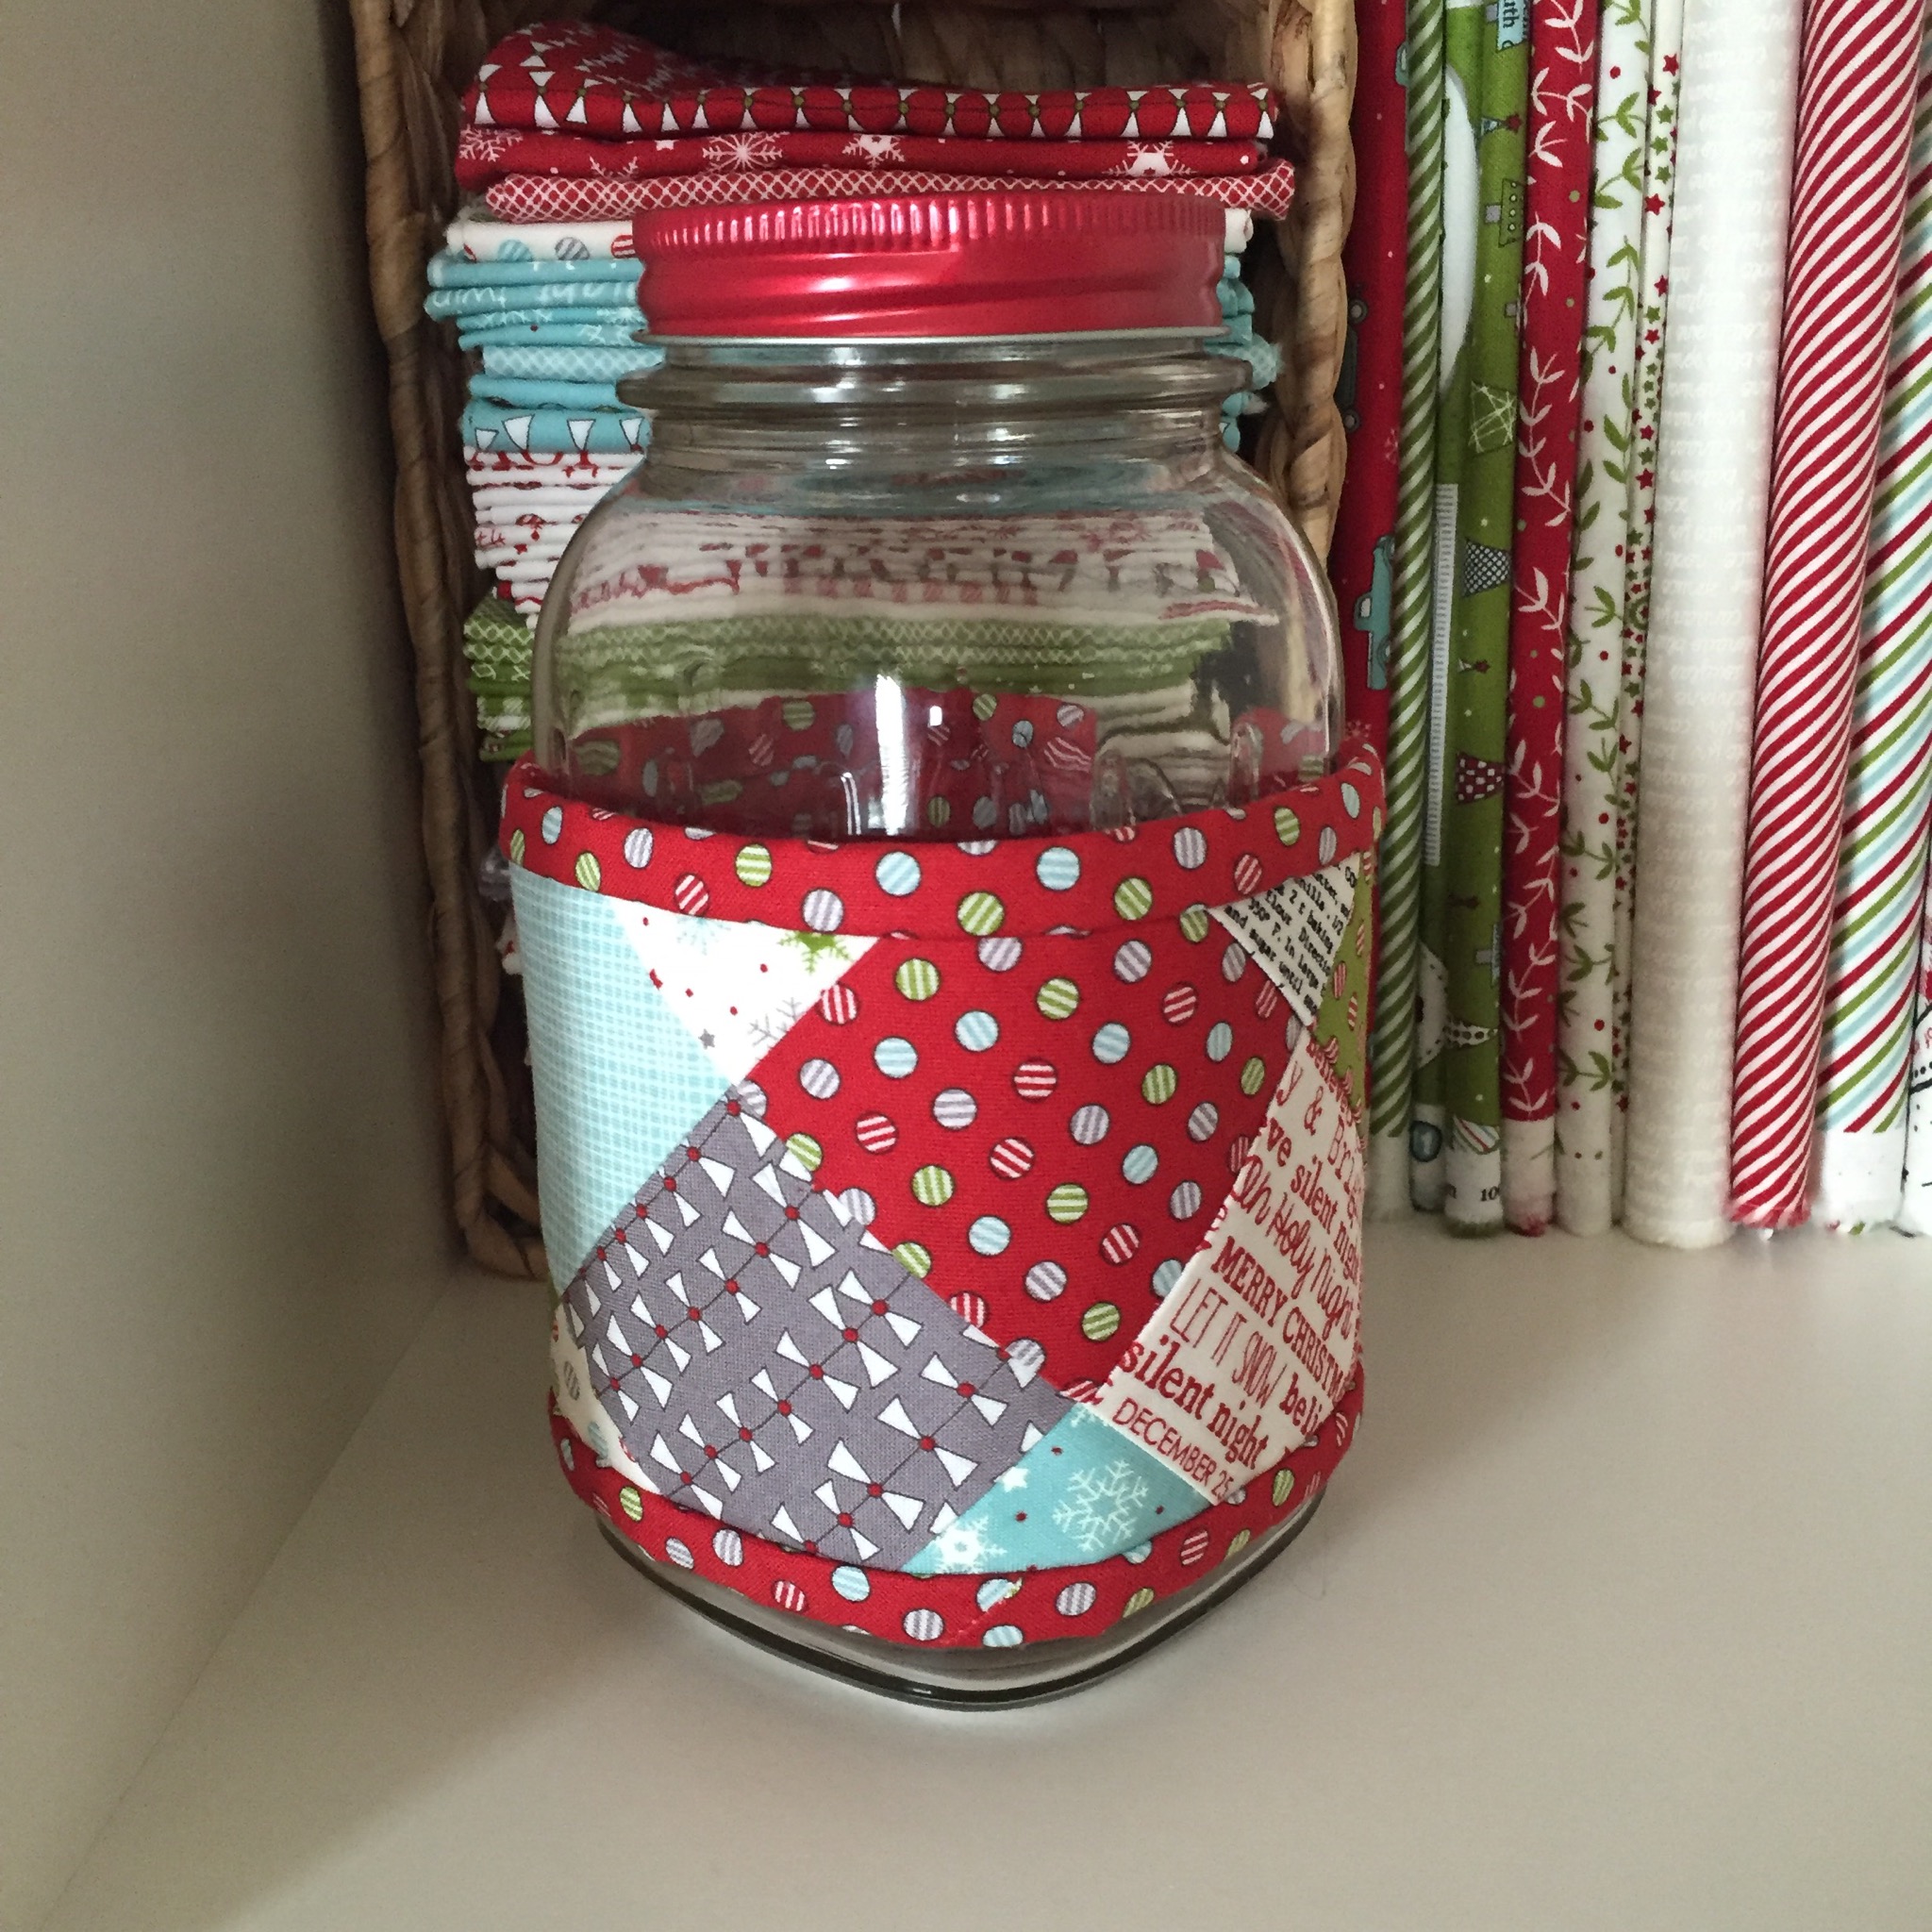
For the Quart Sized Jar Wrap
Step 1 - Choose 21 Moda Candy Squares and arrange them like the photo below. Sew the squares together in rows, and press the seams in the direction of the arrows, so that you can nest your rows together and sew into one large piece. I like to make my piece a little bit oversized so I can adjust the placement of the fleece backing to exactly where I want it.

Step 2 - Once your squares are sewn together place your fleece rectangle fusible side on the wrong side of your fabric and move it around until you like how the squares are placed on the front and then fuse the fabric and fleece together. Trim 1/8" off of each side of the fleece through all layers, leaving you with a rectangle that is 3 1/2"x 12 1/2". Cut a 3 1/2' x 12 1/2" rectangle from your Fat Quarter and baste the backing on using spray or pins, whatever you prefer.

Step 3 - Cut your piece of elastic into (2) 3" pieces and attach them to the short side of the lining of your rectangle with the raw edges aligned, approximately 3/4" from the top and 3/4" from the bottom

Step 4 - Using a scant 1/4" on your sewing machine, sew the elastic loops in place. we will be covering them with binding later, so the stitching doesn't have to be perfectly neat as long as you keep your seam allowance at a scant 1/4" or less. Once your elastic loops are stitched down, it is time to prepare your binding. Using your preferred binding method, cut and join your binding strips from the Fat Quarter and bind your rectangle.

Step 5 - Place your buttons on the front side of the opposite edge, measuring down from the top and up from the bottom 3/4" and stitch in place.

Your Quart Sized Scrap Wrap is now complete, just fill with cookies, sewing notions, or small gift and enjoy!
![]()
Three pint sized jar wraps and one quart sized jar wrap.
I hope this has inspired you to go dig in those scrap bins and pull out some orphaned layer cake squares or go grab a Moda Candy and start dressing up all of your mason jars! I would love to see all of your creations, please be sure to tag me on Instagram @thebaconandmegssews and use the hashtag #scrapwraps on Instagram. I can't wait to see all of your creations!
Meg Dunton
{@thebaconandmegssews}
![]()