Welcome to Moda Fabrics!
Dash into Spring Place Mat
Dash into Spring Place Mat
Published:
Mar 7 2016 - 23:00


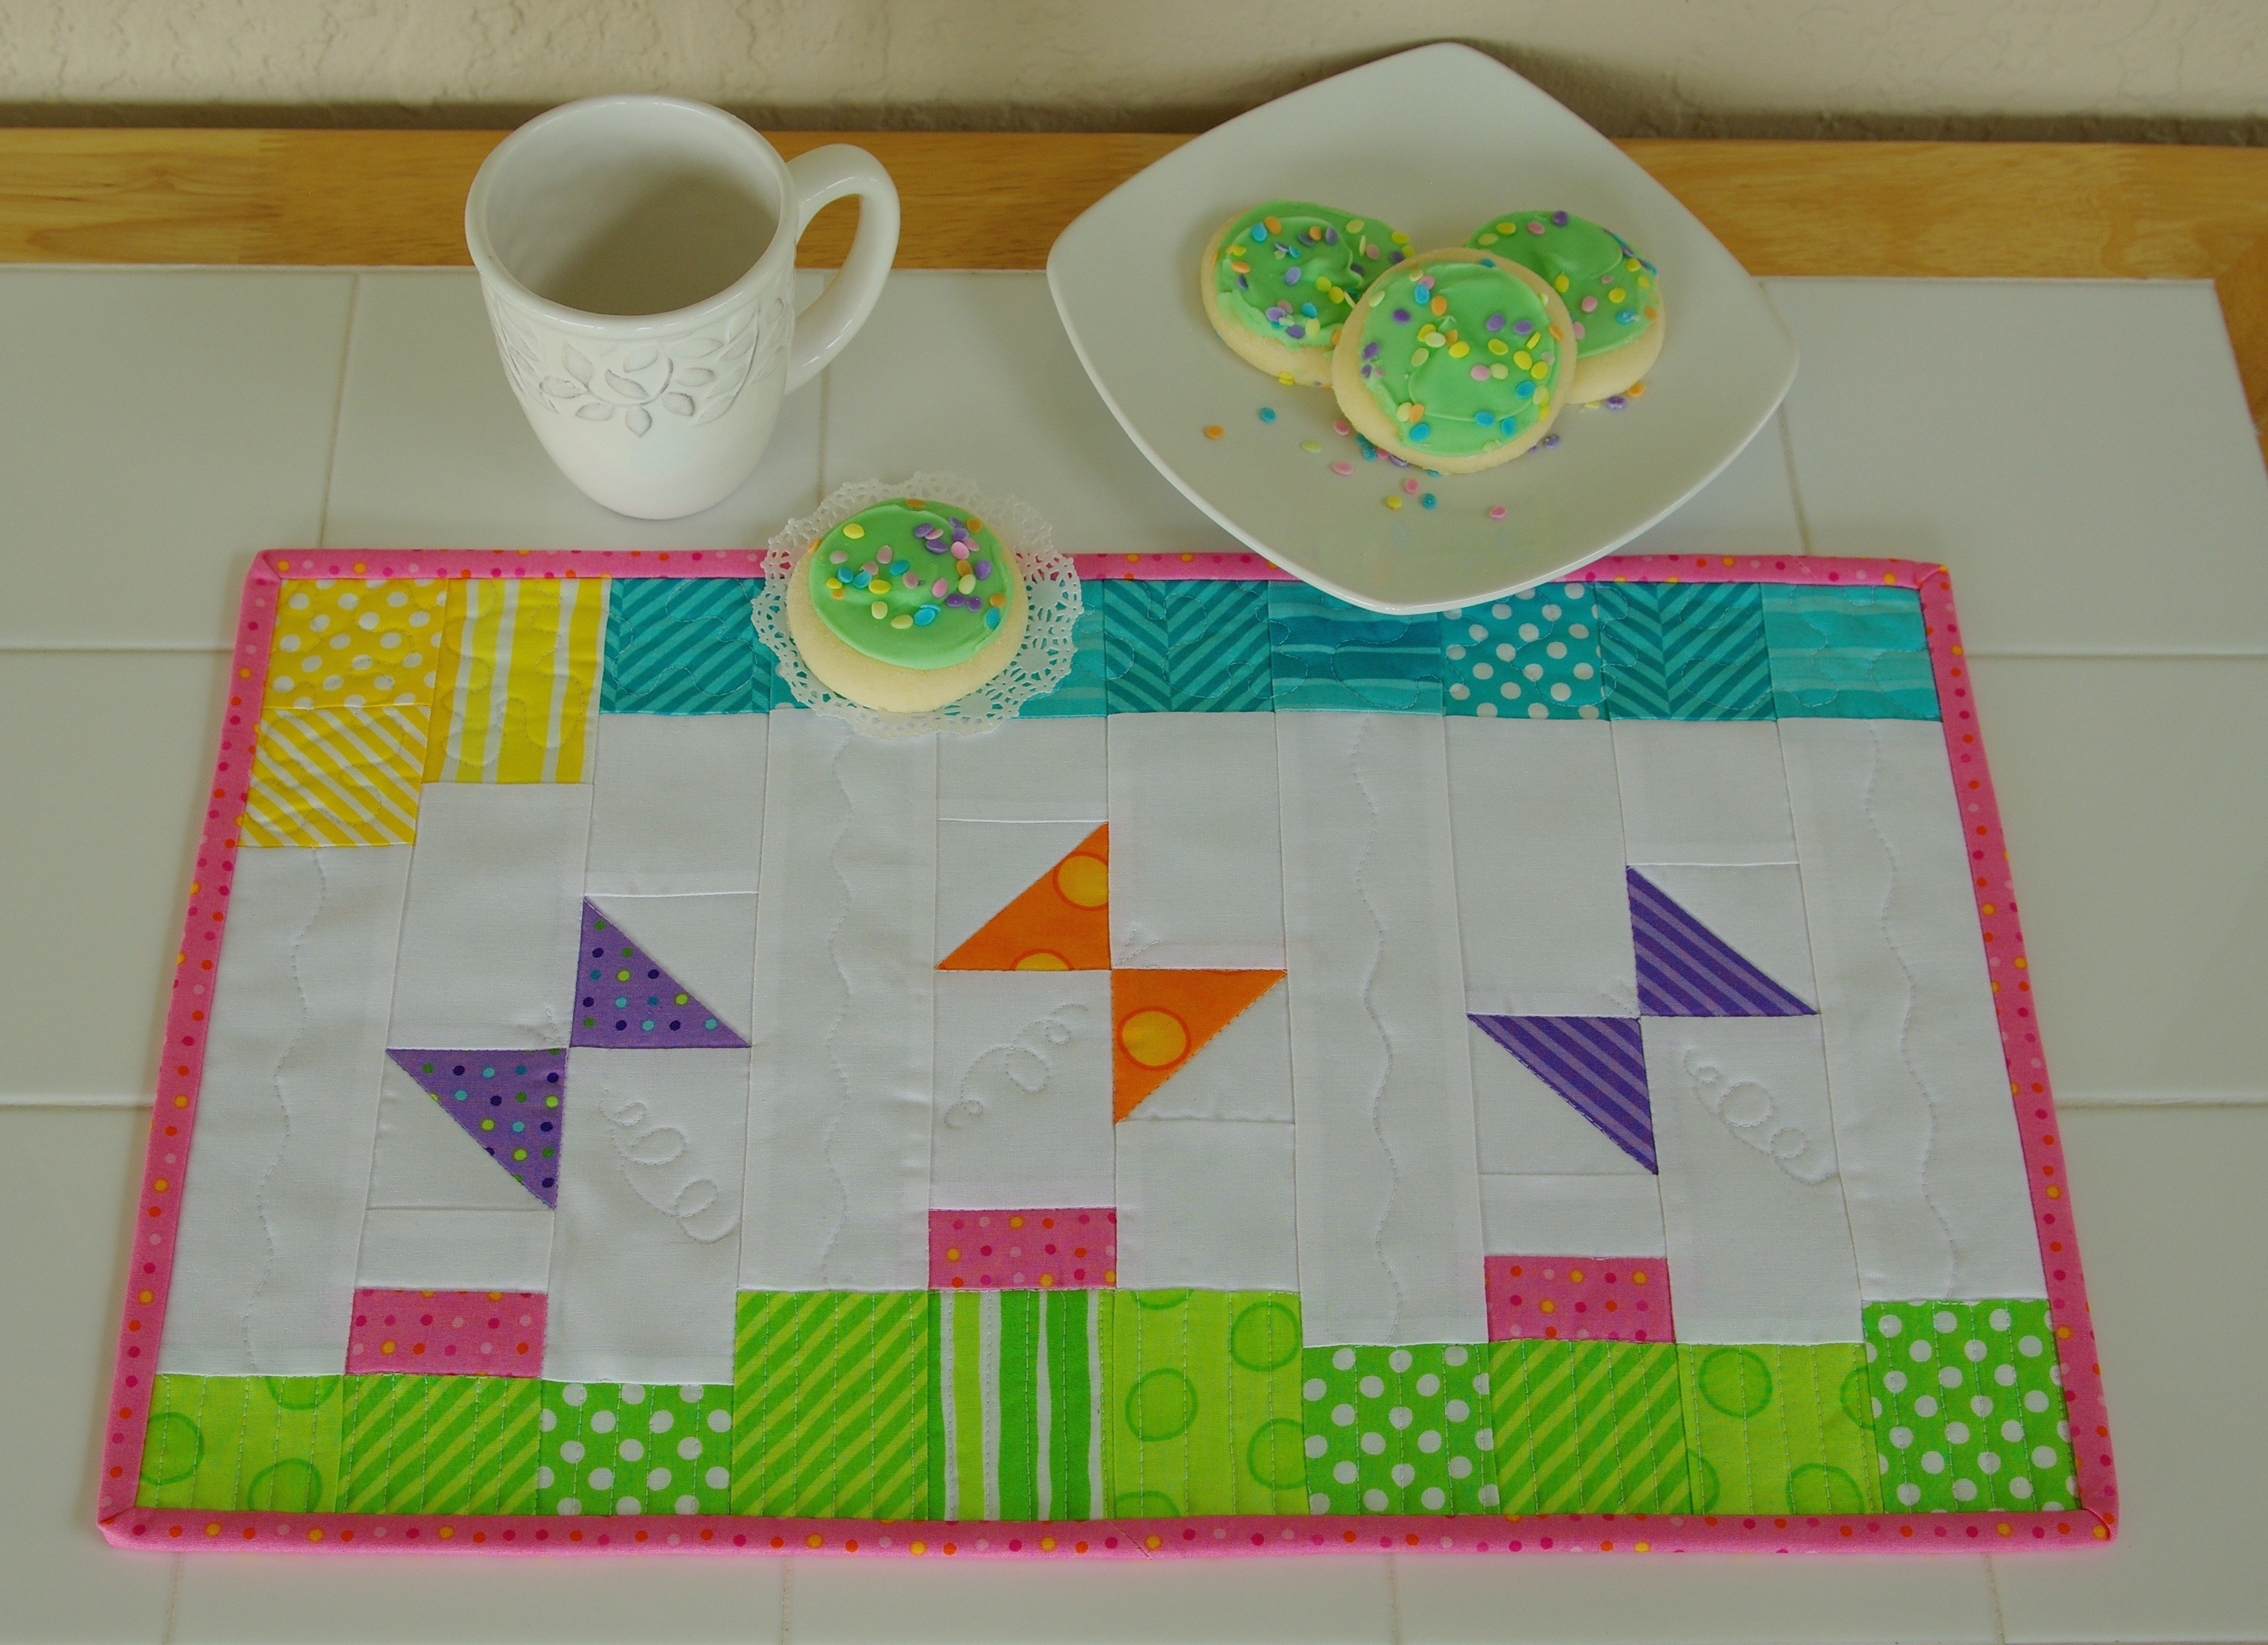
Hi everyone, I’m Deb Gehringer of Monday Morning Designs and I’m happy to be a first-time chef at the Moda Bake Shop. My project is a whimsical place mat I designed during the winter when I had spring on my mind. I chose Dot.Dot.Dash by Me and My Sister Designs for its bright and happy colors. All you need is a charm pack and two 2 ½” strips.
Place mat finishes at 12" x 20".
![]()
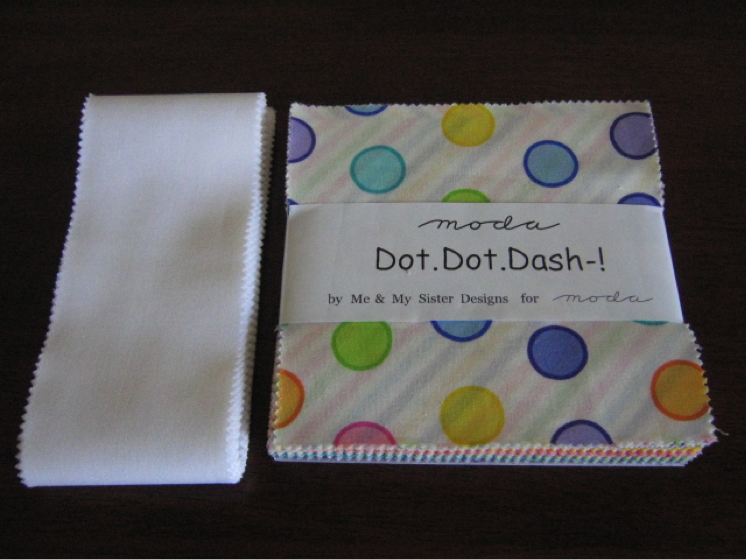
One Charm Pack
Two 2 ½” strips for background (White Bella Solid)
One Fat Quarter for binding (Dot Dot Dash Pink Mini)
Backing Fabric (approximately 16” x 24”) or you can piece the back with leftover charm squares
Cotton Batting (approximately 16” x 24”)
![]()
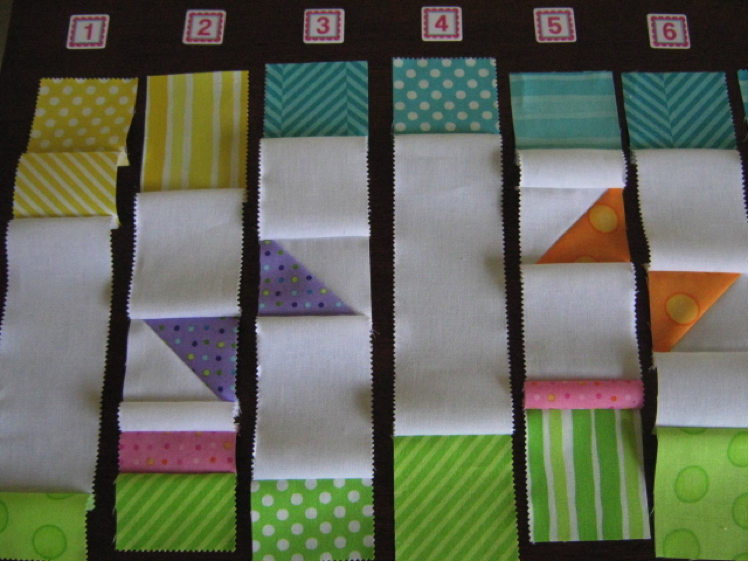
Sort out charm squares according to sections of the place mat by choosing colors for the grass, sky, sun, etc. Once determined, cut and layout fabric pieces in order as listed per strip (start with the grass and work towards the sky). Be sure to number the strips from left to right accordingly. There are 10 strips. When sewing, use ¼” seam allowance throughout.
HINT: To save on green fabric—after cutting pieces for strips 1-3, you will have three 3” pieces left that can be used for strips 4-6.
CUT: (one piece each; all pieces are 2 ½” wide)
Strip 1
2 ½” x 2” green
2 ½” x 7” white
2 ½” x 2 ½” yellow
2 ½” x 2 ½” yellow (of another choice)
Strip 2
2 ½” x 2” green
2 ½” x 1 ½” pink
2 ½” x 1 ½” white
2 ½” x 2 ½” purple/white HST
2 ½” x 4” white
2 ½” x 3 ½” yellow
Strip 3
2 ½” x 2” green
2 ½” 4 ½” white
2 ½” x 2 ½” purple/white HST
2 ½” x 3” white
2 ½” x 2 ½” aqua blue
Strip 4
2 ½” x 3” green
2 ½” x 8” white
2 ½” x 2 ½” aqua blue
Strip 5
2 ½” x 3” green
2 ½” x 1 ½” pink
2 ½” x 3 ½” white
2 ½” x 2 ½” orange/white HST
2 ½” x 2” white
2 ½” x 2 ½” aqua blue
Strip 6
2 ½” x 3” green
2 ½” x 2 ½” white
2 ½” x 2 ½” orange/white HST
2 ½” x 4” white
2 ½” x 2 ½” aqua blue
Strip 7
2 ½” x 2 ½” green
2 ½” x 8 ½” white
2 ½” x 2 ½” aqua blue
Strip 8
2 ½” x 2 ½” green
2 ½” x 1 ½” pink
2 ½” x 1 ½” white
2 ½” x 2 ½” purple/white HST
2 ½” x 4 ½” white
2 ½” x 2 ½” aqua blue
Strip 9
2 ½” x 2 ½” green
2 ½” x 4 ½” white
2 ½” x 2 ½” purple/white HST
2 ½” x 2 ½” white
2 ½” x 2 ½” aqua blue
Strip 10
2 ½” x 3” green
2 ½” x 8” white
2 ½” x 2 ½” aqua blue
For binding: Cut enough 2 ½” strips from the fat quarter to make approximately 70” of binding. Sew strips together and press.
Cut and numbered strips should look like this:

ASSEMBLY:
Sew pieces in order within each strip, starting with the grass and working toward the sky.
NOTE: Some strips include half square triangles (HSTs). I made my HSTs before piecing; if you prefer, you can make them while you piece.
Refer to this diagram for the correct placement of HSTs and strip order.

HINT: To keep strips in order, I left the identifying numbers on my cutting table and returned the strip back to the proper number after sewing together.
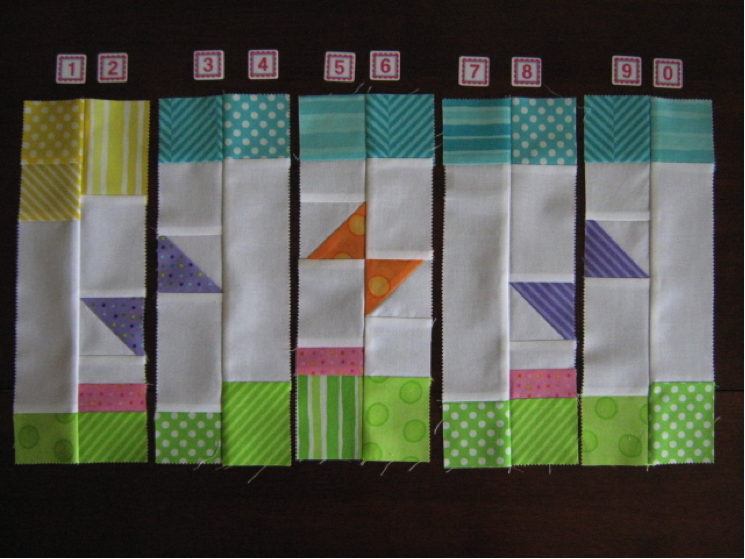
Sewn strips should look like this:
Once strips are sewn, it’s time to press. Press all ODD numbered strips seams UP (toward sky) and pressed all EVEN numbered strips seams DOWN (toward grass) with the exception of the HSTs. Press HST seams toward their adjacent piece, see below.

Once all strips are pressed, pin together in sets of two. It is important to note that not all seams will line up with others (referring to the diagram will help determine this). Be sure to pin where nesting seams align. Sew together.
Press seams toward the strip with the least amount of horizontal seams.
Attached strips sets should look like this:
Continue to assemble place mat by pinning and sewing strip sets 1 - 2 to strip sets 3 - 4 and so on. Be sure to pin where seams nest. Press seams toward the strip with the least amount of horizontal seams.
Assembled place mat top should look like this:
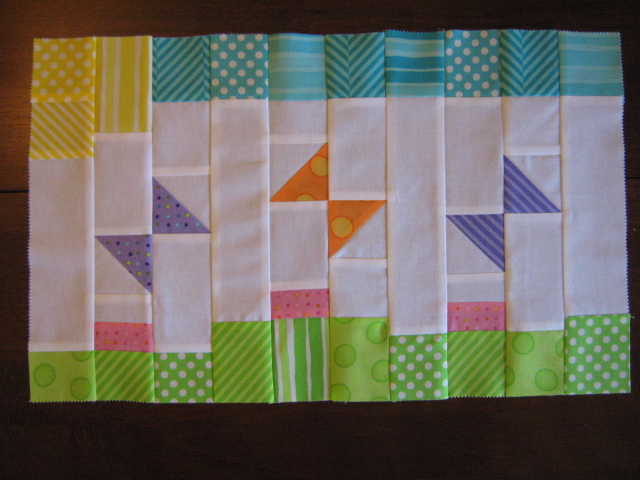
Your place mat top is complete.
Measurement for the place mat top is 12” high by 20” long. Trim if necessary.
To finish, sandwich your backing, batting and place mat top. Pin and quilt as desired.
Lastly, add your binding and your Dash into Spring place mat is finished!
![]()
Place mat finishes at 12" x 20".
I hope this place mat brightens your day! If you make one and post it on Instagram, tag me @mondaymorningdesigns—I’d love to see what you create.
Deb Gehringer
{Monday Morning Designs}
![]()
Posted in: