Welcome to Moda Fabrics!
Boxed Candy Toss Quilt
Boxed Candy Toss Quilt
Published:
Jan 16 2016 - 23:00
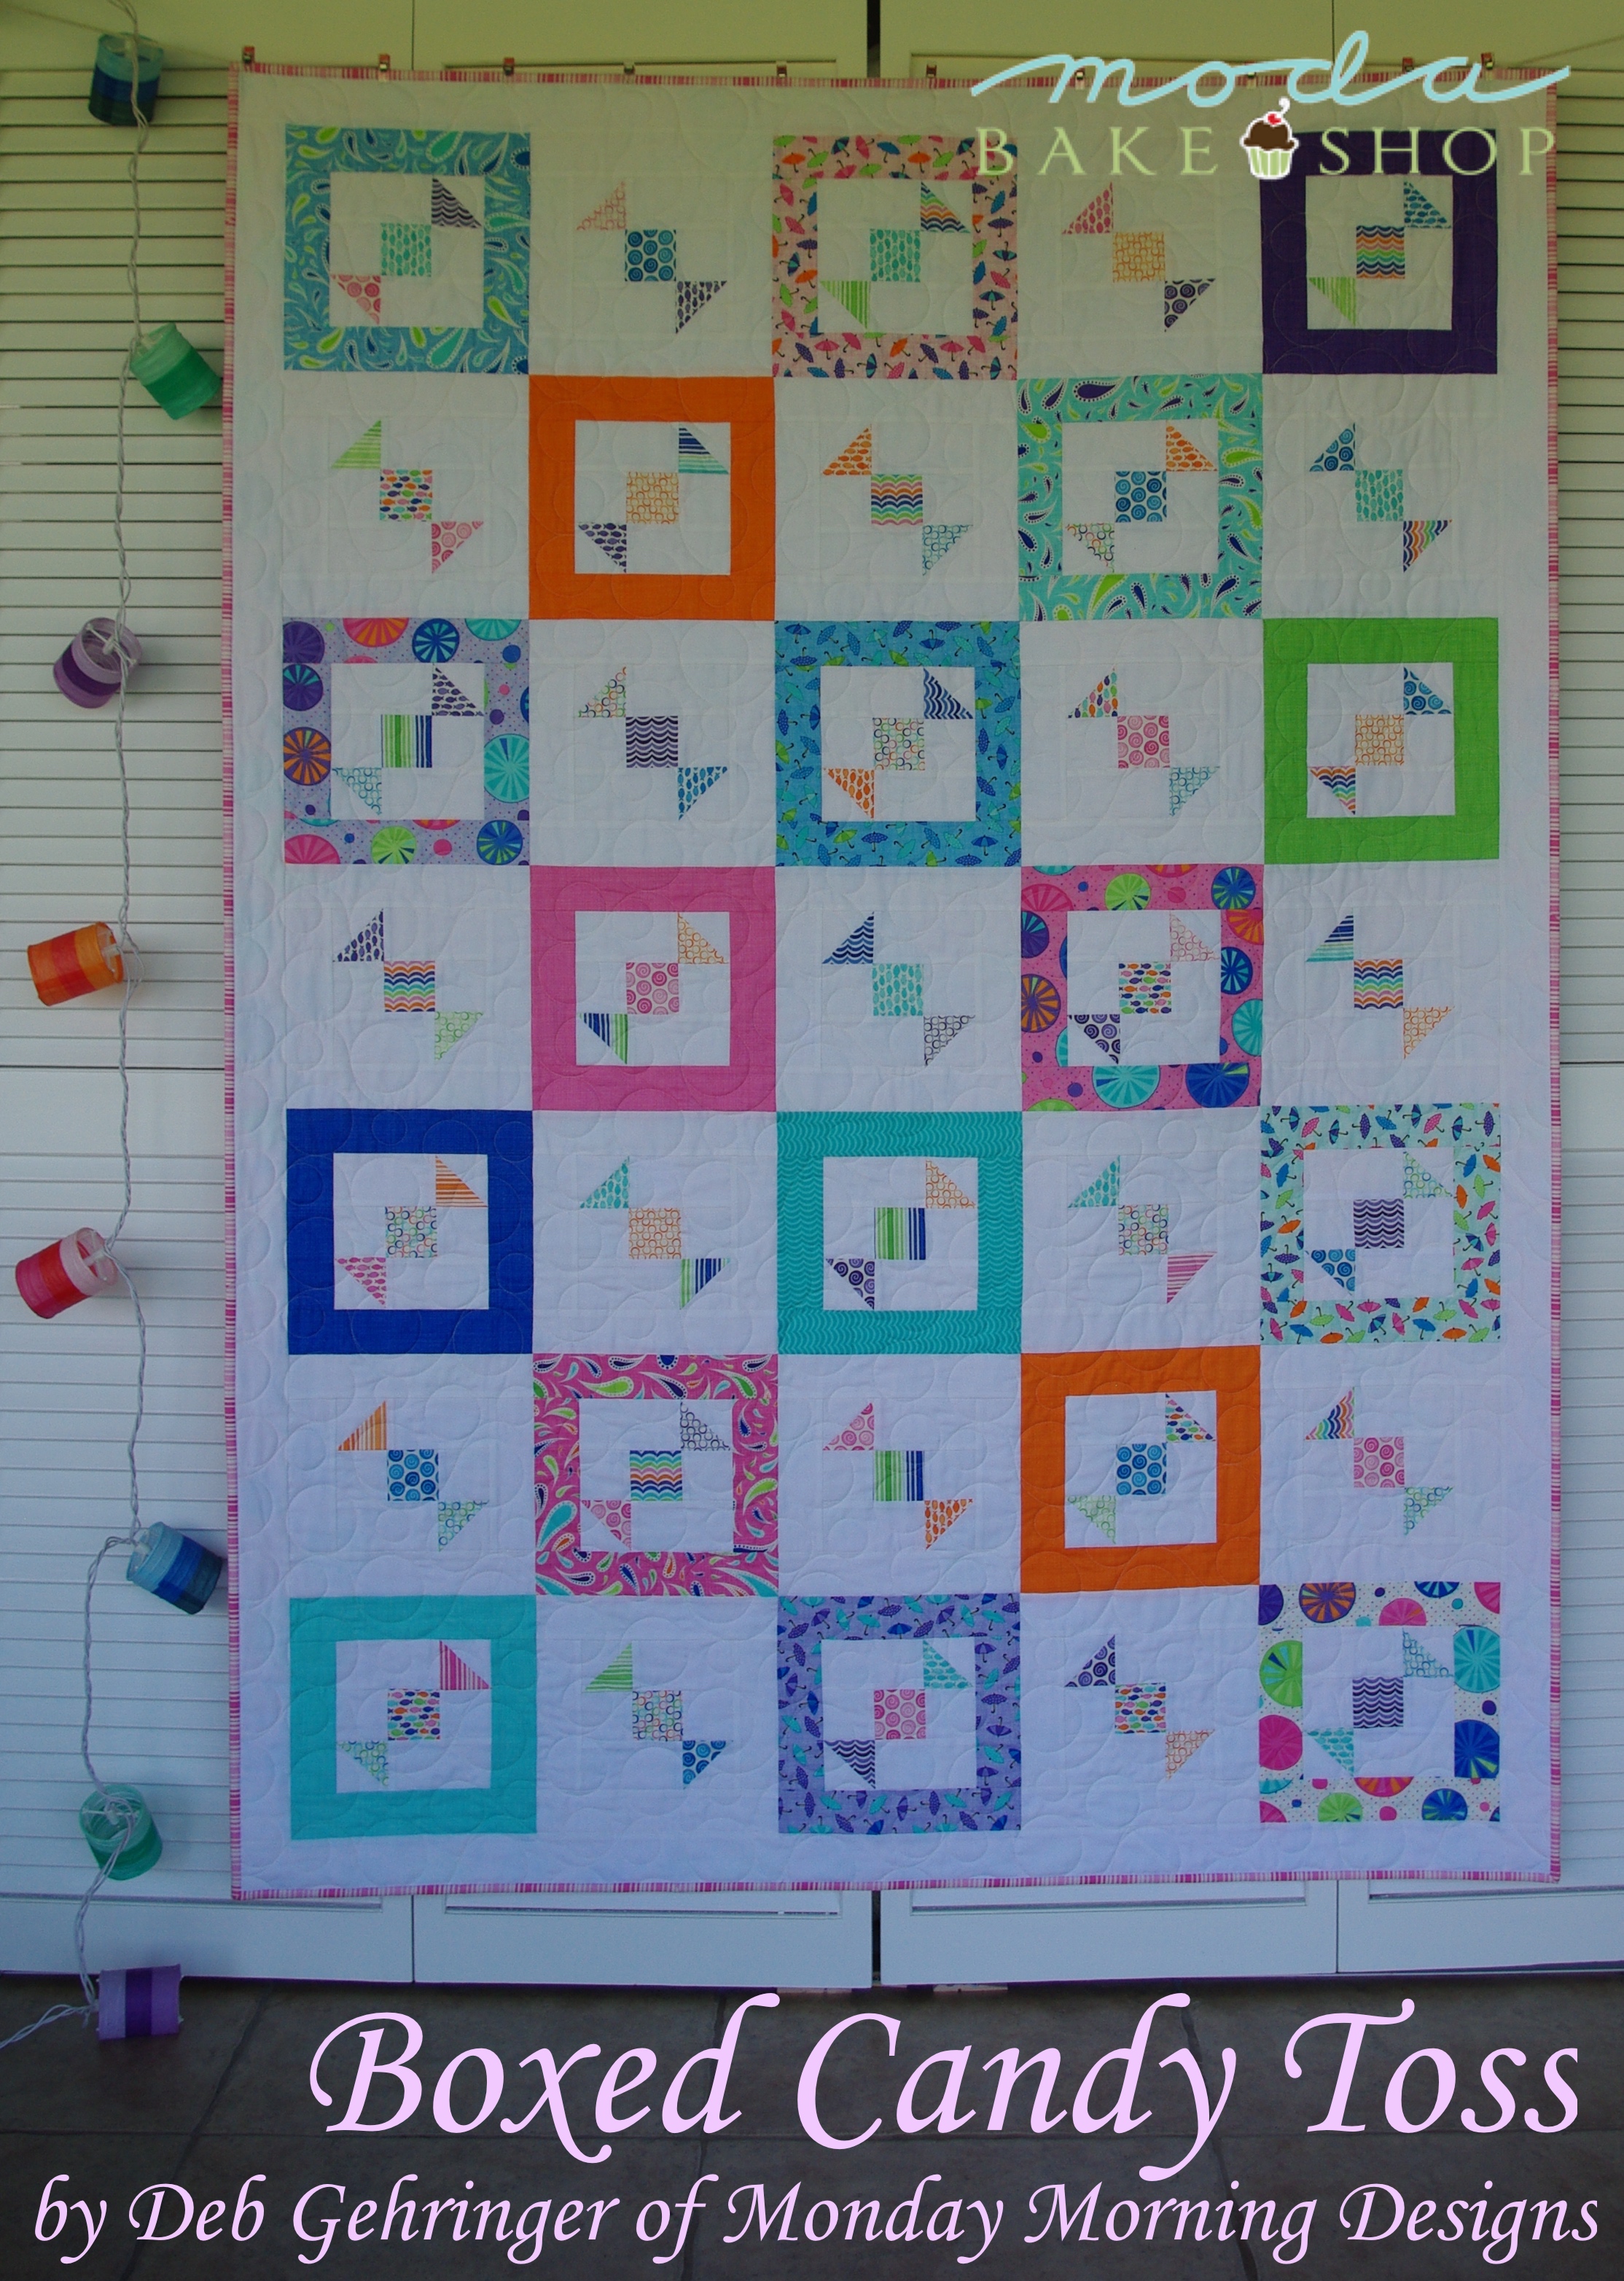

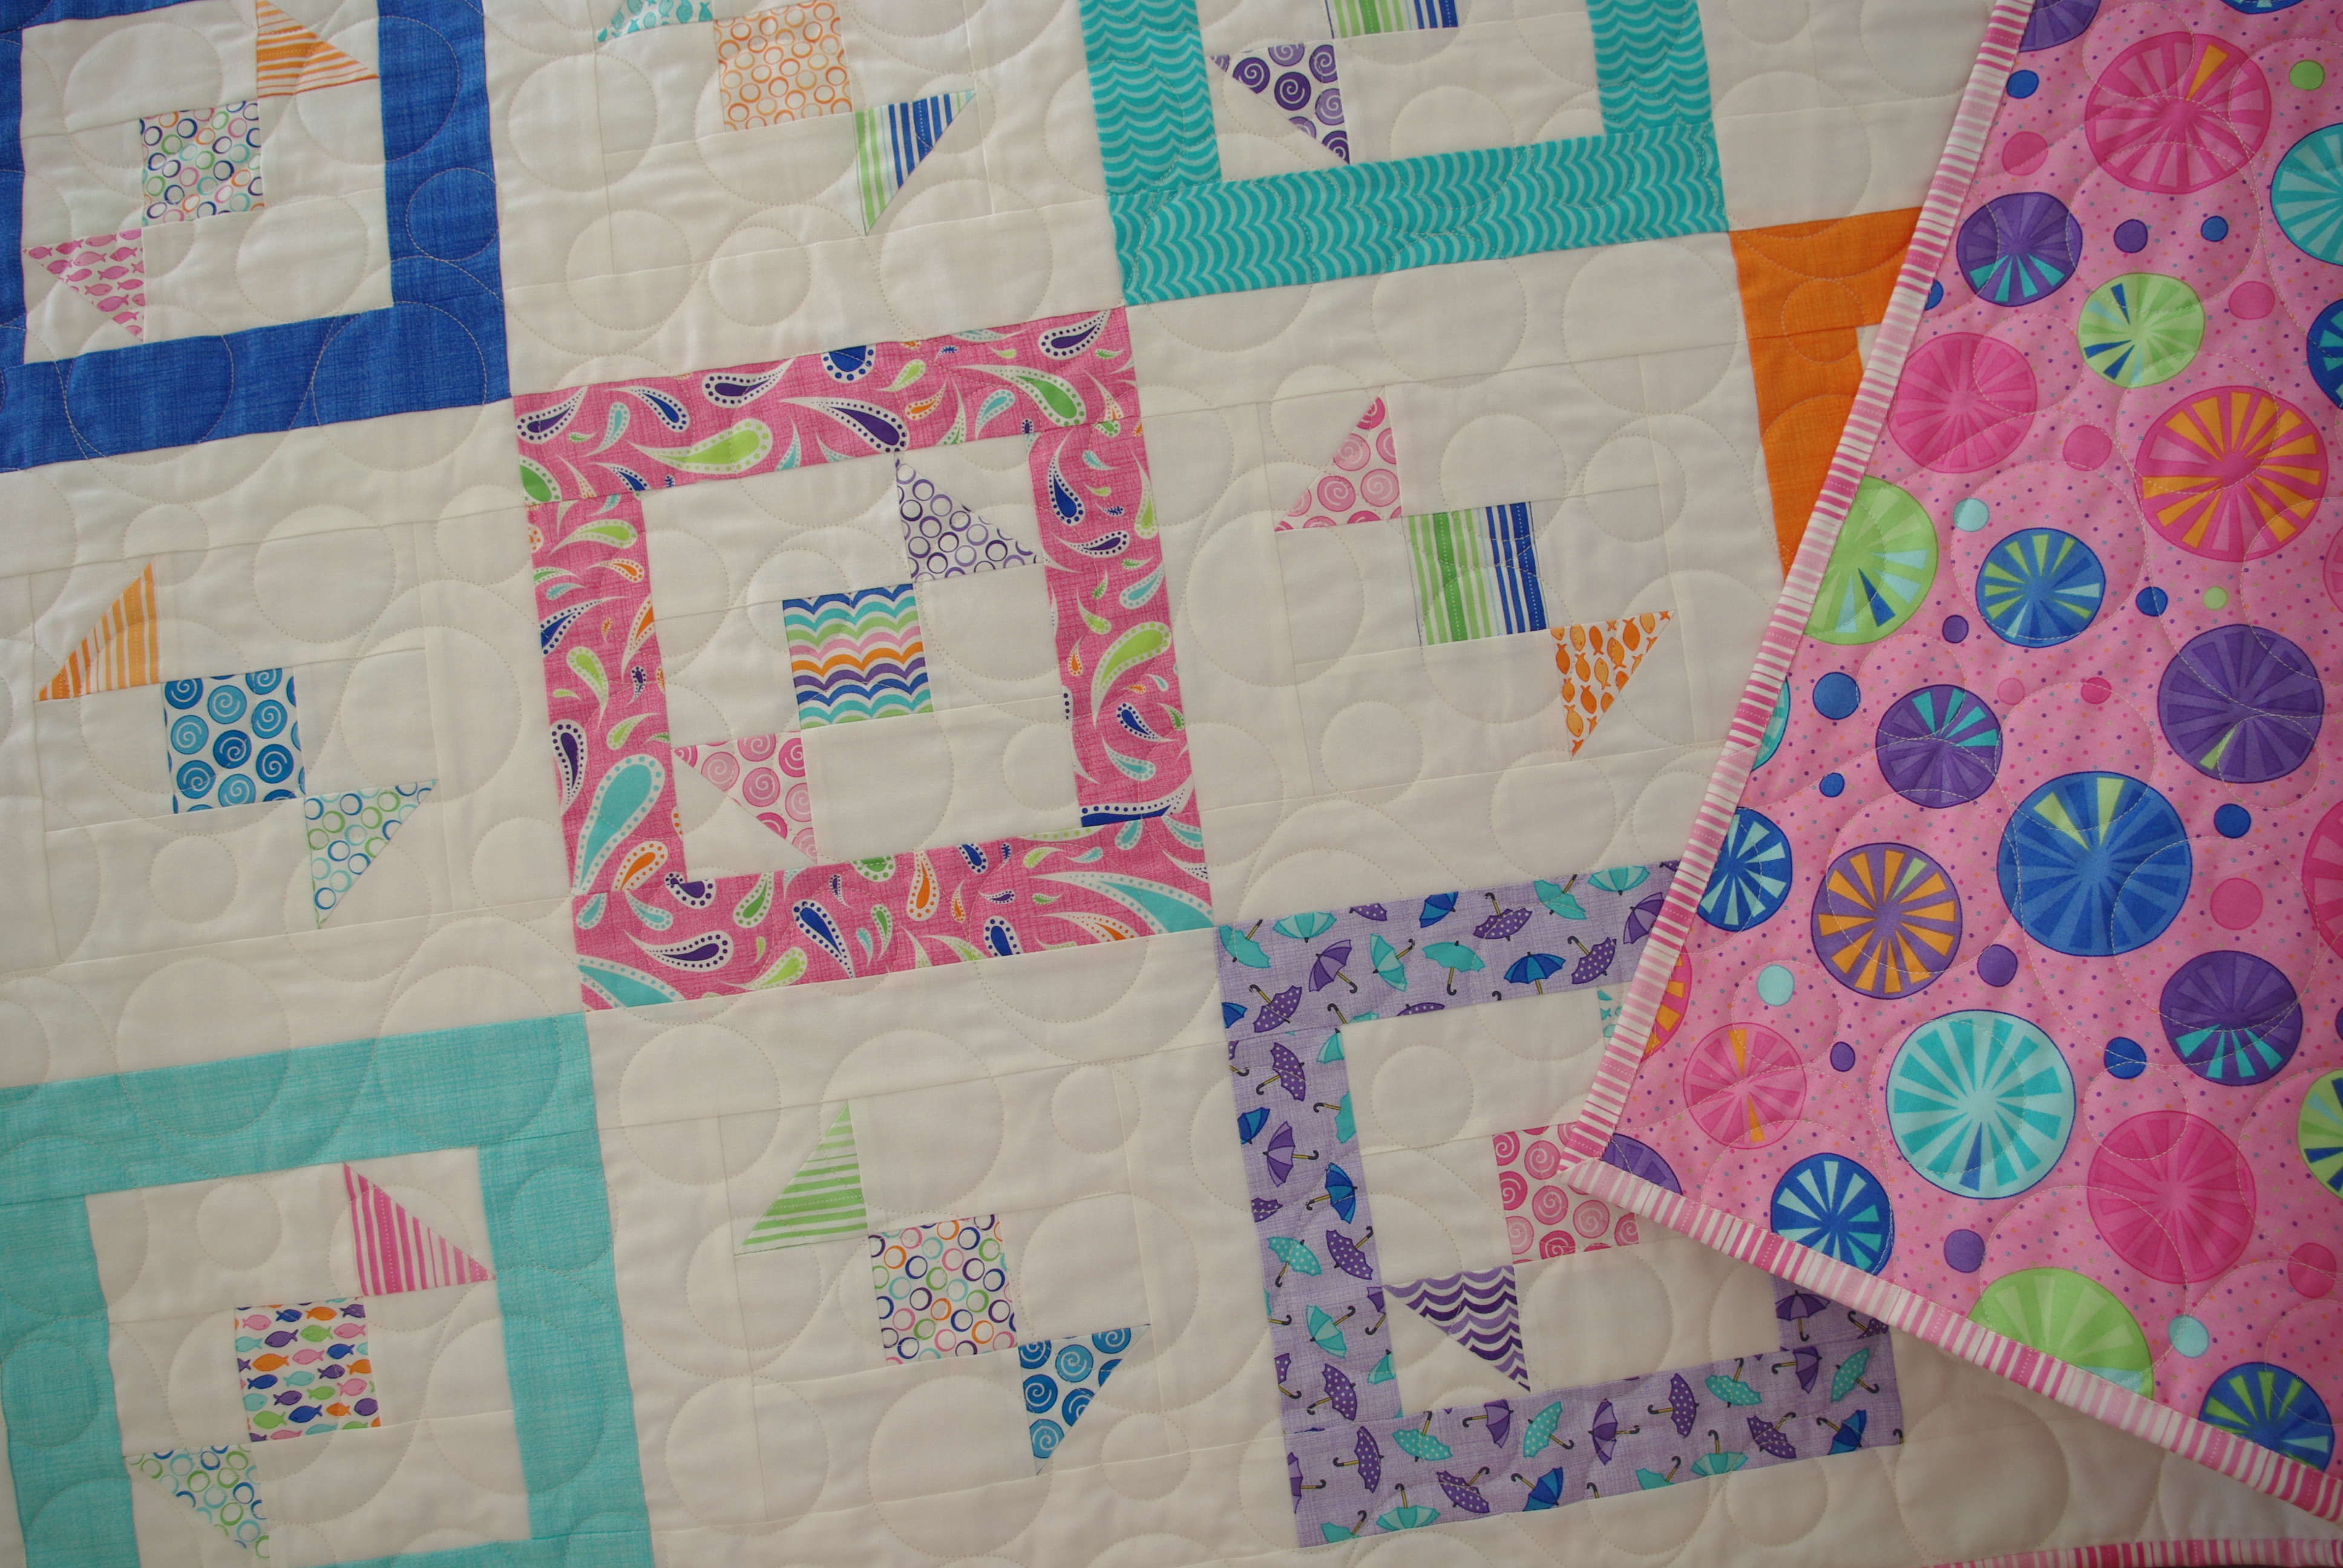
Hello quilters! I’m Deb Gehringer of Monday Morning Designs, back with a fun and playful quilt tutorial to share with you. Boxed Candy Toss is a blend of whimsy, mixed-up half square triangles and Rainy Day! brights by Me and My Sister Designs. I’m not quite sure what inspired me to design this quilt, but I think sweets had something to do with it!
This quilt finishes at 52" x 71".
![]()
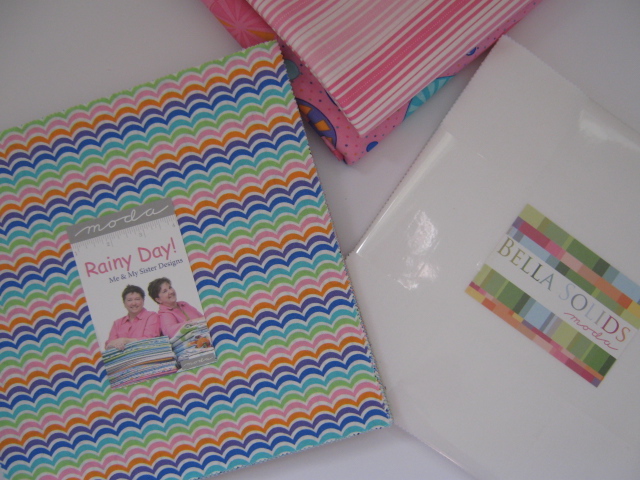
One layer cake of Rainy Day! by Me and My Sister Designs
One layer cake of background fabric — Bella Solids White
½ yard background fabric for quilt borders — Bella Solids White (or 7 – 2 ½” precut strips)
½ yard binding fabric — Rainy Day! Umbrella Pink Stripe
3 ½ yards backing — Rainy Day! Umbrella Pink
![]()
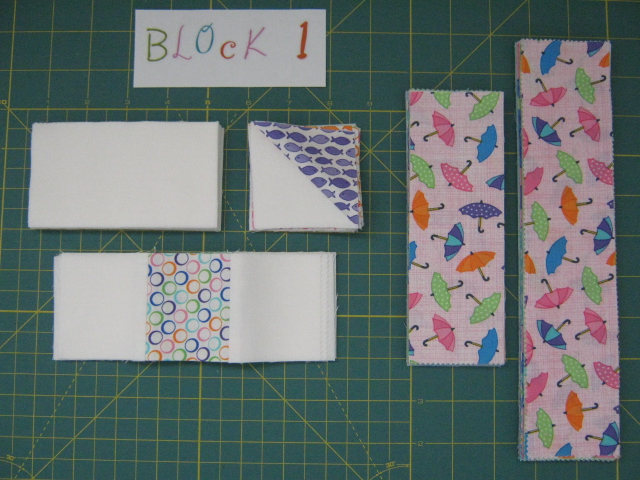
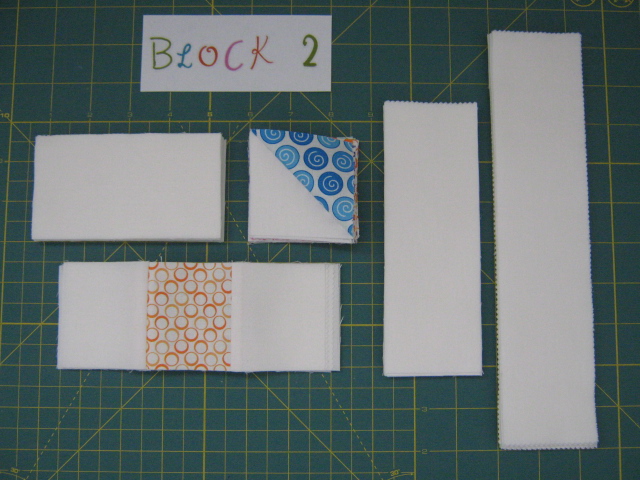
Because this pattern requires two blocks, it’s easiest to cut fabric and separate pieces into piles labeled Block 1 and Block 2. There are 18 Block 1s and 17 Blocks 2s. Blocks will consist of a candy center row, two candy wrapper rows and a box border.
From color layer cake:
Choose 18 squares for box borders. From each square, cut 2 - 2 ¼” x 6 ½” strips and 2 - 2 ¼” x 10” strips. You will have 36 of each size strip. Place strips into Block 1 pile.
Choose 9 squares for candy center rows. Cut 1 - 2 ½” x 10” strip from each square. Set aside. (After sewing and cutting, strip sets will be separated into Block 1 and Block 2 piles).
From remaining fabric, cut 35 – 3” squares to make half square triangles (HSTs) for candy wrappers. (After sewing, rows will be separated into Block 1 and Block 2 piles).
From background layer cake:
Pull 17 squares for box borders. From each square, cut 2 - 2 ¼” x 6 ½” strips and 2 - 2 ¼” x 10” strips. You will have 34 of each size strip. Place strips into Block 2 pile.
Cut 18 - 2 ½” x 10” strips for candy center rows. Set aside with 9 color strips. (After sewing and cutting, strip sets will be separated into Block 1 and Block 2 piles).
Cut 35 - 2 ½” x 10” strips. Subcut strips into 2 - 4 ½” strips. You will have 70 strips. Place 36 into the Block 1 pile and 34 into the Block 2 pile. (These will be sewn to the HSTs to complete the candy wrapper rows).
Cut 35 – 3” squares to make HSTs for candy wrappers. (After sewing, rows will be separated into Block 1 and Block 2 piles).
From background yardage, cut and sew together:
Cut 7 (width of fabric) 2 ½” strips. Make 2 - 2 ½” x 67” strips for side borders. Make 2 - 2 ½” x 52” strips for top and bottom borders.
From binding fabric, cut and sew together:
7 (width of fabric) 2 ½” strips
ASSEMBLY:
Now that the fabric is cut, you will first assemble the candy center rows and HSTs as follows. Use a ¼” seam allowance throughout.
To assemble candy center rows:
You will need both (9) color and (18) background 2 ½” x 10” strips. Attach one background strip to each edge of the color strip.
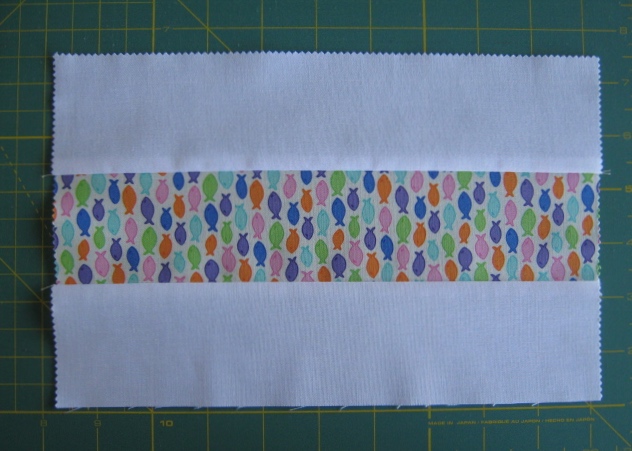
Press seams toward background strips. Make 9 strip sets.
Once strip sets are sewn and pressed, cut into 2 ½” sections.
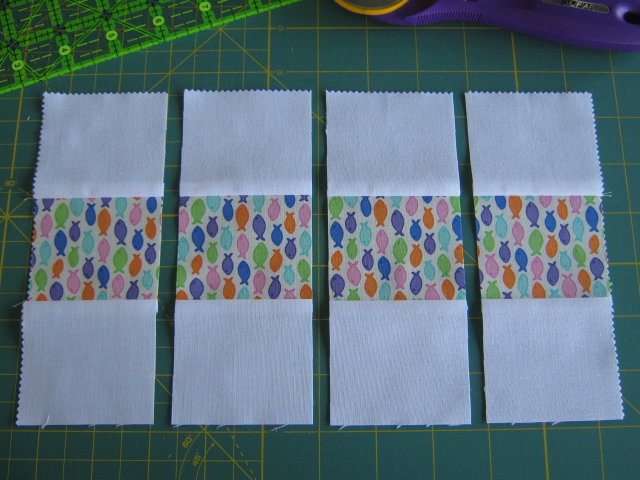
Place 18 strip set sections into the Block 1 pile and 17 strip set sections into the Block 2 pile. Make sure to distribute colors evenly. (You will have 1 left over).
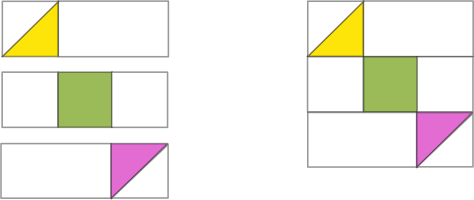
To make HSTs for the candy wrappers:
You will need both (35) color and (35) background 3” squares.
On the wrong side of each background square, draw a diagonal line. Layer the color and background square right sides together. Sew a ¼” from each side of the diagonal line.
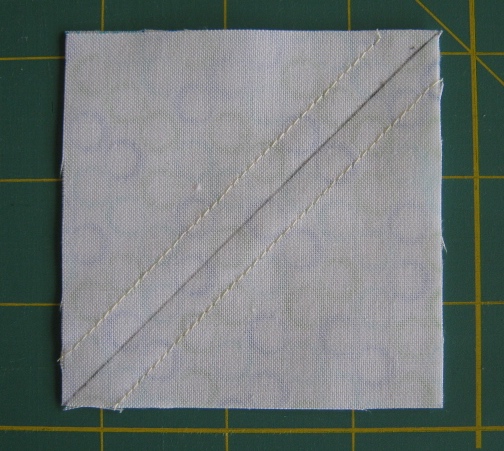
Cut on the drawn line.
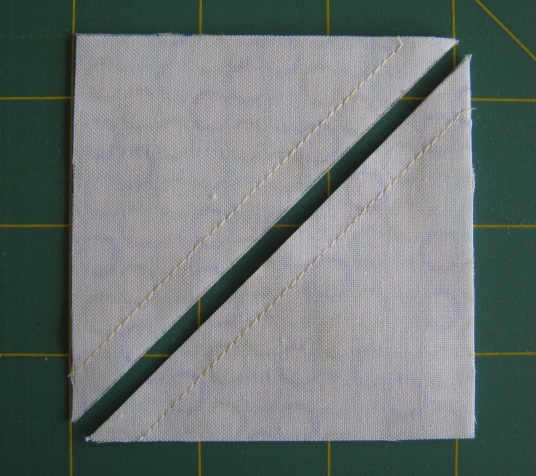
Press seams toward the color triangle. Each unit will yield 2 HSTs. You will have 70 total.
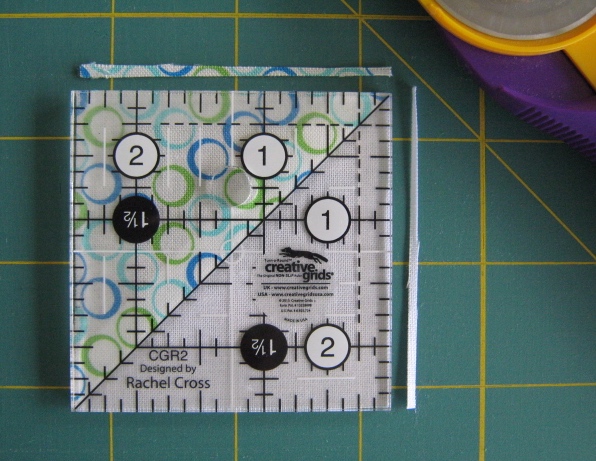
Trim HSTs to 2 ½”.
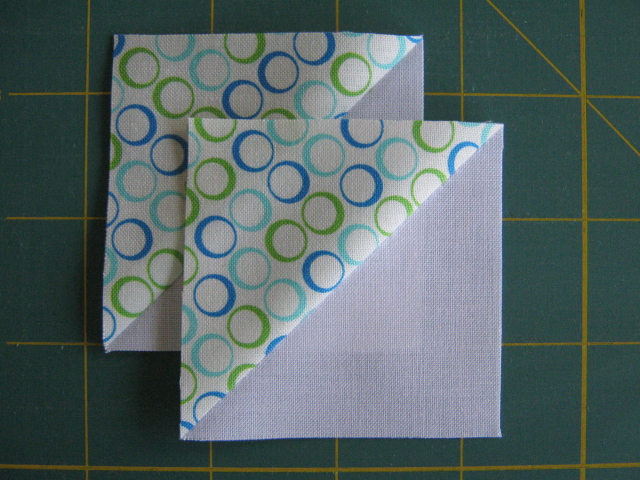
Place 36 HSTs into the Block 1 pile and 34 into the Block 2 pile. Make sure to distribute colors evenly.
After the candy center rows and HSTs are sewn, cut and distributed, your block piles will look like this:
Next up, making blocks.
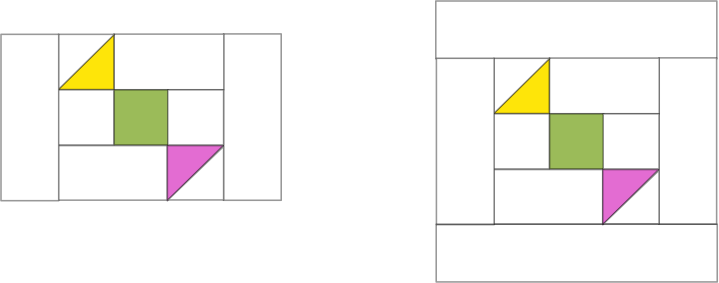
To assemble Block 1:
Sew one HST to each 2 ½” x 4 ½” strip, as shown below. Be sure to note the directionality of the HST.

Make 36. Press seam toward strip.
Lay out rows as illustrated, pin where seams nest, sew. You will have 18 completed candy units.
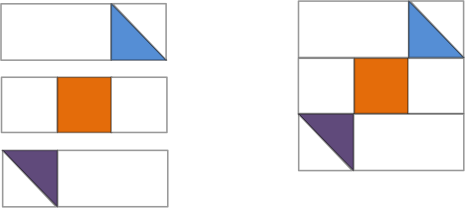
Next, add a 2 ¼” x 6 ½” color strip to each edge of candy unit, as shown below. Press seams toward strip. (I chose controlled color when assembling, but you can go scrappy if you wish).
Lastly, add a 2 ¼” x 10” strip to the top and bottom edge of unit, as shown.
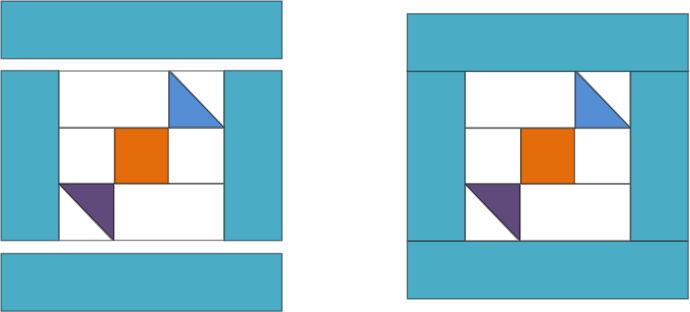
All your Block 1s are complete! Block measures 10” square.
To assemble Block 2:
Sew one HST to each 2 ½” x 4 ½” strip, as shown below. Be sure to note the directionality of the HST.

Make 34. Press seam toward strip.
Lay out rows as illustrated, pin where seams nest, sew. You will have 17 completed candy units.
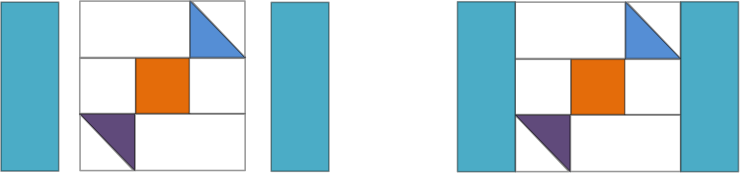
Continue using the same method as Block 1 by adding side strips then top and bottom strips.
All your blocks are complete and it’s time to sew the blocks into rows.
Row 1, 3, 5 and 7: Beginning with Block 1, alternate blocks. Sew together 5 blocks across. Press seams toward dark blocks.
Row 2, 4 and 6: Beginning with Block 2, alternate blocks. Sew together 5 blocks across.
TIP: To help keep blocks more precisely aligned, try this pinning option by placing pins where seams meet before sewing.
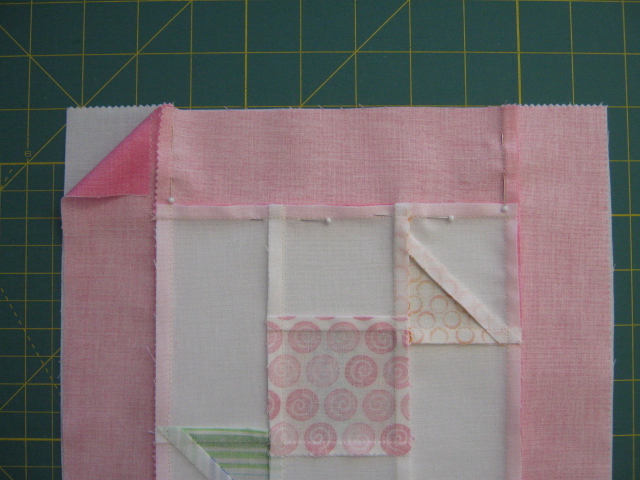
Once your rows are sewn together, you will sew on your borders. Sew your 2 ½” side borders first, then top and bottom borders.
Layer quilt top, batting and backing. Baste and quilt as desired. Sew on binding.
![]()
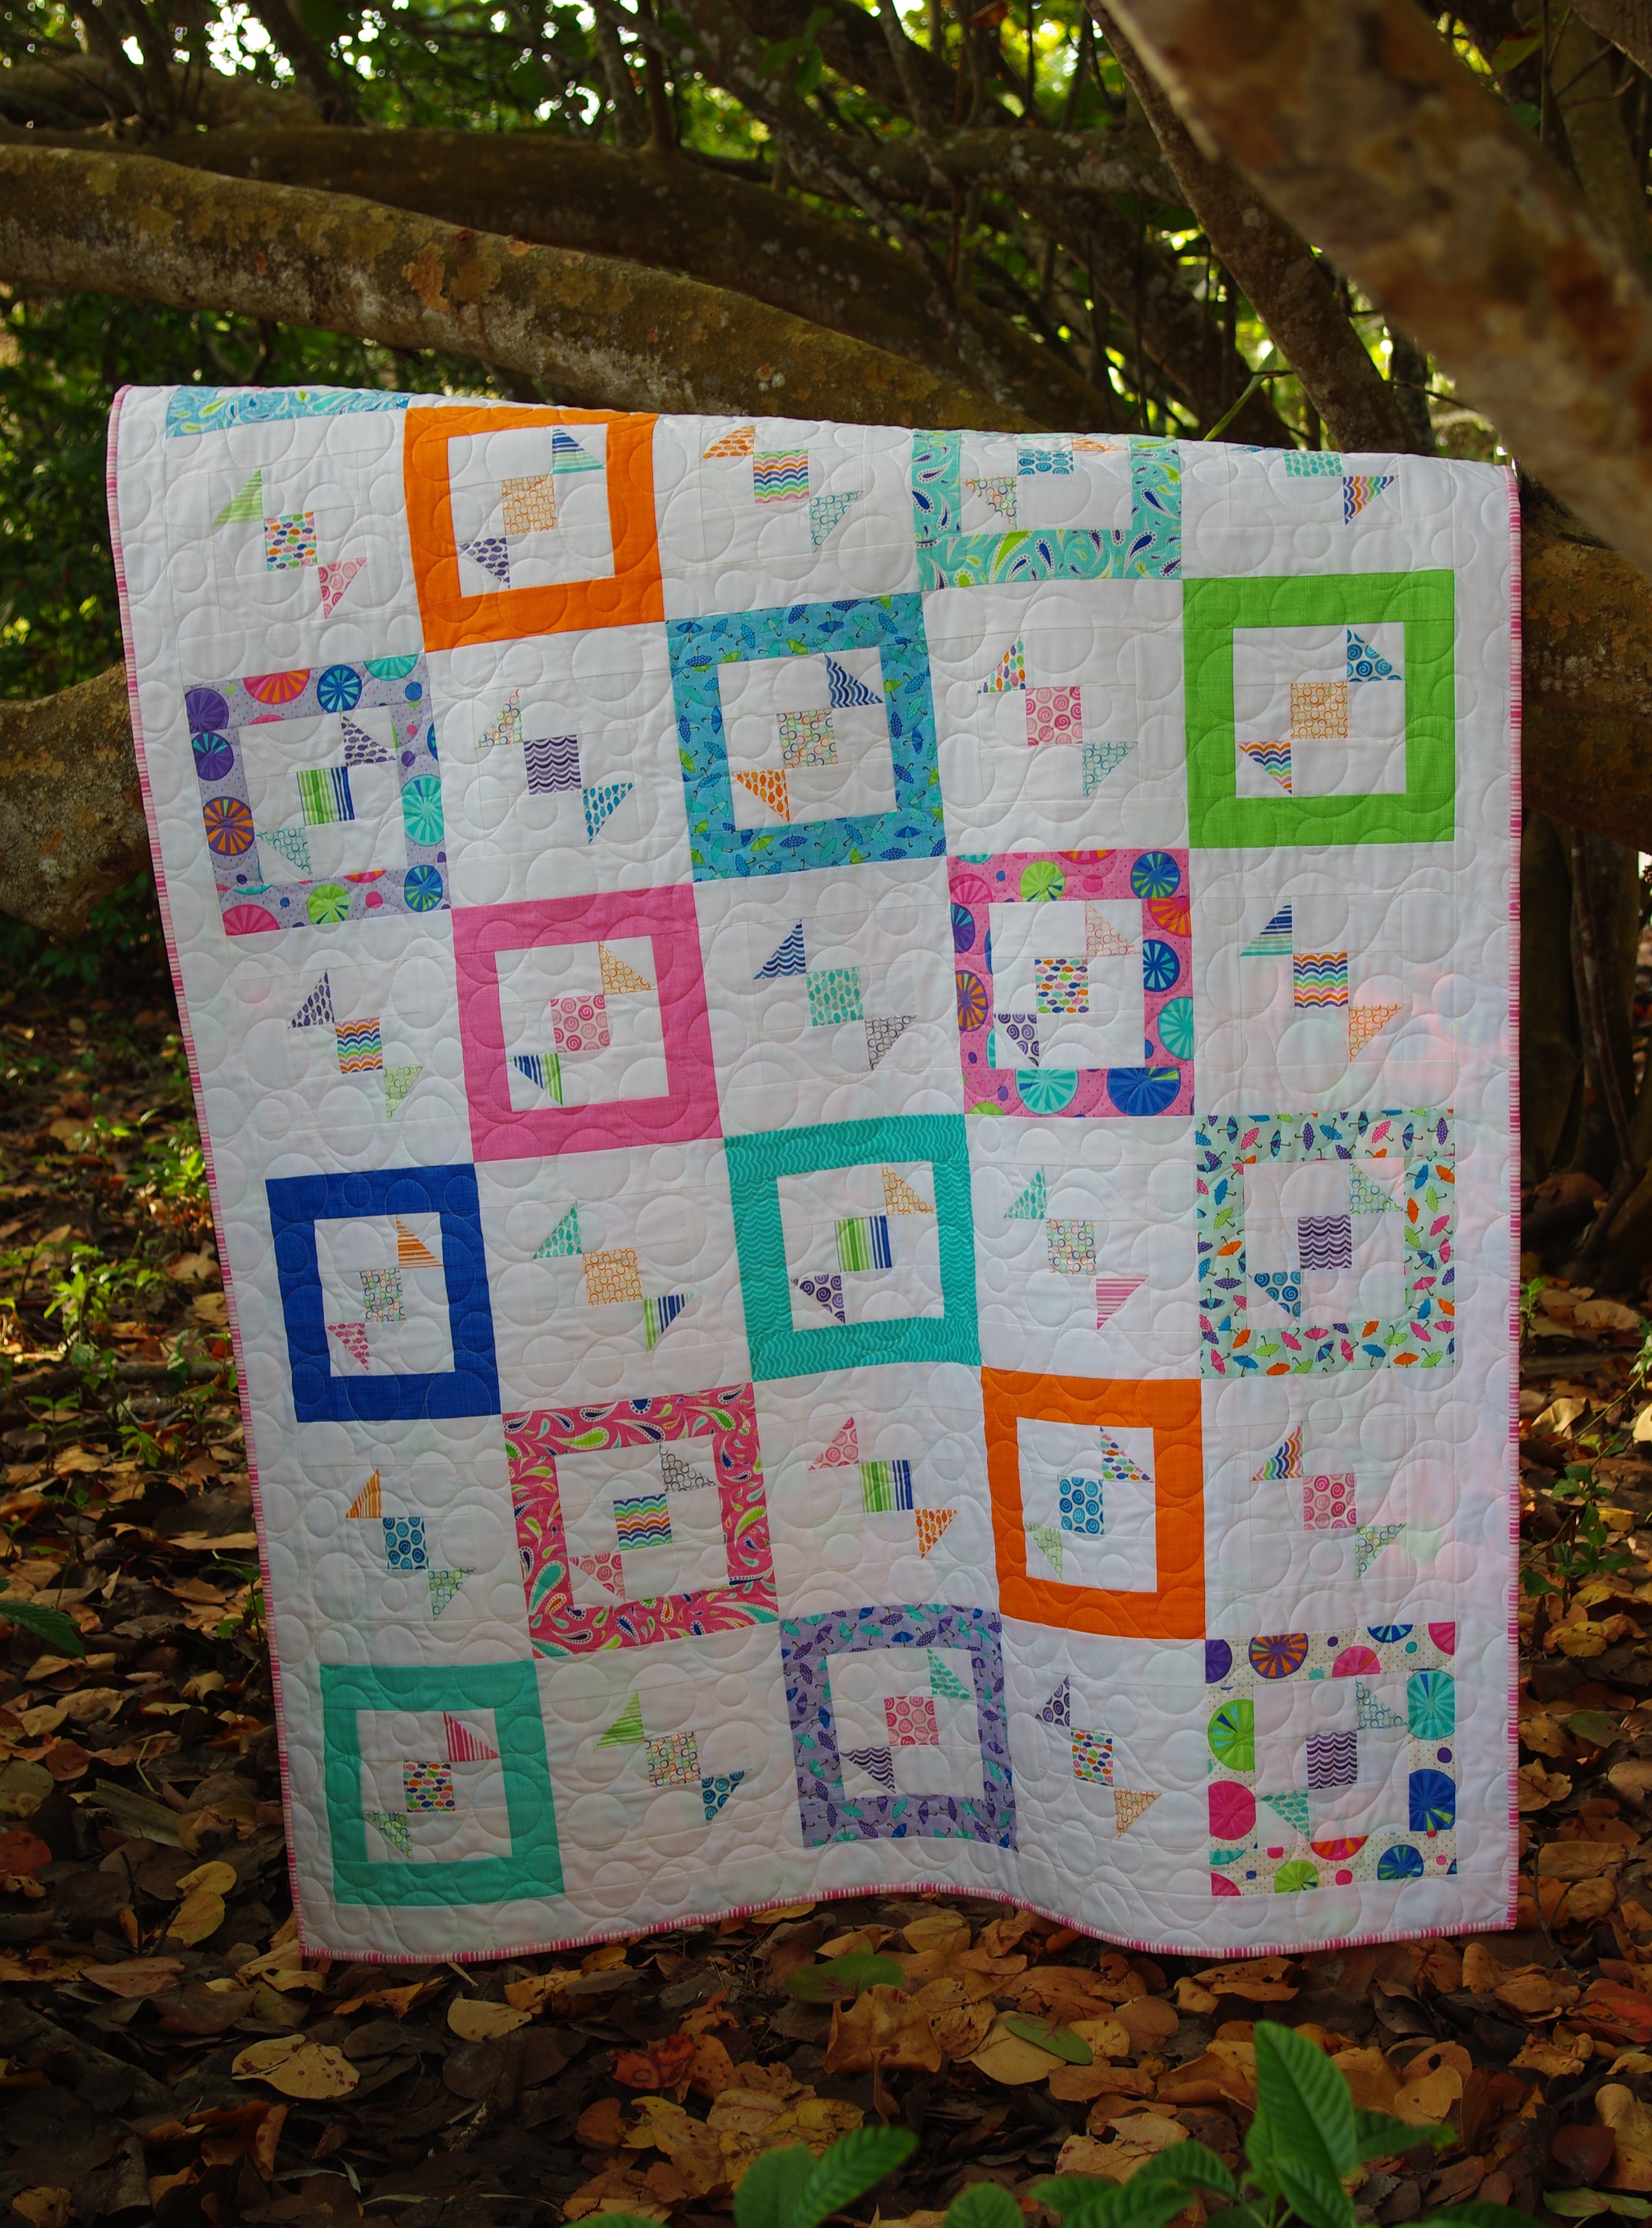
Quilt finishes at 52” x 71”
I think this pattern would do well showcasing a variety of fabrics, from prints to solids. I’m @mondaymorningdesigns on Instagram; if you decide to make this quilt, I would love to see your take on it!
Deb Gehringer
![]()
Posted in: