Welcome to Moda Fabrics!
NIOSA Quilt
NIOSA Quilt
Published:
Oct 23 2015 - 23:00


Hi y'all! It's Cathy Smith again from over at A Quilting Chick. I'm so excited to be back at Moda Bake Shop sharing my newest pattern design, NIOSA. NIOSA (N-eye-O-sah) is Night in Old San Antonio. During Fiesta, I was inspired by all of the bright, fun colors of the piñatas and cascarones that hail in Spring in San Antonio. I started playing around with sawtooth stars and came up with these fun, bright blocks. They remind me of the fun colors of Fiesta on a night sky, thus NIOSA.
This quilt/project finishes at 94" x 94".
![]()
1 Fat Quarter Bundle (Good Karma by Stephanie Ryan) Use as many as you'd like for variety but you can get what you need from 17 fat quarters
6 yards background fabric (Bella Solids Royal 9900-19)
9 yards backing fabric
1 yard binding fabric
![]()
Cutting Instructions
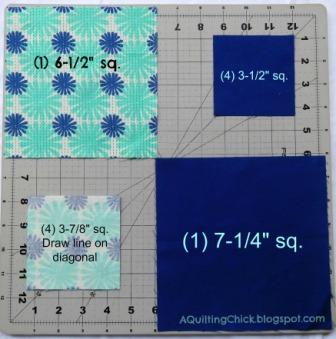
- From the background fabric, cut (50) 7-1/4” squares, and (200) 3-1/2” squares.
- From each fat quarter, (3) 6-1/2” squares, and (12) 3-7/8” squares. Draw a diagonal line on the back of each of the 3-7/8” squares. Keep the fabrics sorted by fat quarter.
- Cut (3) 24-5/8" squares of your background fabric. Cut each on the diagonal twice (in an “x” fashion). Set aside for your side setting triangles.
- Cut 2 (for all sizes) 12-5/8” squares of your background fabric. Cut ONCE on the diagonal. Set aside for your corner setting triangles.
Sewing Instructions
All sewing instructions assume a scant 1/4" seam allowance. We will be making (50) sawtooth stars. The following directions are to make ONE star. Repeat to make all 50 stars.
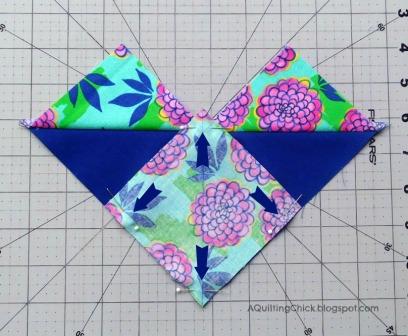
- Place (2) 3-7/8” squares on top of (1) 7-1/4” square, right sides together, as shown. The center corners will overlap. Pin as shown.
- Sew a scant 1/4” seam on each side of the diagonal line as shown.
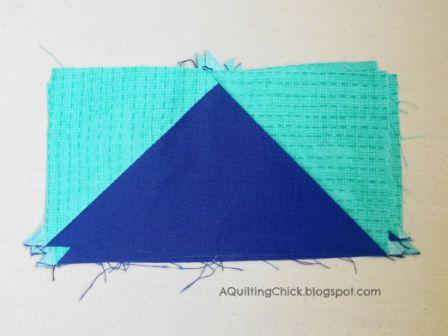
- Cut on your drawn diagonal line and press open. You will have two pieces that look like the picture to the right.
- Pin a 3-7/8” square to the corner of your partial flying geese. Pin as shown. Repeat for both of the partial flying geese pieces.
- Sew a scant quarter inch seam on both sides of your drawn line, as shown.
- Cut on your drawn line and press open. You will now have 4 flying geese units. Square up to 3-1/2 x 6-1/2”.
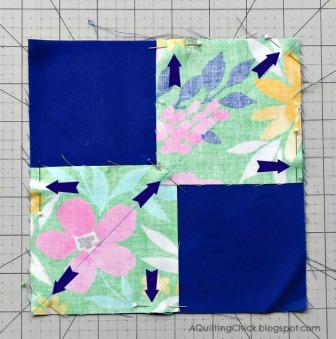
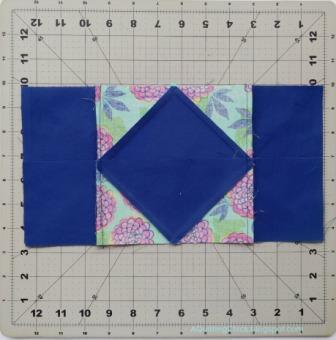
- Arrange (4) flying geese units with (1) matching 6-1/2” square and (4) 3-1/2” background squares as shown. Sew into three rows. Press seams away from the flying geese units.
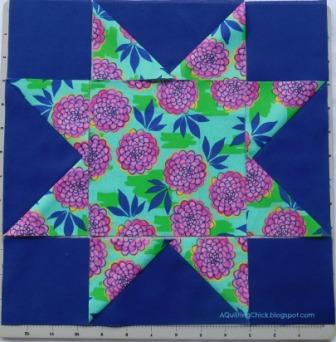
- Layer the top and bottom row over the middle row as shown. Pin along the long edges and sew.
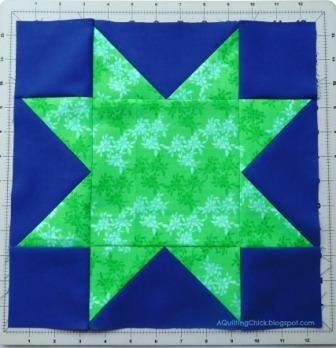
- Press open. You've now completed your sawtooth star! Remember, you need to repeat these instructions to make (50) stars.
- Next, go through and pair up your stars. You don't want them to be too “matchy” so don't pair up two greens or two blues. Mix it up.
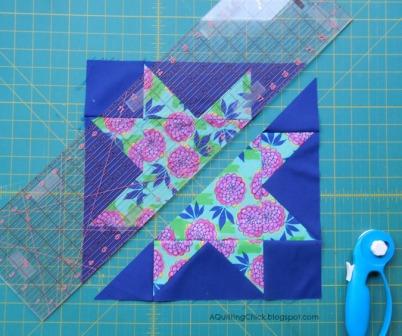
- Now this is the hard part. It literally made me wince when doing it. But you CAN do it! We're going to cut those pretty sawtooth stars. Line one of your stars up on your cutting board, using the 45-degree angle line as your guide (see picture).

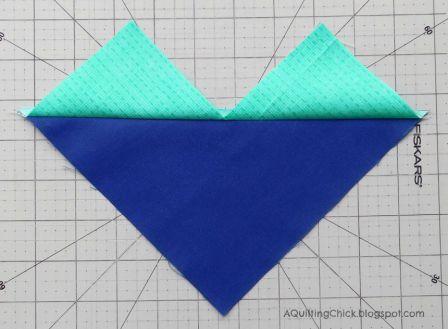
- Now...cut. You will get two halves, as shown. Repeat with your matched star.
- Rearrange your halves as shown. This is your final block layout.
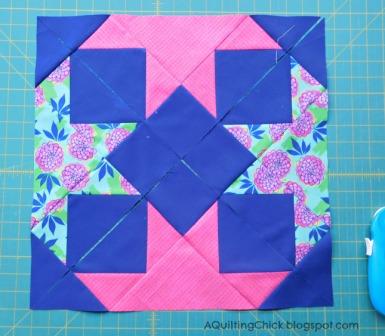
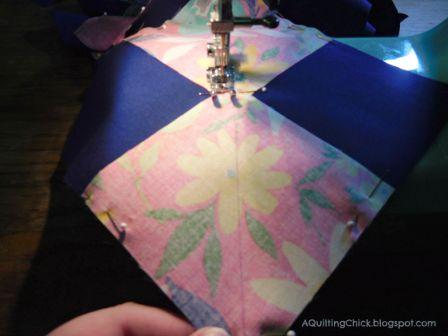
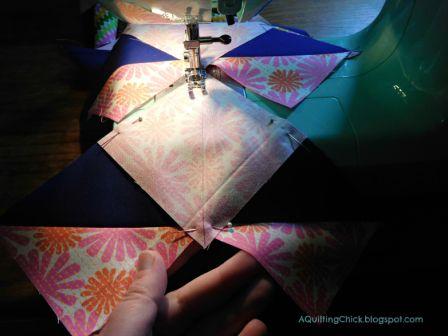
- Flip the top, right halves onto the lower, left halves, right sides together and pin as shown.

- Sew the pieces together then join the new halves into the whole block. Be careful when sewing your center seam; you will be sewing on a bias edge. Pin well and don't pull it through the machine. Just let if feed through. Press open. Repeat with all matched pairs. Your unfinished blocks will measure 17".

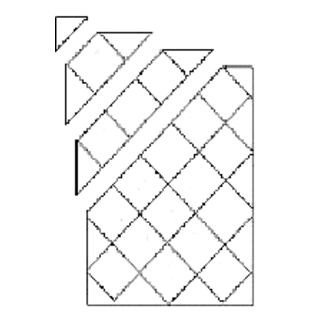
- Now it's time to arrange your blocks!!! We are setting this on point (see diagram). Your setting size is listed in the fabric requirements chart. Using your corner and side triangles, sew your quilt top together!
![]()
Makes one (1) 94" x 94" quilt top. Layer with batting and backing and quilt as desired.

I sure hope that you give this one a try! It looks a lot harder than it is and I enjoyed making it so much! My son is campaigning hard for this one! And if I'm honest, it just screams his name. Where will yours go? Don’t you know someone that will love it? I hope you enjoy making NIOSA. Please feel free to stop by my blog and join in the fun!
Cathy Smith
{aquiltingchick.blogspot.com}
![]()
Posted in: