Welcome to Moda Fabrics!
Apron Strings Table Runner
Apron Strings Table Runner
Published:
Oct 5 2015 - 23:00
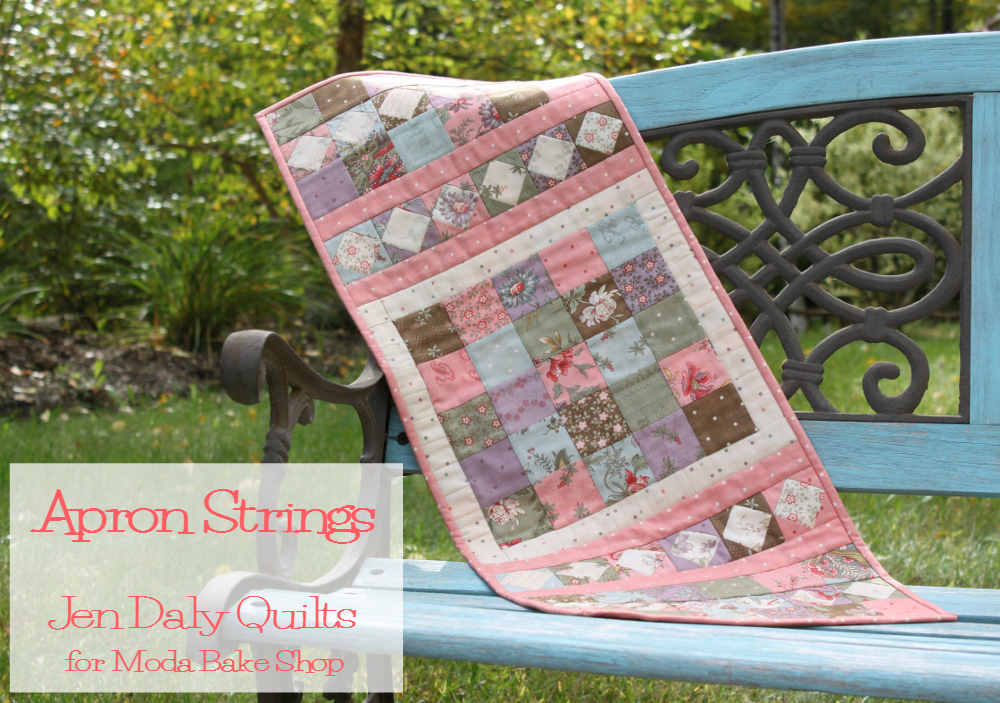

Hi there! I'm Jen Daly and I'm thrilled to be back at the Moda Bake Shop today to share a fun new project. It's a pretty little 12" x 32" table runner that's made with a charm pack and 2/3 yard of a coordinating fabric. I made my quilt with Blackbird Designs' gorgeous "Hyde Park" collection. I loved working with these fabrics -- the soft colors are beautiful and give this version of Apron Strings a warm, nostalgic feel. Wondering where the name "Apron Strings" came from? Well, my mom, the person responsible for teaching me how to sew, has sewn and worn aprons for as long as I can remember. The rose colored strips and matching binding of this quilt remind me of the colorful bias tape that she uses on her aprons to both finish the edges and create ties or strings. I suppose I could have called this quilt "Bias Tape," but somehow it just doesn't have the same effect!
Let's get started...
![]()
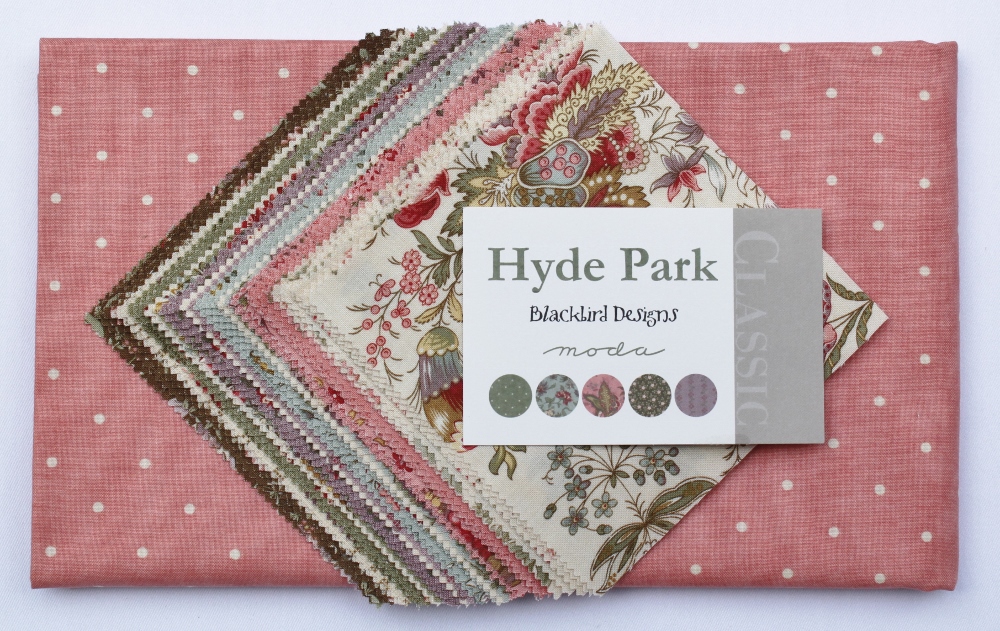
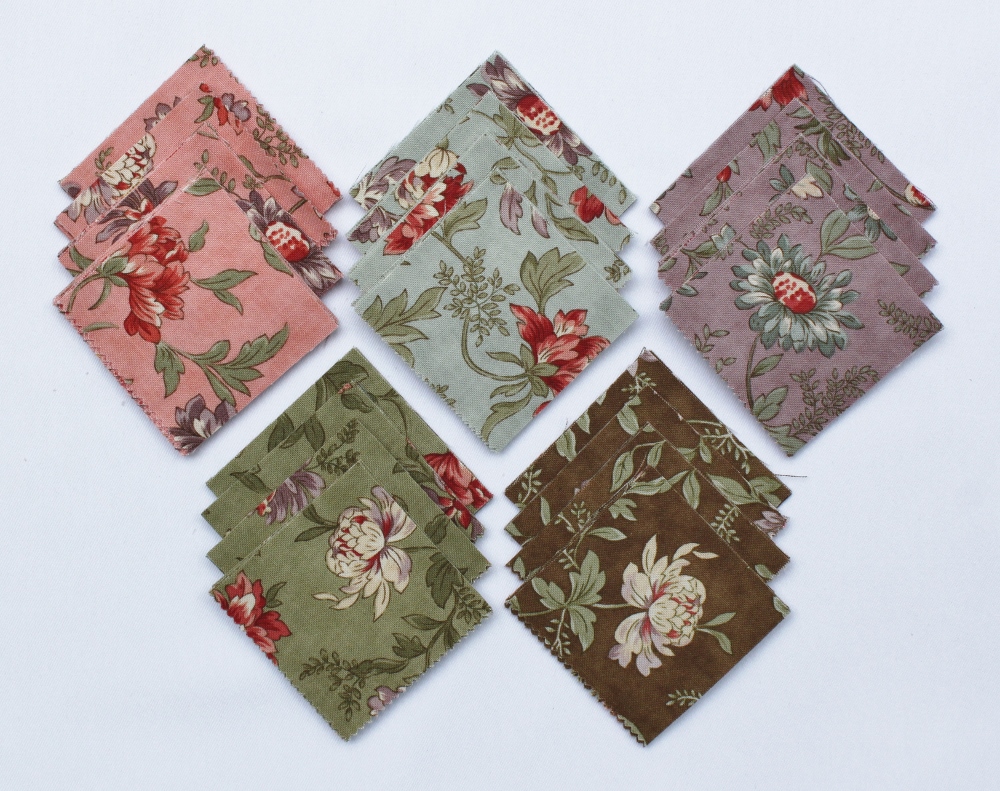
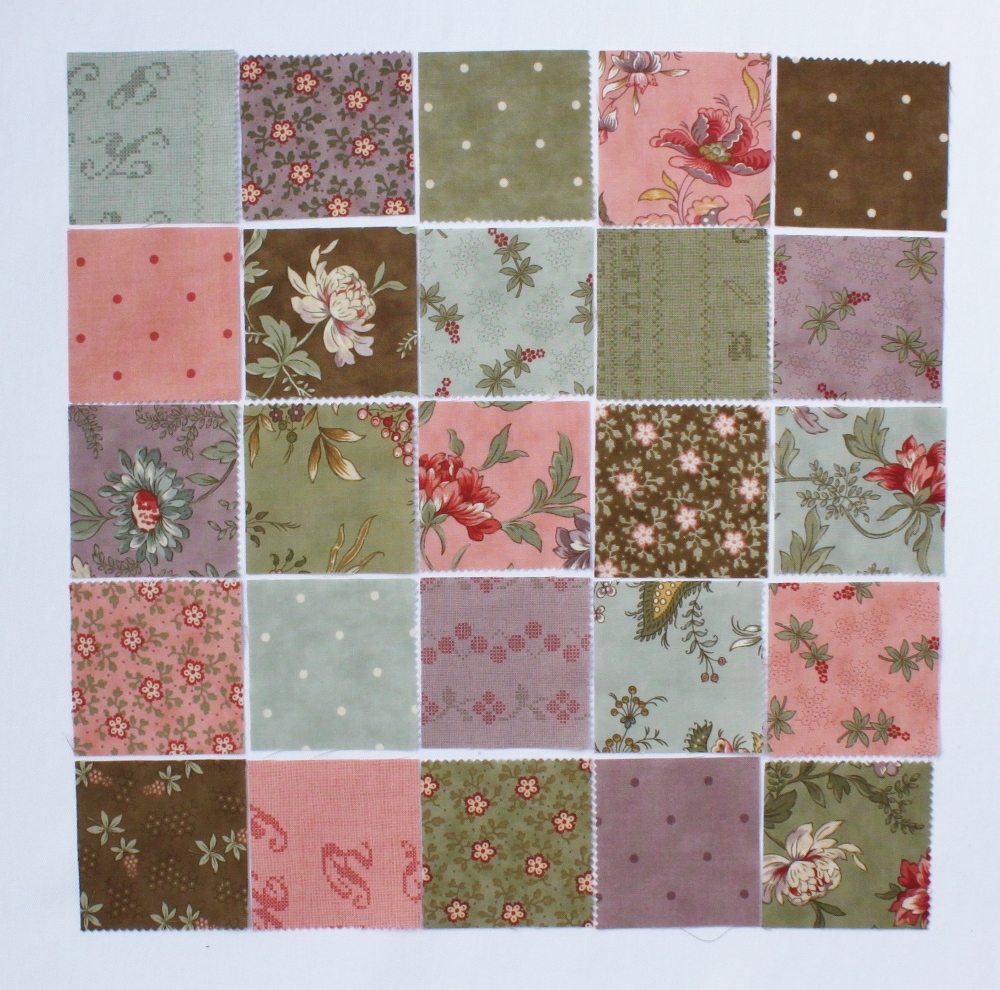
- 1 Charm Pack (shown in Hyde Park by Blackbird Designs)
- 2/3 yard coordinating fabric (shown in Tonal Rose Hips)
- batting measuring 16" x 36"
![]()
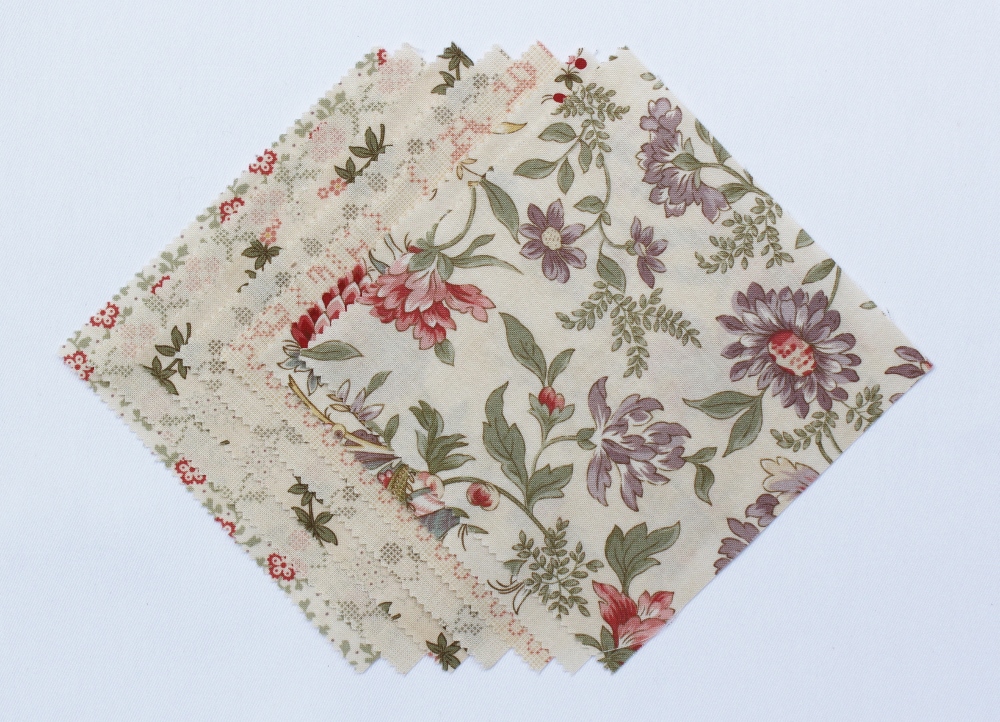
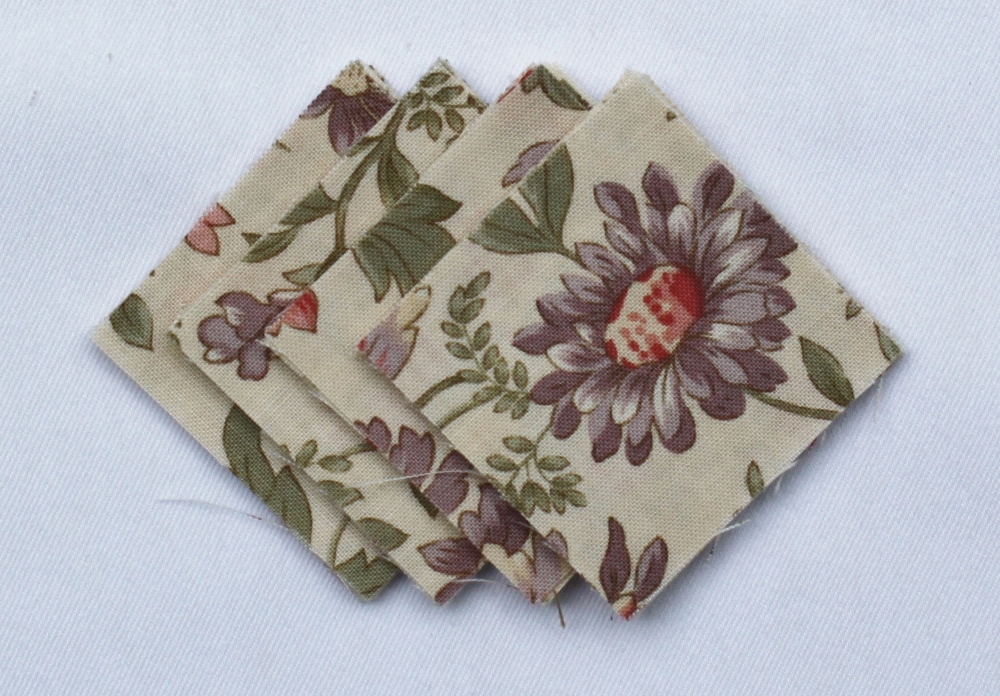
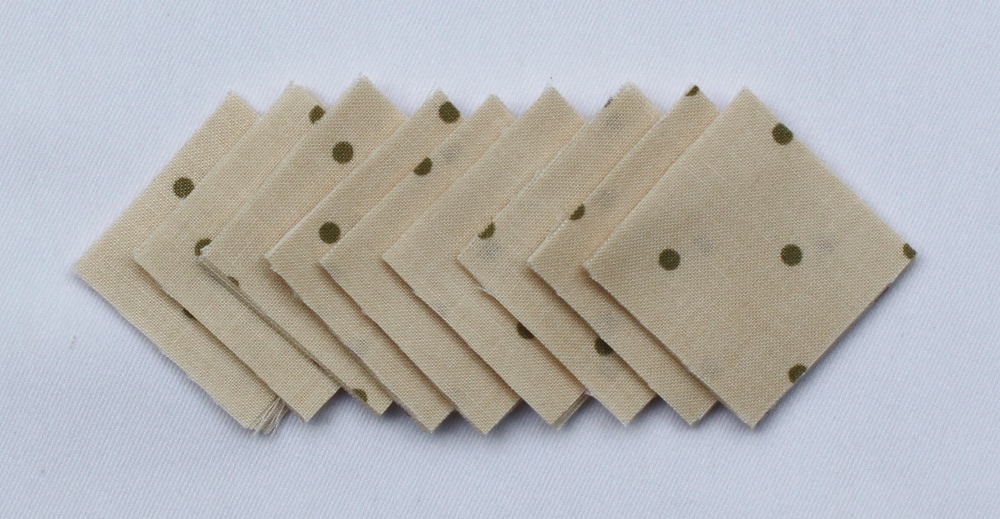
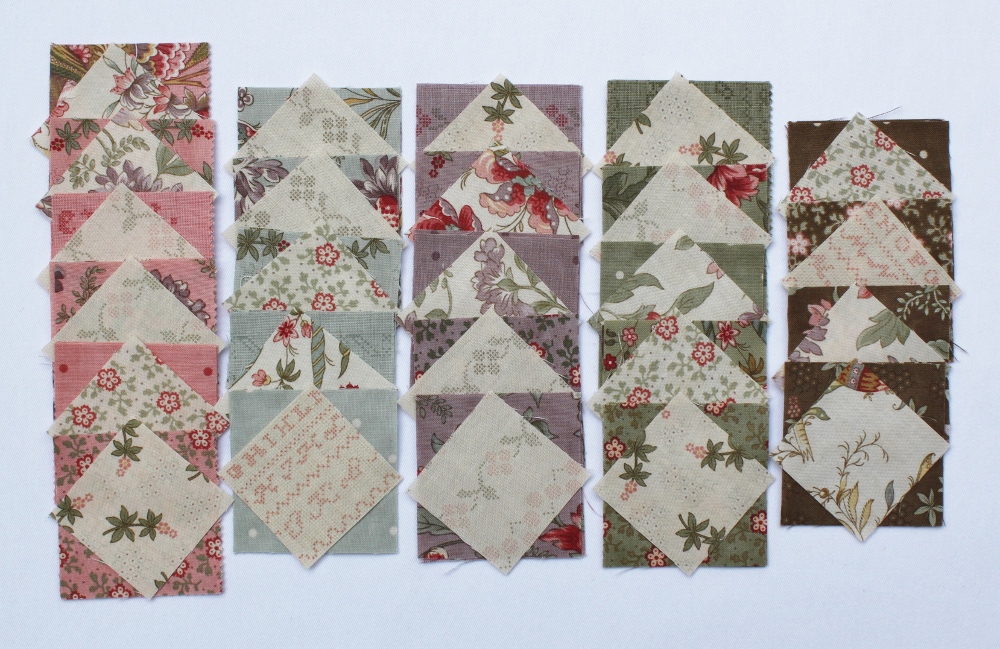
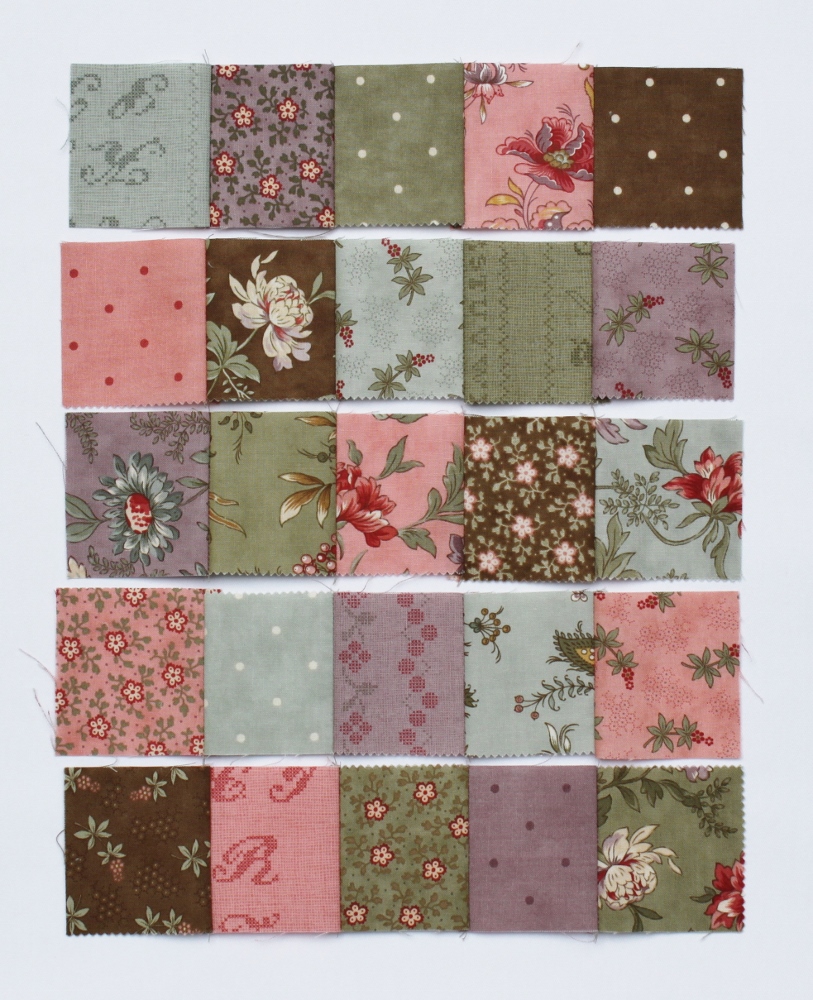
Before cutting, take a few moments to sort your charm squares. You'll need 25 medium/dark charm squares for the patchwork and square-in-a-square blocks, 6-7 light charm squares for the centers of the square-in-a-square blocks, and 6 light charm squares for the pieced 1" border that surrounds the patchwork in the center of the quilt.
Here's how I sorted my charm squares:
For the patchwork/square-in-a-square blocks:
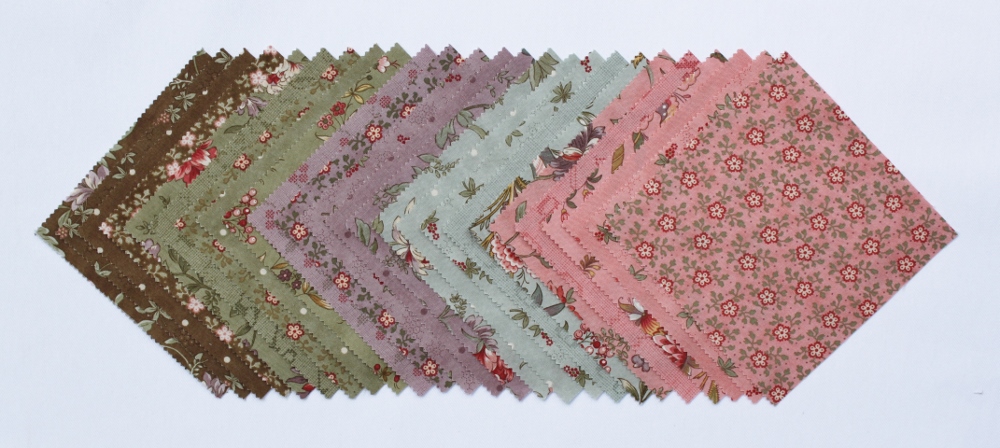
For the centers of the square-in-a-square blocks:
For the pieced 1" border:

Cutting:
1. Cut each of the 25 medium/dark charm squares into 4 - 2 1/2" x 2 1/2" squares. Of each medium/dark fabric, 2 - 2 1/2" x 2 1/2" squares will be further cut and used for the square-in-a-square blocks and 2 - 2 1/2" x 2 1/2" squares will be used as is for patchwork.
2. Cut each of the 6-7 light charm squares that you plan to use for the centers of the square-in-a-square blocks into 4 - 2" x 2" squares.
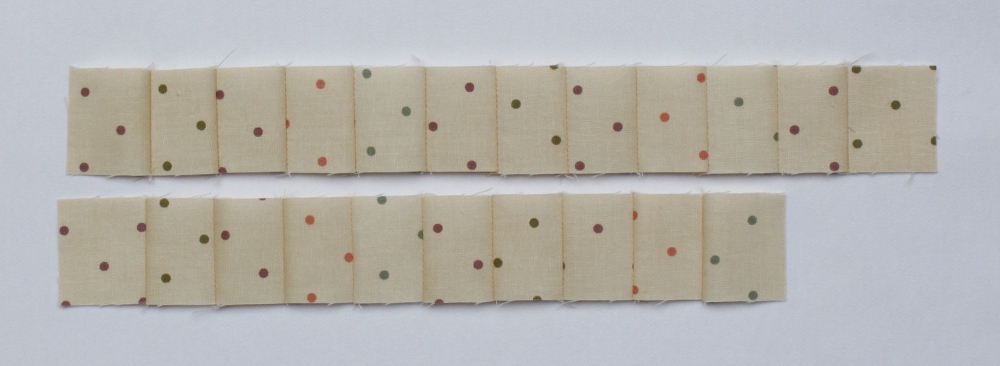
3. Cut each of the 6 light charm squares that you plan to use for the pieced 1" border into 9 - 1 1/2" x 1 1/2" squares.
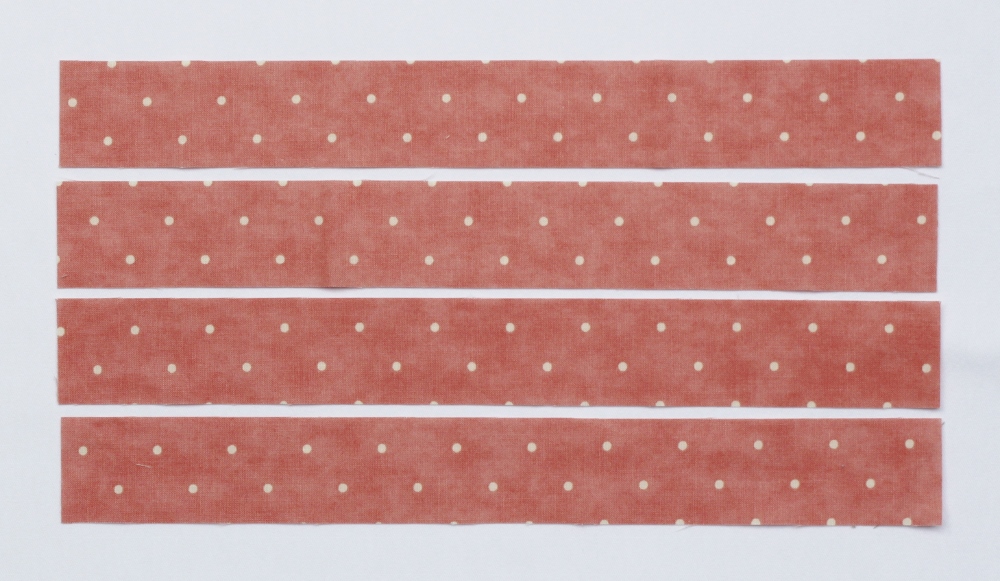
4. From the coordinating fabric, cut 1 - 16" x 36" panel to use as the backing for your table runner; cut 3 - 2 1/4" x WOF (width of fabric - or one selvage edge to the other) strips for your binding; and from the remaining coordinating fabric, cut 4 - 1 1/2" x 12 1/2" strips for the quilt top.
Square-In-A-Square Blocks:
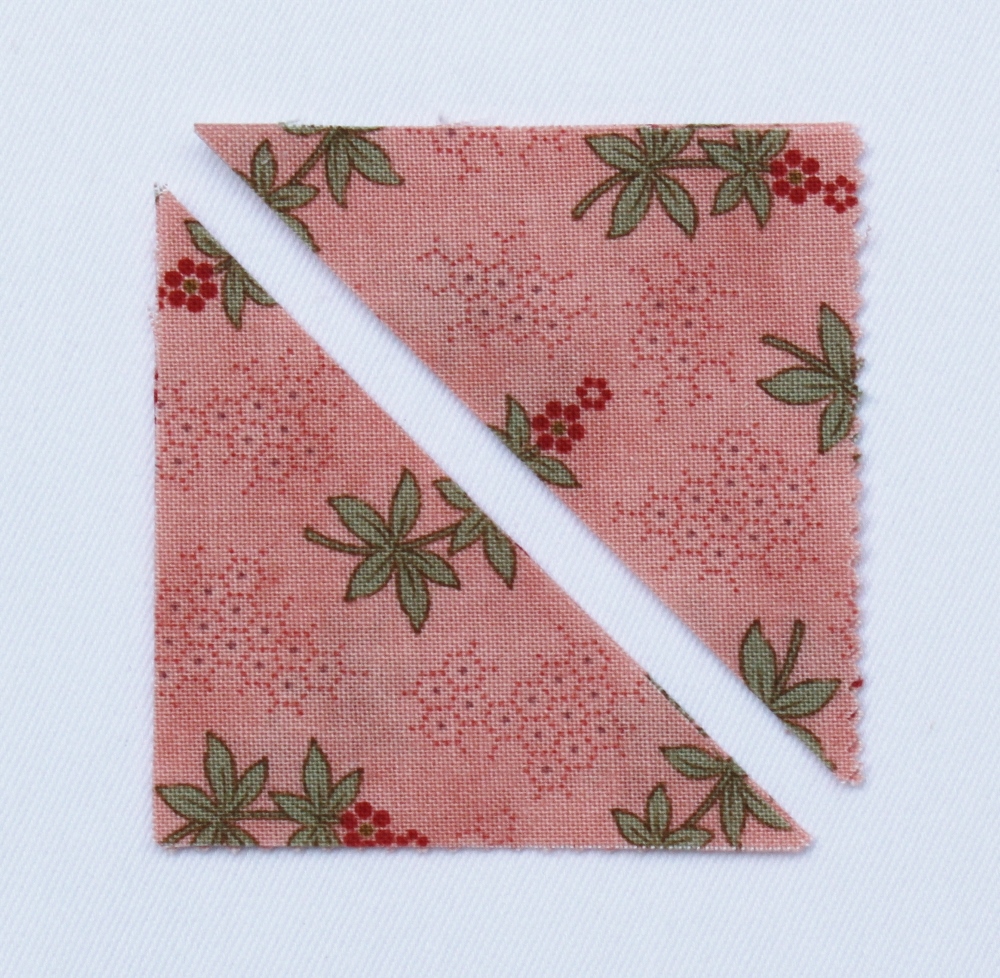
1. Gather 25 sets of 2 matching 2 1/2" x 2 1/2" medium/dark squares and 1 light 2" x 2" square.
2. Cut each set of 2 matching 2 1/2" x 2 1/2" medium/dark squares in half diagonally to form 4 triangles.
3. Matching centers, stitch 2 of the triangles created in step 2 above to opposite sides of a light 2" x 2" square (Note: the ends of the triangles will extend beyond the 2" x 2" square).
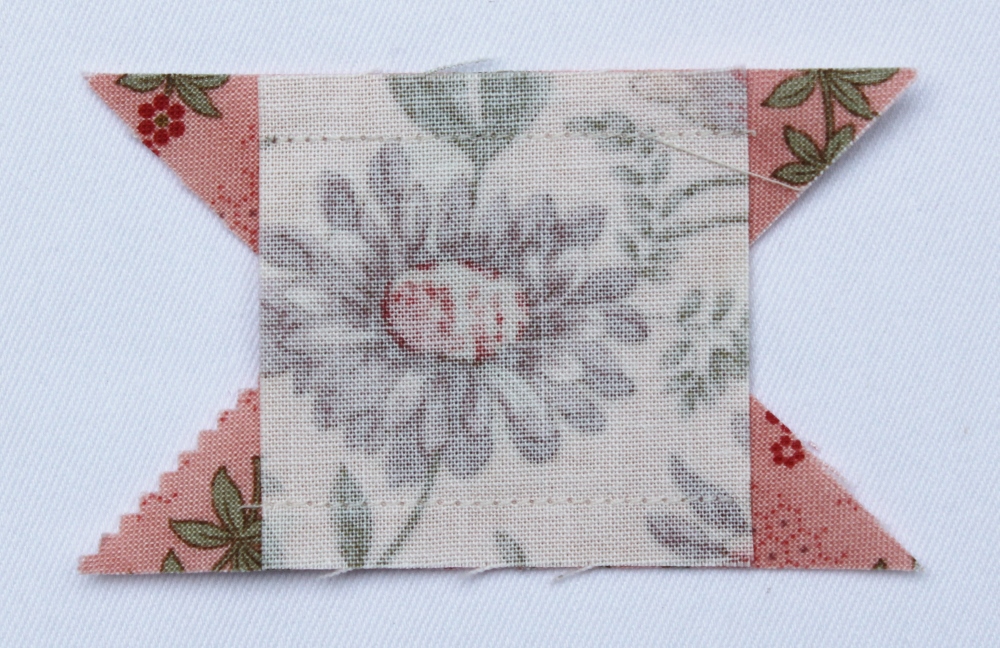
4. Open and press the seams towards the triangles.
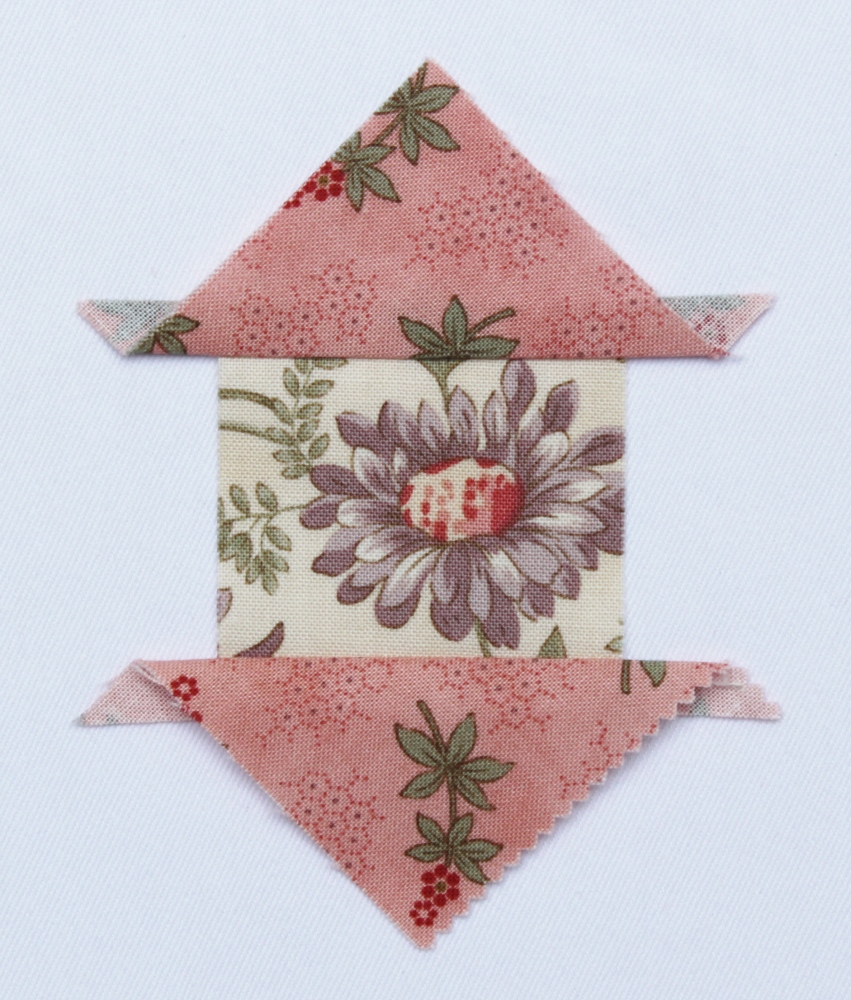
5. Trim the triangle ends even with the 2" x 2" square.
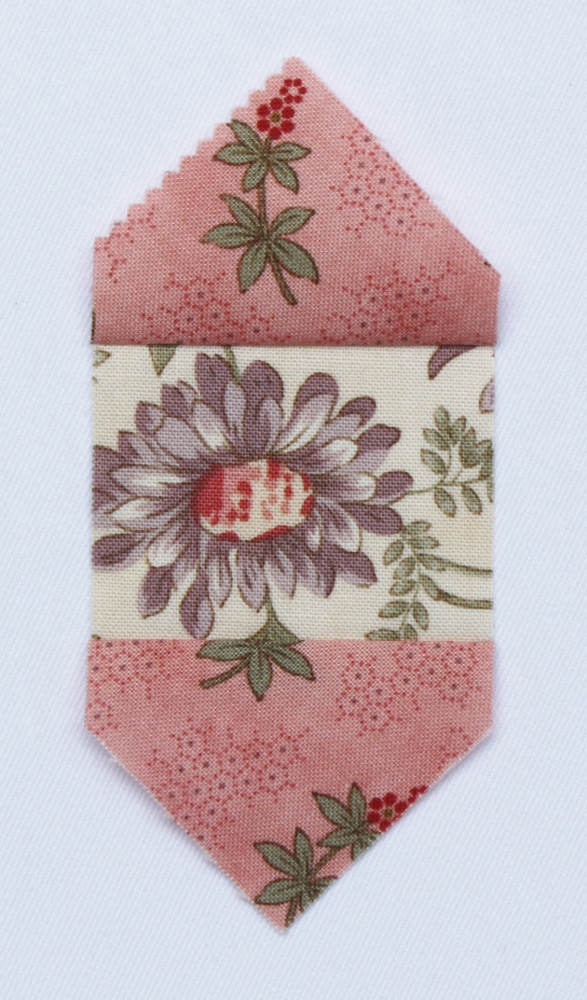
6. Matching centers, stitch the remaining two triangles created in step 2 to the remaining opposite sides of the light 2" x 2" square.
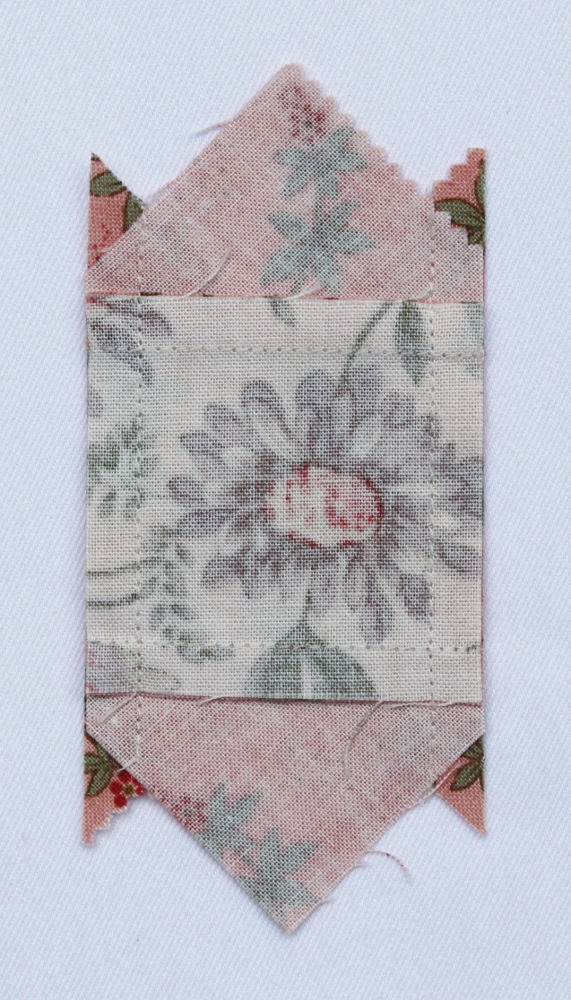
7. Open and press the seams towards the triangles.
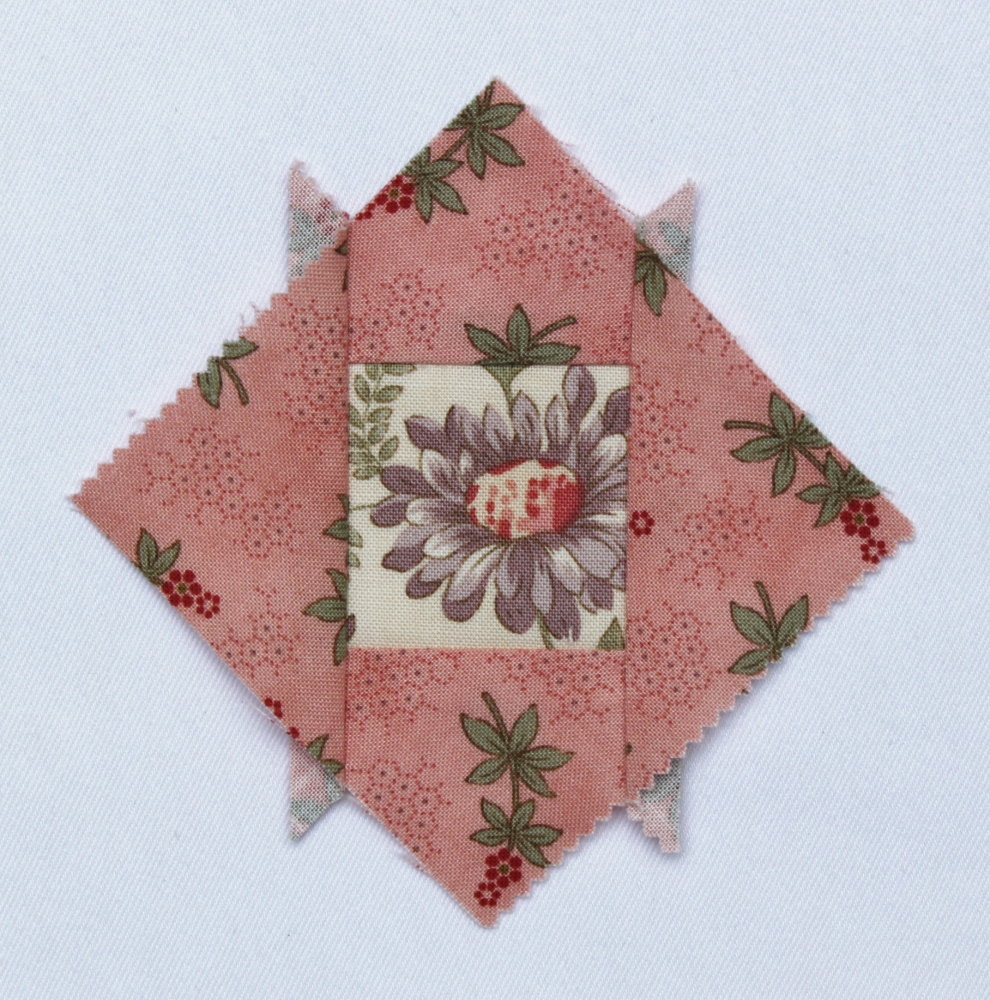
8. Trim the square-in-a-square block to 2 1/2" x 2 1/2" making sure to center the light center.
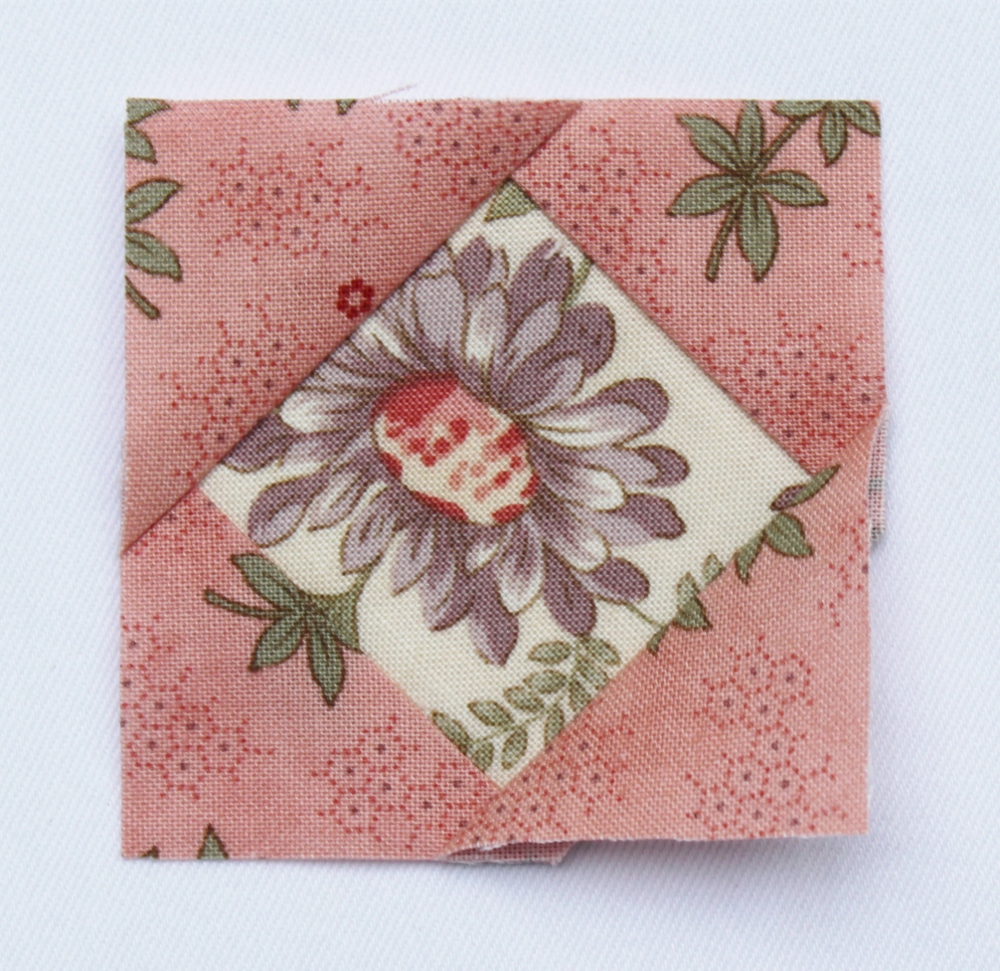
9. Repeat with remaining 24 sets of 2 medium/dark 2 1/2" x 2 1/2" squares and light 2" x 2" squares to make 25 - 2 1/2" x 2 1/2" square-in-a-square blocks. (Note: this step creates one extra block)
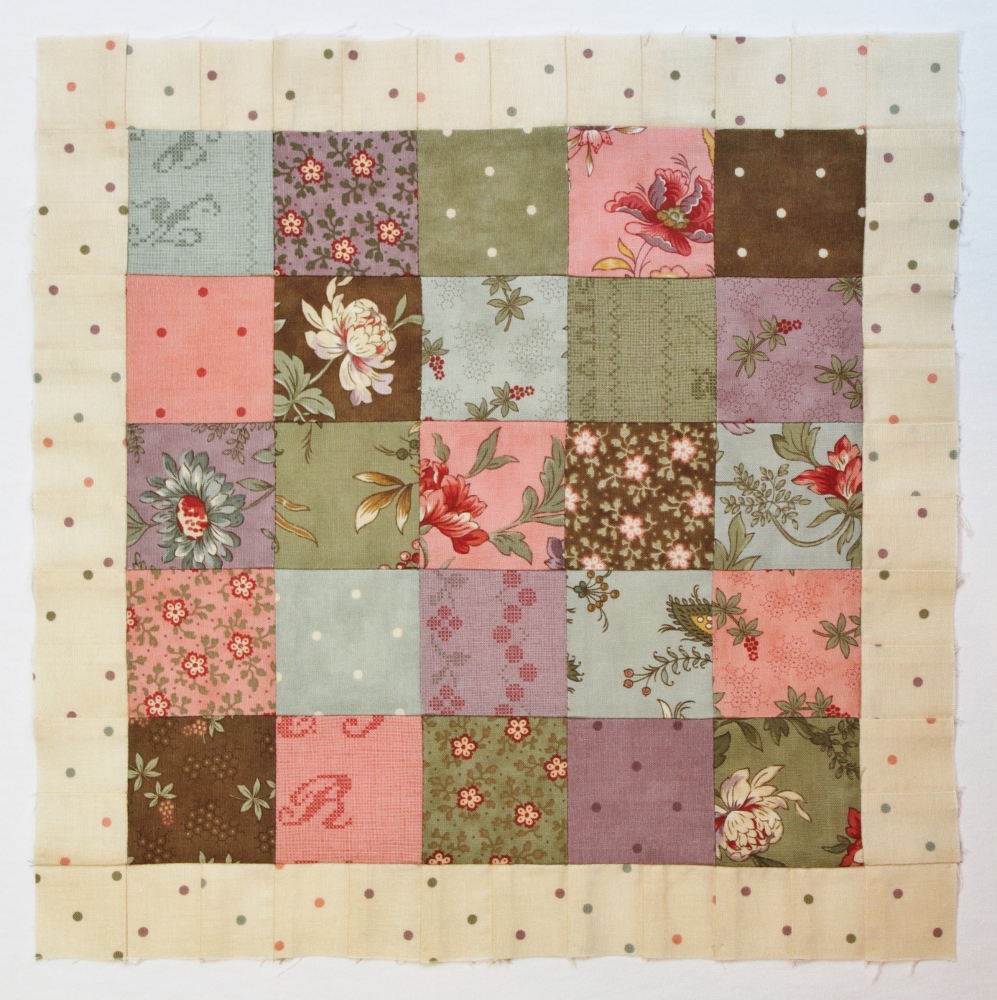
Patchwork Quilt Center:
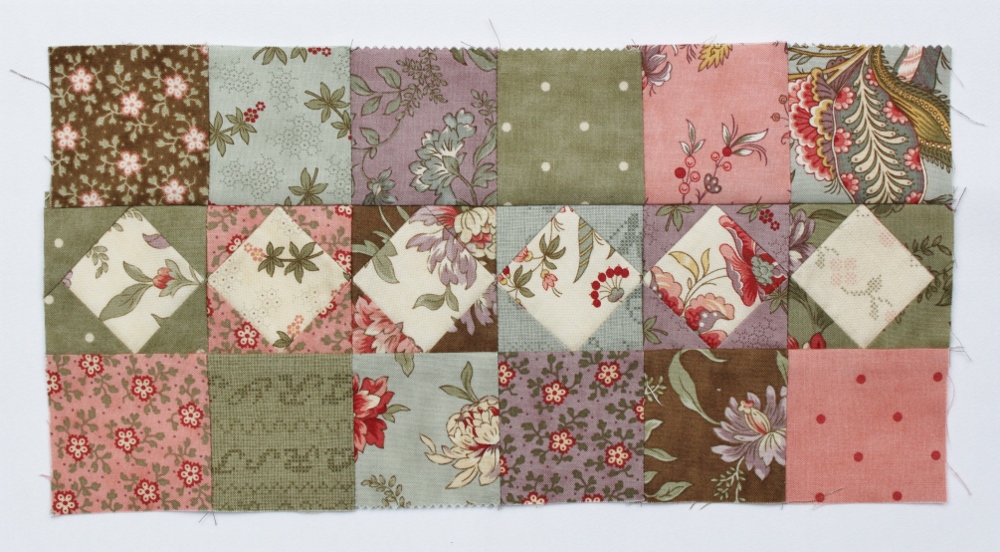
1. Lay out 25 medium/dark 2 1/2" x 2 1/2" squares in 5 rows of 5.
2. Stitch 2 1/2" x 2 1/2" squares together in rows.
3. Stitch rows together to form patchwork center.
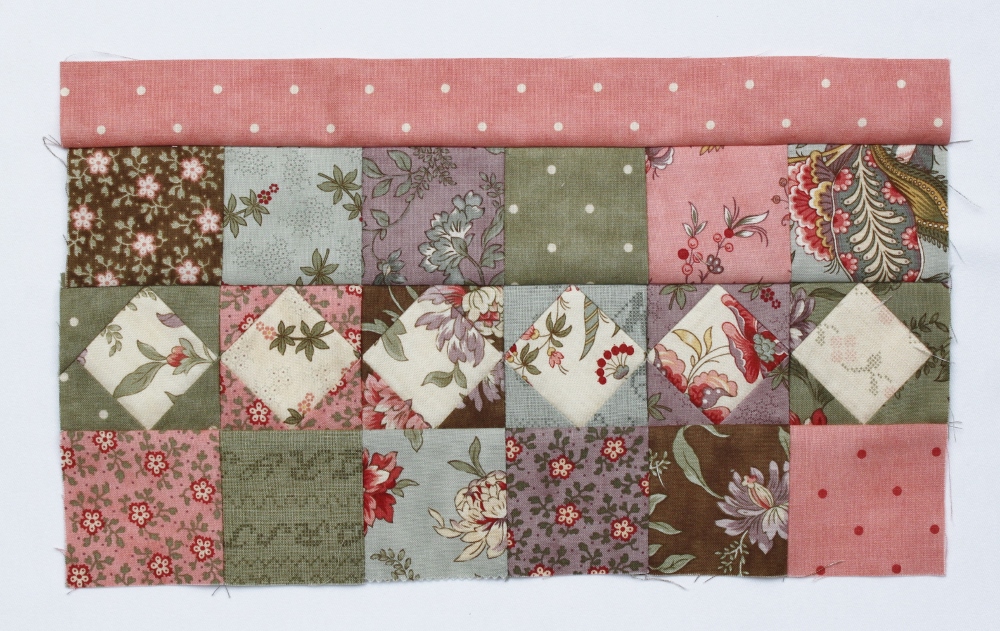
4. Lay out and stitch together 2 rows of 12 light 1 1/2" x 1 1/2" squares and 2 rows of 10 light 1 1/2" x 1 1/2" squares for pieced border.
5. Stitch 1 shorter pieced border to either side of the patchwork quilt center. Press seams towards darker fabrics.

6. Stitch 1 longer border to top and bottom of patchwork quilt center. Press seams towards darker fabrics.
Patchwork / Square-in-a-Square Rows:
1. Lay out and stitch together 6 medium/dark 2 1/2" x 2 1/2" squares. Repeat with remaining 2 1/2" x 2 1/2" medium/dark squares to make 4 patchwork rows total.

2. Lay out and stitch together 6 - 2 1/2" x 2 1/2" square-in-a-square blocks. Repeat with remaining square-in-a-square blocks to make 4 square-in-a-square rows total.

Assemble Quilt:
1. Stitch 1 - 1 1/2" by 12 1/2" coordinating fabric strip to 1 square-in-a-square row. Repeat with an additional 1 1/2" by 12 1/2" coordinating fabric strip and square-in-a-square row to make 2 units total.

2. Stitch 1 patchwork row to both long sides of 1 square-in-a-square row. Repeat with remaining 2 patchwork rows and 1 square-in-a-square row to make 2 units total.
3. Stitch a 1 1/2" by 12 1/2" coordinating fabric strip to one long side of each of the units created in step 2 above.
4. Stitch together units created in steps 1 and 3 as follows to make 2 end units.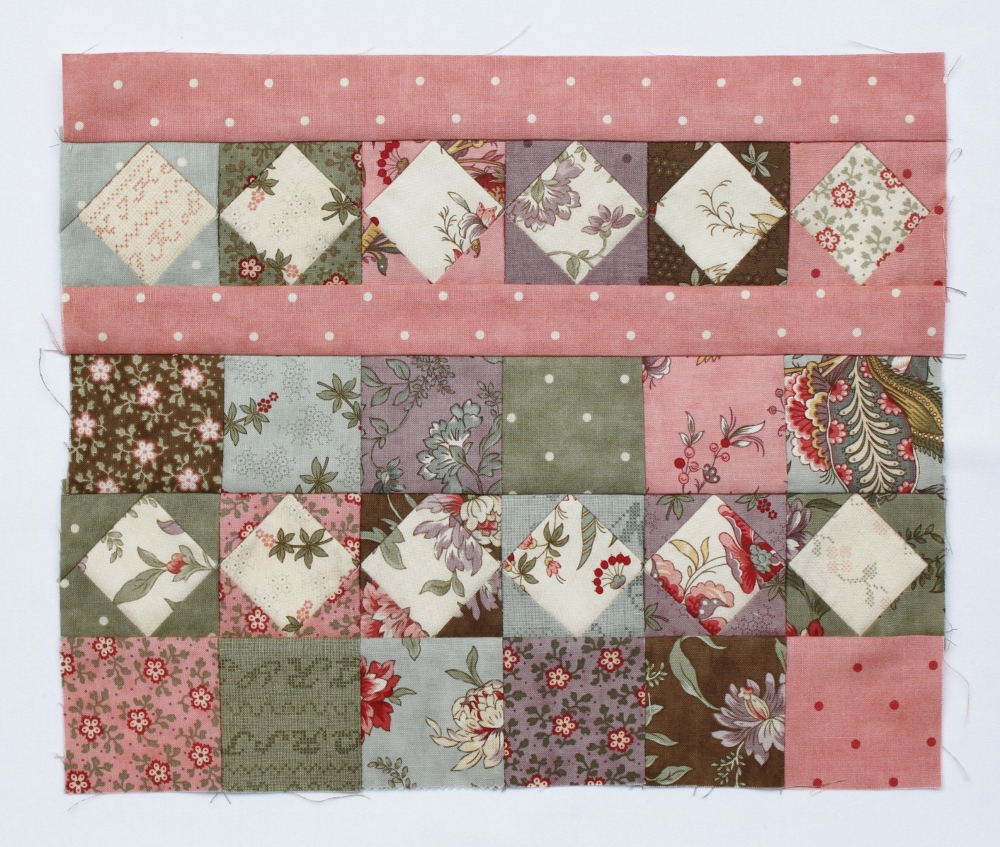
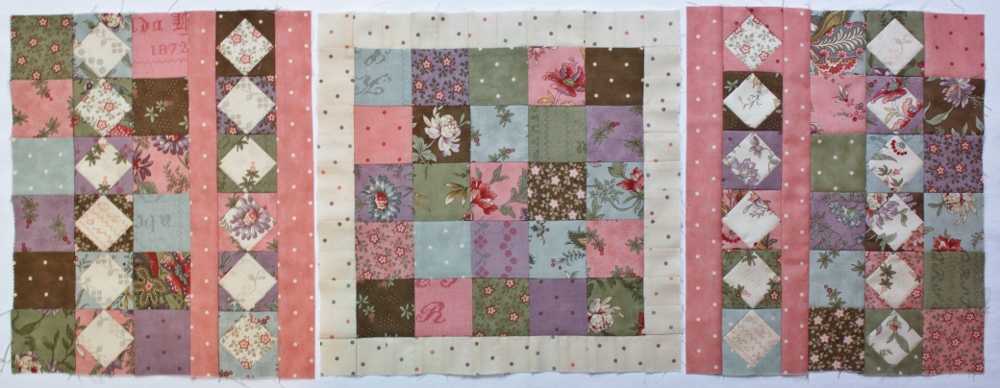
5. Stitch together quilt center and 2 end units to finish quilt top.
Finish quilt:
Layer the quilt top with batting and backing fabric. Baste, quilt as desired, and bind. I machine quilted this quilt by stitching in the ditch between the patchwork center and 1" pieced border and on either side of the coordinating fabric strips.
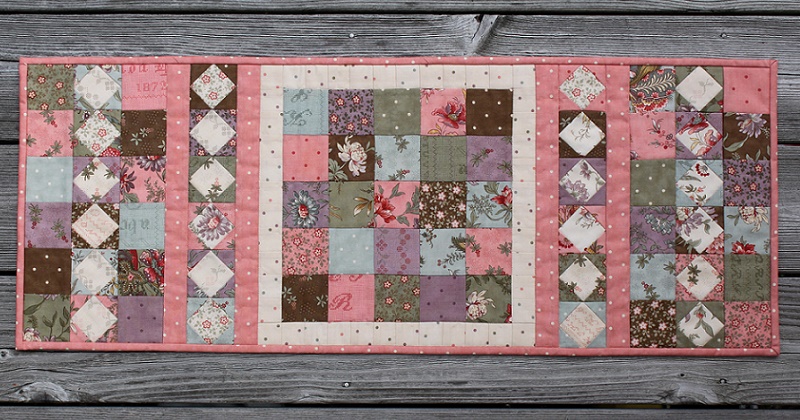
![]()
One charming 12" x 32" table runner!
Apron Strings is an easy project and definitely doable in a weekend. To see another version of Apron Strings made with "California Girl" by Fig Tree Quilts for Moda, check out my blog.
Happy quilting!
Jen Daly
{www.jendalyquilts.com}
![]()
Posted in: