Welcome to Moda Fabrics!
Gooseberry Star Patch Quilt
Gooseberry Star Patch Quilt
Published:
Sep 10 2015 - 23:00


Hello there! I'm Peta Peace of She Quilts Alot and I've been visiting the Moda Bake Shop for many years now so it's super dooper exciting to be able to share my Gooseberry Star Patch with you as a new Chef! This is a super fun quilt to make and, since it is made entirely of quarter square triangles and squares, its great for chain piecing and comes together really quickly. I've used a white background in my quilt but you could try any complimentary solid for a different look. I sure hope you enjoy making it!
This quilt finishes at 61½" x 89½".
![]()
1 Gooseberry Layer Cake
2 White Layer Cakes (or 3¾ yards of background fabric)
1 yard of border fabric - I've used Bella Solid 9900-140 Raspberry
5/8 yard binding fabric
70" x 98" batting
5½ yards backing fabric

![]()
Cutting Instructions:
Choose 22 of the Gooseberry layer cake squares. Cut each square in half horizontally and vertically to make 4 - 5" squares. You will need 88 - 5" squares.
From 65 white layer cake squares:
- cut 22 in half horizontally and vertically to make a total of 88 - 5" white squares.
- cut 43 squares into 4 - 4" squares. You will need a total of 172 - 4" white squares.
From the border fabric cut 8 - 4 1/2" x width of fabric strips. Set aside for borders.
From the binding fabric cut 8 - 2½" x width of fabric strips. Set aside for binding.
Sewing Instructions:
- Choose 2 - 5" Gooseberry print squares and 2 -5" white squares. Draw a pencil line on the wrong side of the white squares. Place a 5" white square on top of each of the 5" print squares. Sew ¼" away from the drawn line on both sides. Cut along the pencil line and press towards the print fabric. You will have 2 half square triangle units of each print.
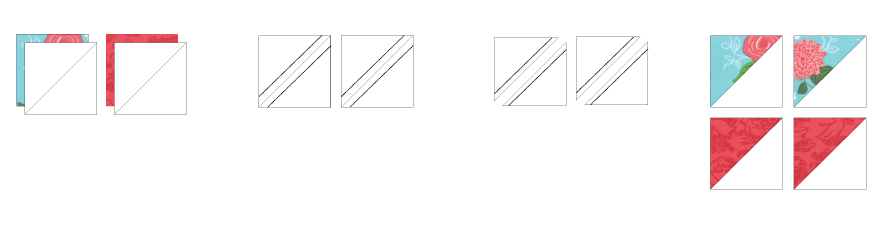
- Next, take one set of the half square triangle units, flip them over and draw a diagonal pencil line on the wrong side. Place on top of the other print half square triangle units so that the seams nest and right sides are together. Sew ¼" away from the drawn line on both sides. Cut along the pencil line and press. You will now have 4 quarter square triangle units.
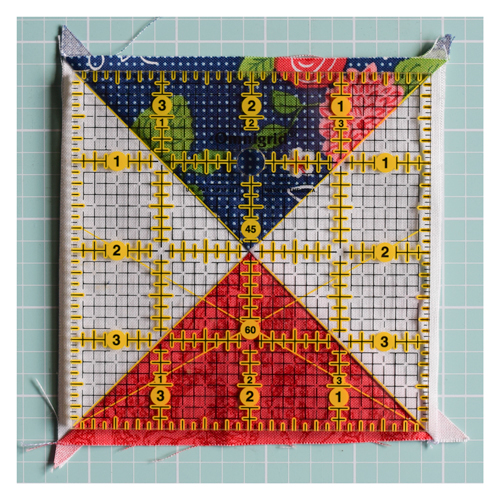
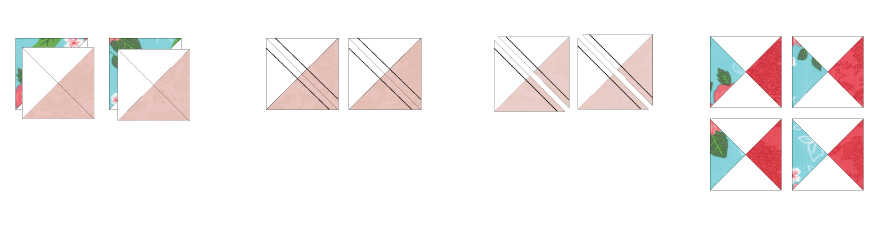 Use a ruler with a diagonal line to trim each quarter square triangle unit to 4" square. Take care to ensure that the corners all line up before you trim. Repeat with the remaining 5" print and 5" white squares until you have made 173 quarter square triangles.
- Choose 5 different quarter square triangle units and 4 - 4" white squares. Lay the white squares and quarter square triangles out in 3 rows of 3. Sew rows together. Press seams towards the white squares. Join rows and press towards the centre. Make 18 of these nine patch, we will call these type "A" nine patch units. Each one will measure 11" x 11".
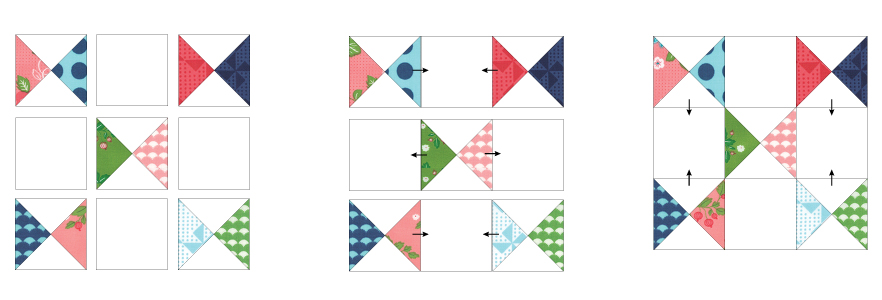
- Use the same construction method to make 17 type "B" nine patch units. This time choose 4 quarter square triangles and 5 - 4" white squares. Press towards the white squares in each row and towards the outside once the rows have been joined.
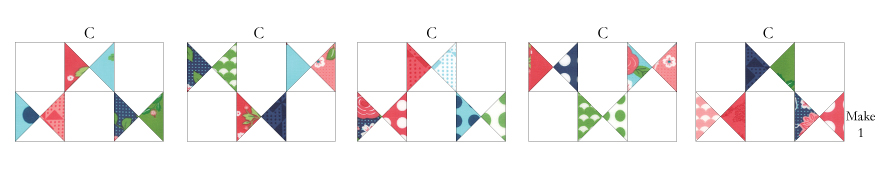
- You will also need to make 5 type C six patch units. For each six patch you will need 3 quarter square triangles and 3 - 4" white squares. Press towards the white squares.

- Now you can assemble the rows for the quilt. You will need 4 - A-B-A-B-A rows and, 3 - B-A-B-A-B rows. Press seams towards the B units in each row.
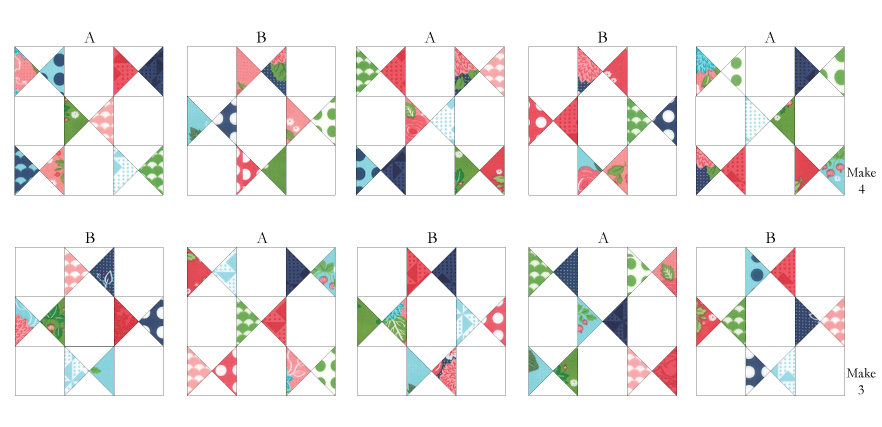
- Finally, make one row by alternating the direction of the six patch units, type C. Make sure the row has three six patches that point up and two that point down as shown in the diagram below.
- Starting with an A-B-A-B-A row, join rows together as shown below. Press seams towards the B-A-B-A-B rows.
- Row 1 - A-B-A-B-A
- Row 2 - B-A-B-A-B
- Row 3 - A-B-A-B-A
- Row 4 - B-A-B-A-B
- Row 5 - A-B-A-B-A
- Row 6 - B-A-B-A-B
- Row 7 - A-B-A-B-A
- Row 8 - C-C-C-C-C
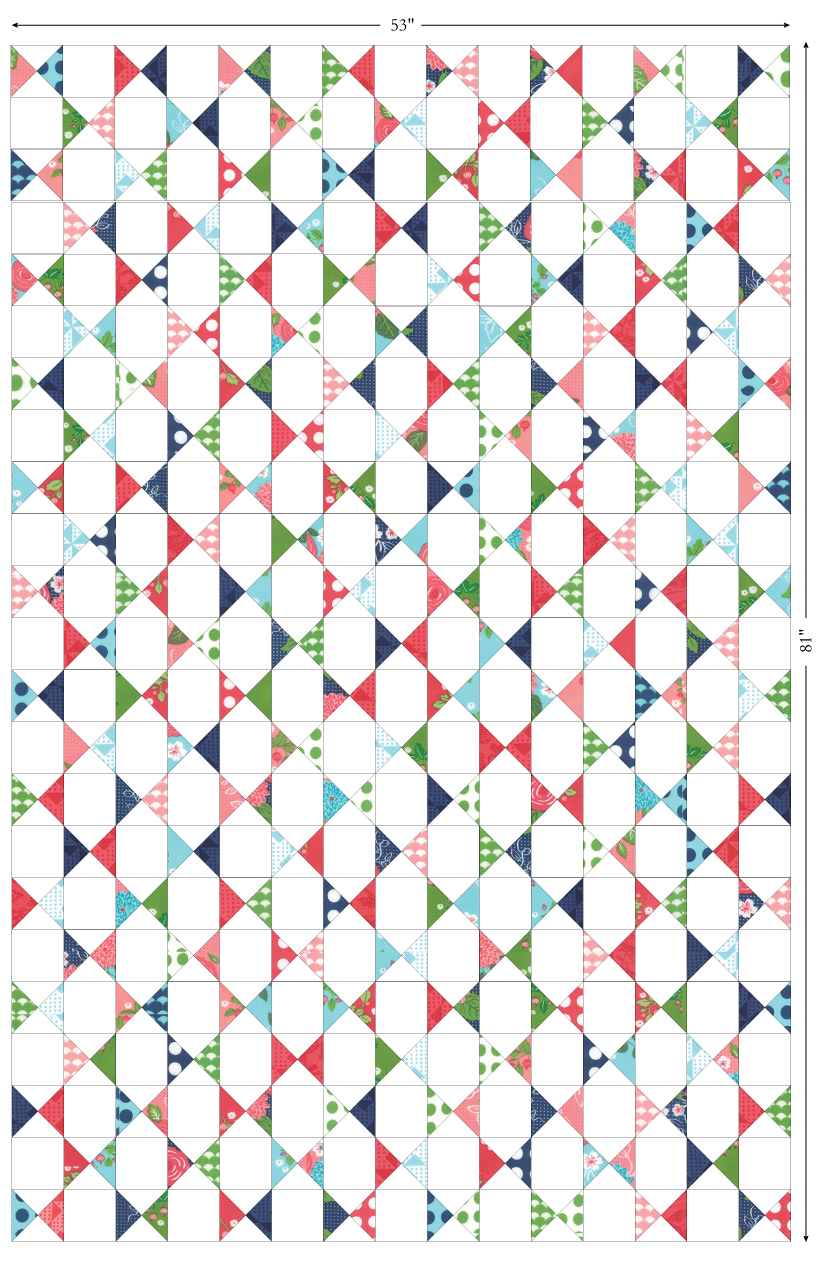
- Check measure the quilt top, if your quilt is not 53" x 81" at this point you will need to adjust the borders to fit. Trim 4 of the 4½" x width of fabric strips cut from the border fabric so that each strip measures 4½" x 40¾". Sew 2 strips together end to end to make 1 - 4½" x 81" strip. Repeat with the remaining 2 - 4½" x 40¾" strips. Pin in place on the long sides of the quilt before sewing in place. Press towards the border fabric. Trim the remaining 4 - 4½" x width of fabric strips cut from the border fabric to 4½" x 31". Sew 2 strips together end to end to make 1 - 4½" x 61½" strip. Repeat with the remaining 2 -4½" x 31" strips. Pin in place on the top and bottom of the quilt before sewing in place. Press towards the border fabric.

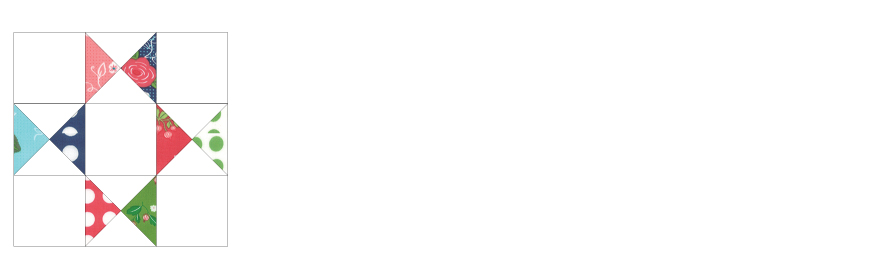
Congratulations! Your quilt top is complete. You can now baste, quilt and bind using your favourite methods and, if you are interested, I have a really cool tip on my blog under the tutorials menu to help with making sure your binding is nice and flat every time.
![]()
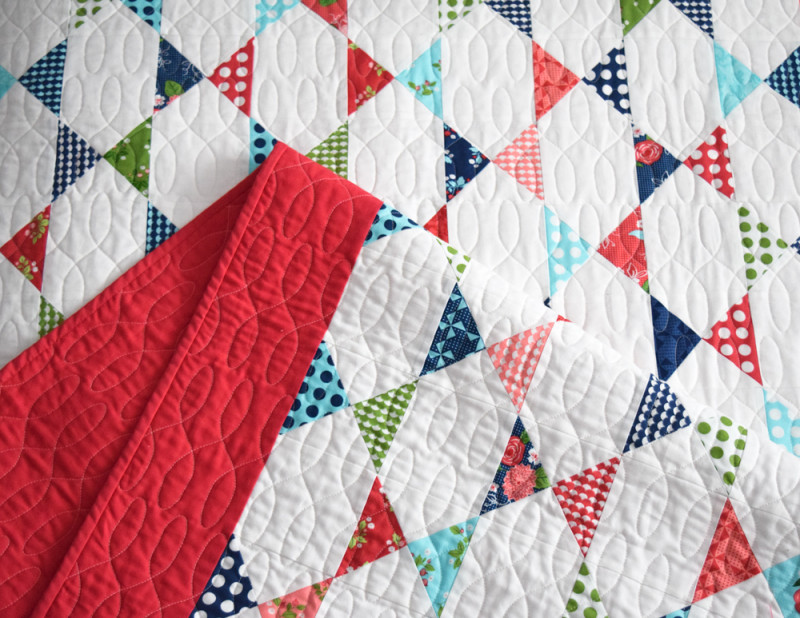
One bright and scrappy 61½" x 89½" Gooseberry quilt perfect for a childs bed or, for snuggling under on the couch. Of course, you could keep on making quarter square triangles from the left over layer cake squares and make another one or, a super sized version of the Gooseberry Star Patch quilt.
Peta Peace
{She Quilts Alot}
![]()
Posted in: