Welcome to Moda!
Jewel Toss Quilt
Jewel Toss Quilt
Published:
Jun 25 2015 - 23:00
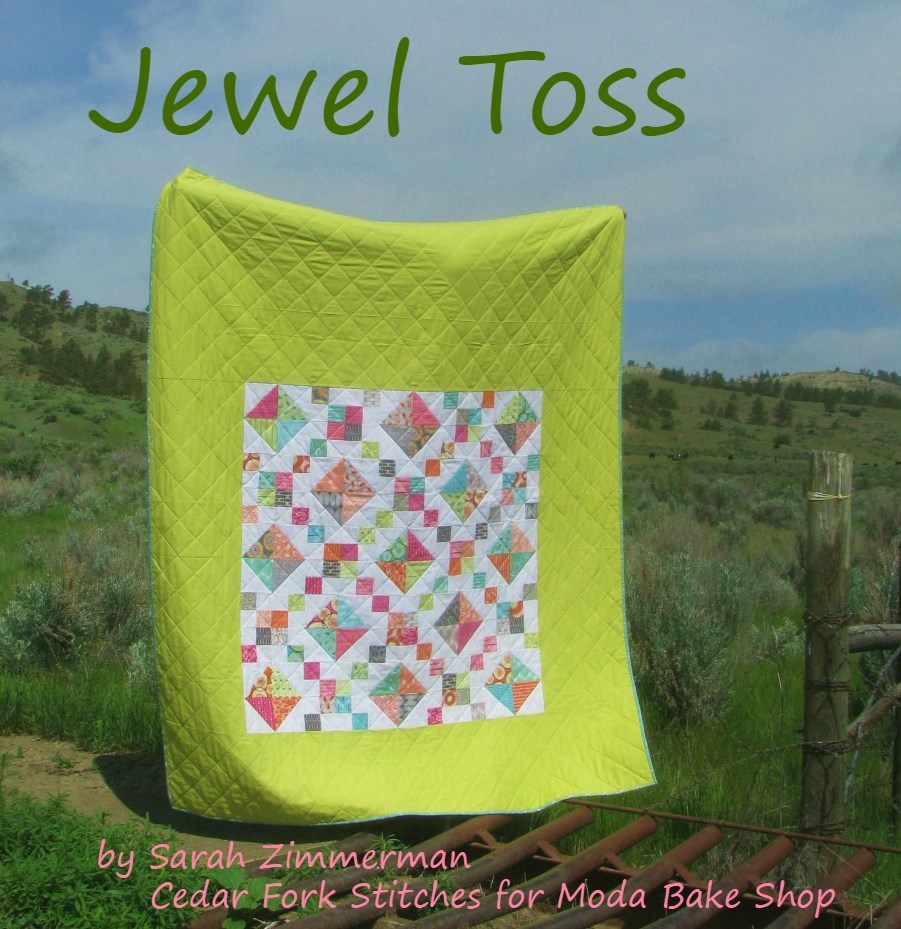

Pamper yourself with a scrappy sparkler of a quilt by "tossing" the traditional Jewel Box onto a field of vibrant color! The playful combinations of pattern and color in Zen Chic's "For You" are a self-indulgent treat, especially when nestled in your choice of rich Bella Solids color! A quick throw assembled in rows instead of by blocks! Treat yourself!
![]()
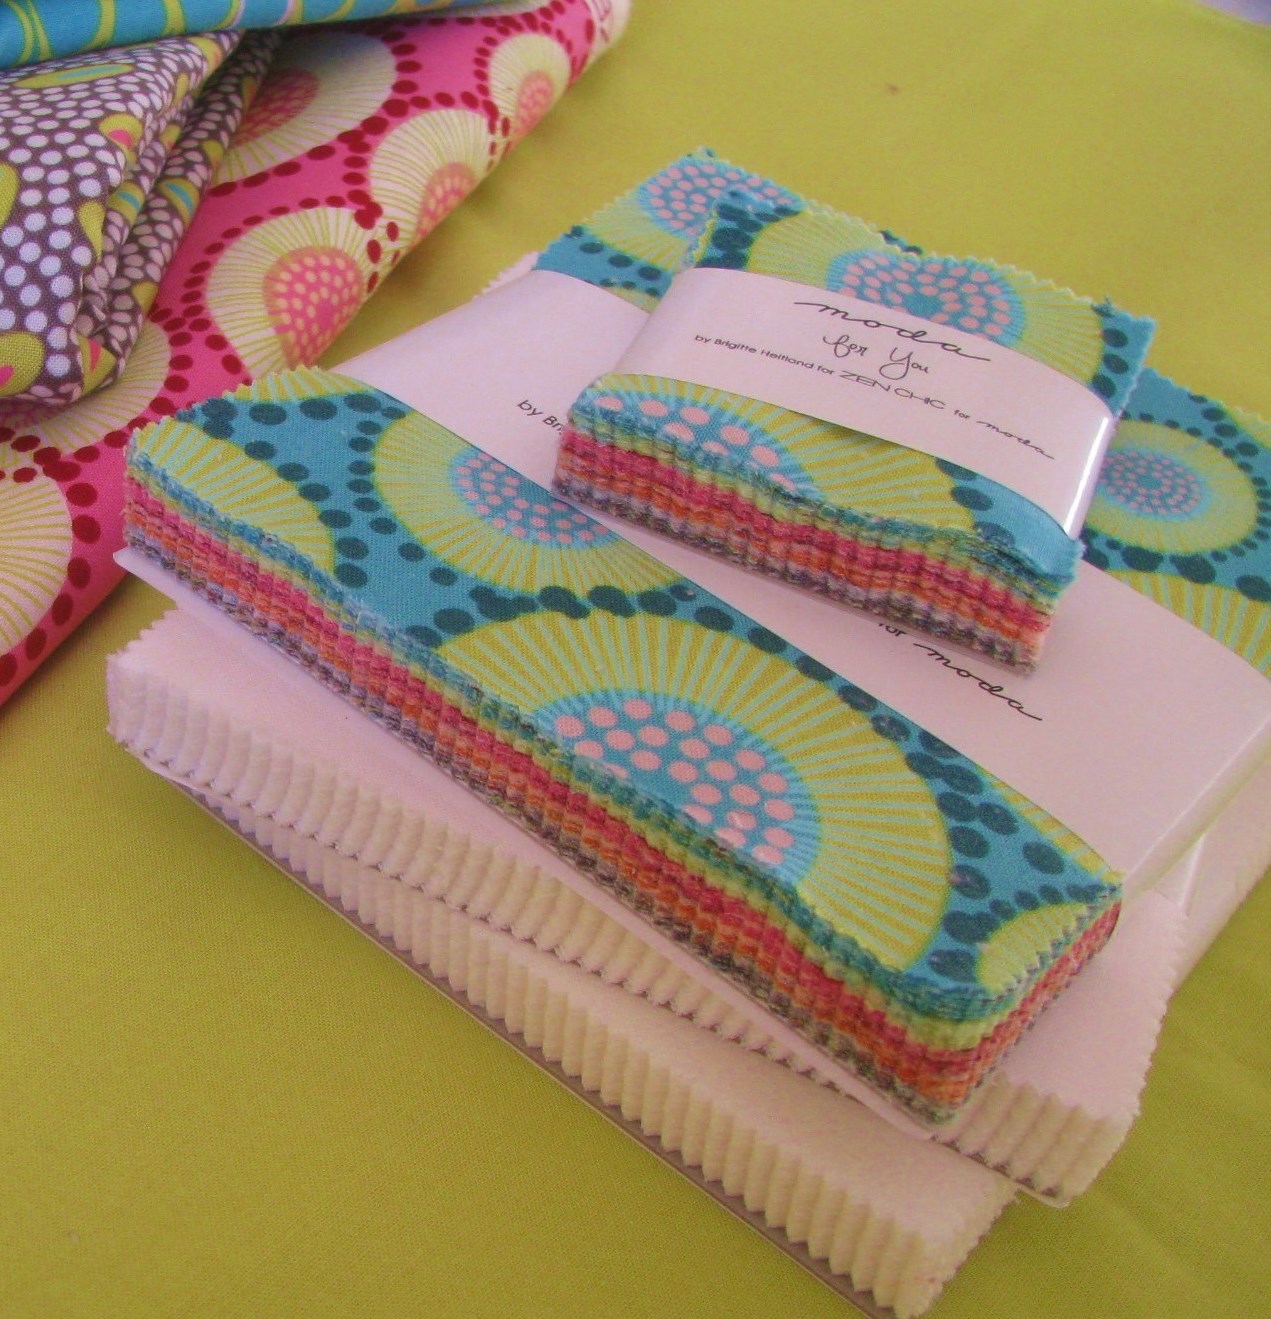
1 Charm Pack and 1 Candy Pack: For You by Zen Chic
2 Charm Packs: Bella White
3 yd Bella Chartreuse (yum!)
4 yd backing: I used 2 yds each of 2 favorite prints from the collection, Poppy Raspberry (1570-12) and Combo Graphite (1571-15)
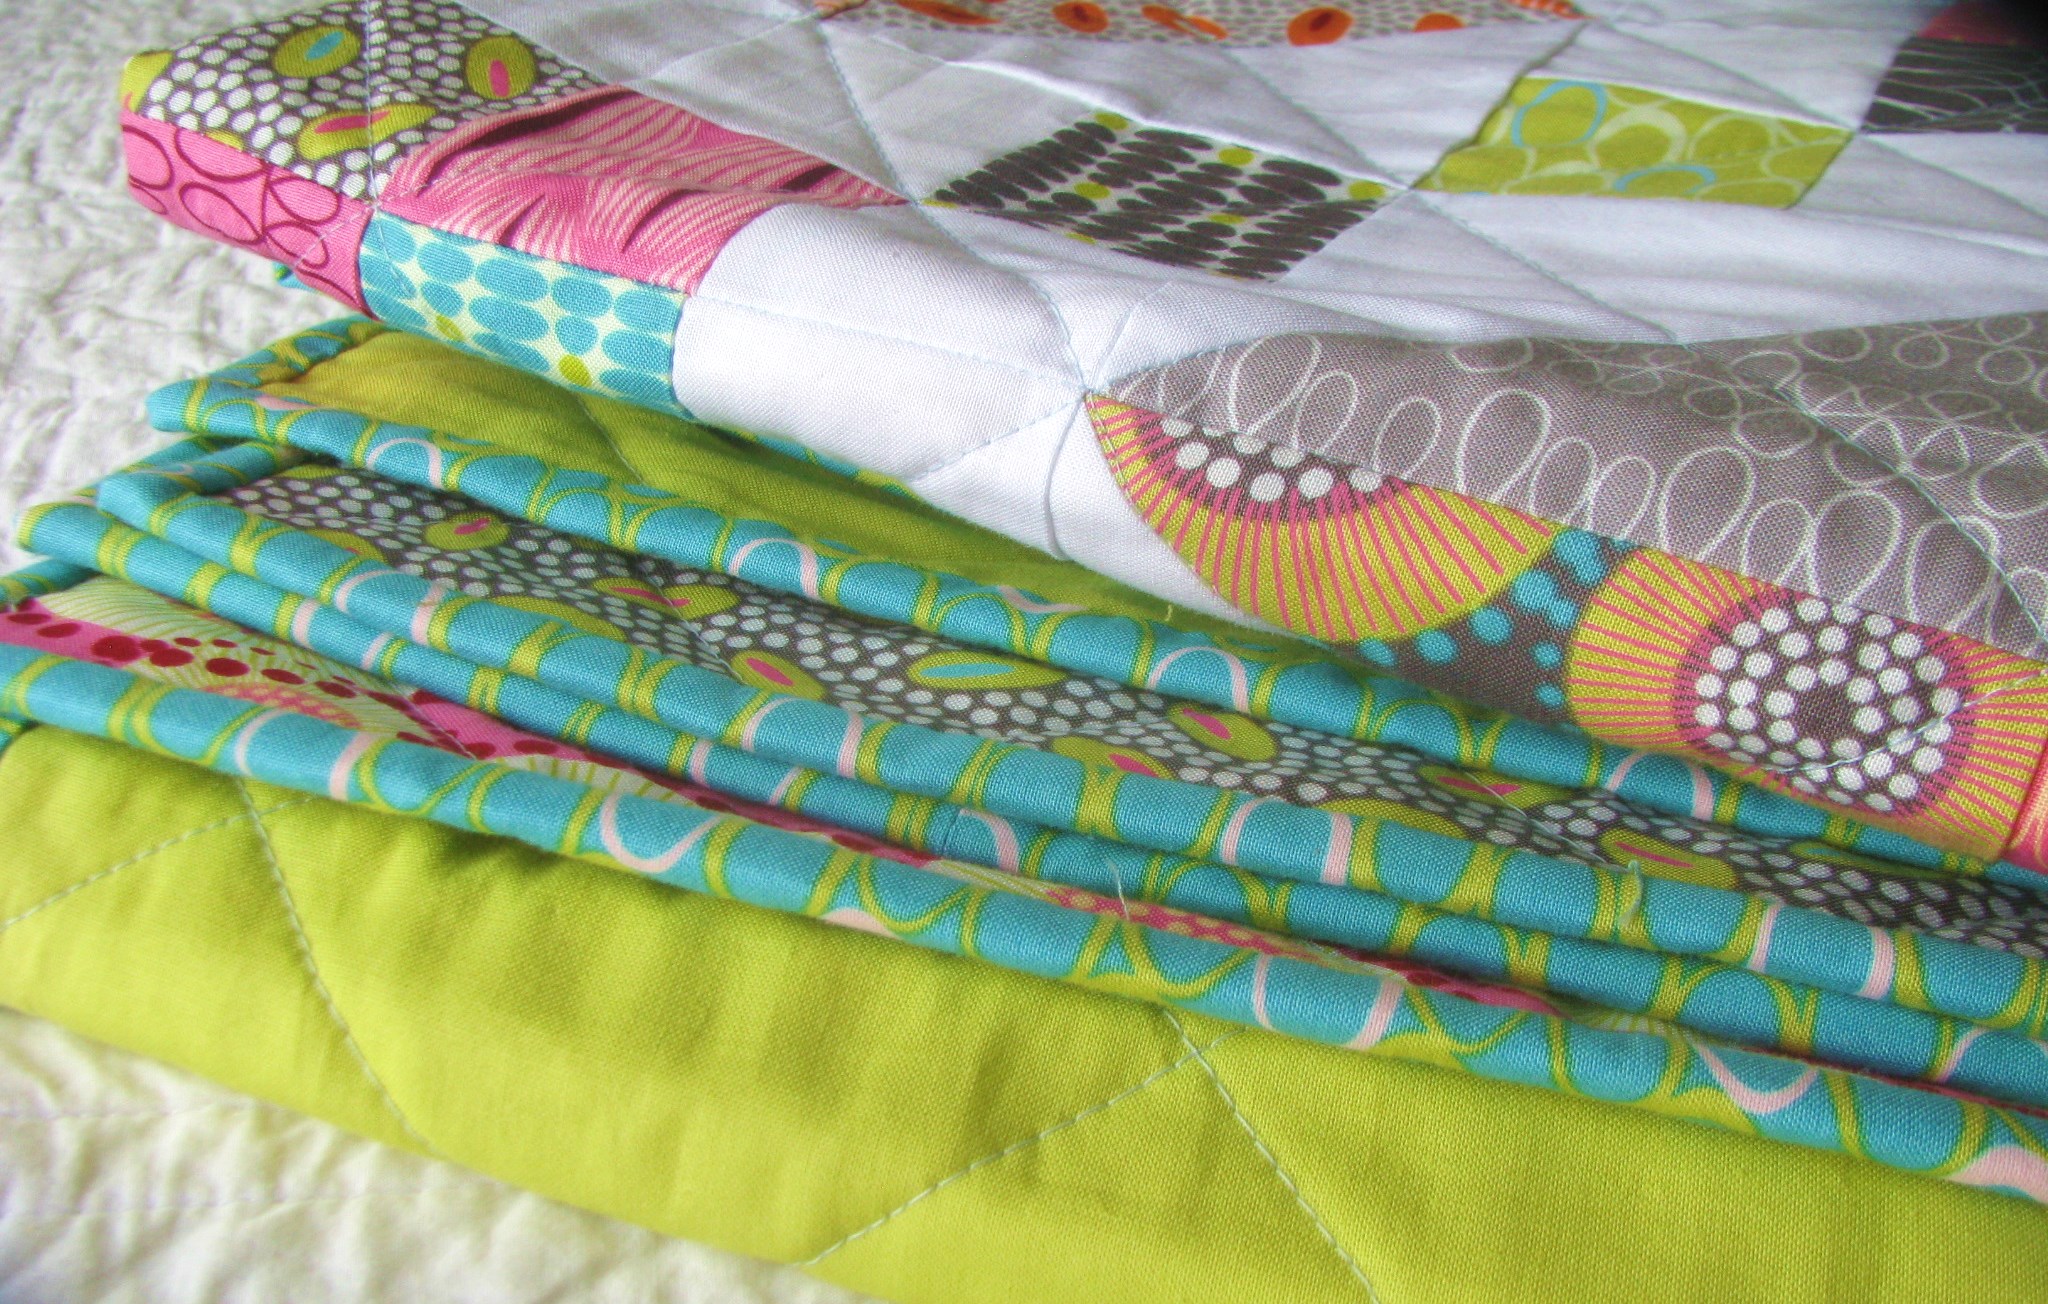
1/2 yd binding, Mod Teal (1572-16)
![]()
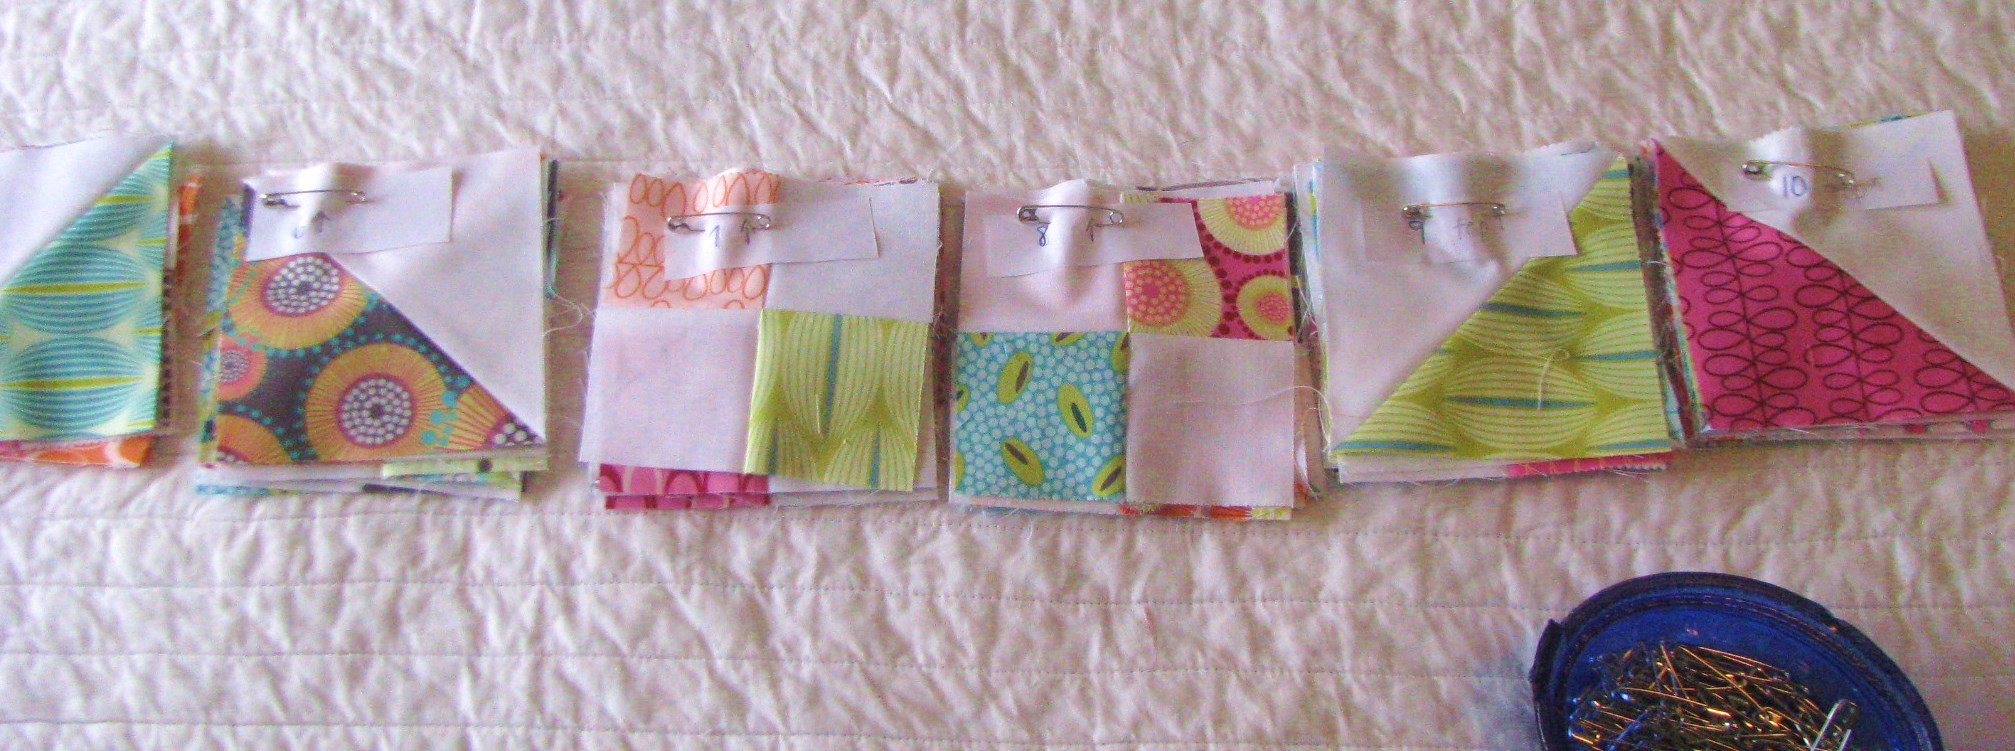
For the central patchwork panel, construct 2 basic units: Half Square Triangles (HSTs) and 4-patches.
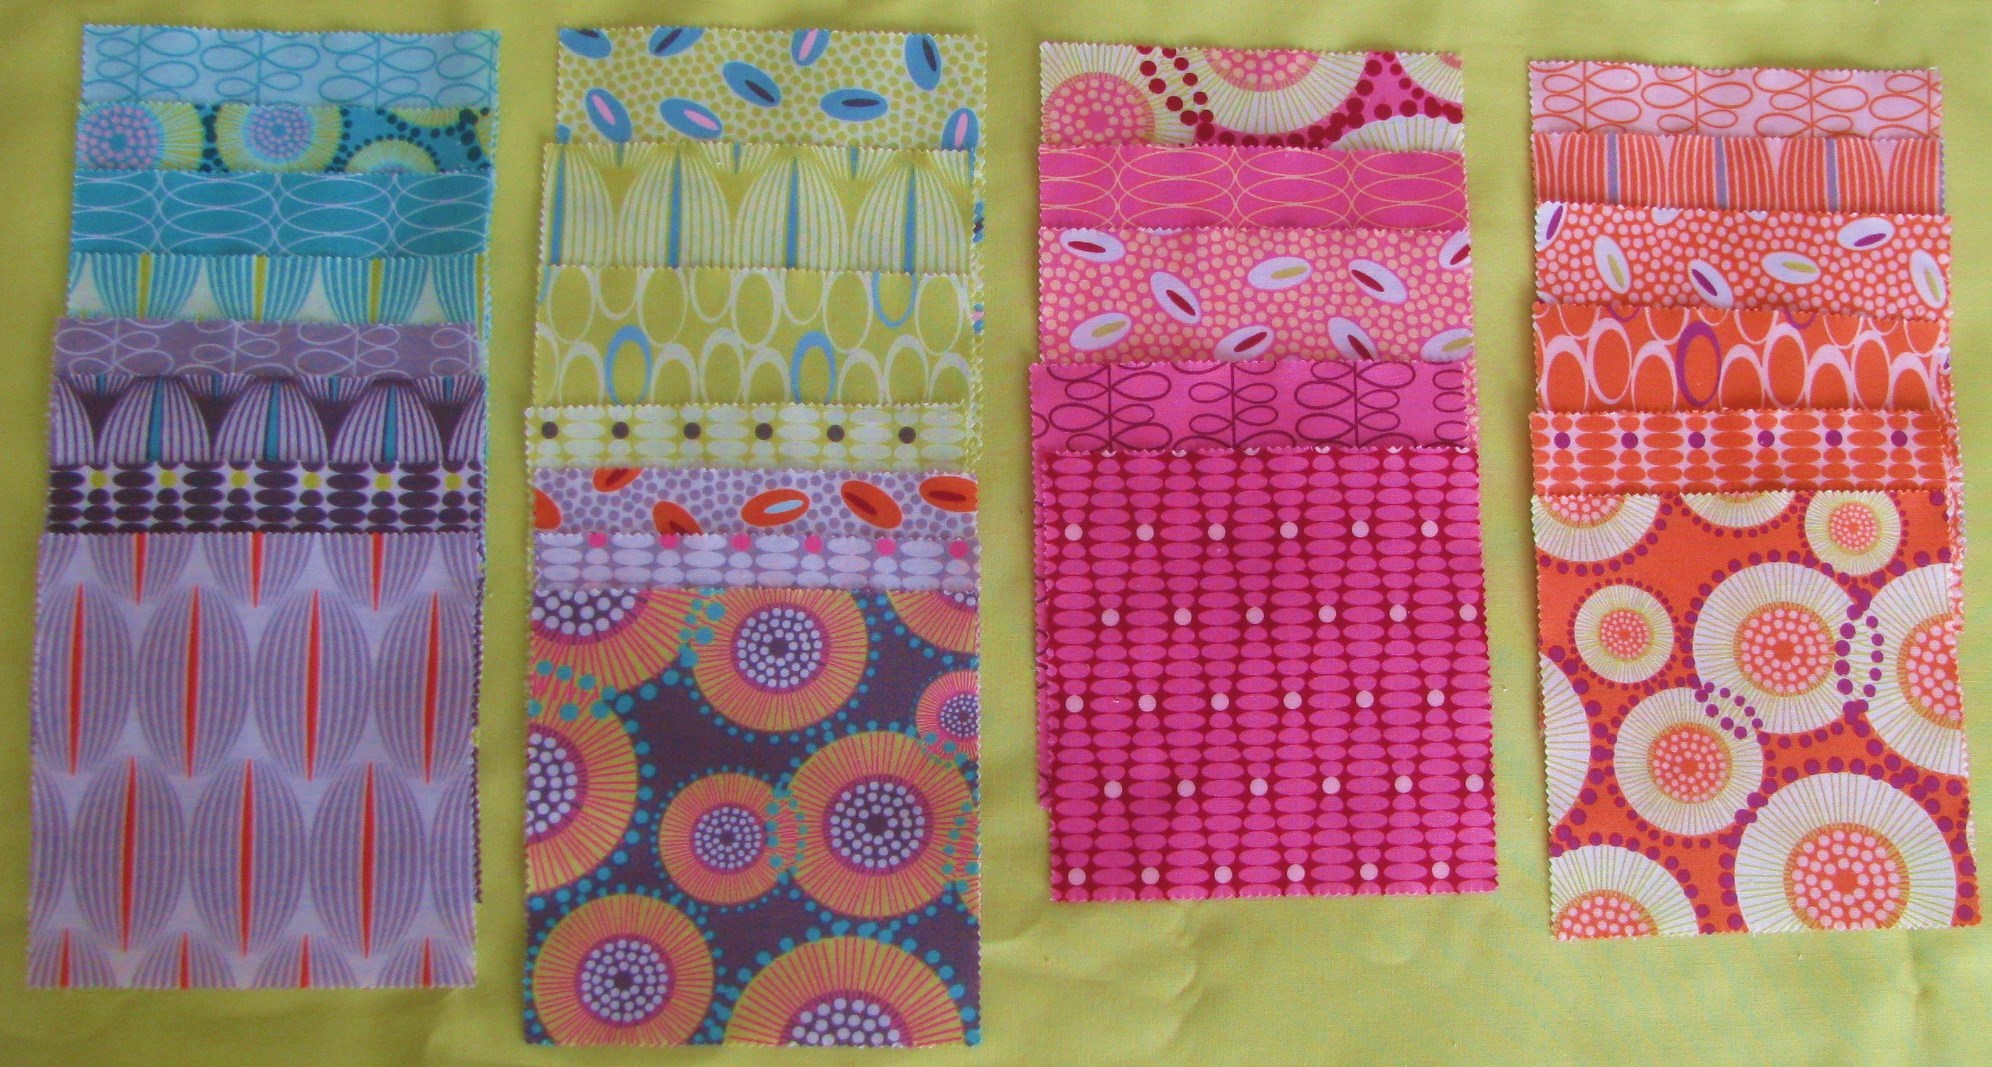
From For You charm pack, separate the charms by choosing 26 for the HSTs, and 14 for the 4-patches. The mini charms will all be used in 4-patches as well.
Tip: Since Bella White is the background for these units, choose charms that have the most contrast, leaving the 2 lightest or whitest out.
Construct the HSTS:
Mark 26 Bella White charms on the diagonal. Match with the 26 print charms chosen for the HSTs. Sew 1/4 inch from either side of the marked line. Cut on line, press and trim to 4 1/2", for a total of 52 HSTs.

Construct the 4-patches:
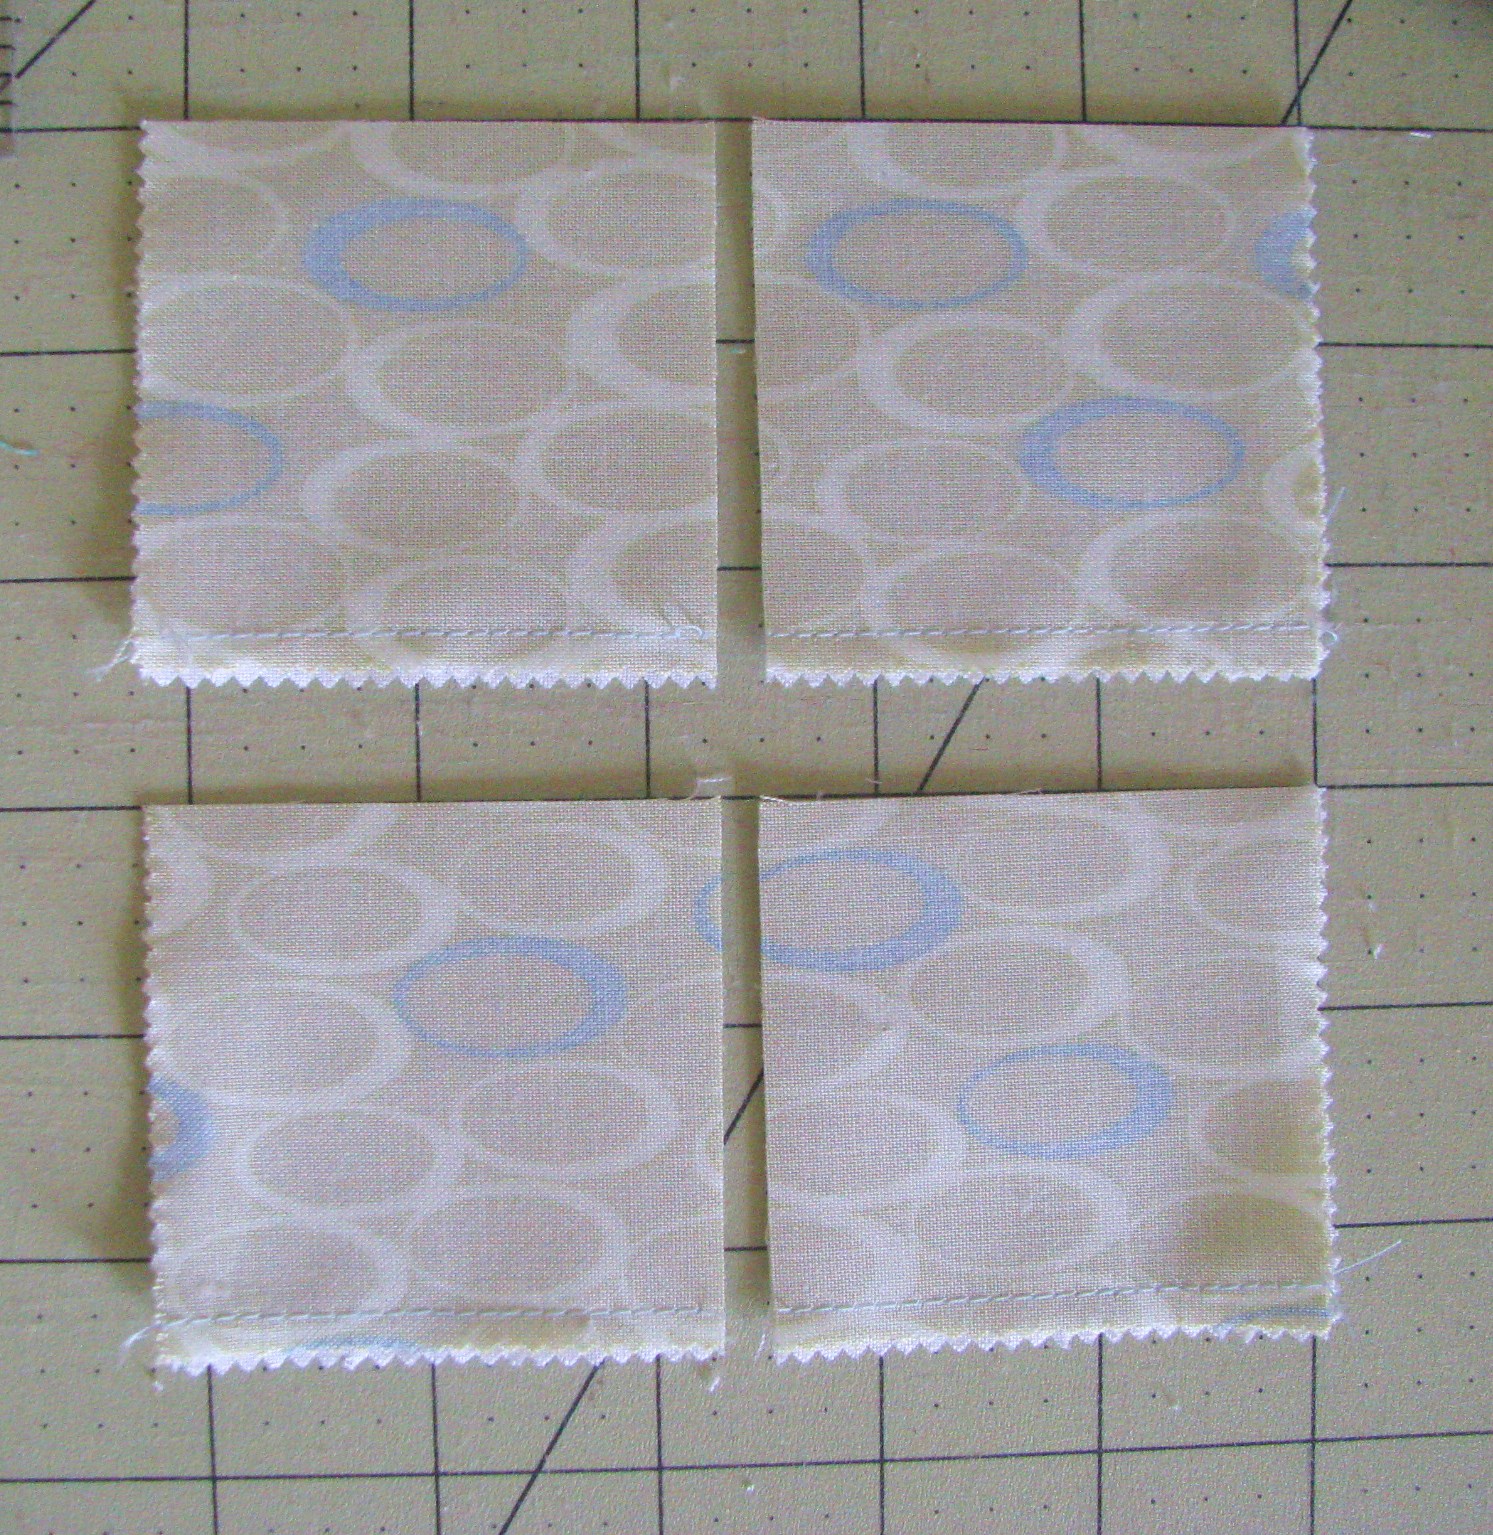
Begin by making 2-patches:
A. Place a white charm right sides together with the remaining 14 print charms. Sew 1/4" seam along 2 opposite/parallel sides of each pair of charms.
Cut apart using the 2 1/4" mark on your ruler. Line up with first one seam then the other. Cut each half into 2 2 1/2" units. Press to the print side.


B. Next, take 11 white charms and cut them in half, so that you have rectangles that are 2.5" x 5". Take these and your mini charms to your sewing machine. Lay two mini charms, side by side, on each rectangle, feed through the machine, chain-piecing until all mini charms are sewn to a half charm rectangle.
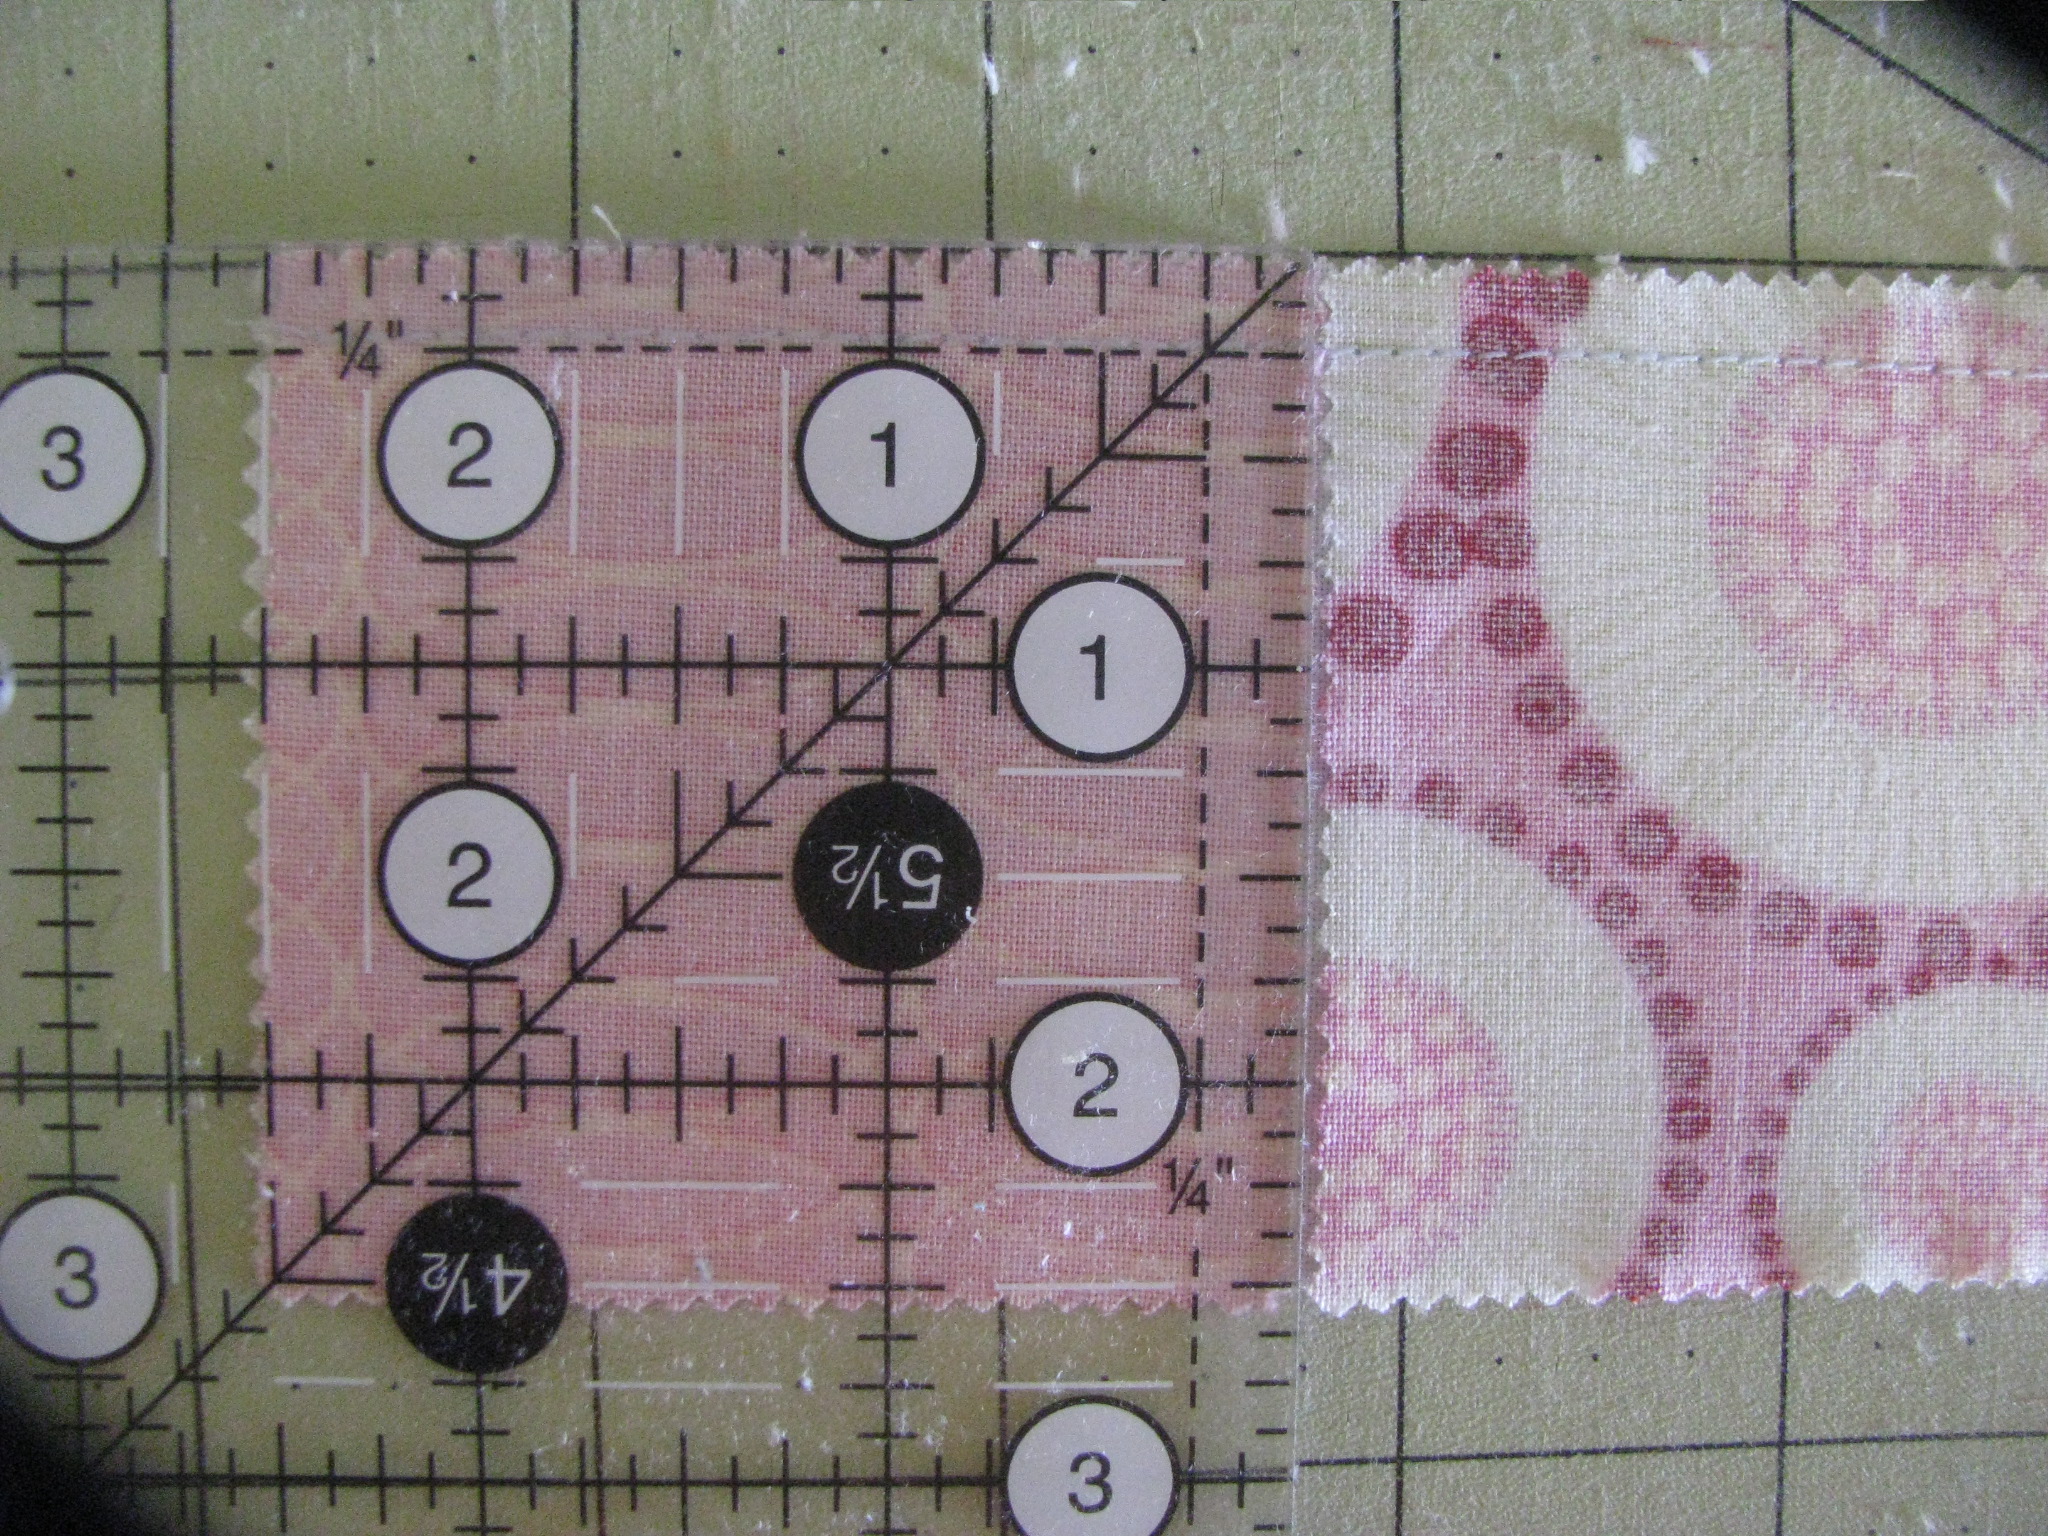
Before you press open, cut apart and trim as needed, again lining your ruler up with the seam line. Each unit should measure 2 1/2" wide and 2 1/4" from the seam line, before pressing. Press to the print side.
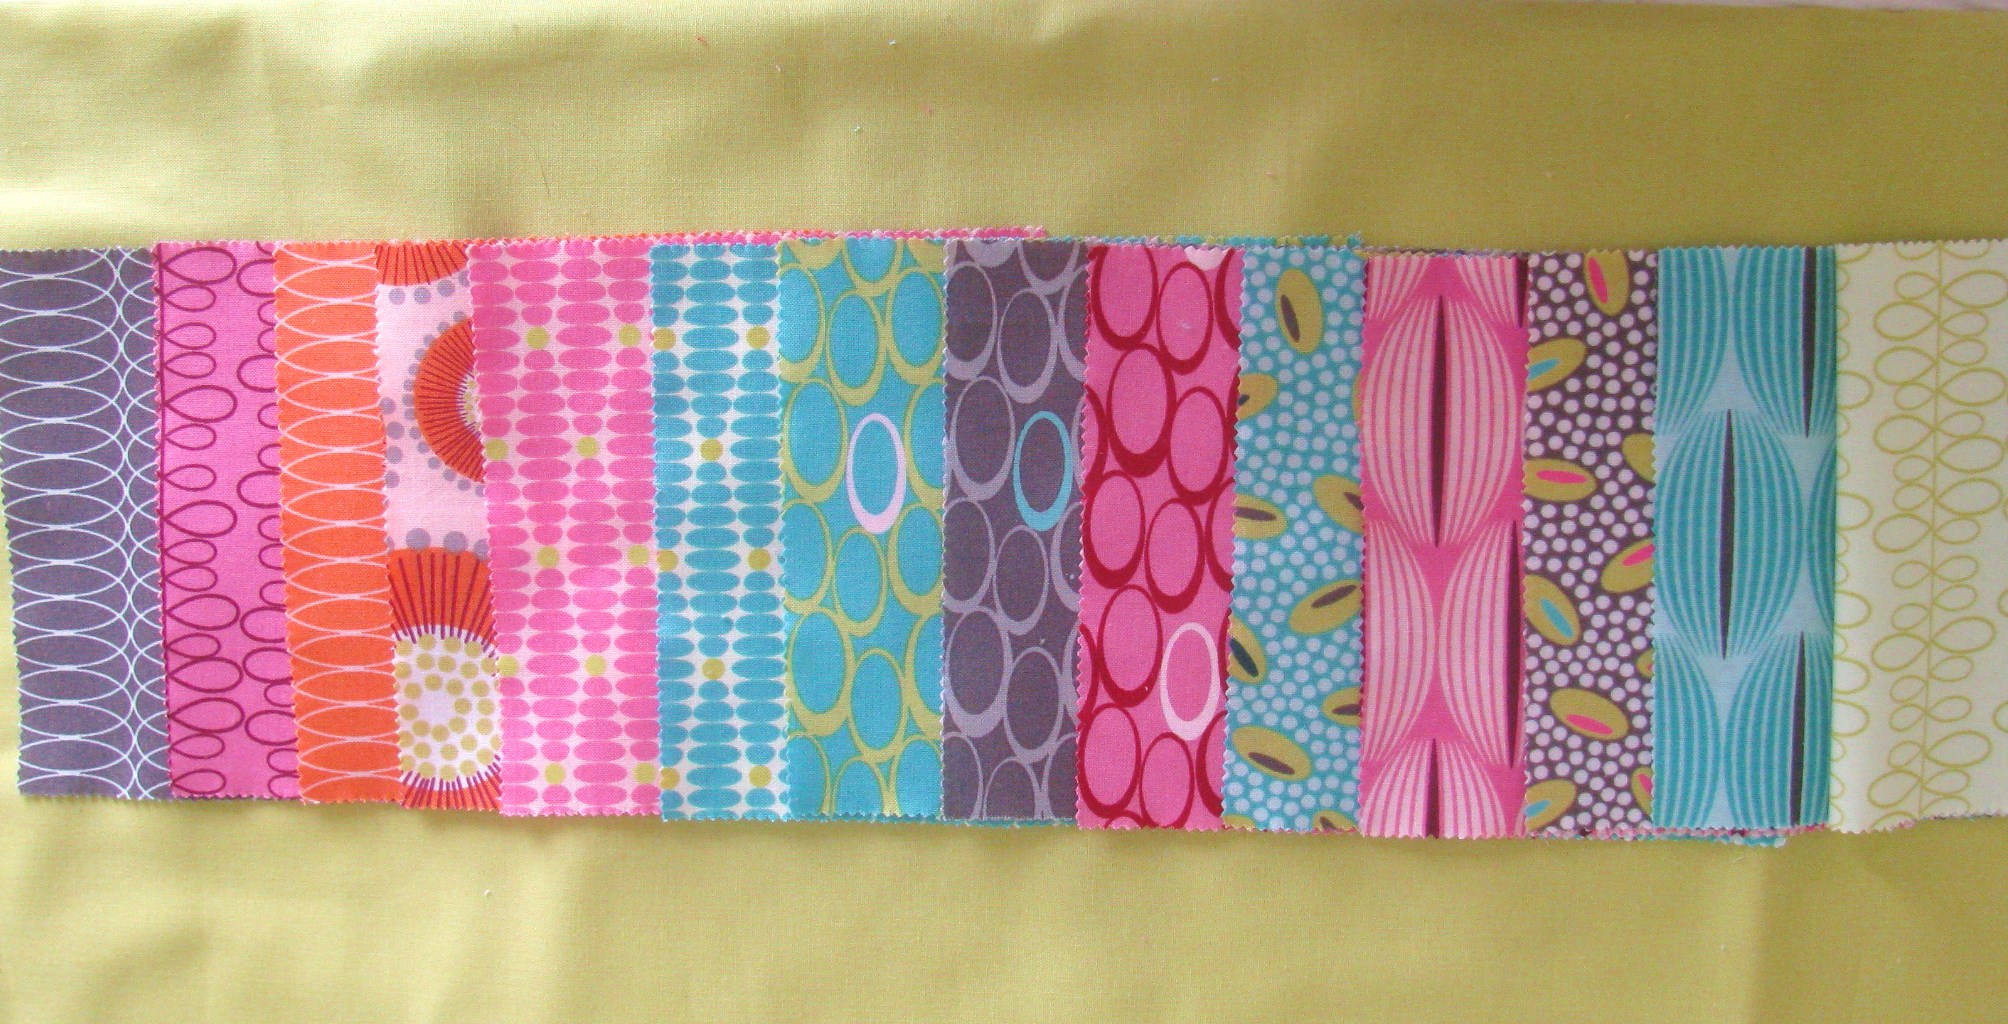
C. For a completely random layout, construct 4-patches by pairing 2 of these units, and sewing. Or, as I did, layout all the units and play with the color and value placement before you make the 2-patches into 4-patches. For a total of 48 4-patches.
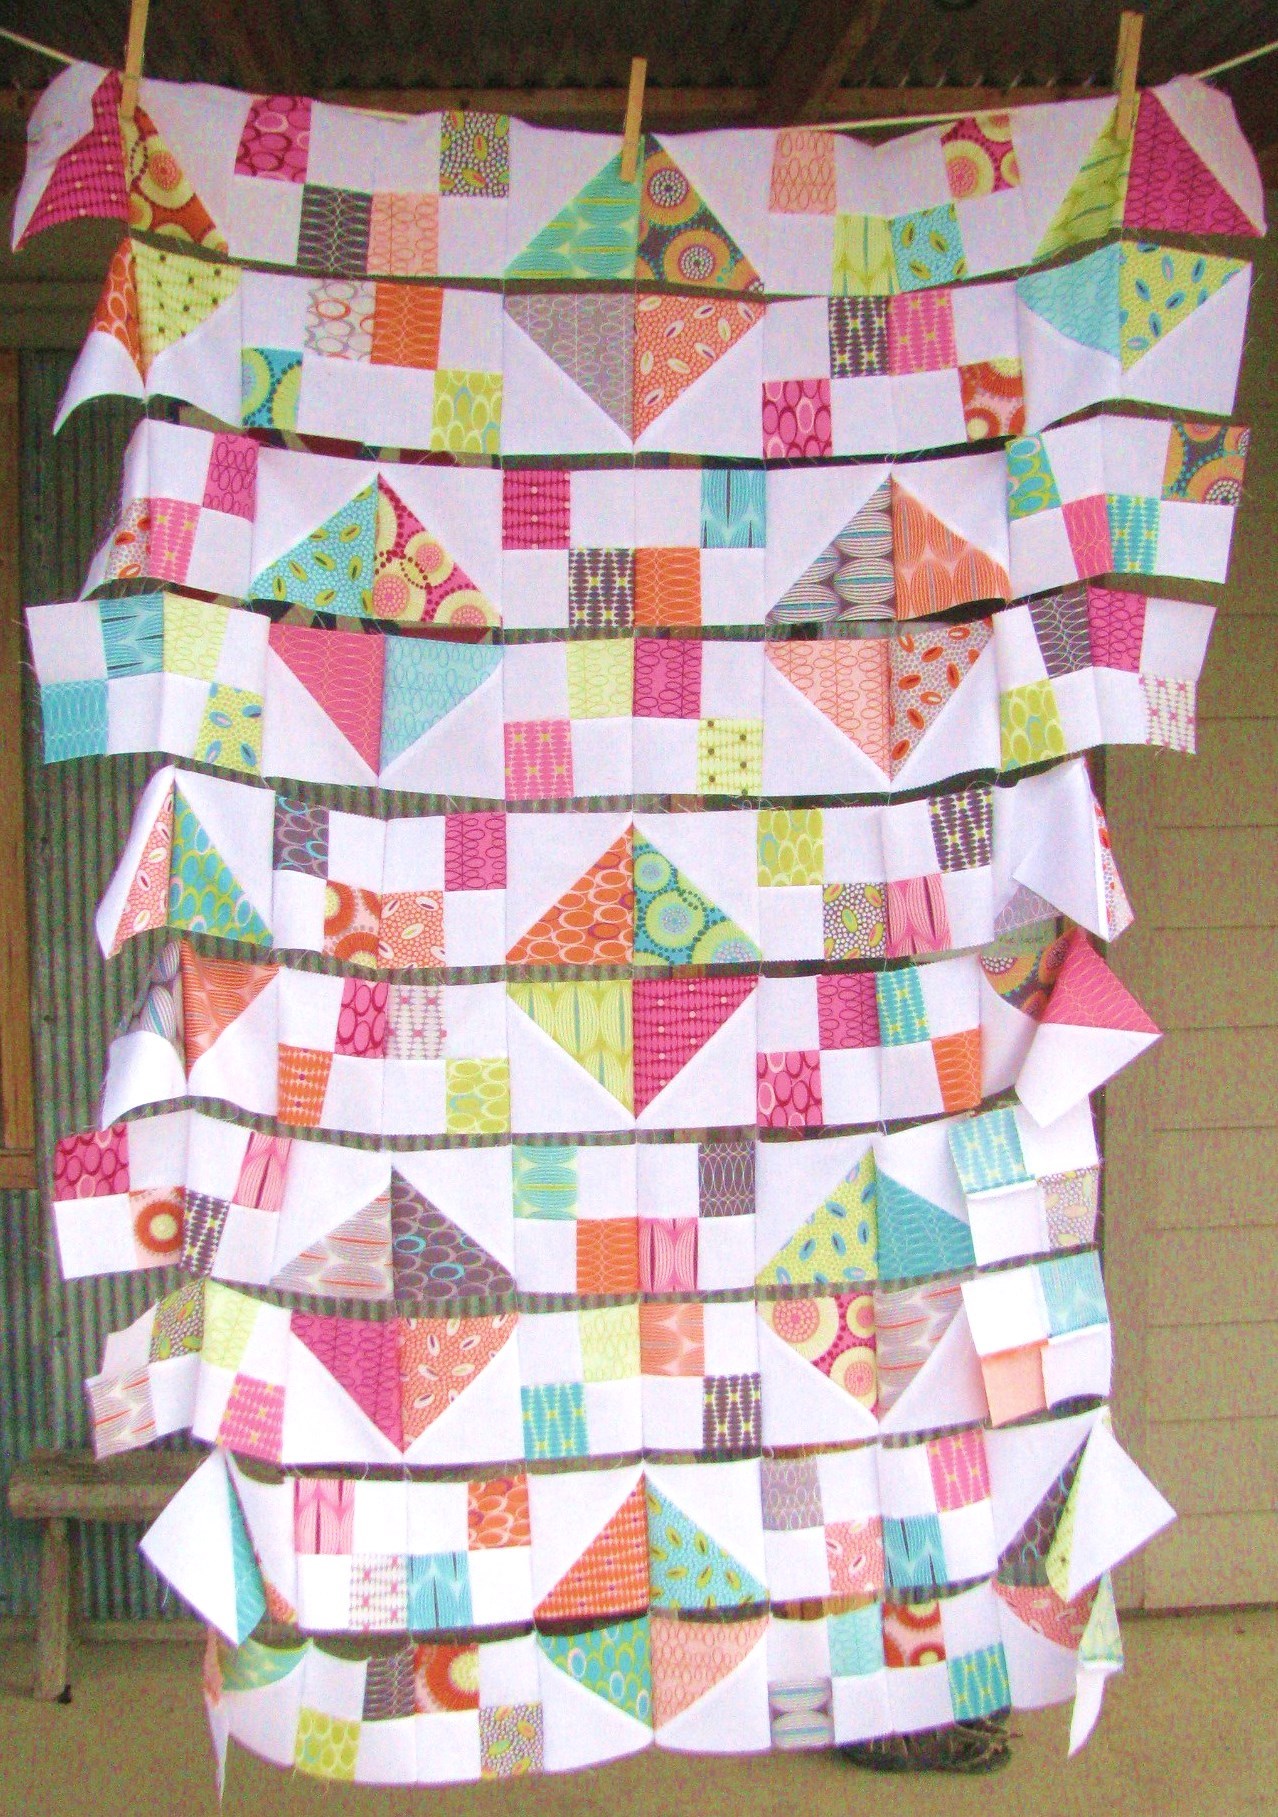
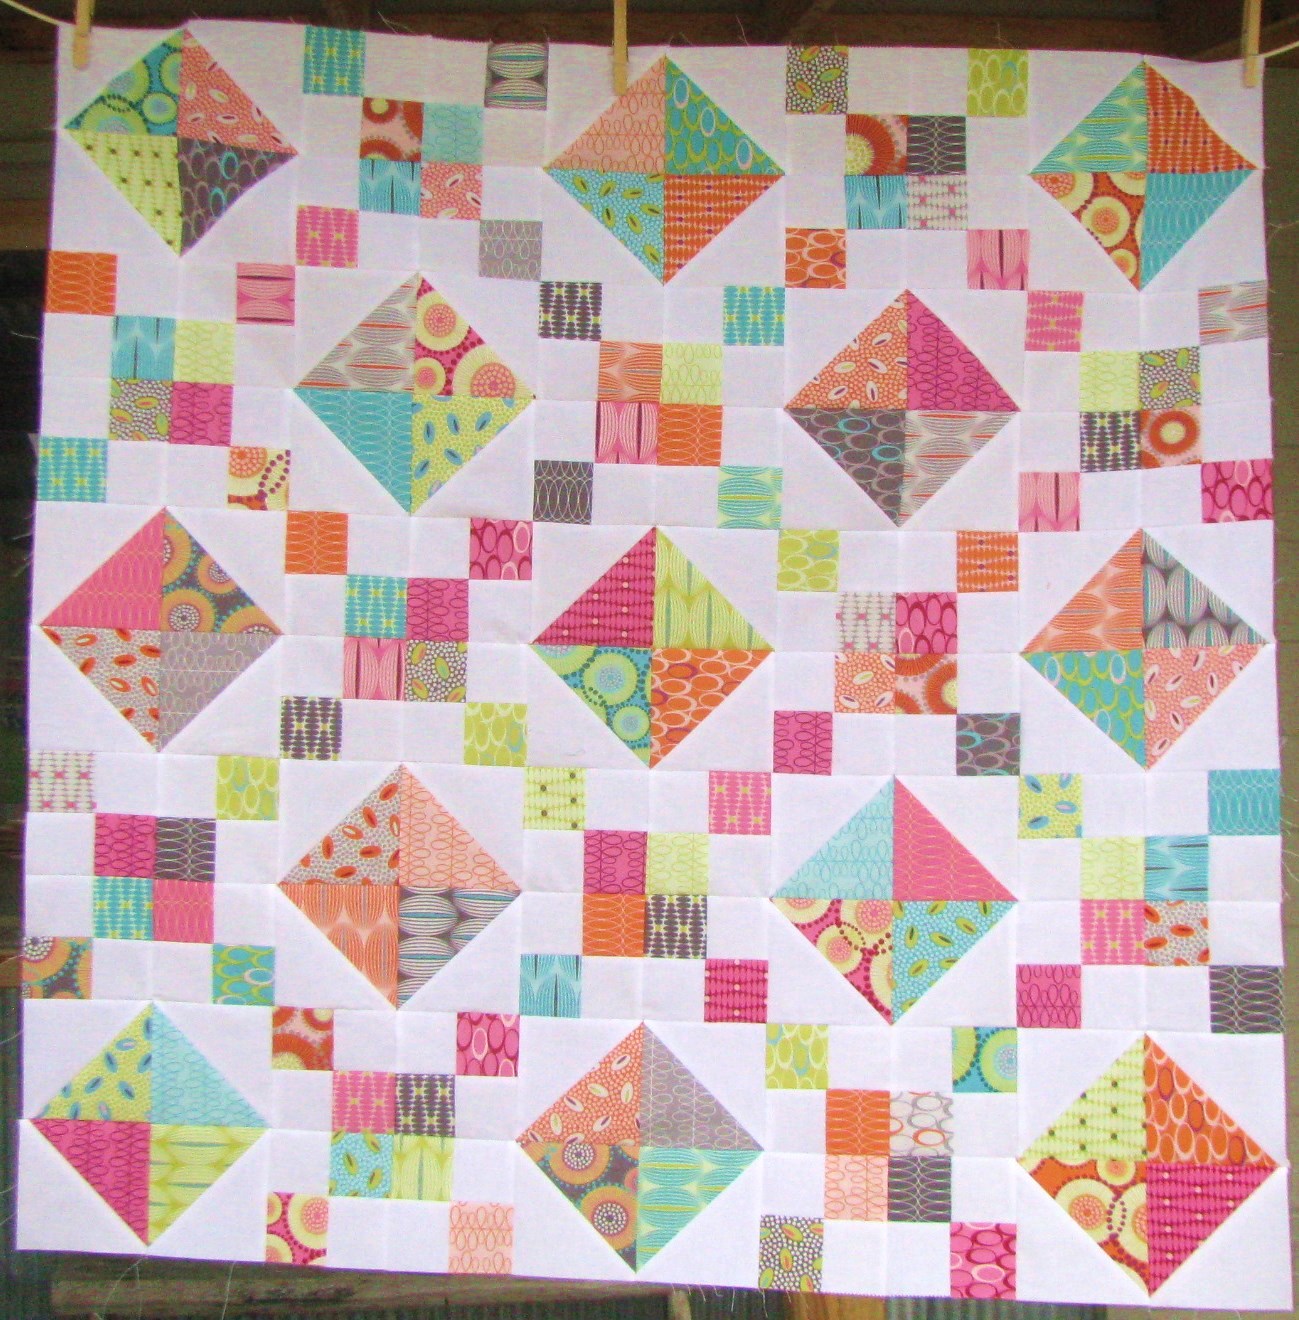
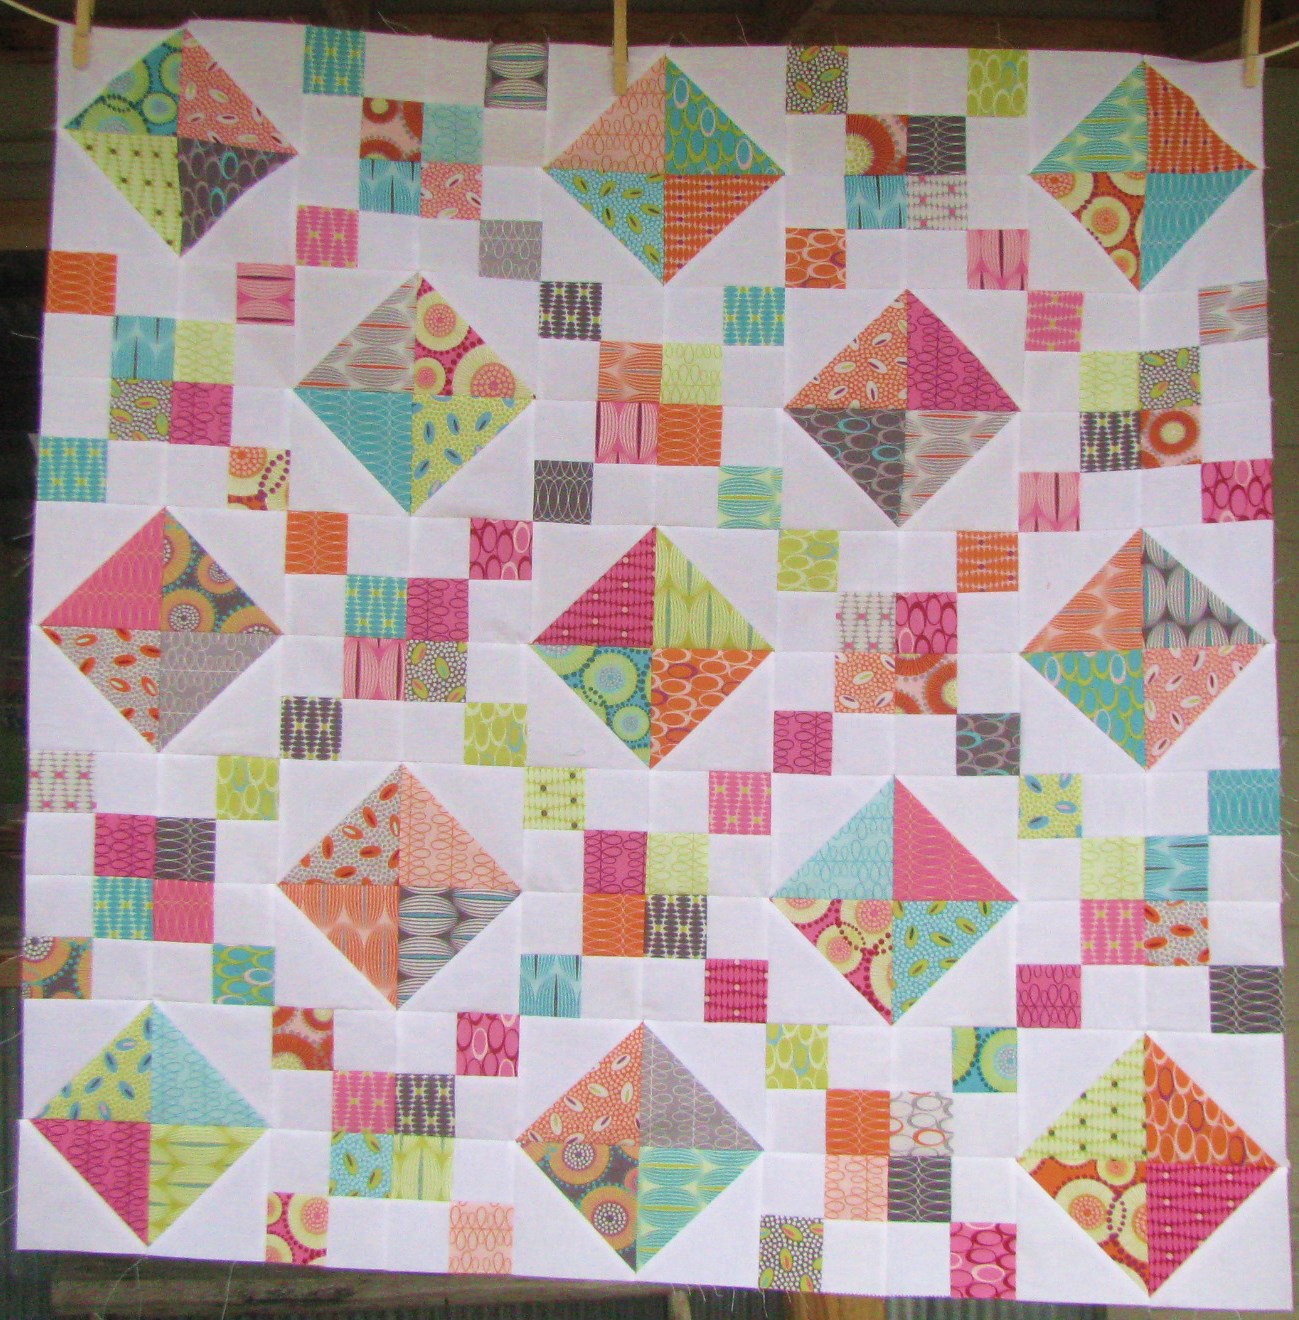 refer to this photo for layout
Tip: When playing with layout, I found it helpful to place all the HSTs first, then fill in with the 2-patches.
Assemble Patchwork Panel:
Layout 10 rows and 10 columns:

Flip column 2 over onto column 1. Chain piece those 2 columns, in order from row 1 through row 10. Do not clip connecting threads and do not press until all rows are sewn.
.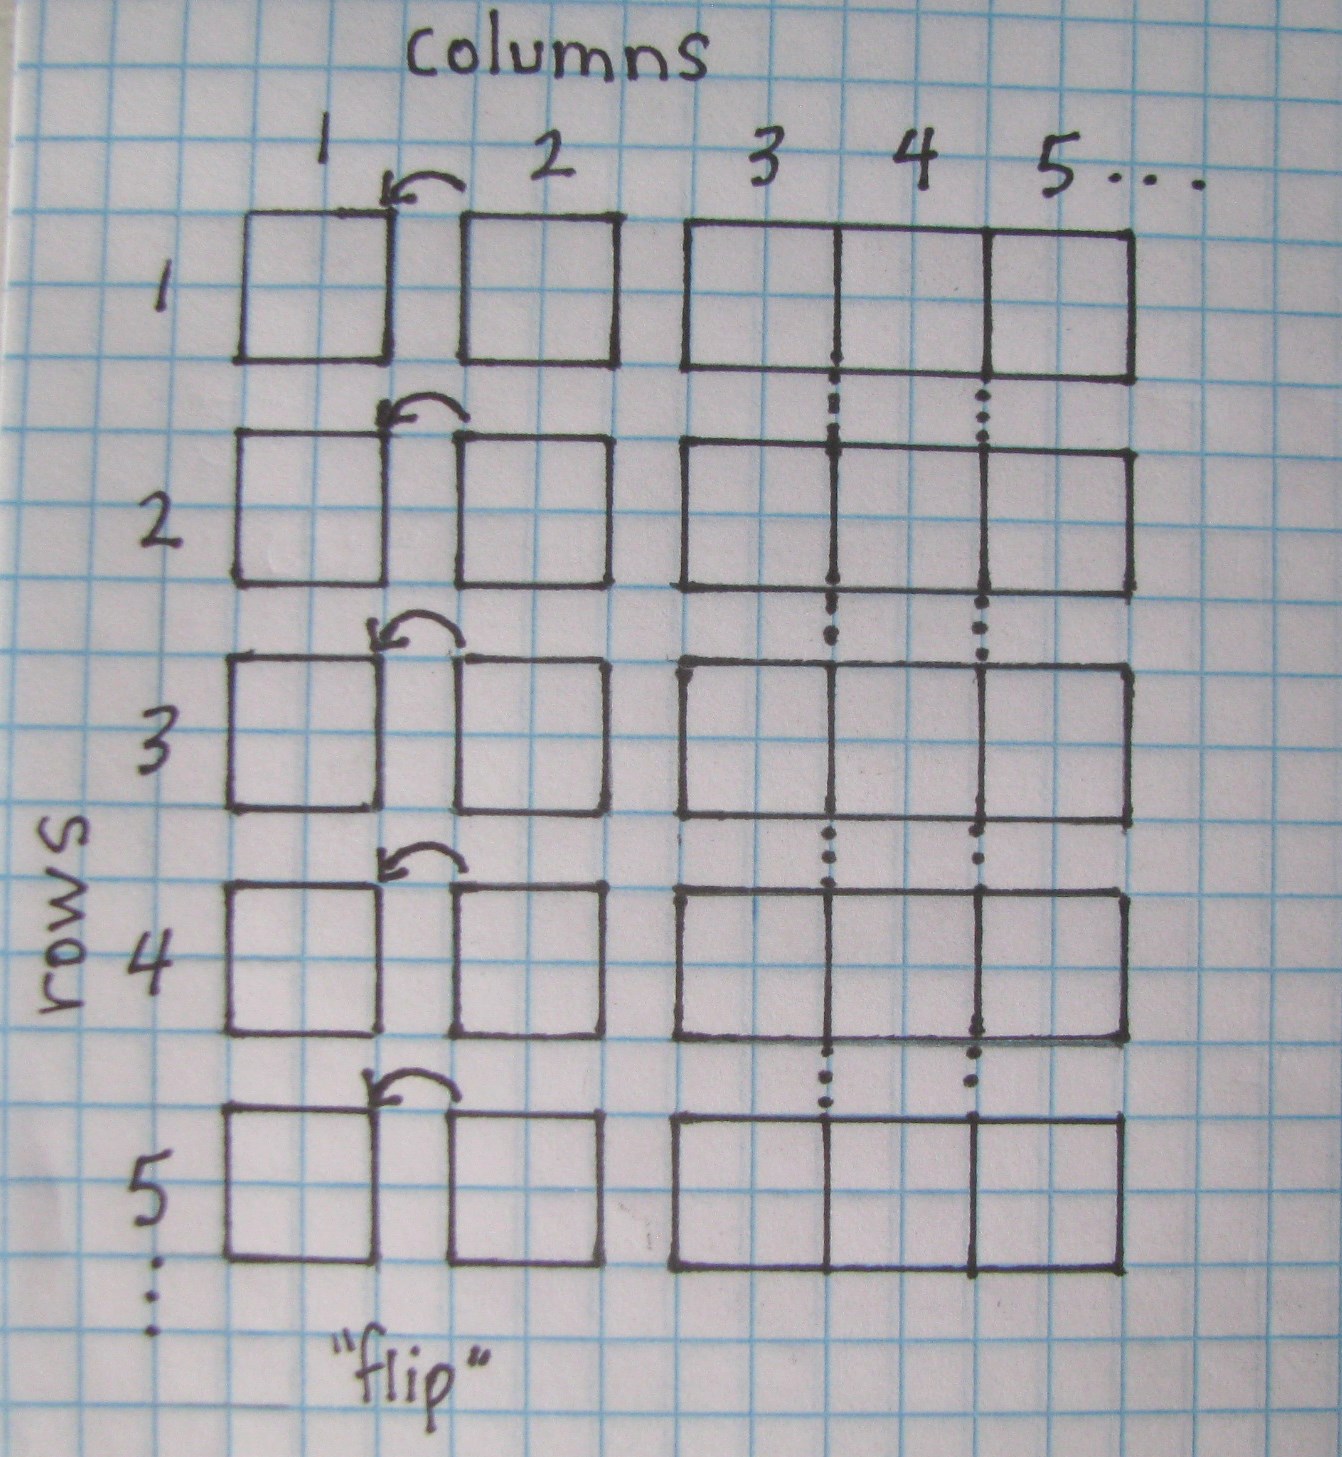

Stack each column, 3-10, in order, with row 1 on top, 10 on bottom. Pin a label to each stack, designating column number and which direction is "up".
Continue adding each column to your connected rows, without snipping connecting threads...

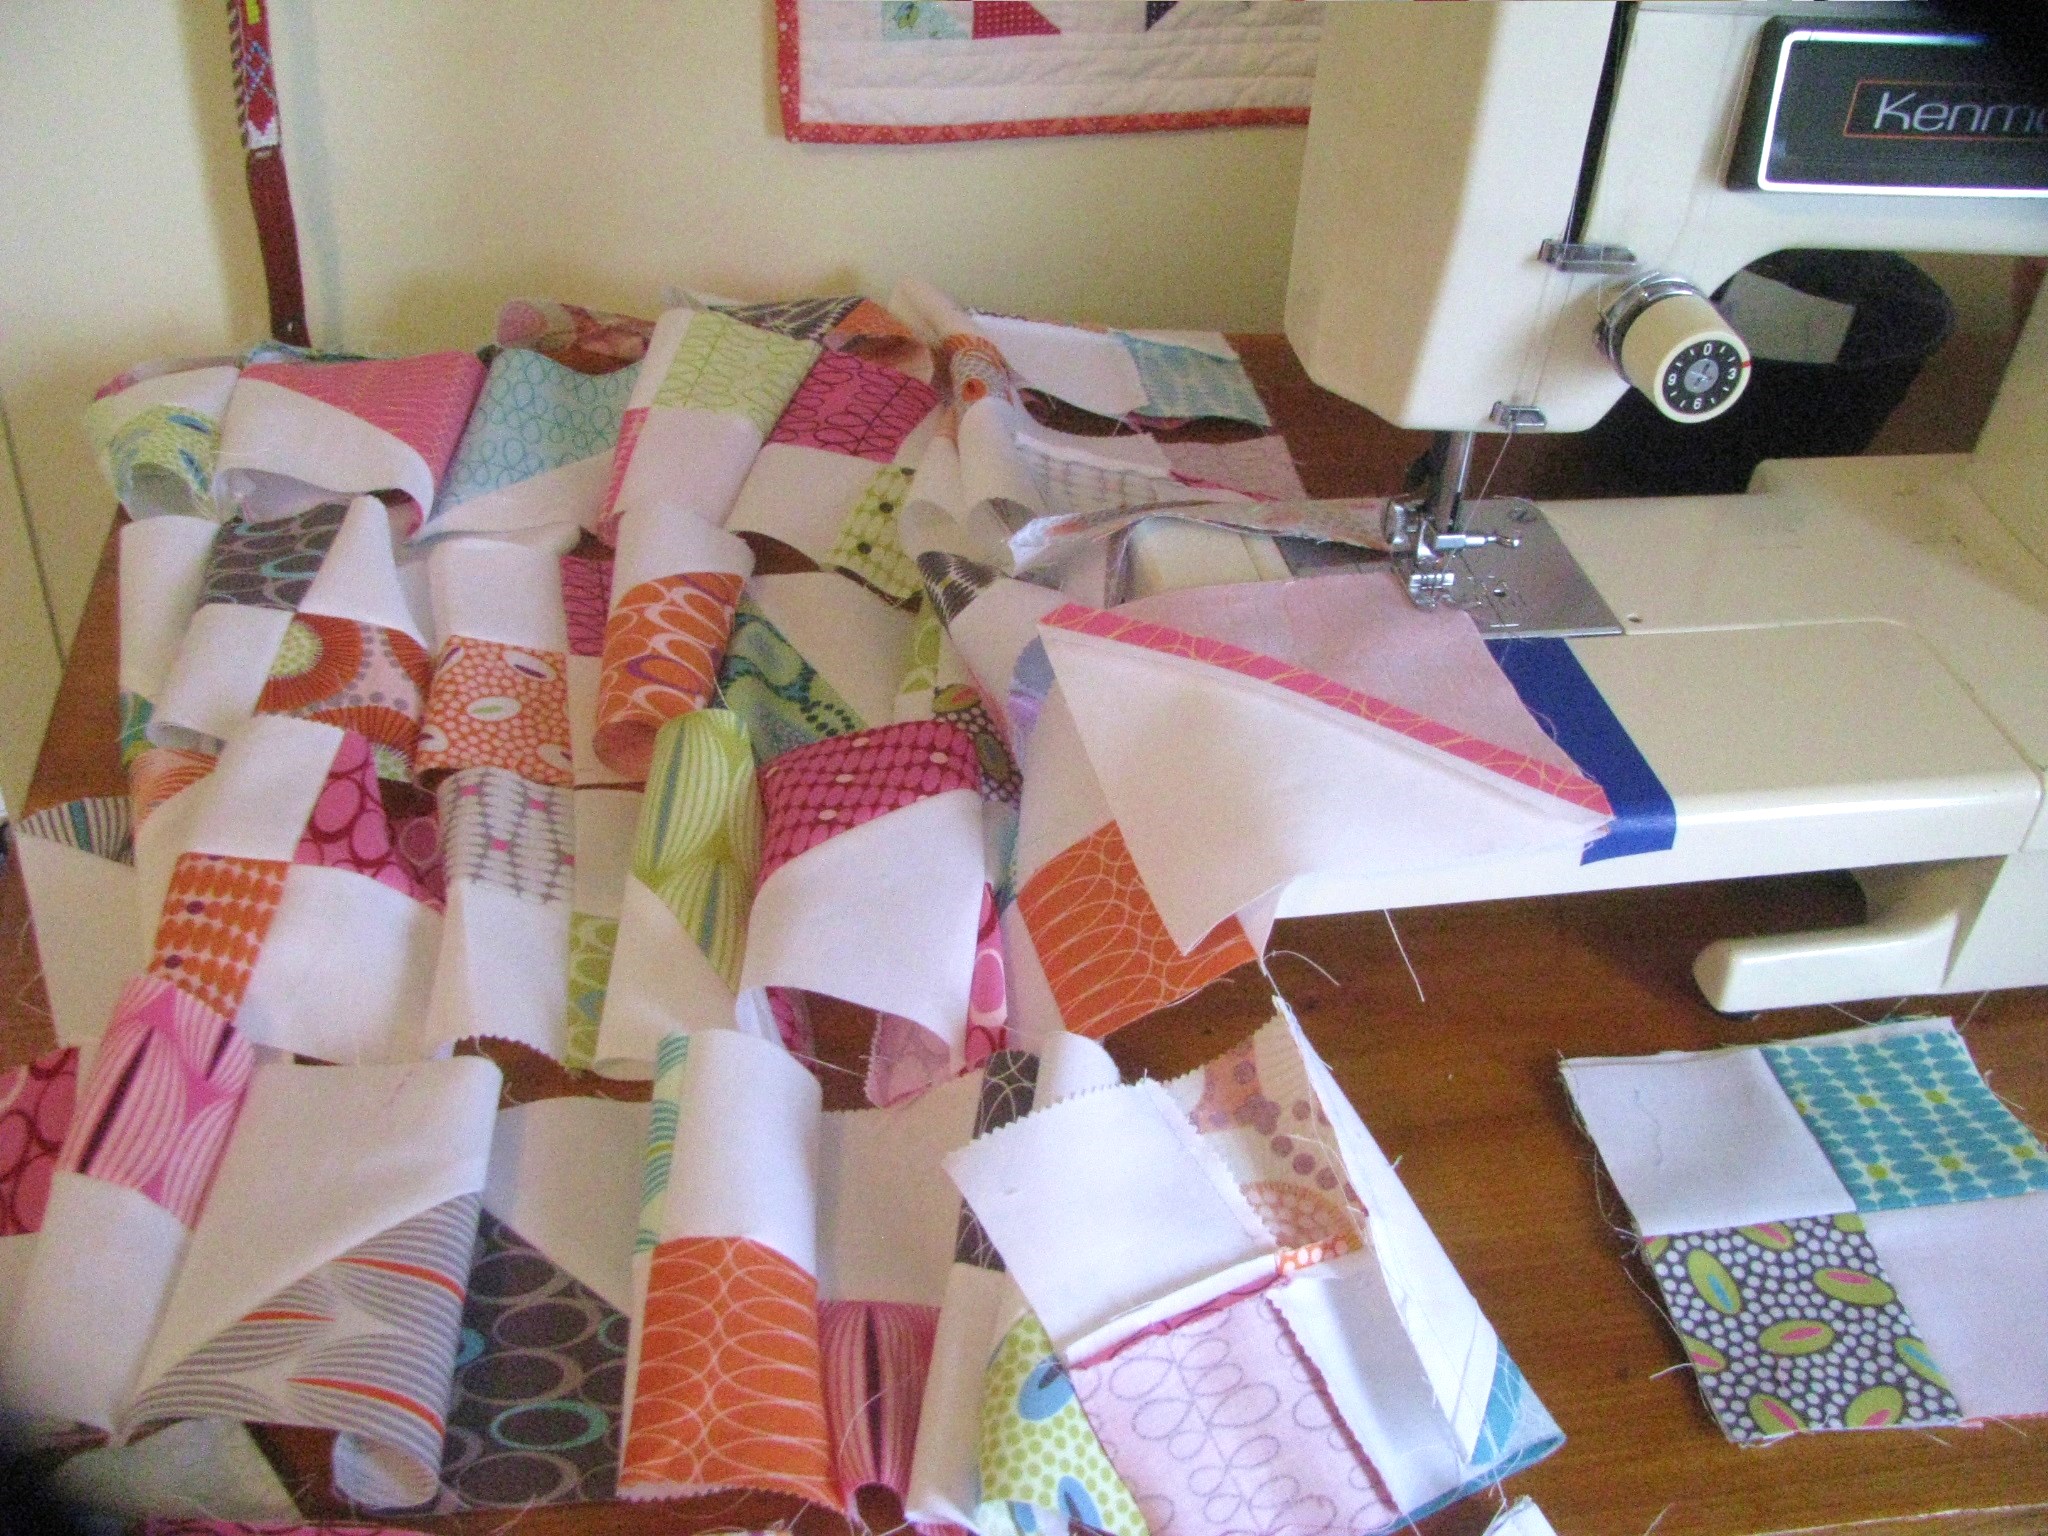
...until they look like this, all together! Don't snip those threads...
Now press, alternating direction for each row. Sew each row to the next, nesting seams, until all are sewn, and the patchwork panel is complete!
Assemble Quilt Top:
From chartreuse yardage cut the following:
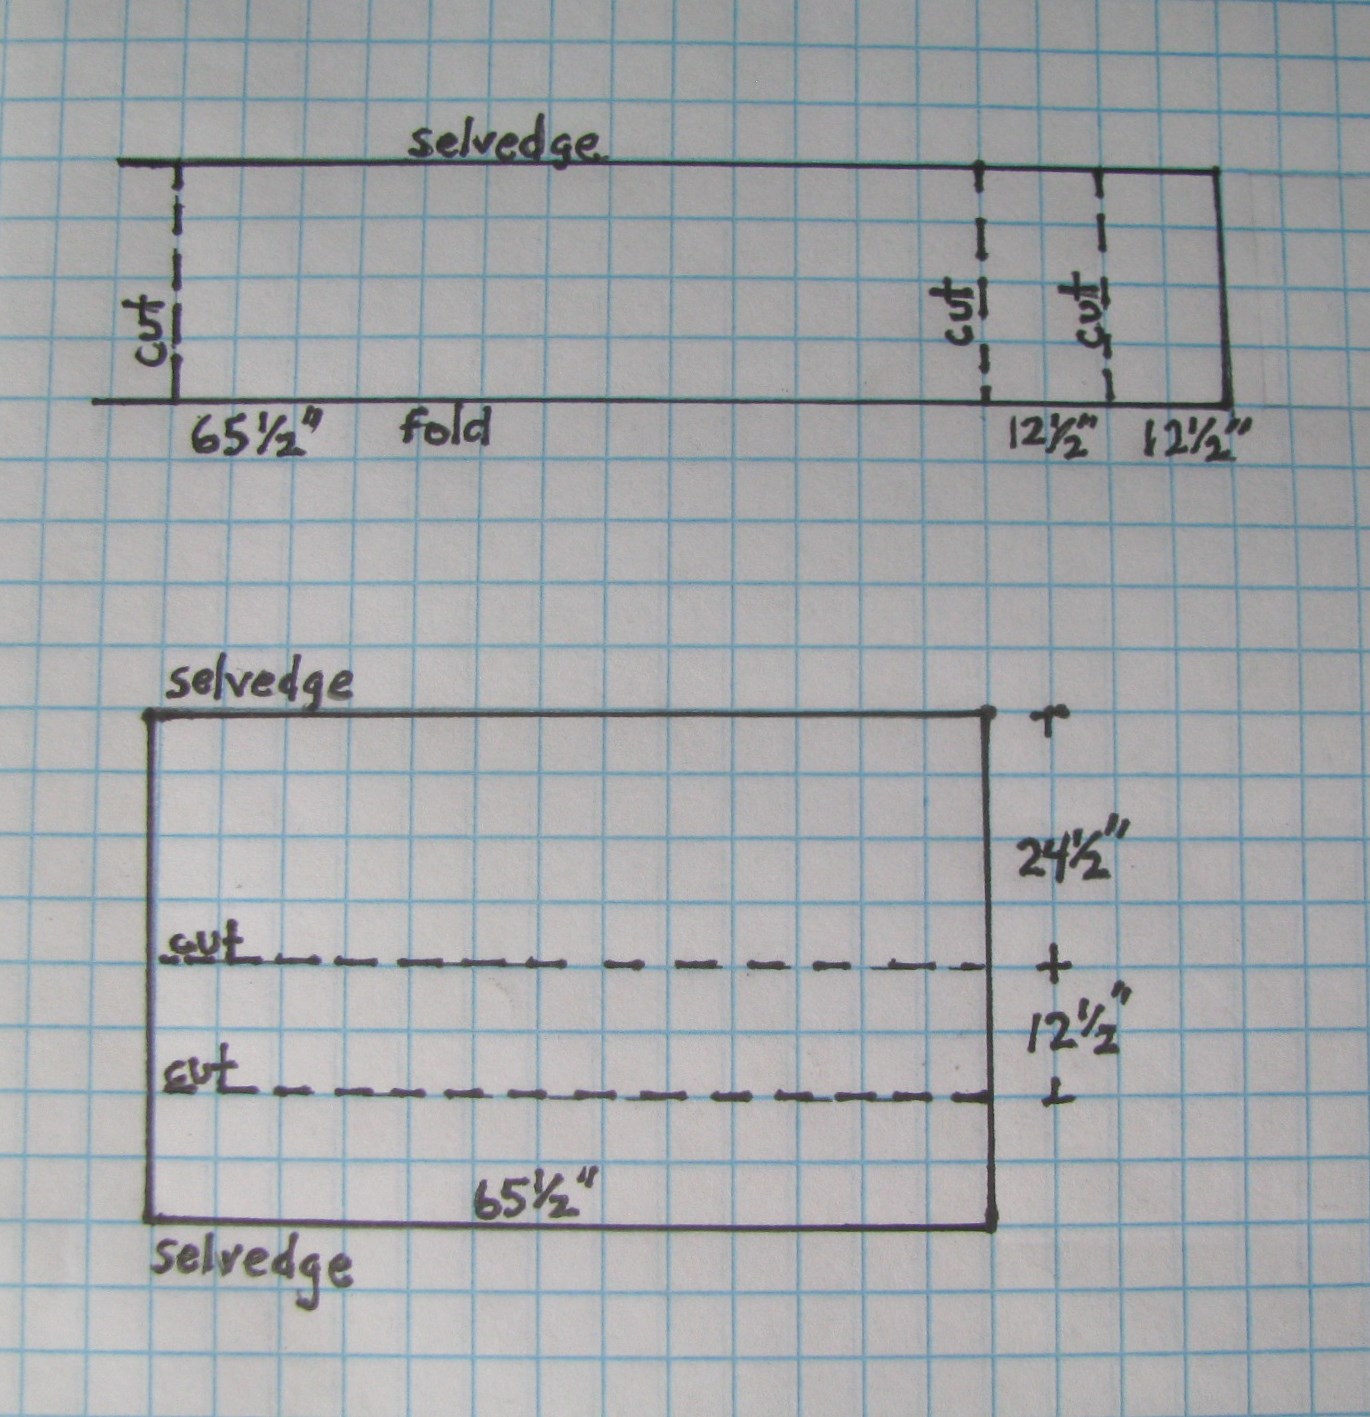
2 strips 12 1/2" x Width Of Fabric. Trim to 40 1/2" length
1 65 1/2" length x WOF
from this cut, lengthwise, 1 24 1/2" x 65 1/2"; 1 12 1/2" x 65 1/2"
Tip: Sew 12 1/2" x 40 1/2" strips to each side of the patchwork before cutting the 65" piece. Measure carefully, twice or more, add 1 1/2 inches to that and then cut...with such a large cut , I would rather trim away afterwards as be 1 inch short!
Assemble quilt top using this diagram:


Tip: When joining long strips to pieced panels, pinch-press centers to match, and don't be stingy with the pins!
Piece backing from single yardage by cutting in half and joining selvedge edge to selvedge edge.

I used 2 different yardages, and since I had extra chartreuse, I added a strip between the pink and the gray, just for fun!
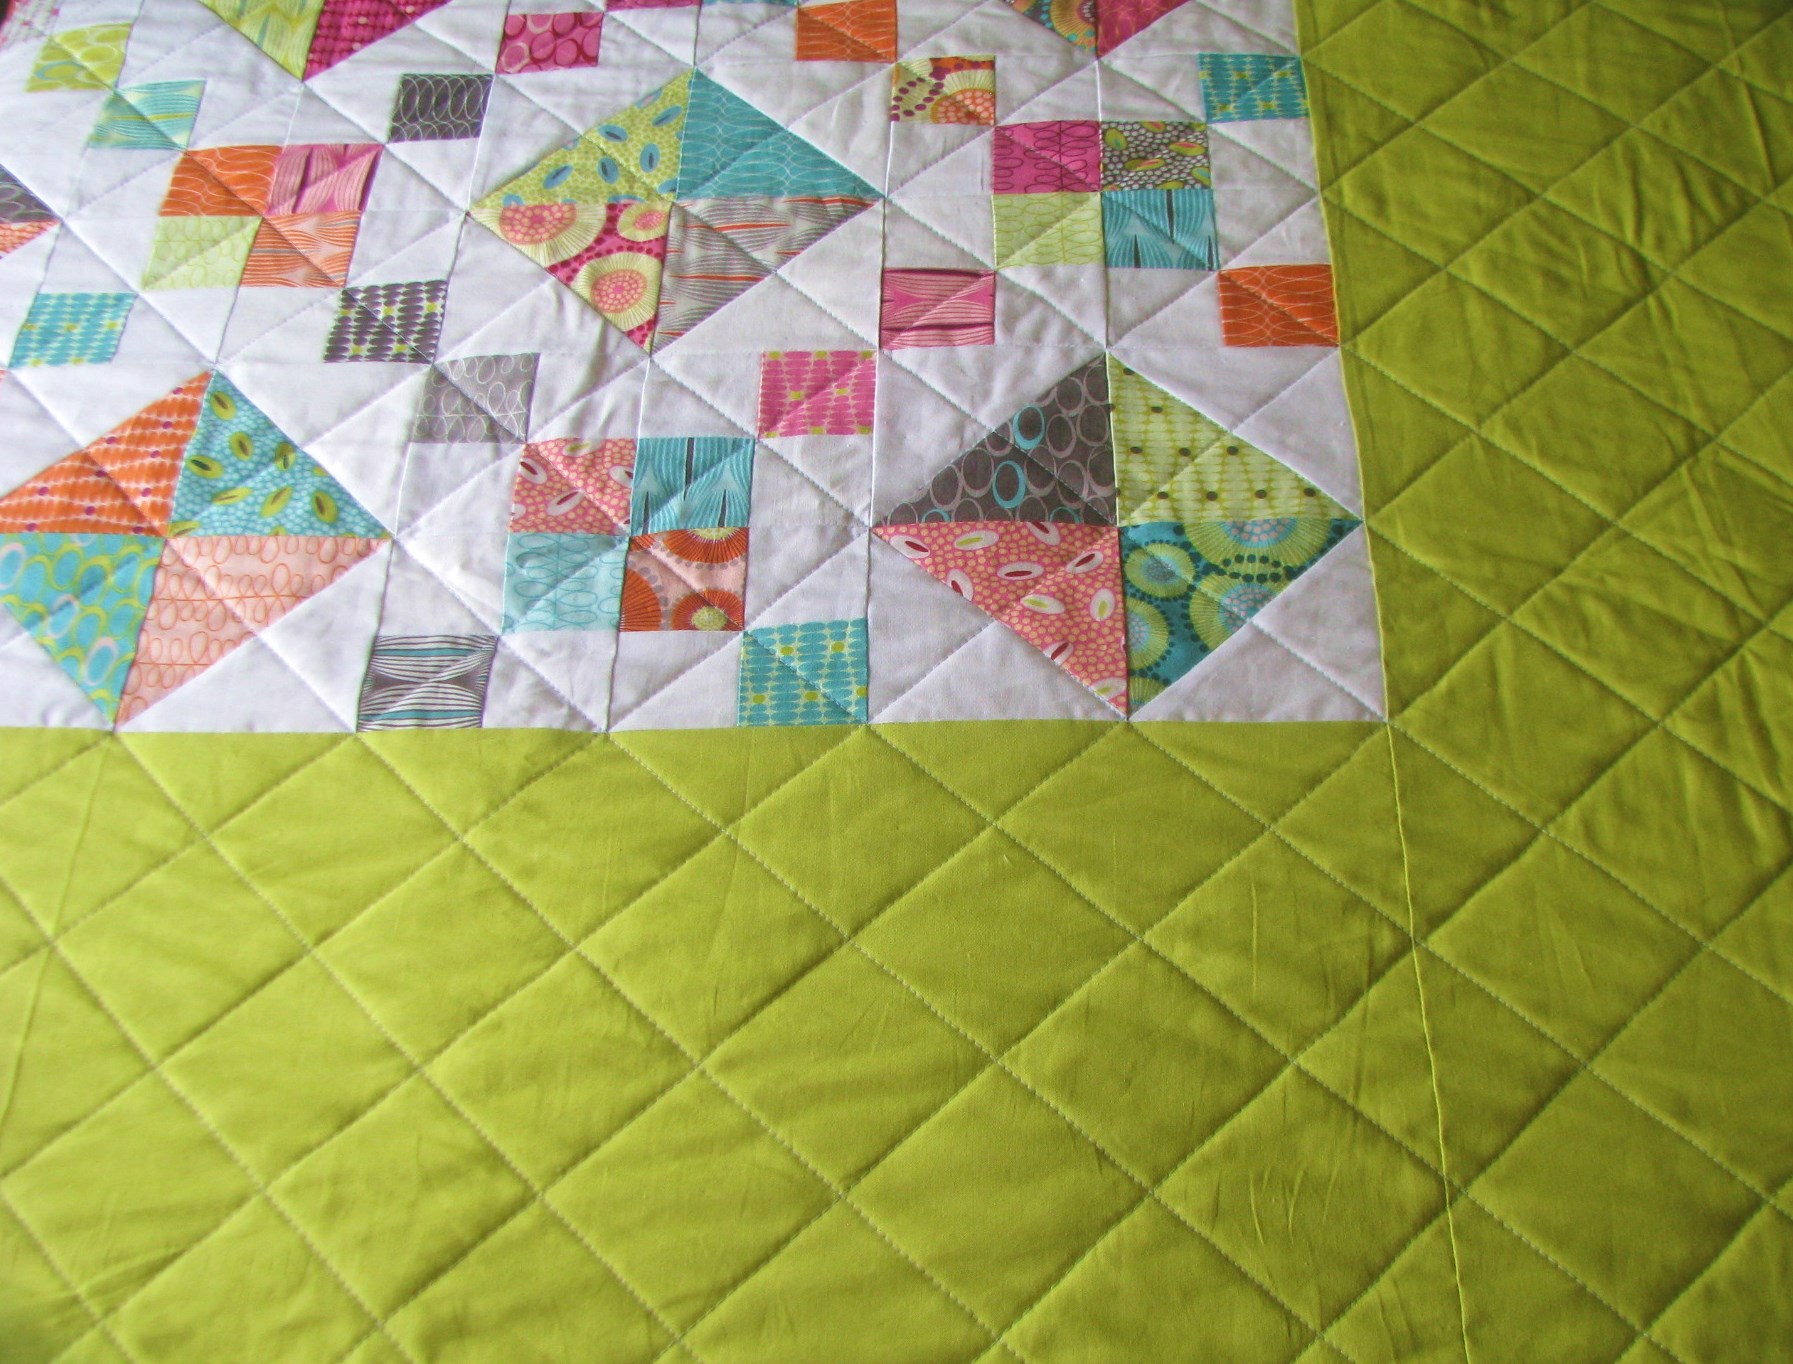 simple grid quilting, following the diagonals of the patchwork
Baste quilt sandwich and quilt. Trim and bind!

![]()
One 64" x 76" yummy, delicious throw quilt, just For You!
Sarah Zimmerman
{www.cedarfork.blogspot.com}
![]()
Posted in: