Welcome to Moda!
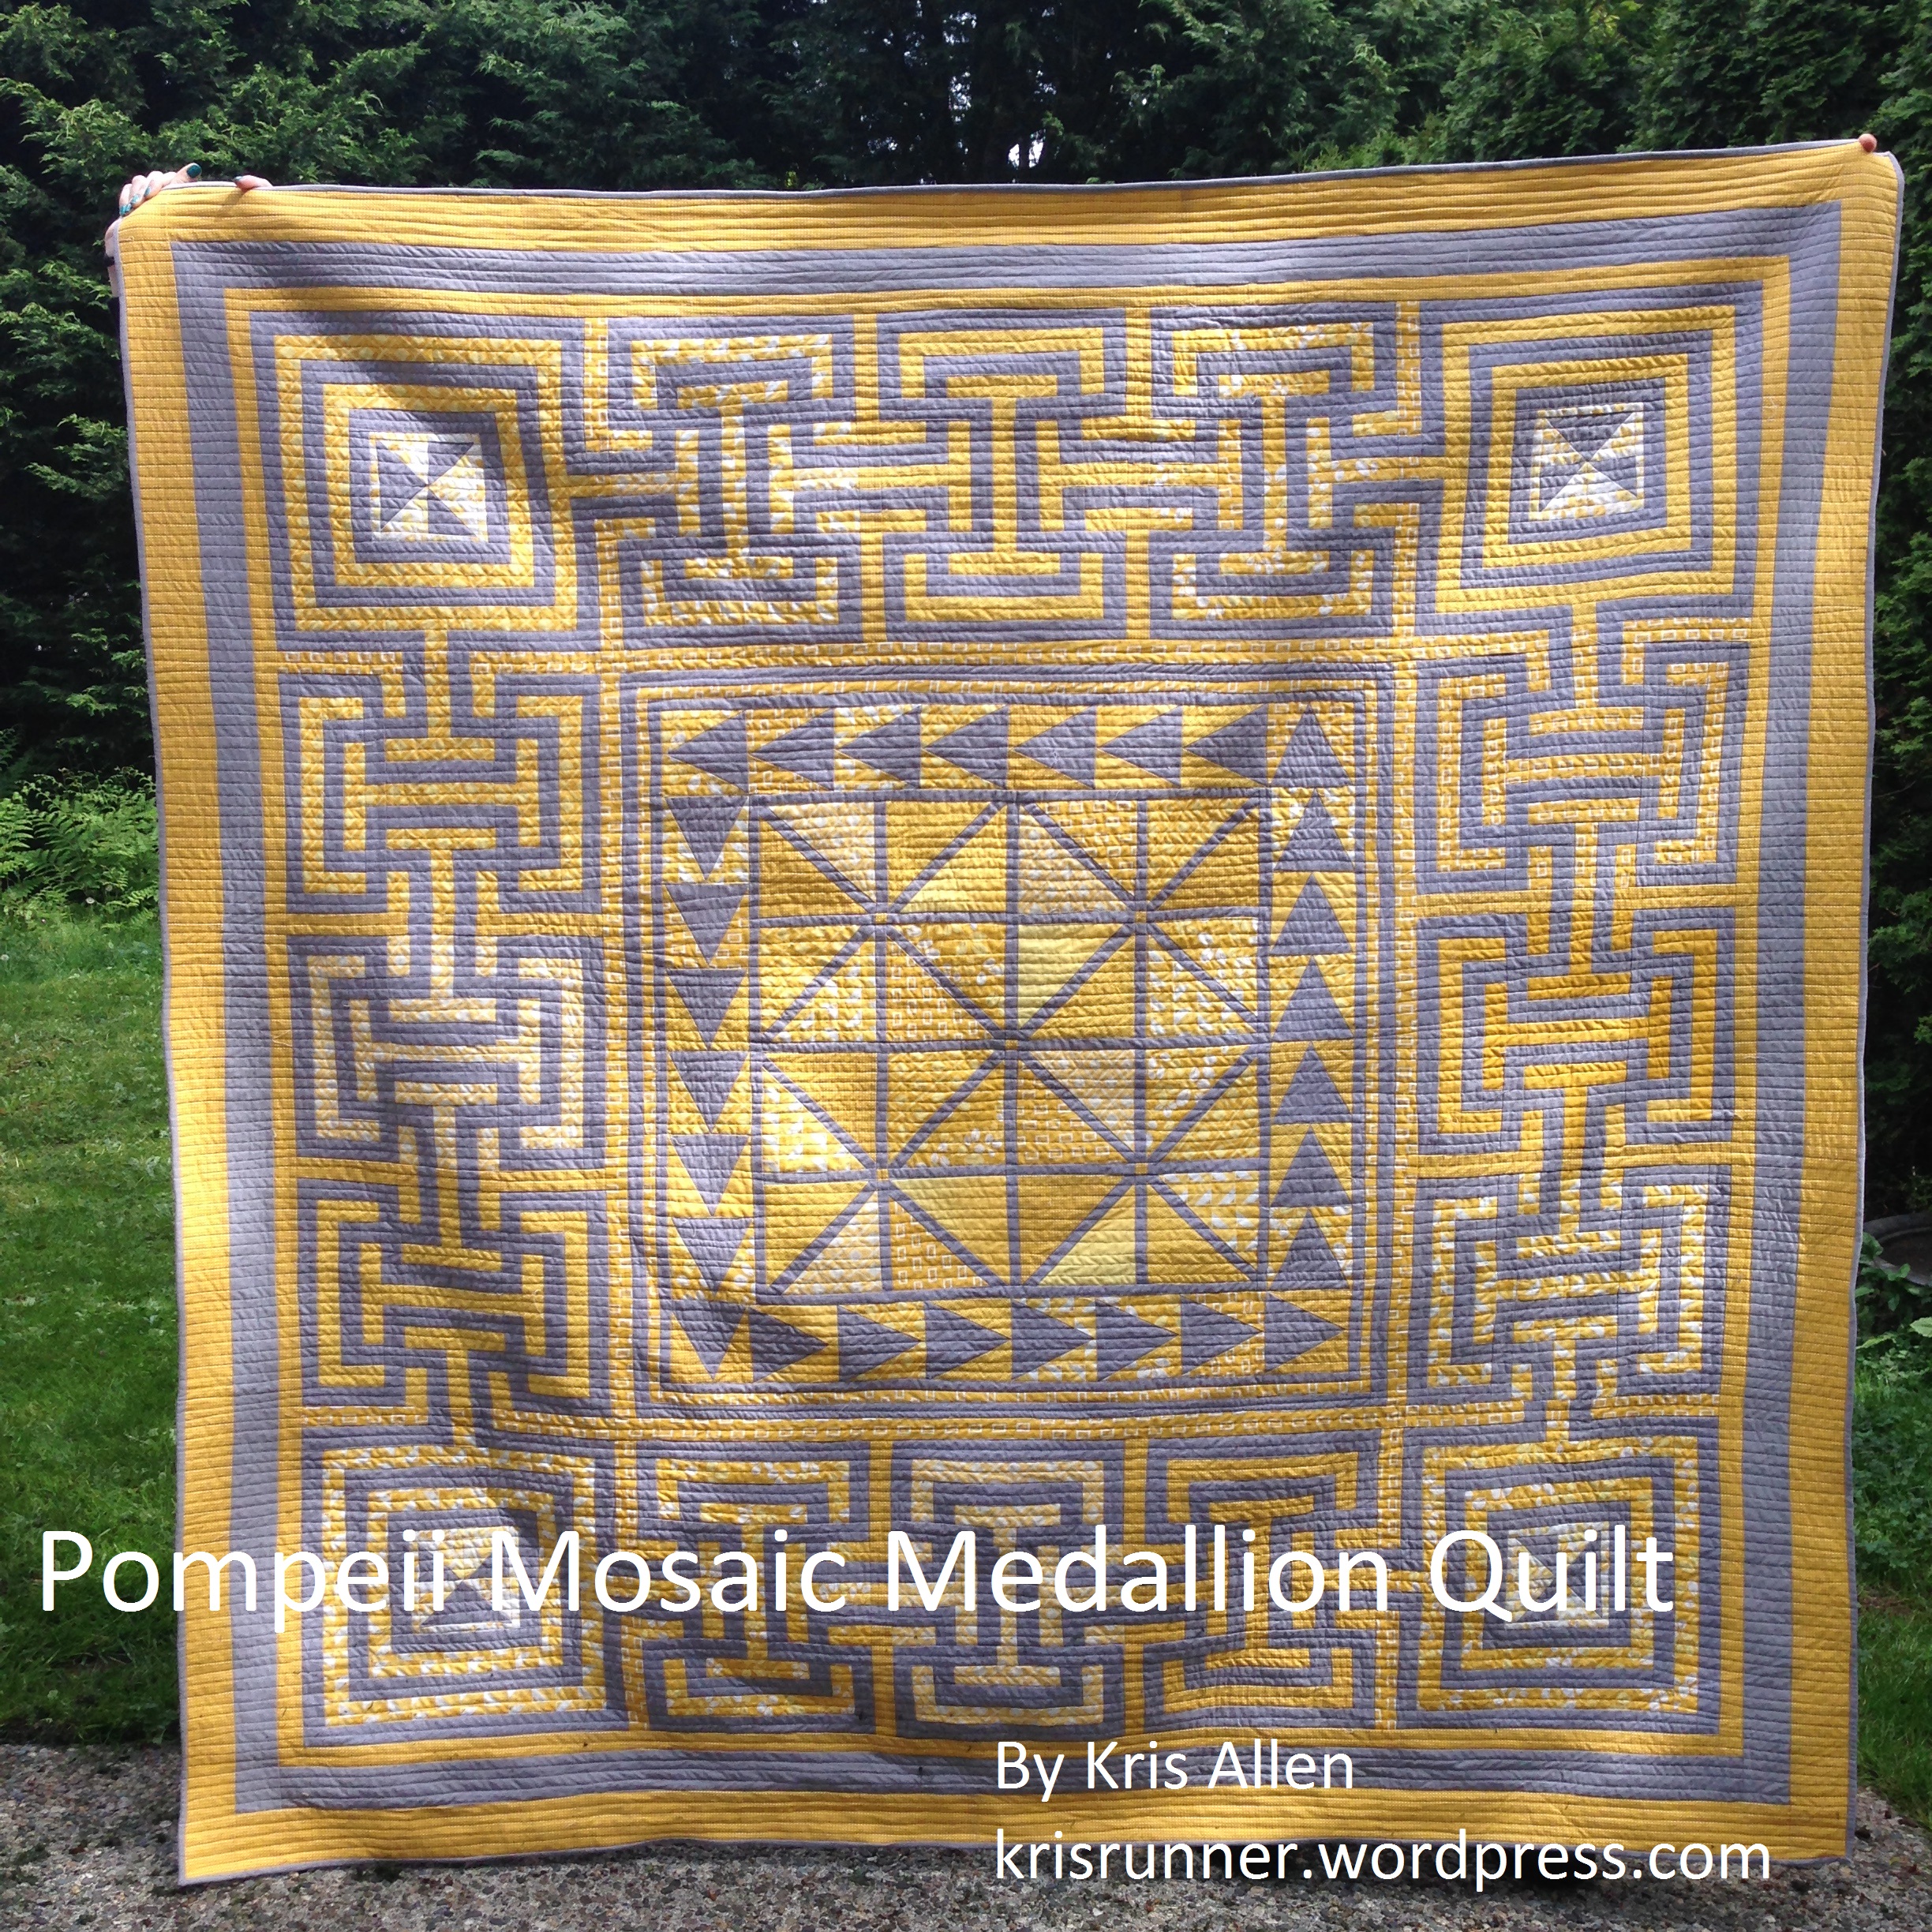
Pompeii Mosaic Medallion Quilt
Pompeii Mosaic Medallion Quilt
Published:
May 10 2015 - 23:00

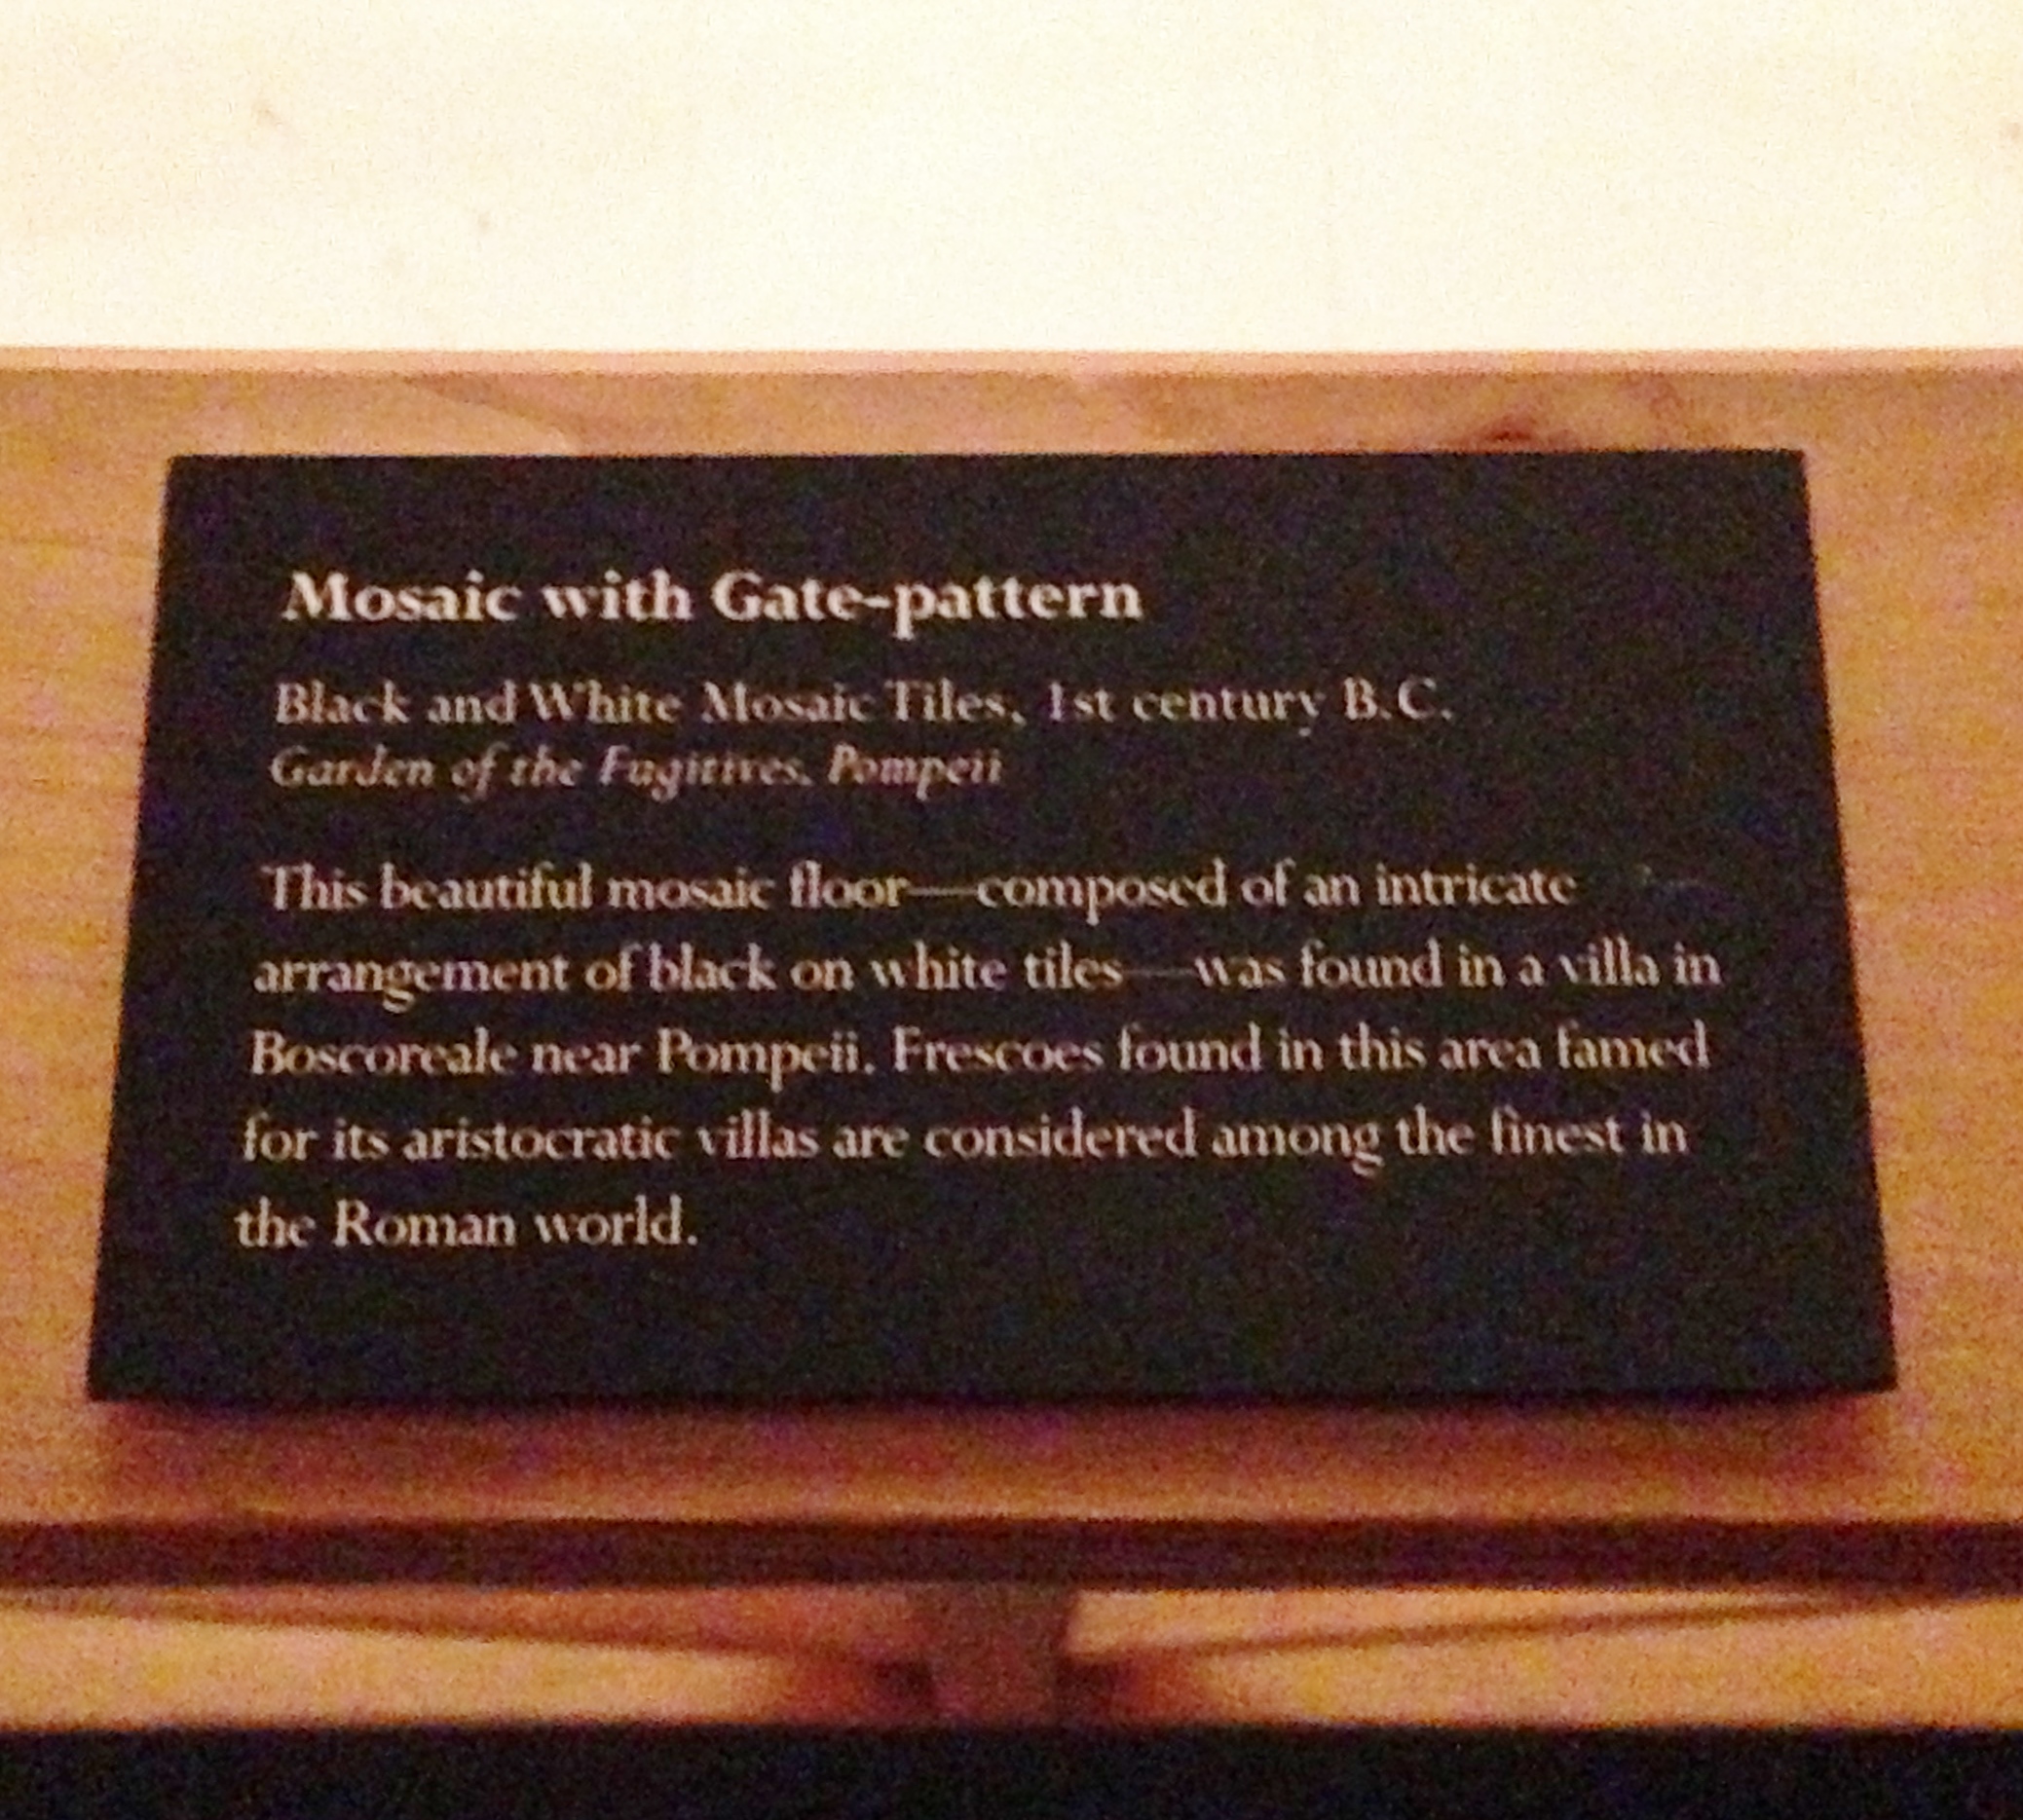
It is great to be here today at Moda Bake Shop to share with you a quilt that I have fallen in love with. My name is Kris and you can find me here. I love when you can find inspiration for an quilt in unique places. Our family was visiting the Pompeii exhibit in Pacific Science Center in February. On the wall was a black and white floor mosaic found in a villa in Boscoreale near Pompeii. I took a picture (which was allowed) with my phone and knew I wanted to make a quilt using the pattern.

When I saw V and Co's Simply Colorful Yellow fabric I knew that was perfect. What I loved even more (if that is possible) is the Cross Weave Fabric from Moda. I love the texture it adds. It makes the quilt. So after lots of math (good thing I am not scared of it) here you have my version of the Pompeii Mosaic Medallion Quilt.
![]()

- Two Simply Colorful Fat Quarter Pack (10 to a pack) in Yellow (You will need 17 fat quarters - I didn't use the bottom yellow with orange flowers)
- 1 yard of Simply Colorful Yellow with white dots (10843-13) for sashing and borders
- 4.25 yards of Graphite Cross weave for the quilt, borders and the binding
- 4.5 yards of Simply Colorful Yellow with white rectangles (10842-13) for Backing
![]()
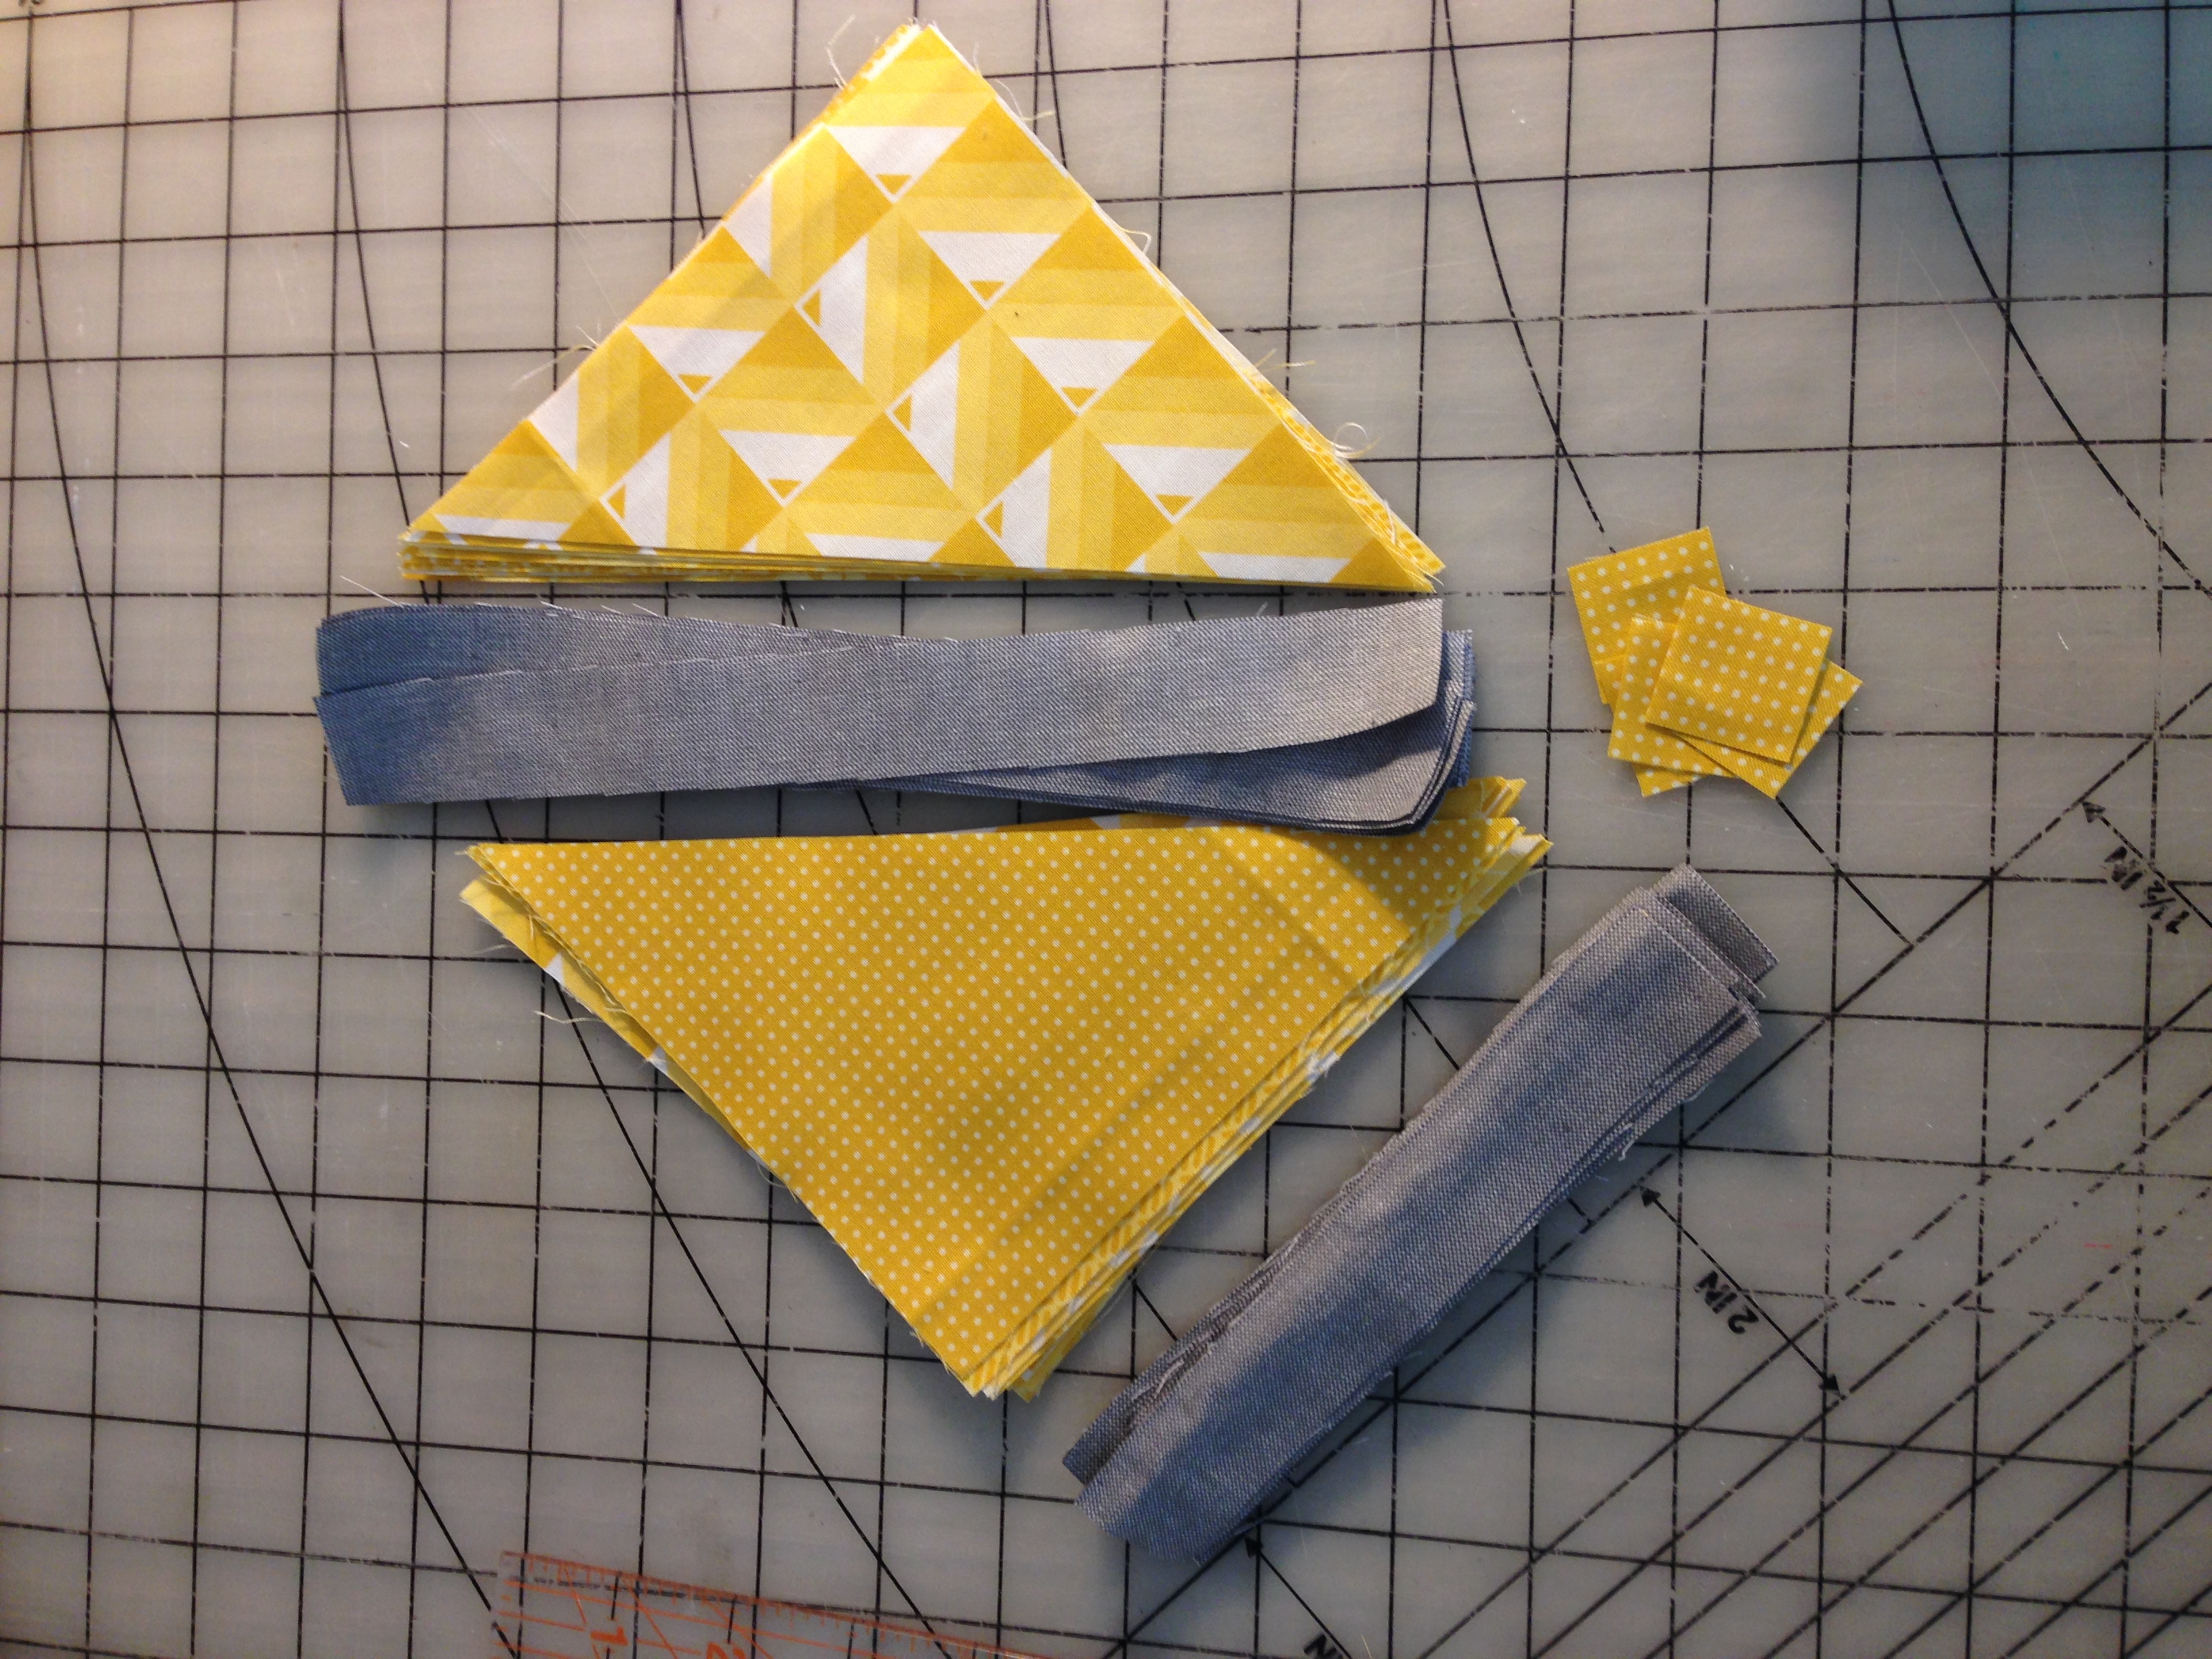
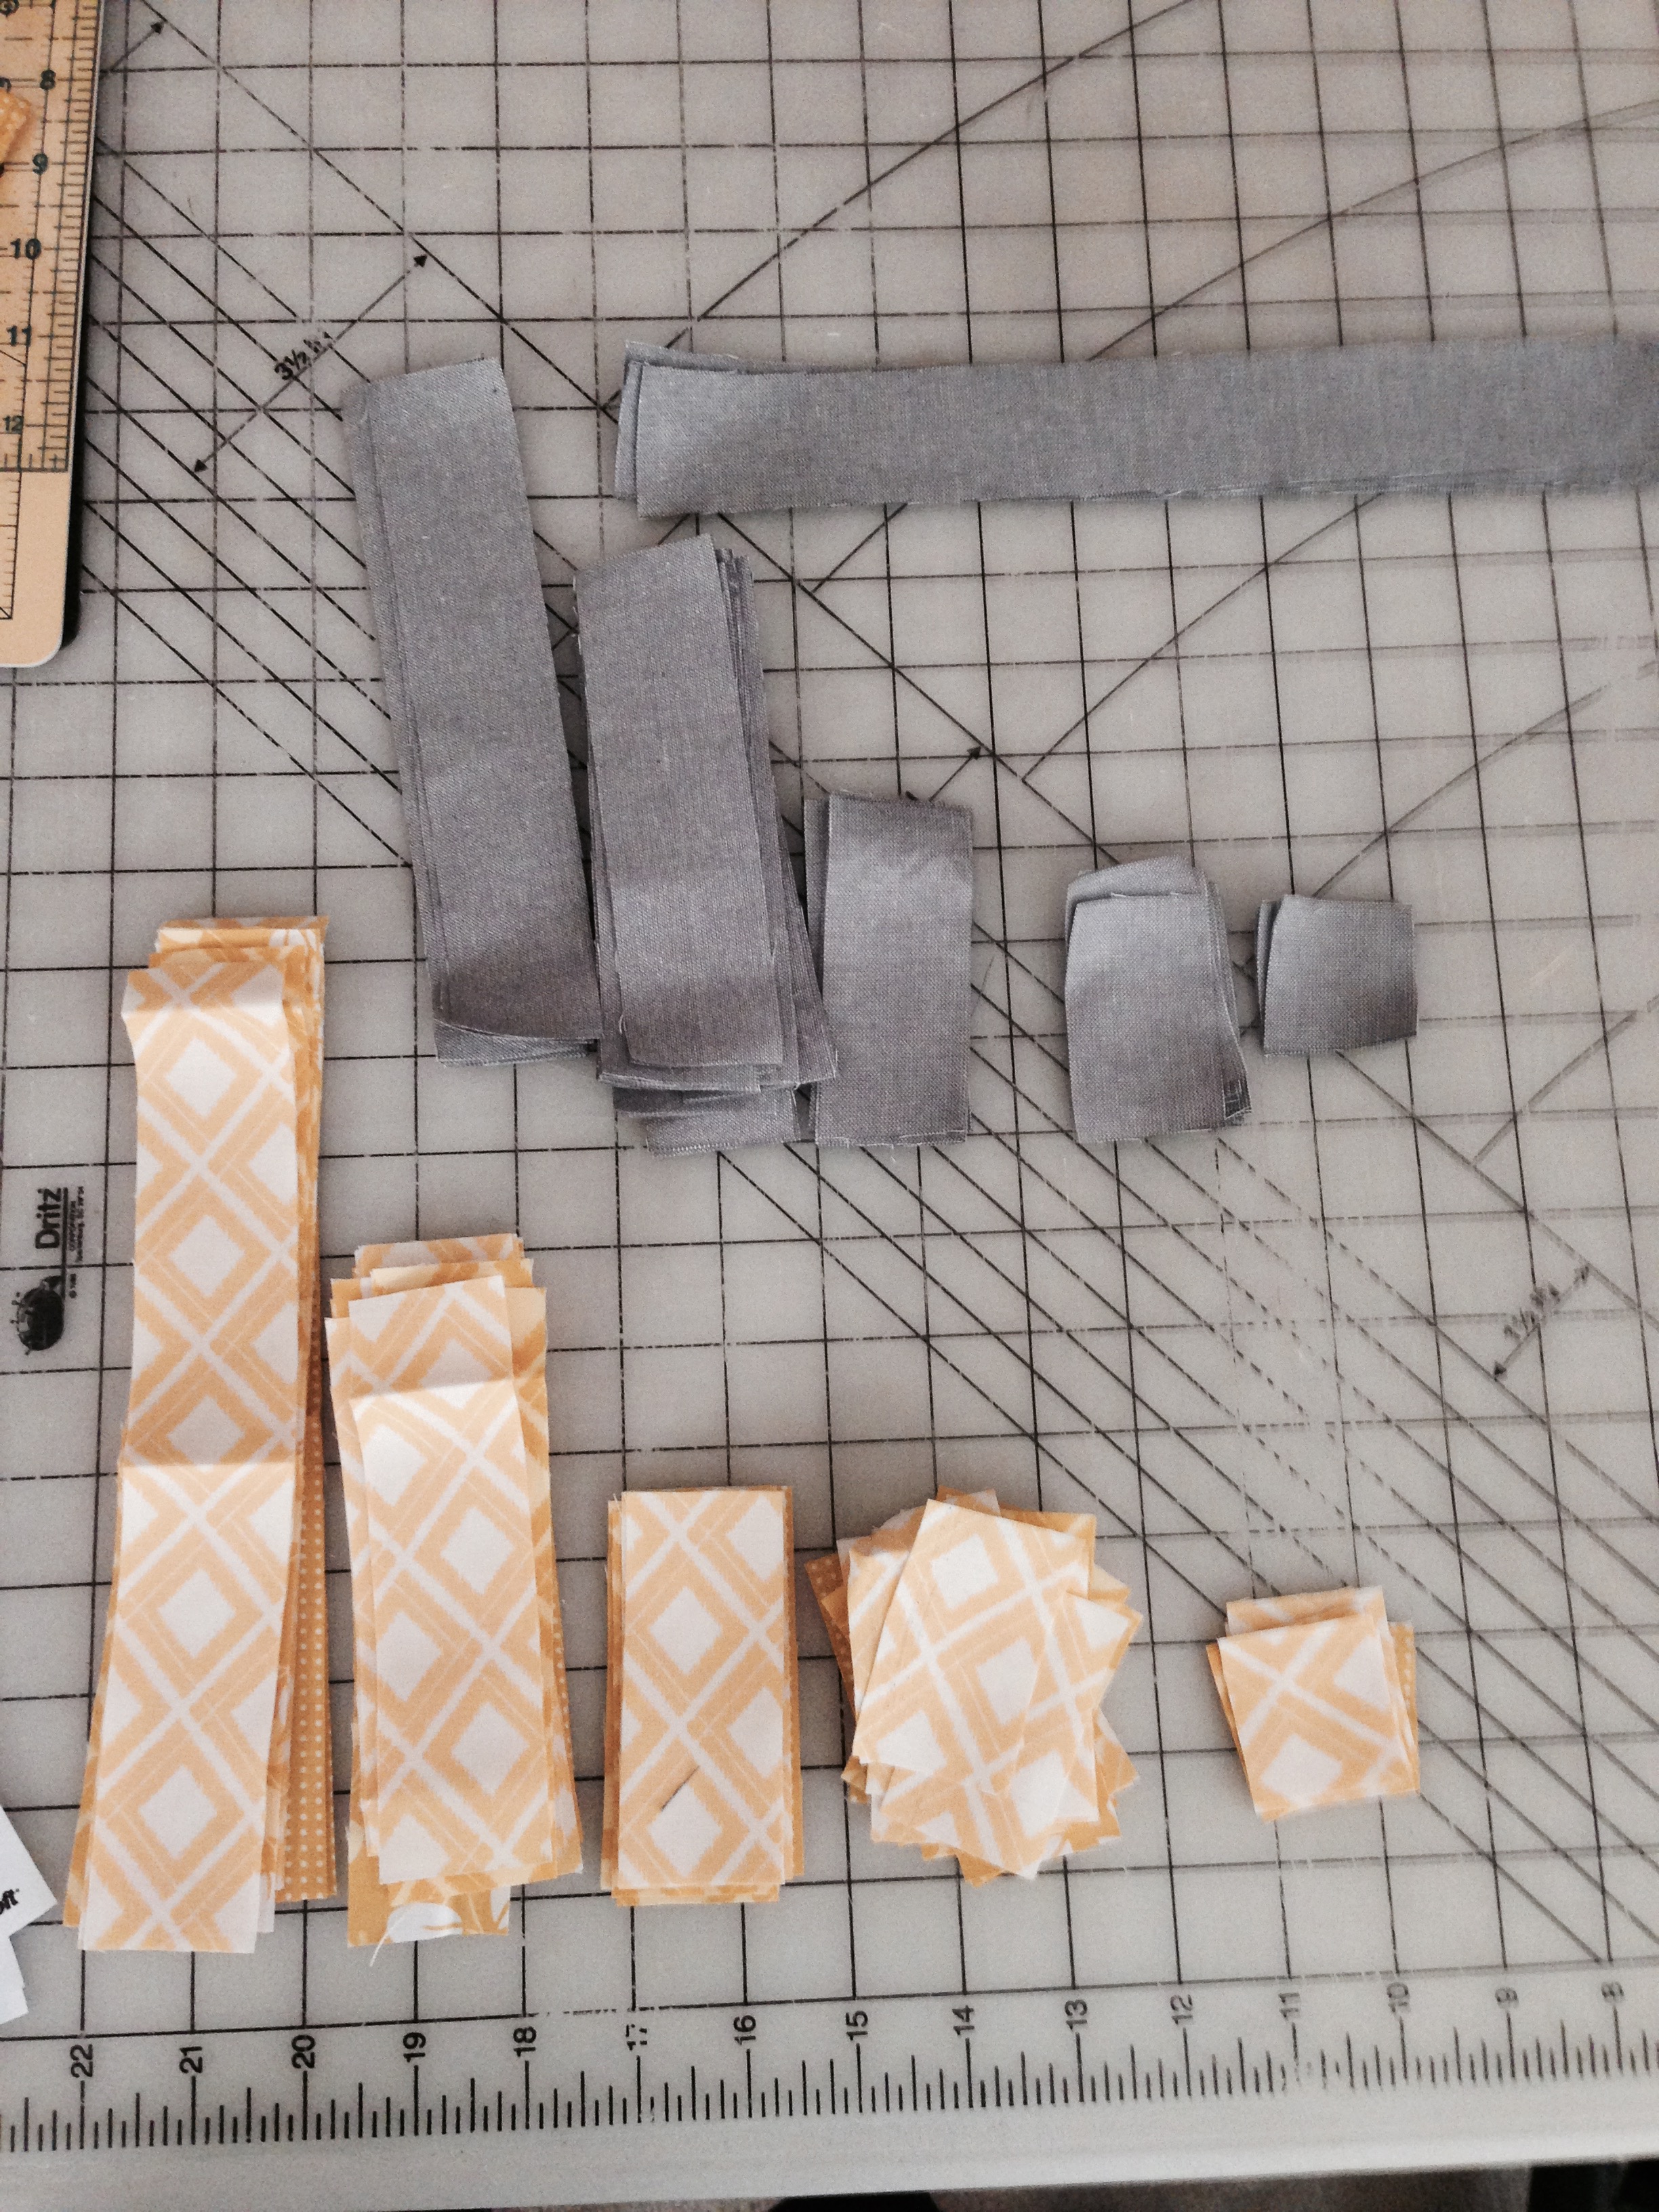
This quilt is a bit different from quilts which use the same block over and over again. For that reason, I am going to only give you the cutting for each part as we go along. There are 5 different blocks and then there is the sashing and borders. Just take each block section and at a time and it will be fun to see your quilt grow and grow. All the blocks when broken down are very simple. So don't get over whelmed and let's get started. All seams are 1/4 inch seams.
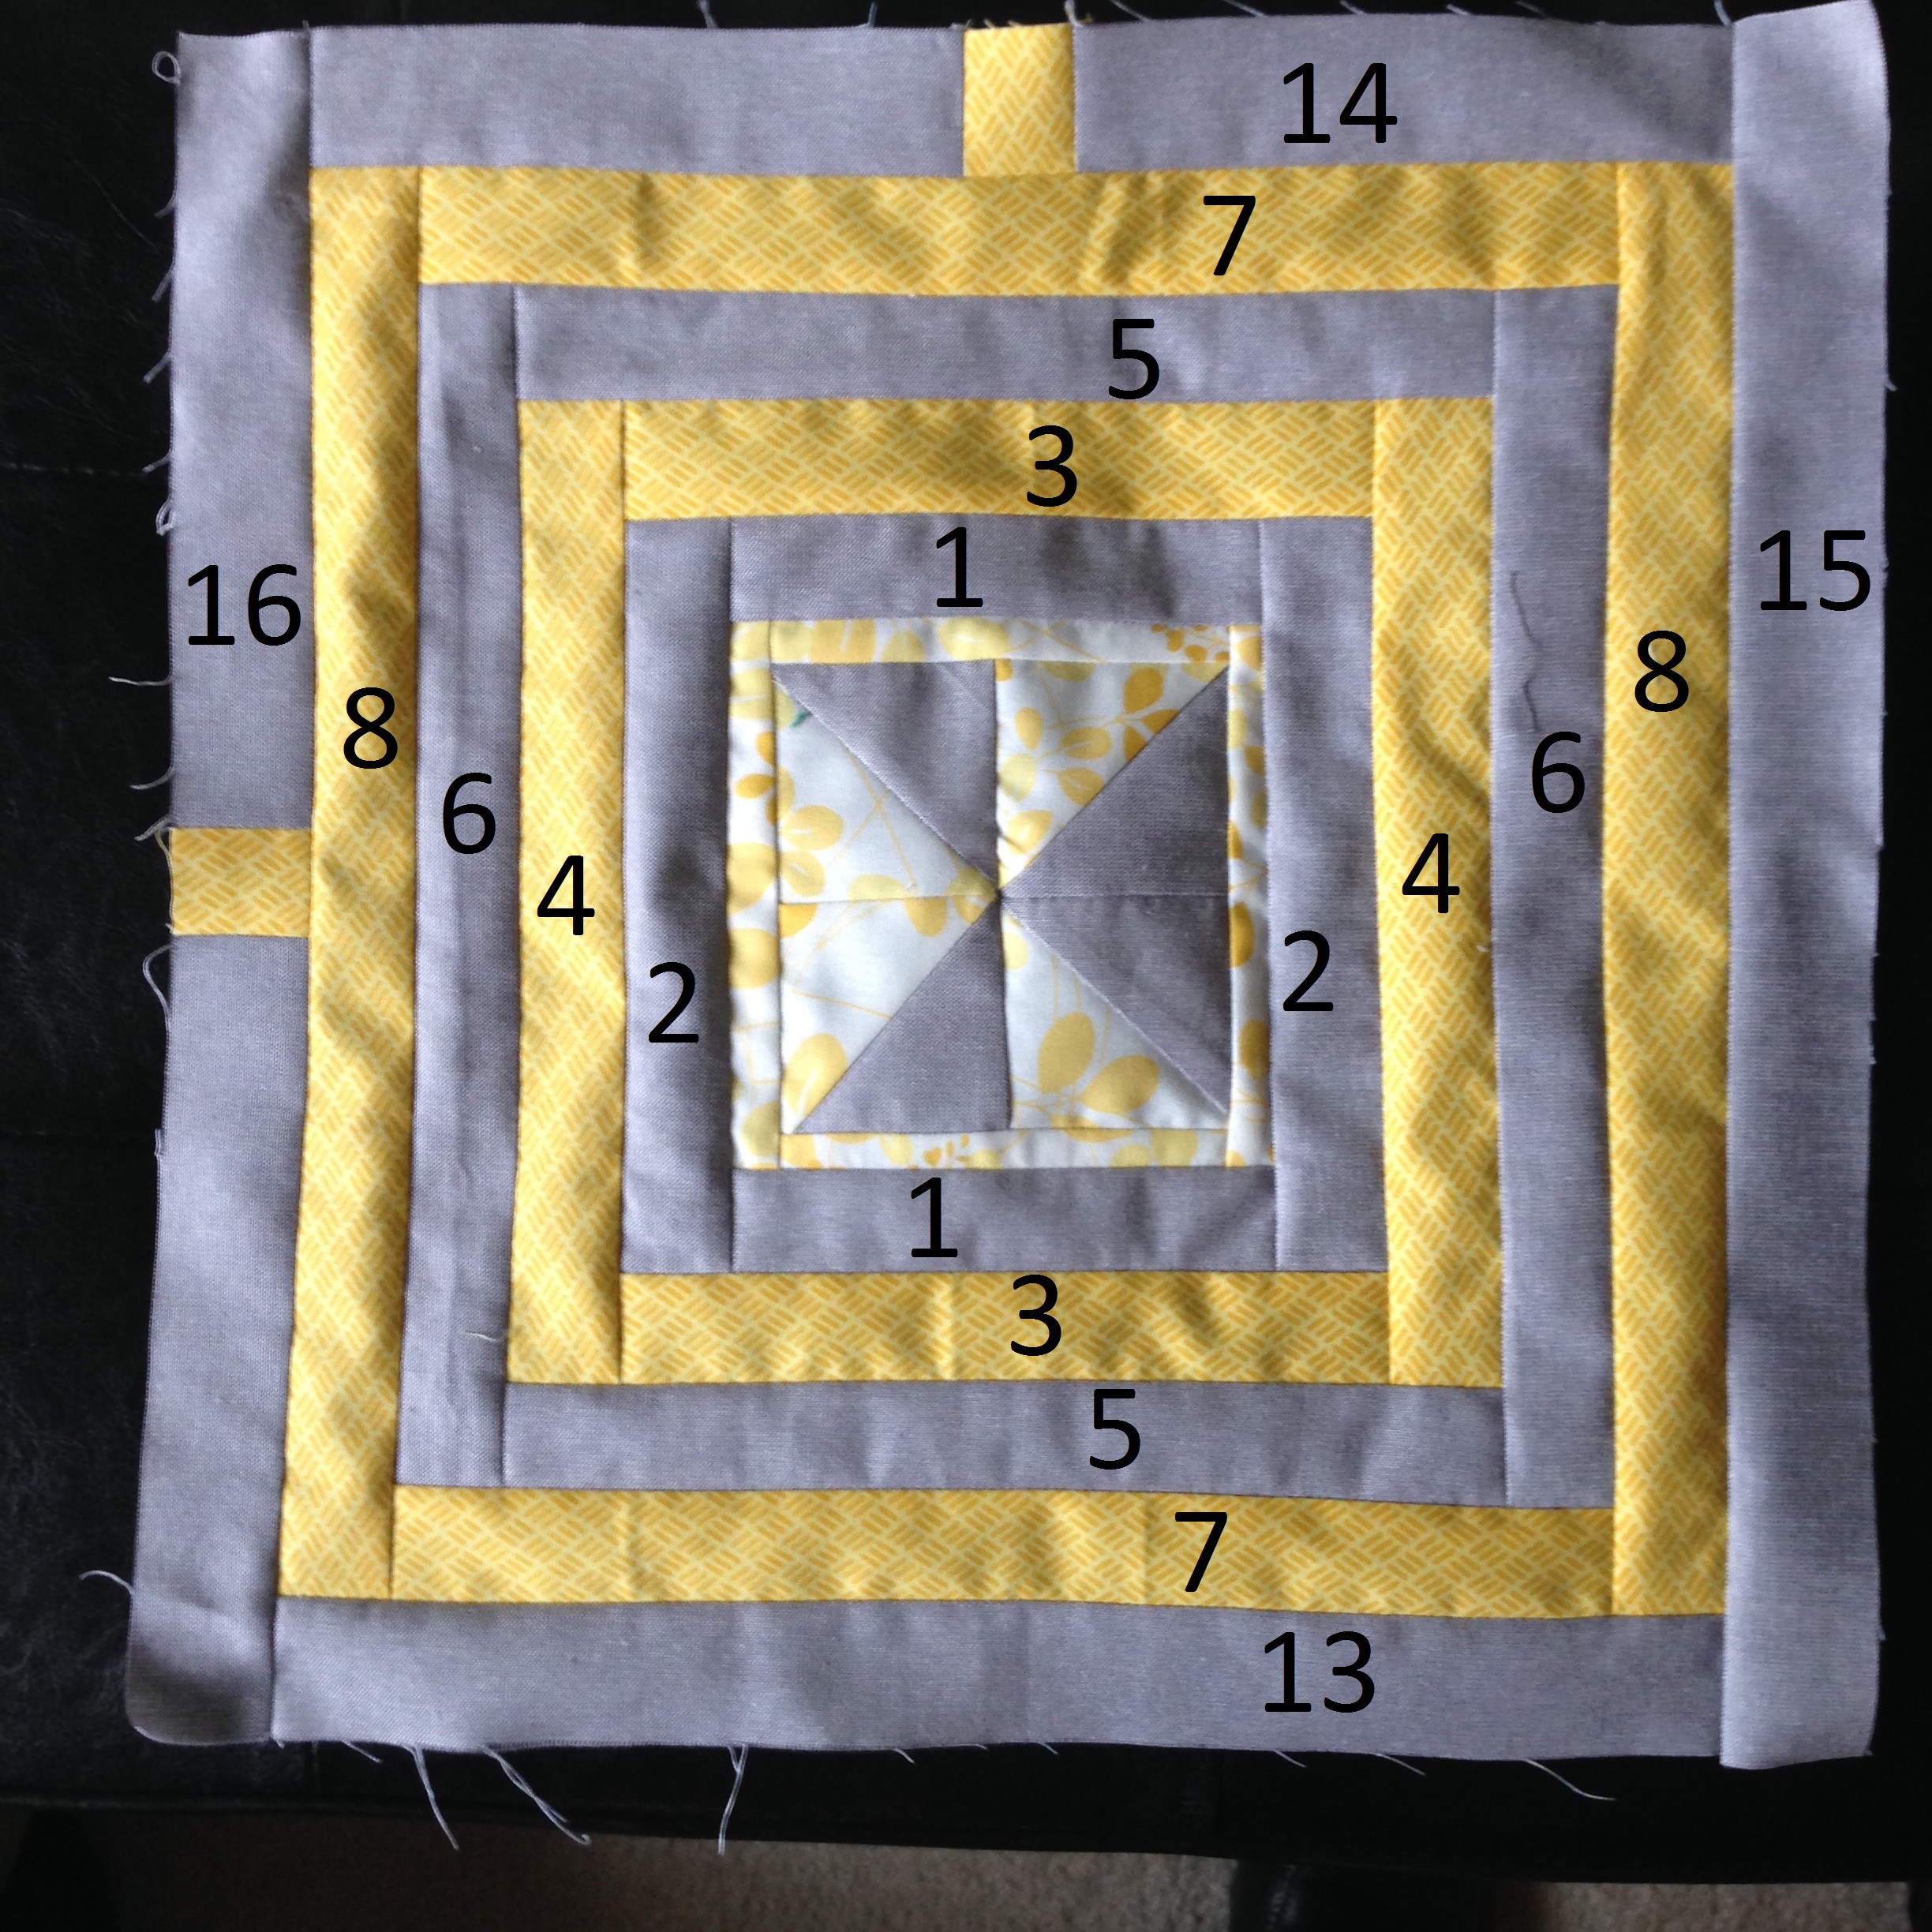
Block 1: The Center Mediallion Block
Yellow Fabric:
For this block you are going to want to take one of your fat quarter packs. I choose not to use the two of the fat quarters for this part of the quilt: one which had lots of white and yellow flowers (save that for the cornerstone blocks) and one print of flowers which had orange in it because I didn't want orange in the quilt (save this one for your stash).
- Cut a 6"x 18" rectangle from the remaining 8 fat quarters.
- Subcut (2) 6"x 6" squares from each rectangle giving you a total of (16) 6"x 6" square.
- Subcut: (16) 6" x 6" squares in half on the diagonal giving you (32) triangles. You will want to divide your triangles into two piles so that you have two of each color in each pile.
- Subcut (2) 6"x 6" squares from each rectangle giving you a total of (16) 6"x 6" square.
- Cut a 1" x 6" rectangle from any of the yellow fabrics that you want. I used the yellow with tiny white dots.
- Subcut (5) 1" x 1" squares
Grey Fabric:
- Cut Ten 1" x WOF of the Grey (Graphite Cross Weave) fabric.
- Subcut the following:
- (16) 1"x 9" rectangles
- (16) 1" x 6" rectangles
- (4) 1" x 12" rectangles
- (2) 1" x 23 1/4" rectangle
- (2) 1"x 24" rectangle
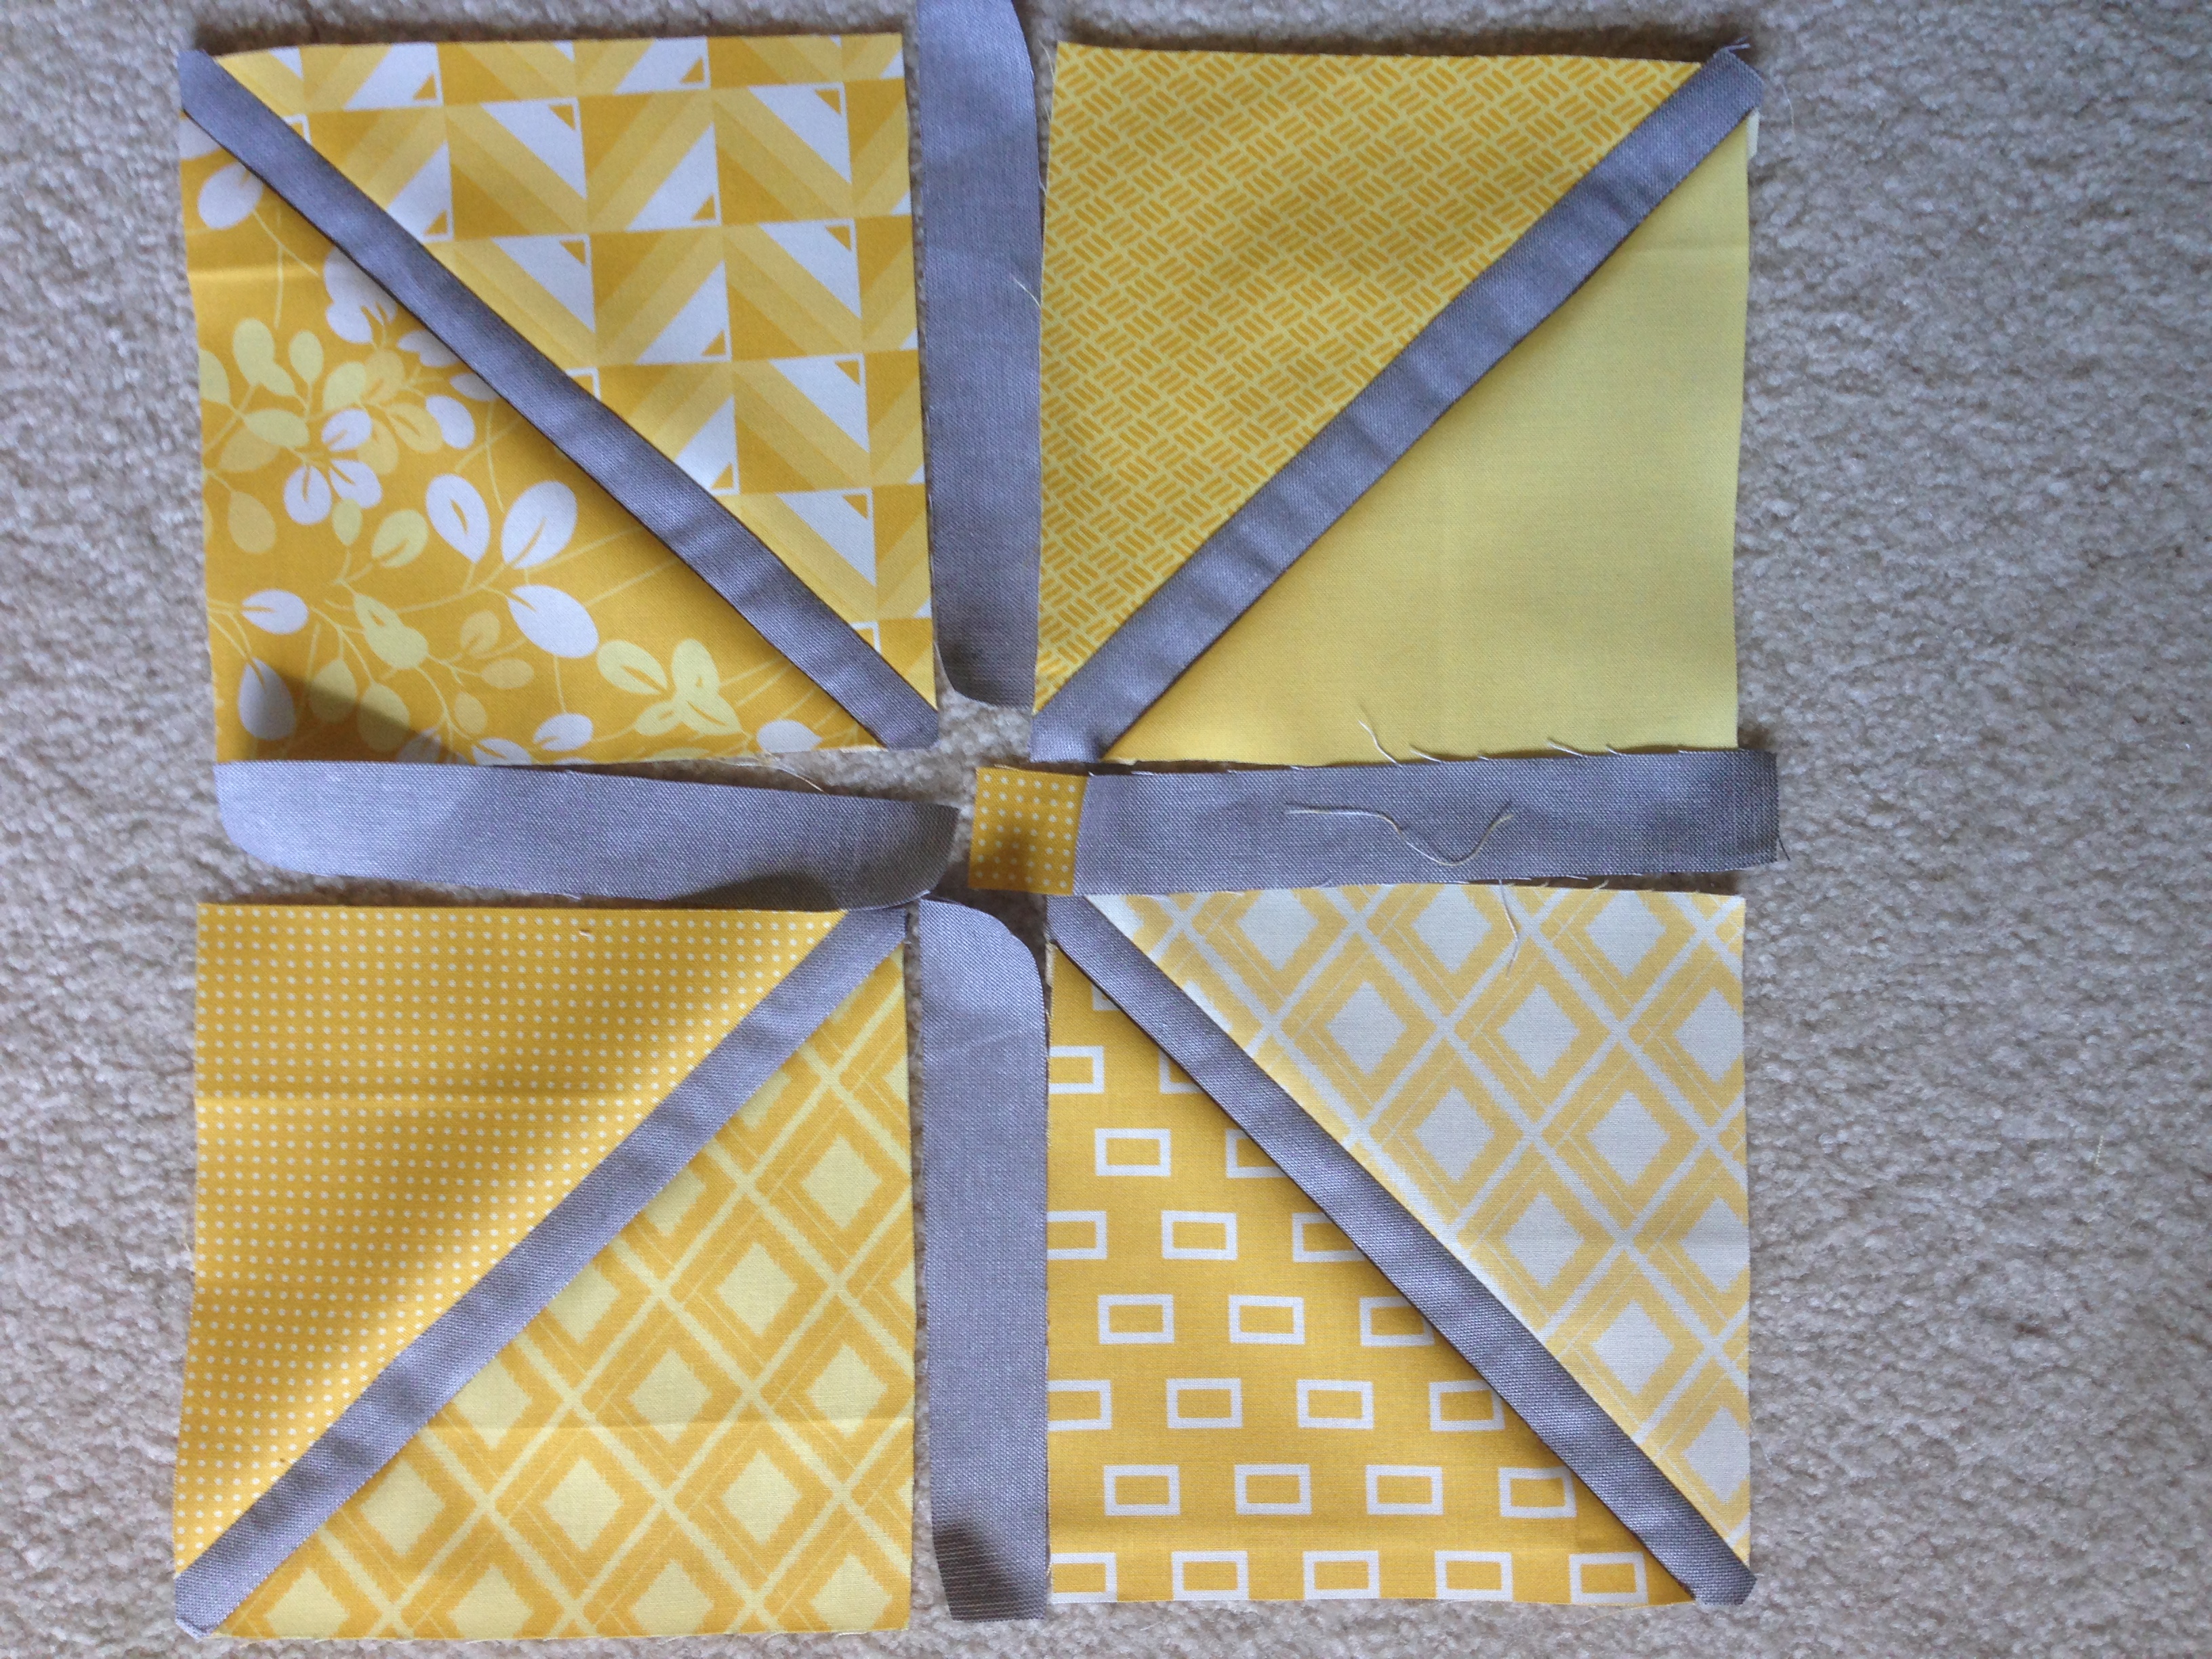
Assembling the Triangle with a Diagonal Strip Square
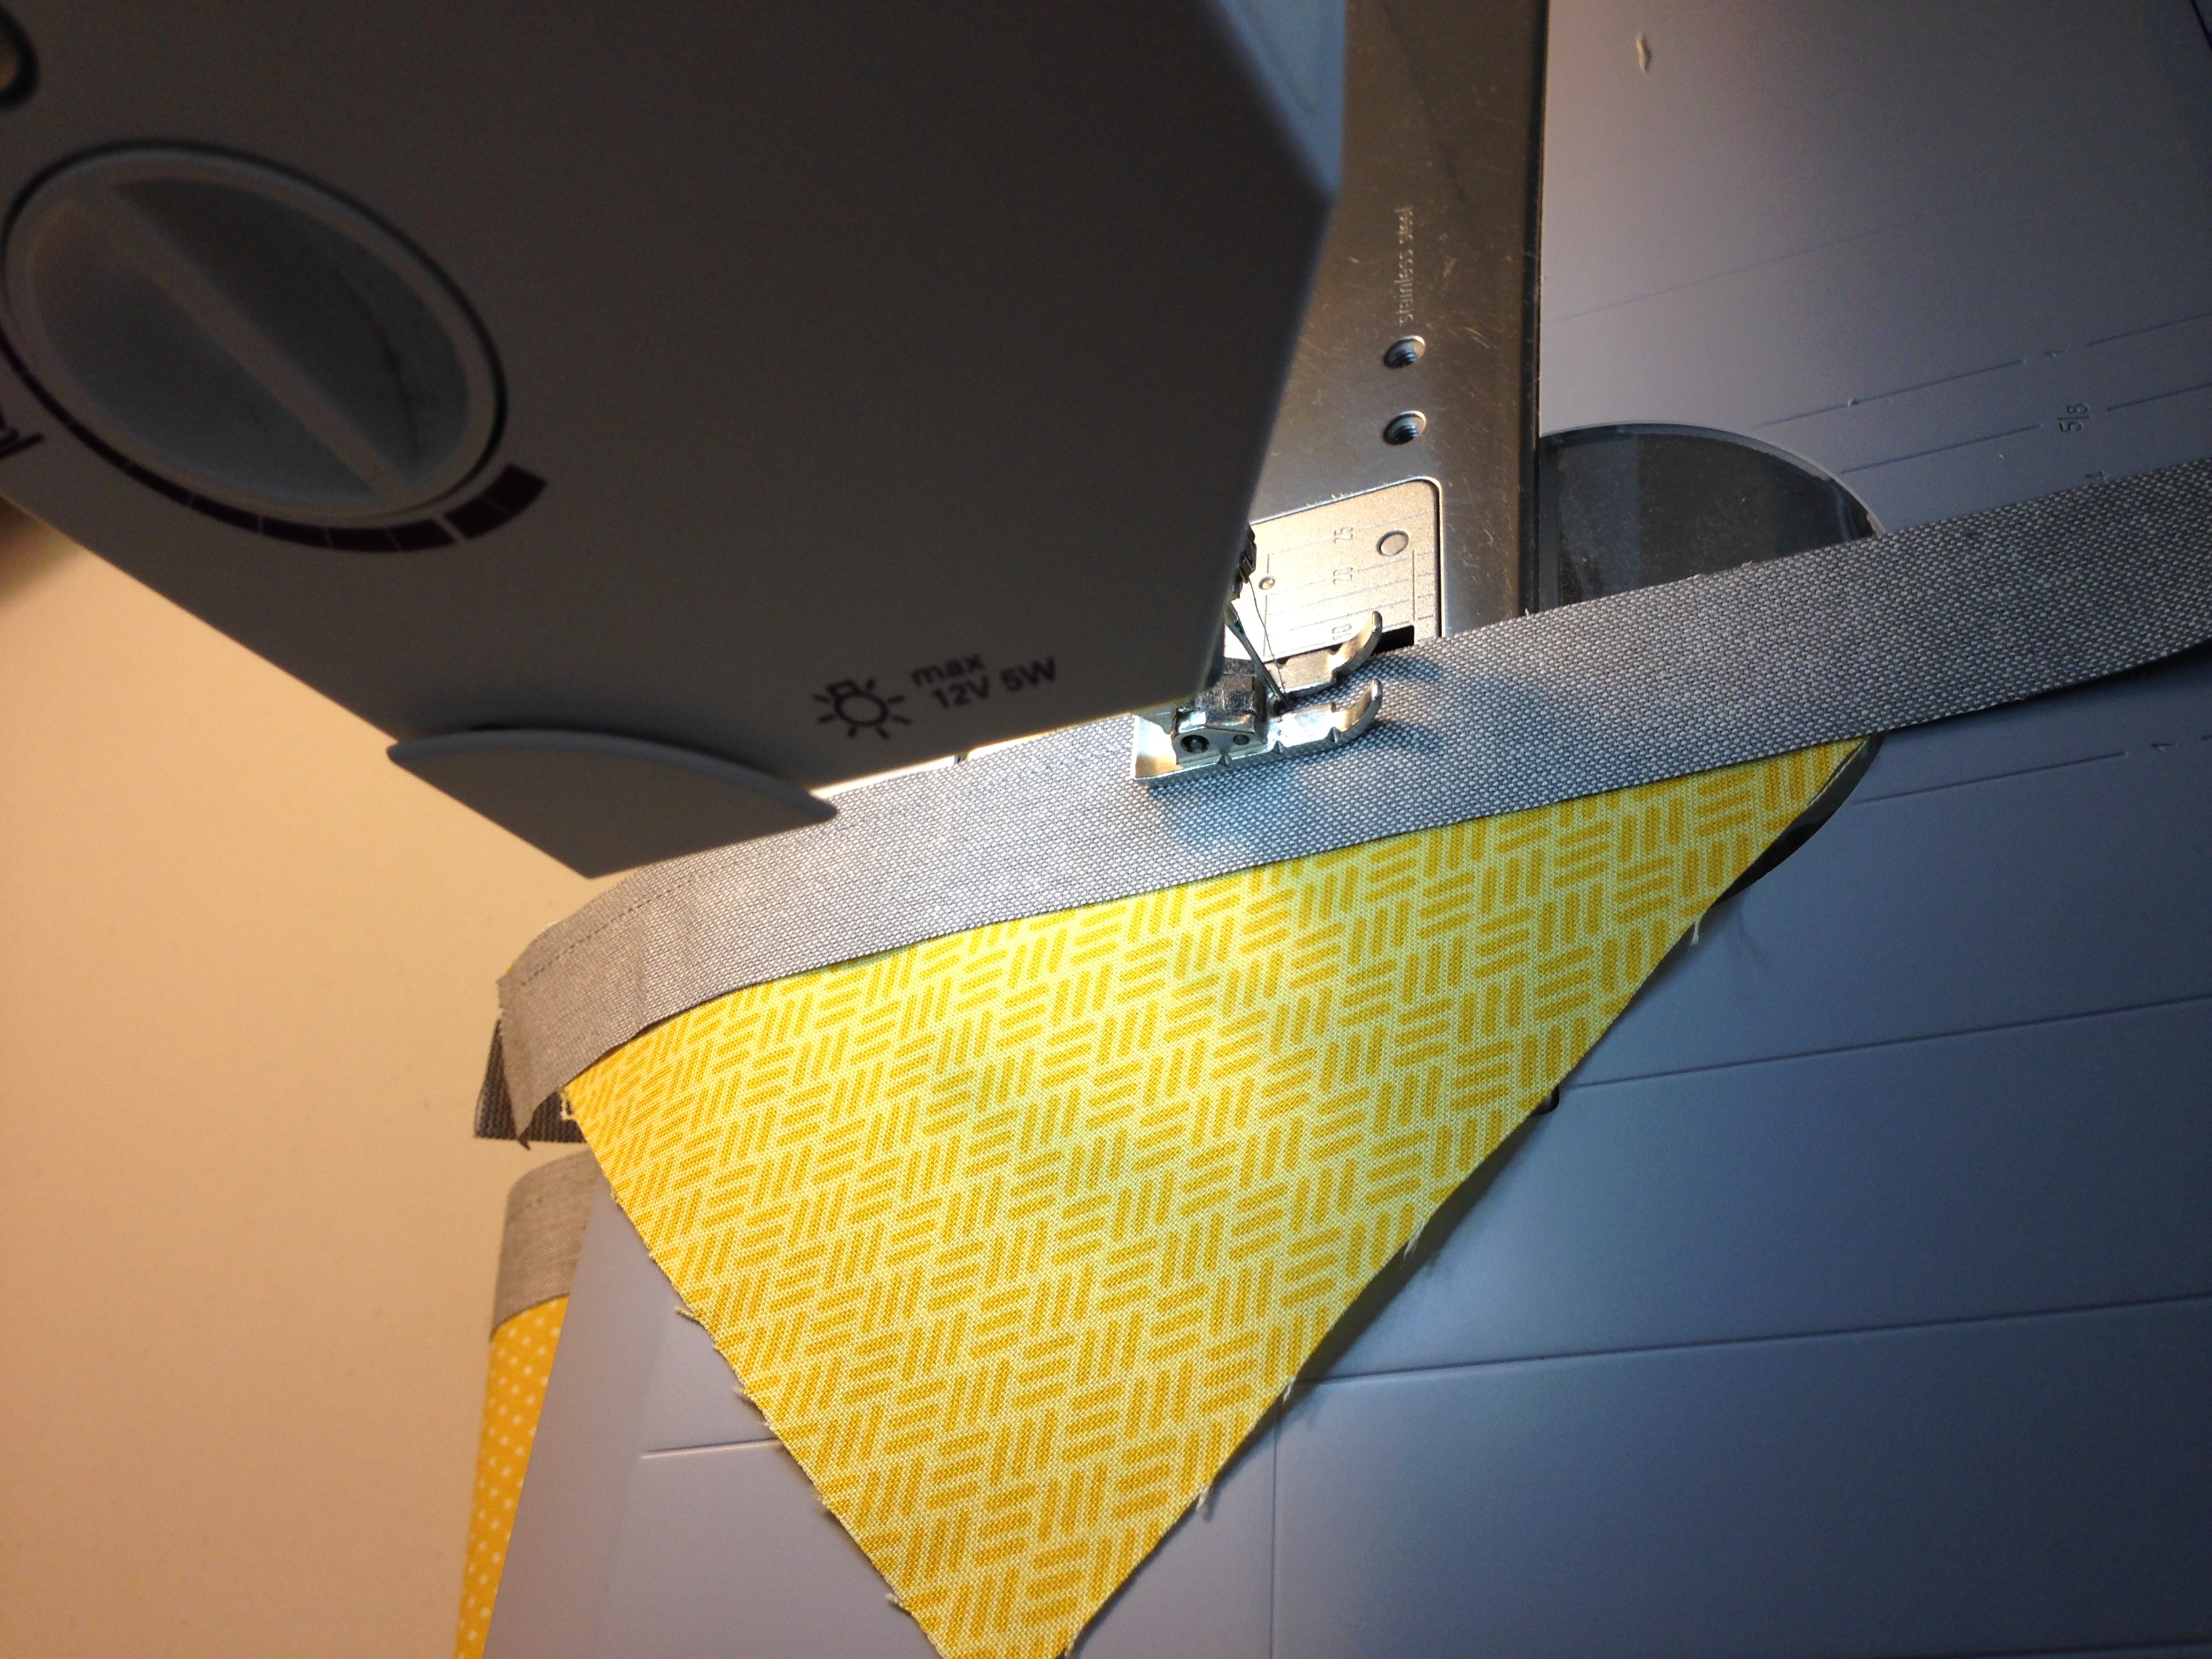
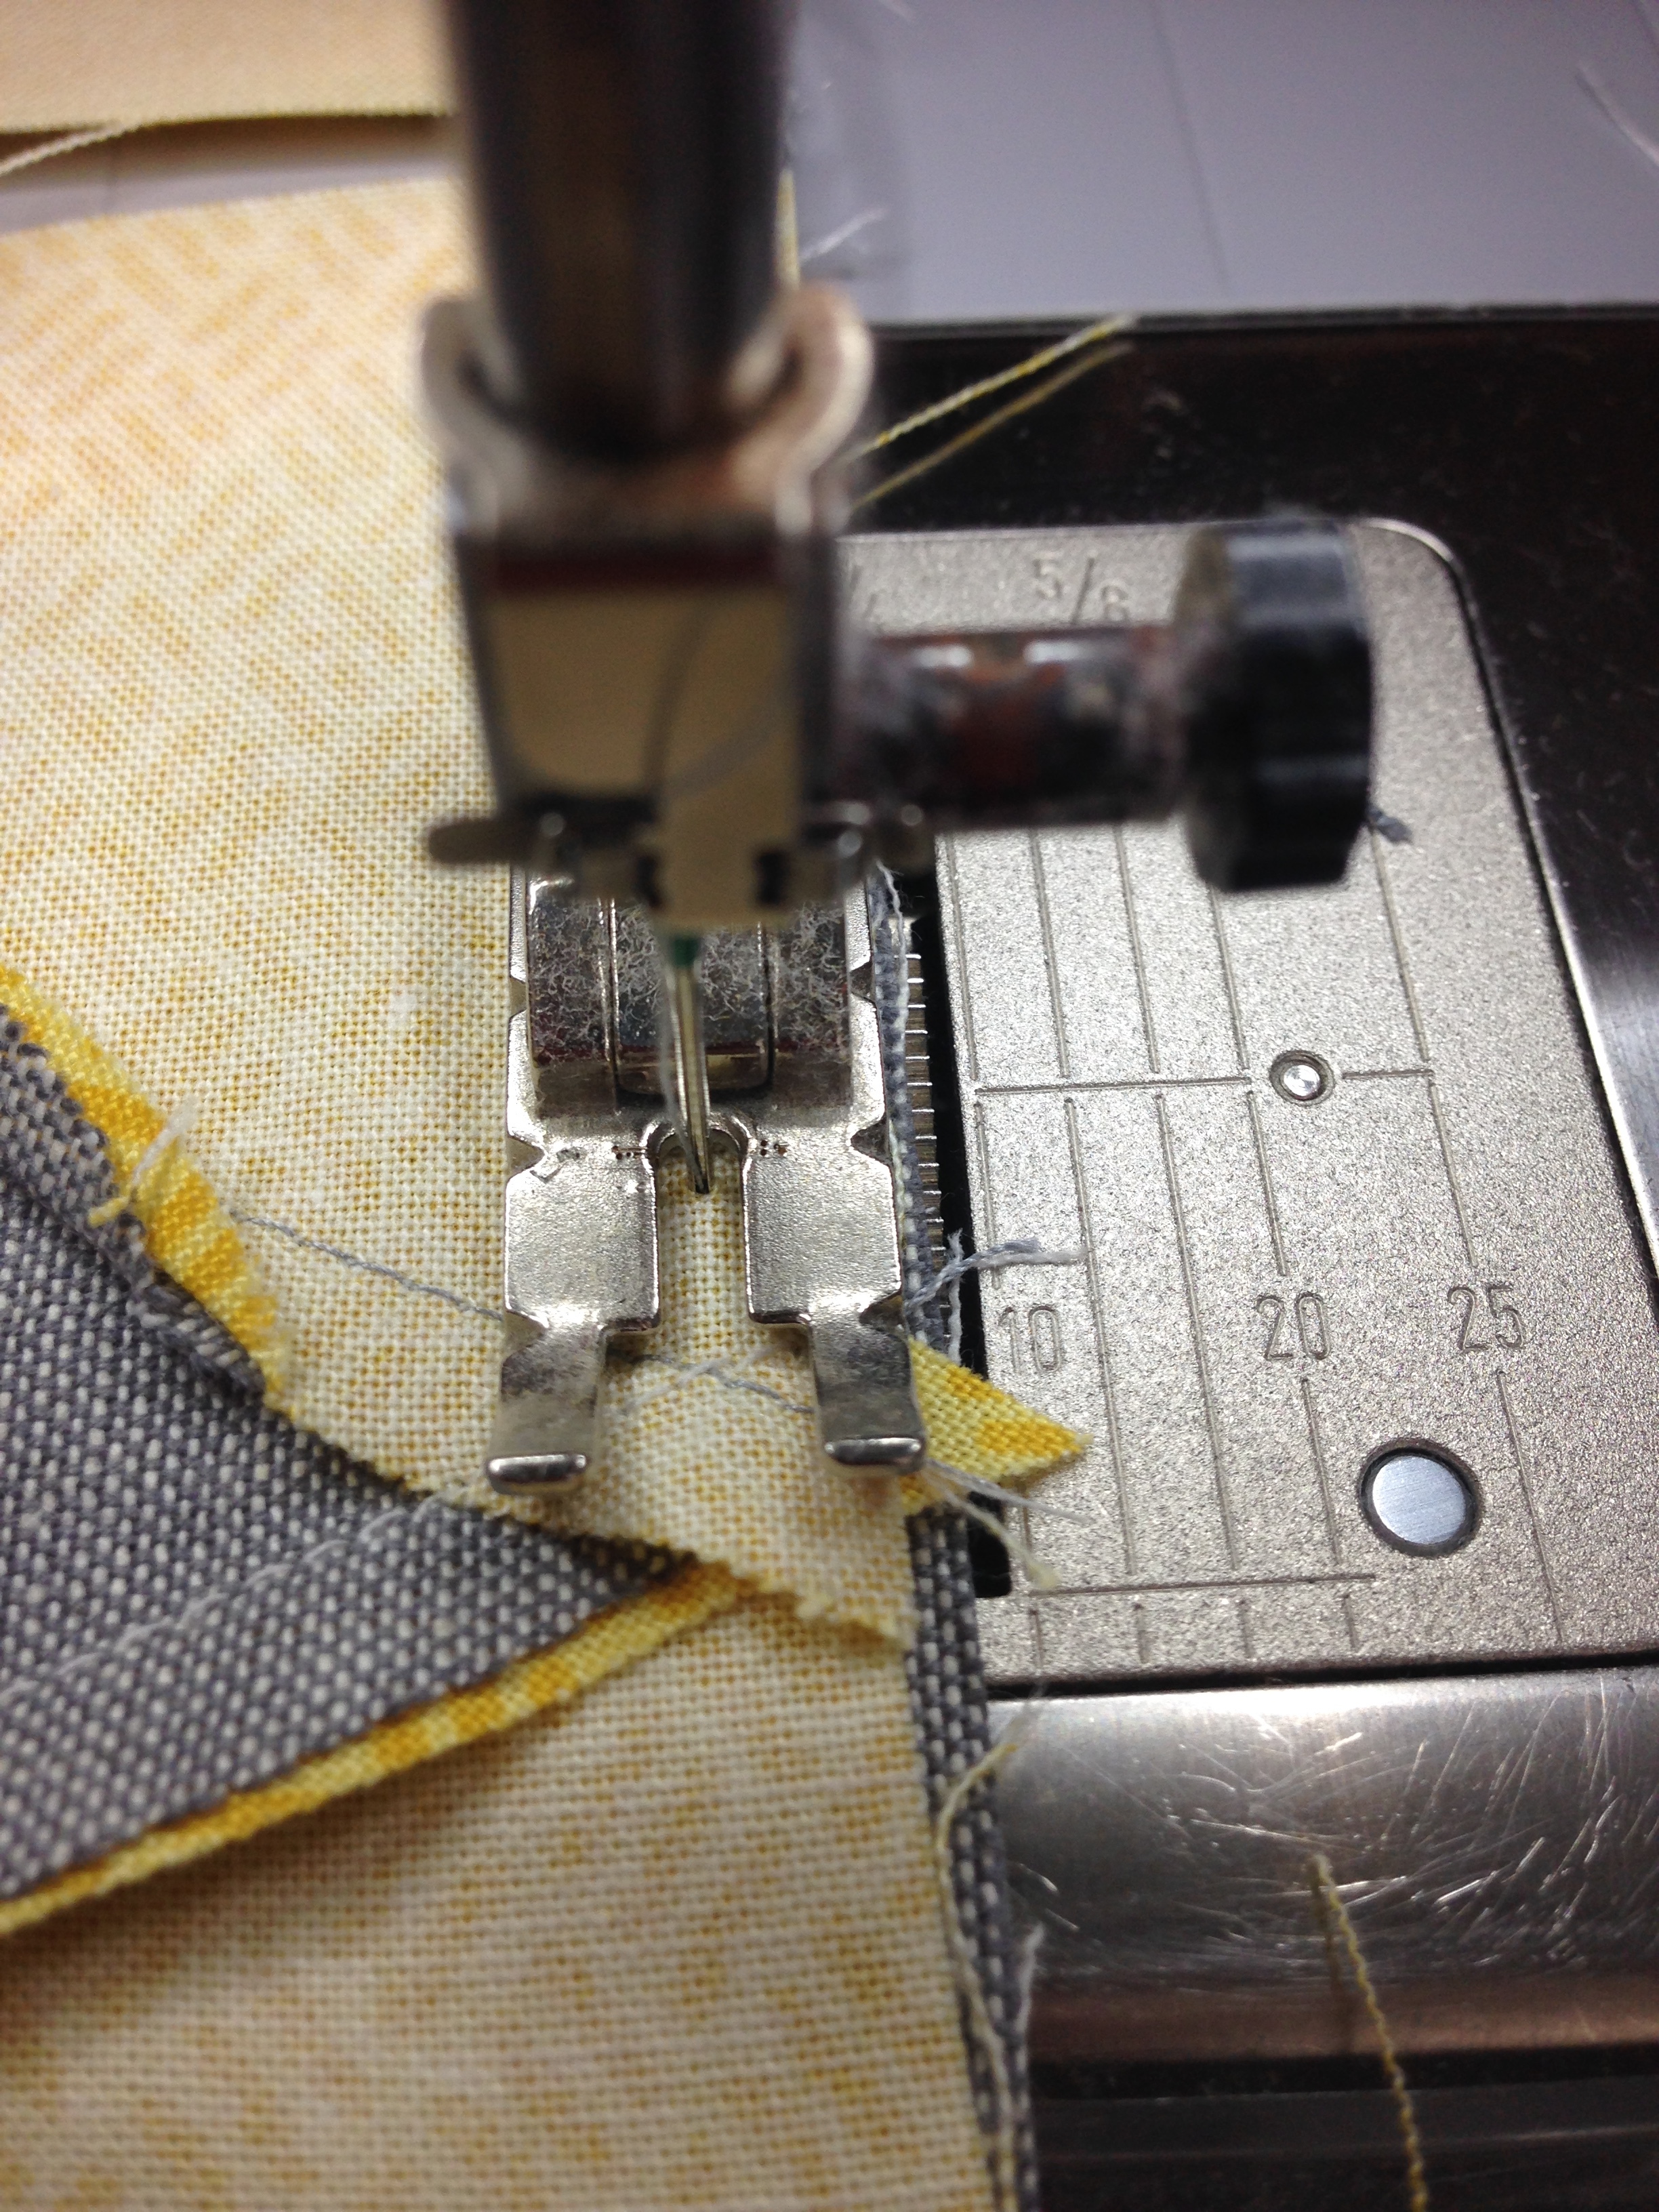
1.: Take a yellow triangle from one pile and sew it to the 1" x 9" grey rectangle. You will want to sew along the long diagonal side of the triangle. Make sure your tip of the yellow lines up with a corner of the grey. There will be extra grey at the end. That is okay. You will trim it off in a bit.
2. Once you have sewed 16 triangles to the grey then press them with your iron towards the Grey.
3. Then take your next stack of triangles and sew it to the grey. Make sure that you start at the same end of the grey (not the end that is extra - you can see in the picture below that the extra is at the bottom in the triangle which has just been sewn). I sewed a different yellow material to the other side. That is up to you if you do different or match the material (personal preference here).

4. Once you have sewn all the triangles together and created a square you will want to trim your square to 6' x 6" square.

Creating the Center Medallion Block.
Next you will want to lay out your squares to create the center medallion. You will make 4 squares which look like the picture below. Each will have 4 squares (6"x6") and the 1"x6" grey sashing between the squares like in the picture with the 1"x1" yellow square in the middle. See picture below for a diagram
- Sew the top left square to the grey sash, then the middle grey sash to the yellow 1" square and finally the bottom left square to the grey sash. Then press the towards the grey sash.
- Sew the top sash to the top right square, the yellow 1" square to the grey sash and then the bottom sash to the bottom right square. Again press towards the grey material.
- Next lining up the yellow 1" square with the grey sash from the top squares, sew the top squares to the grey sashing. Press towards the grey material.
- Then again lining up the 1" yellow square with the grey sashing from the bottom squares, sew the them together. Pressing towards the grey material.

You need to do this 3 more times until you have 4 larger squares.
5. You will now want to lay them out and I tried to not have a print right next to the same print if possible. Next take a 1" x 12" grey rectangle and put between the four blocks along with a small 1" yellow square for the center. (see the picture below). Repeat the process from above to sew the 4 triangles together with the small yellow square in the middle. 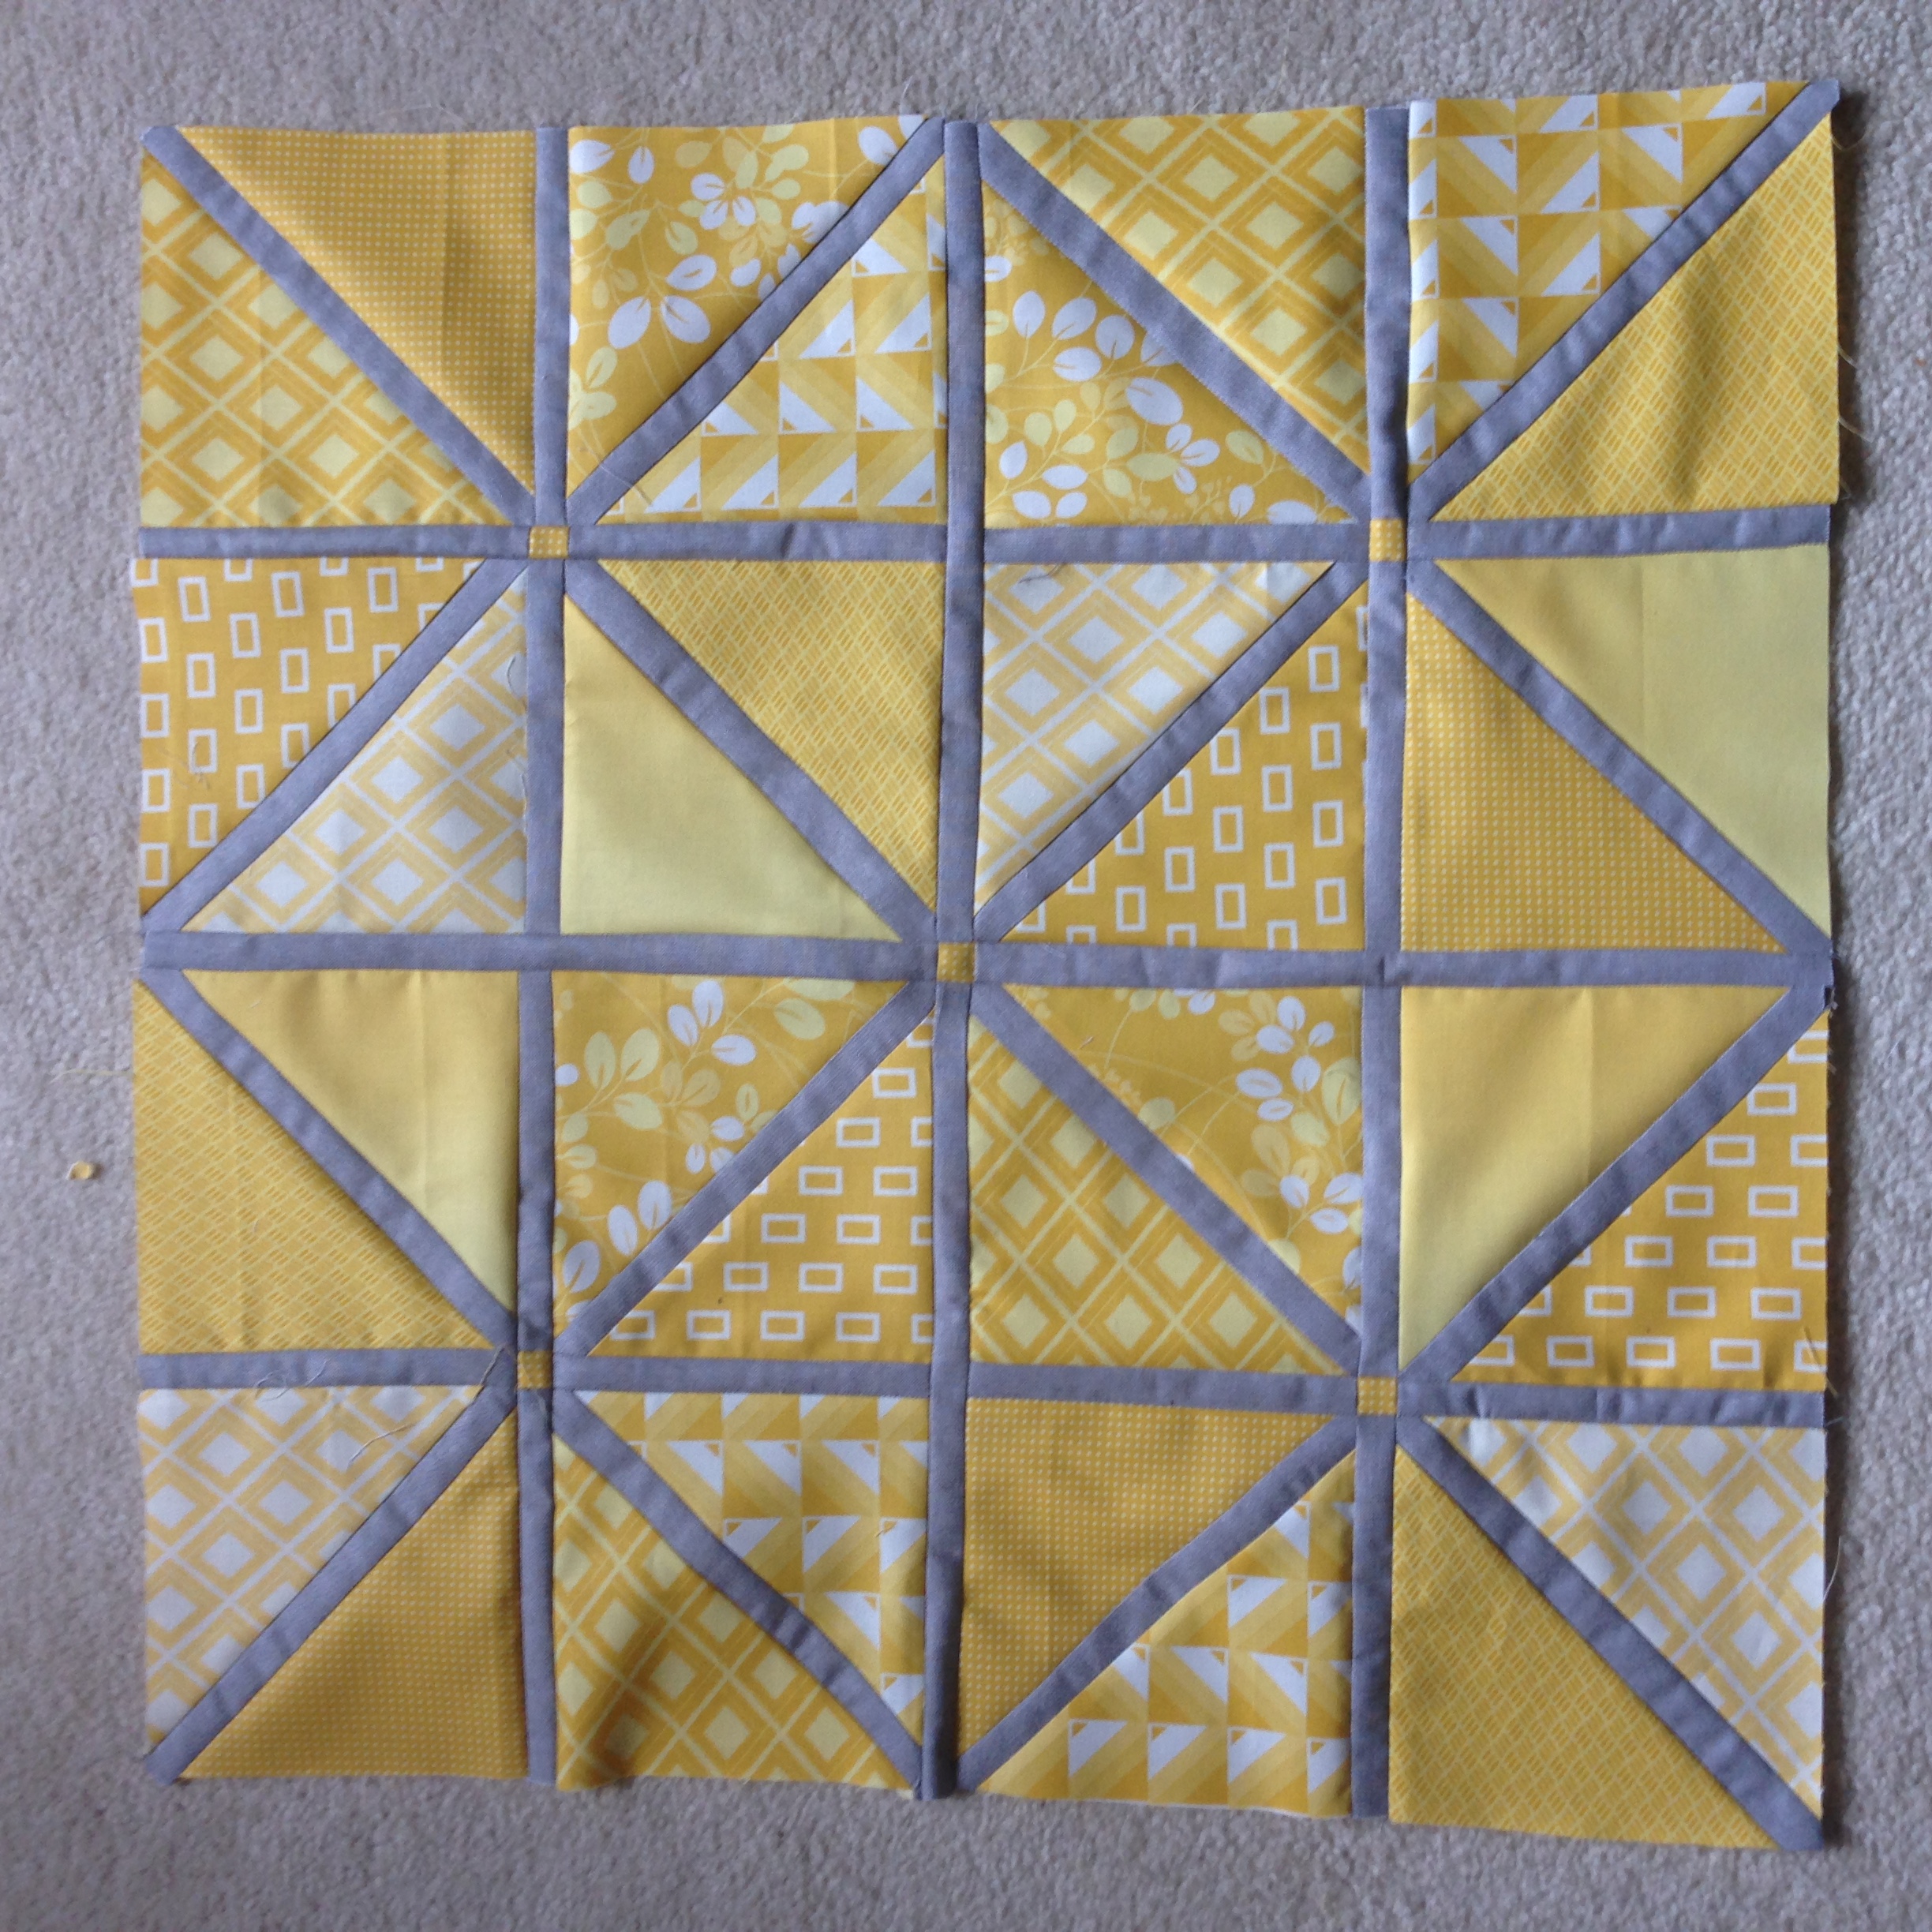
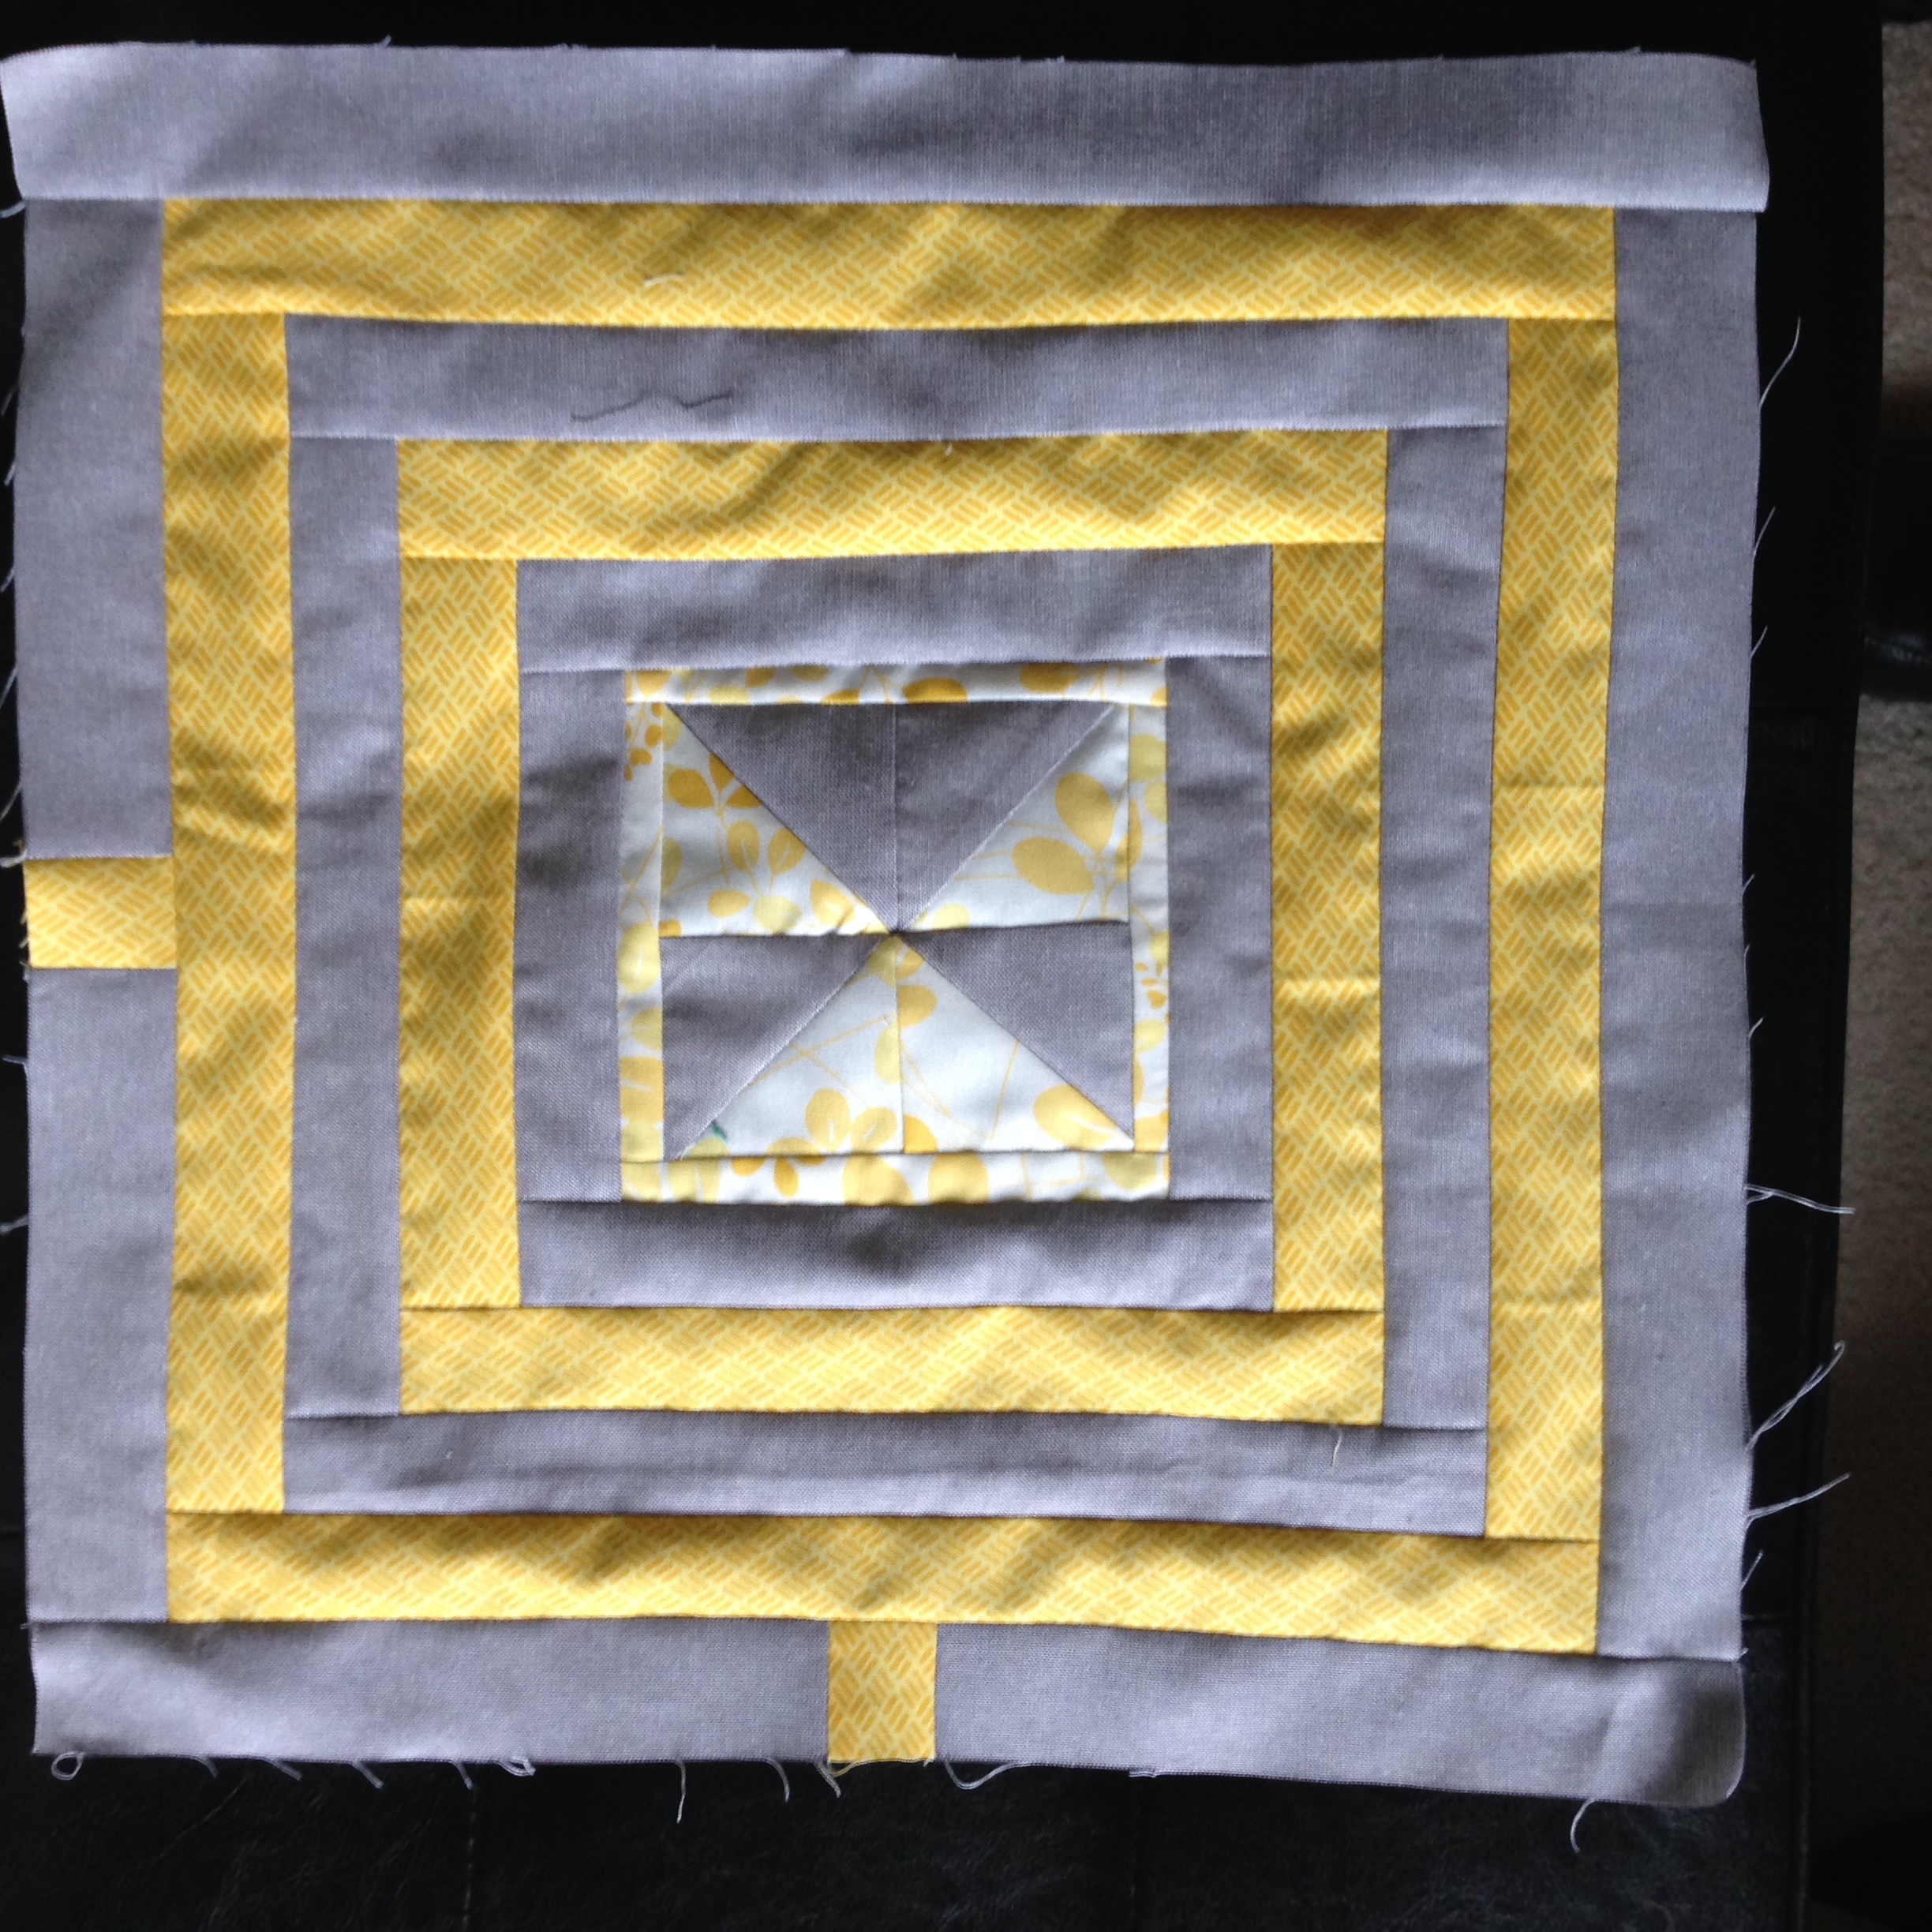
6. You will now want to trim this center block the following way. Place your 6x24" ruler lining up with far left edge of the grey sashing on the right. See picture below. You will trim it at the 6"edge (approx 1/4 "). Turn your block around and trim it in the same way for each sides. This step is important to make sure you have the right size for when you add the grey triangles.


7. Next sew a 1" x 23 1/4" grey rectangle to opposite sides of the square. Press towards they grey and then sew the 1"x 24" inch grey rectangle to the other sides of the square. You should now have the center block done! Congrats. It should be 24" x 24". Step back and take a look at the great job you have done! Take a picture and send it to all your friends!
Block 2: Triangle Block
This next section of the quilt is compromised of (28) 4" triangles. Here is a template, but there are many rulers out there (Peaky and Spike Multi Sz Ruler8289 Michell Marketing#1 Manufacturer Item:8289) for a 4 1/2" triangle.
Cutting Instructions:
Grey Material:
- Cut (2) 4 1/2" x WOF from the Grey Fabric.
- Subcut the 28 grey triangles. (the finished size is 4", but you need to cut yours at 4 1/2 so that one you have sewn them you will have a finished 4" Triangles
- Cut (4) 1" x WOF from the Grey Fabric.
- Subcut (2) 1" x 32" grey rectangles
- Subcut (2) 1" x 33" grey rectangles
- Cut (4) 1 1/4" x WOF from the Grey Fabric.
- Subcut (2) 1 1/4" x 34" grey rectangles
- Subcut (2) 1 1/4" x 35 1/2" grey triangles
Yellow Fabric:
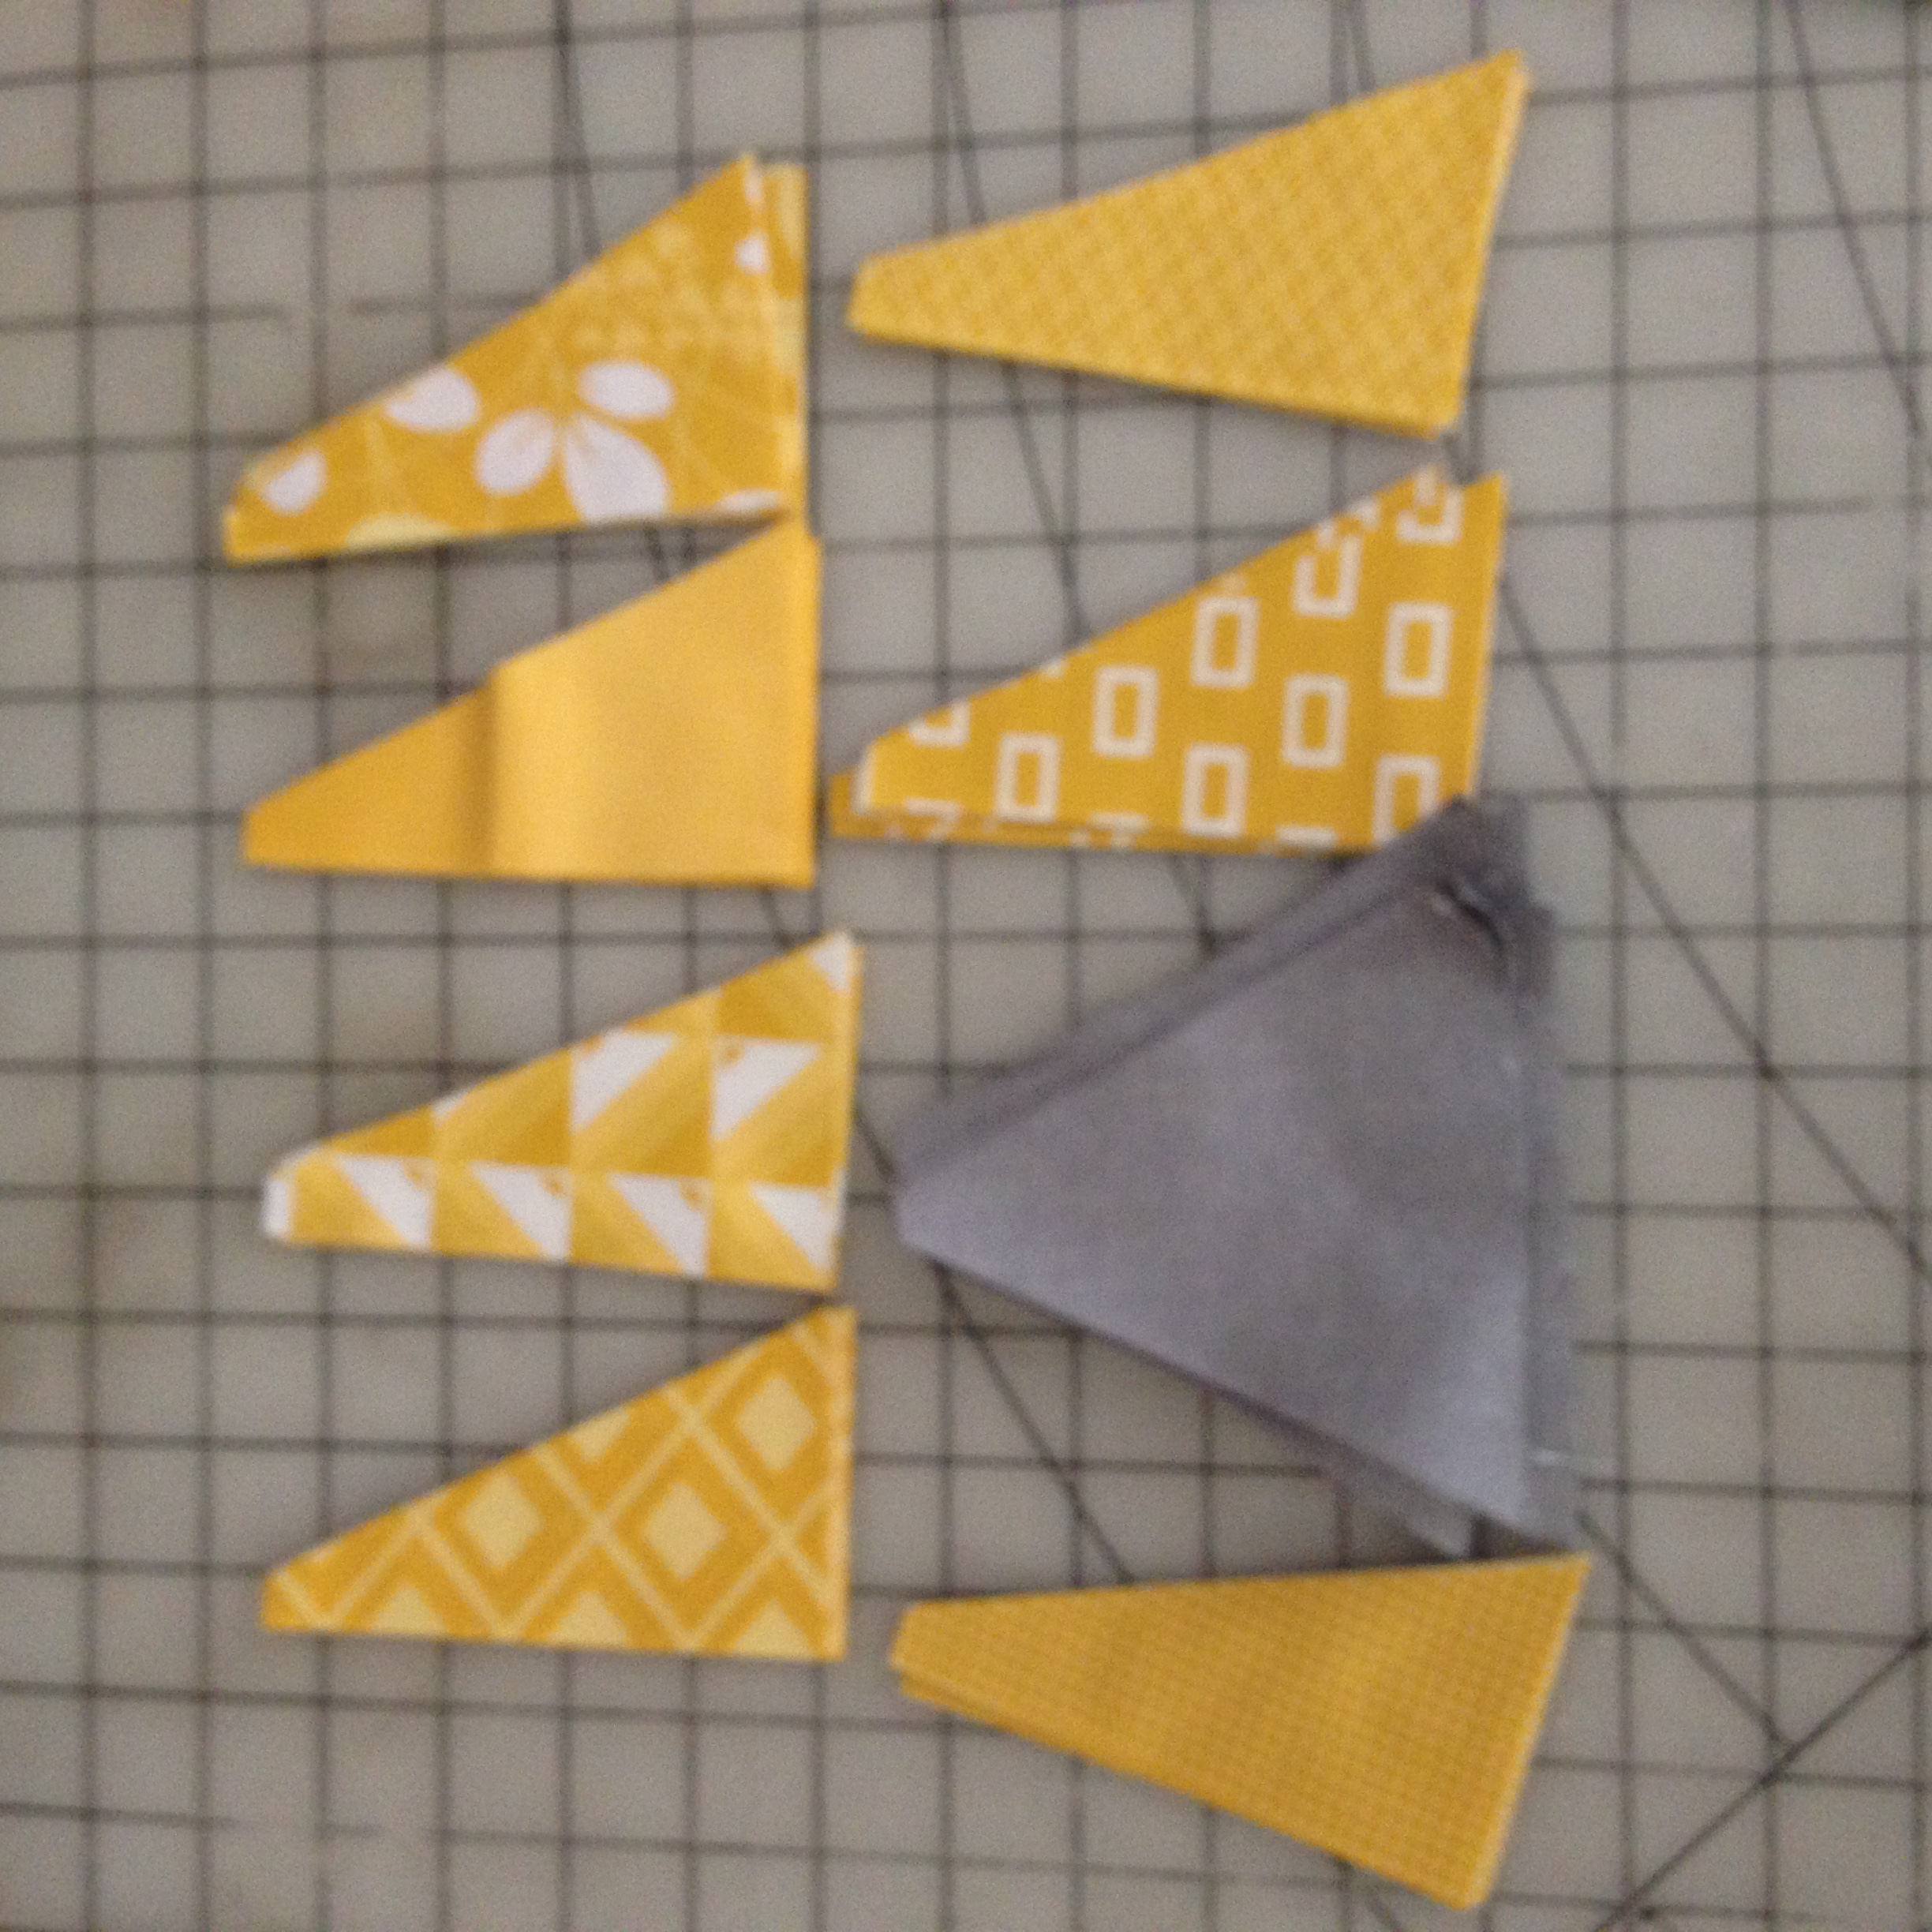
- Cut from 7 different fat quarter's a 4.5" x 18" rectangle.
- Subcut from each fat quarter - 4 sets of half triangles. (a set is on easy to create if you cut with the material folded over. You need one which has the straight edge that when right sides are up they look like a bookend.)
- Cut (4) 1" x WOF from your sashing yellow Fabric.
- Subcut (2) 1" x 33" rectangles
- Subcut (2) 1" x 34" rectangles.
Sewing the Triangles
I chose to make sure that the material on each side of the triangle matched. You are free to choose to match or not to match - it is your personal preference.
1. You now want to take a grey triangle and sew on side of the set of half yellow triangles. You are going to be making a block which finished as a 4.5" square so you need to make sure that you are lining up the half triangle on the triangle so that it will open to create a square side. If is counter intuitive, make sure you check and open up your yellow prior to sewing. See picture below to see how to lay out the triangles.
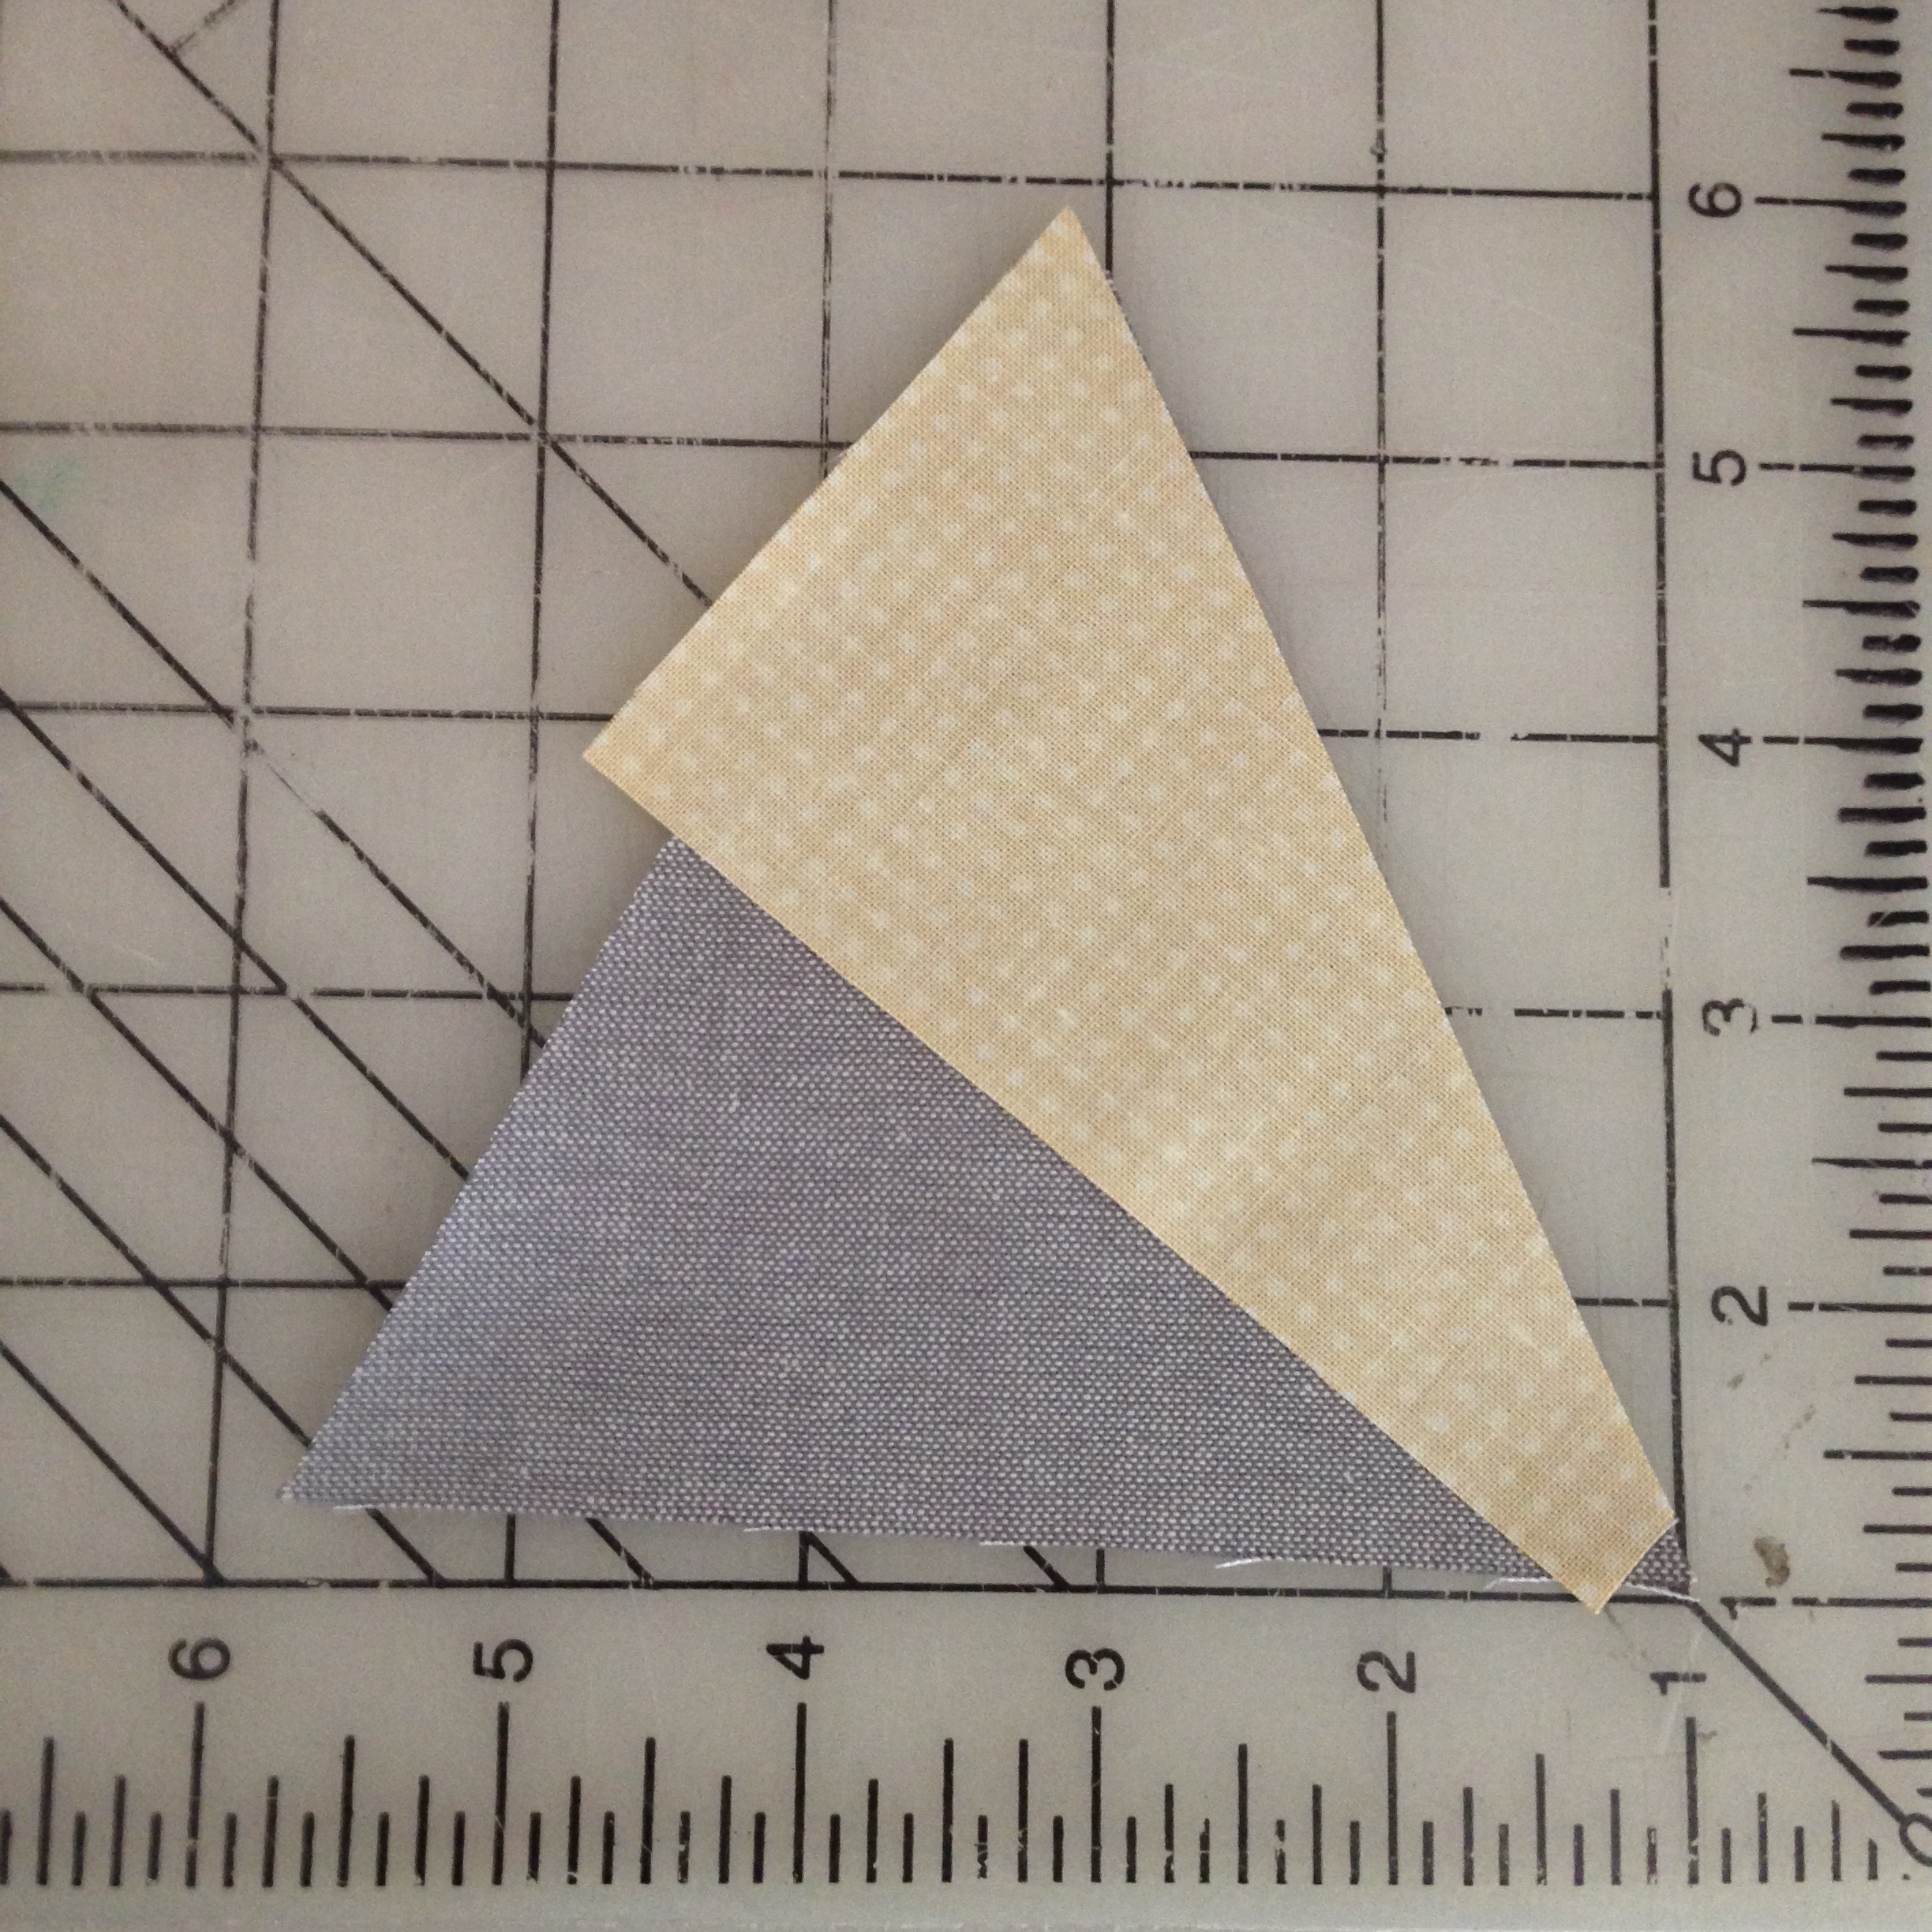 2. Press towards the yellow and then repeat the process to sew the other yellow half triangle on the other side, pressing again towards the yellow fabric.
3. Lay out your finished triangles along the center block to make sure that my colors were not next to each other and I liked the look. 7 triangles go each direction with the one end (depends on how you look at it the back or beginning) change direction. See layout below.

4. Sew the triangle strips together. You will sew 2 strips of 6 triangles (opposite sides of the center block without the two end triangles). Then you will sew the other 2 strips of 8 triangles (which will have the end triangles on both end).
A trick to get your points to be right at the end of the seam is that you want to make sure when you are sewing your seam that you make sure your sew right at the intersection of the point like in this picture. Sew over the X.
5. Sew one row of 6 triangles to your center block and Press seams.
Next sew to the opposite side of the center block the other row of 6 triangles and then Press the seams.
6. You will now take one of the rows of 8 triangles and sew it to one of the sides of the center block making sure that the first and last triangle block line up with the triangle blocks you have already sewn onto it. Press seams and repeat for the final side of the center block.
Doesn't it look great!
7. You will now add the next three borders log cabin style.
First the Grey 1"x32" to opposite sides and then press seams.
Next the Grey 1"x33" to opposite sides and then press seams.
Third the Yellow 1"x33" to opposite sides and then press seams.
Fourth the Yellow 1"x34" to opposite sides and then press seams.
Fifth the Grey 1.25"x34" to opposite sides and then press seams.
Sixth the Grey 1.25 x 35.5" to opposite sides and then press seams.
Take back and look at what you have done!! It looks amazing. You could always stop here and make a small wall hanging, but don't. The next three blocks aren't hard to make but look so amazing. Again - take a picture and send it to your friends or to me! (@krisallenrunner on instagram).
The next three blocks are used to make the next border around your amazing looking center block. They are the Capstone block, the Bookend Maze block and the Center Maze block. There is also a sashing strip that links them all together. They are simple on their own but makes an amazing design together. We will start with the Bookend Maze block, then do the Center Maze block and then the Capstone block and sashings. I chose on these blocks to use one fat quarter for each block and do all the sashings the same material. Again feel free to mix and match or use the same style as I did.
Block 3 - Bookend Maze Block
Cutting instructions:
A Maze block consists of two Bookend Maze Blocks and one Center Maze Block. We will be cutting all them out together as I used the same Fat Quarter for 2 Bookend Maze and a Center Maze Block.
Grey Fabric:
- Cut (2) 1 1/2" x WOF
- Subcut (48) 1 1/2" x 1 1/2" squares
- Cut (4) 2 1/2" X WOF
- Subcut (96) 1 1/2" X 2 1/2" rectangles
- Cut (2) 3 1/2" x WOF
- Subcut (48) 1 1/2" x 3 1/2" rectangles
- Cut (3) 5 1/2" x WOF
- Subcut (60) 1 1/2" x 5 1,2" rectangles
- Cut (1) 7 1/2" x WOF
- Subcut (24) 1 1/2" x 7 1/2" rectangles
- Cut (1) 11 1/2" x WOF
- Subcut (24) 1 1/2" x 11 1/2" rectangles
Yellow Fabric:
Fat Quarters - You will need to cut this amount from 12 fat quarters (I didn't use the yellow with orange flower or the mostly white with yellow flowers - so I did repeat patterns) This takes approx (4) 1 1/2" x 18" plus left over scraps from earlier cuts.
- Cut (2) 1 1/2" x 1 1/2" square
- Cut (8) 1 1/2" x 2 1/2" rectangle
- Cut (2) 1 1/2" x 3 1/2" rectangle
- Cut (5) 1 1/2" x 5 1/2" rectangle
- Cut (2) 1 1/2" x 9 1/2" rectangle
Assembling the Bookend Maze Block
Here is a look at the Bookend Maze Block when the pieces are all laying out on my cutting board.

- Take Strip (A) 1 1/2" x 5 1/2" strip and sew right sides together with Strip B 1 1/2" x 1 1/2". Press towards grey.
- Take Strip AB and Sew Strip C 1 1/2" x 1 1/2" on the bottom of the yellow. Press seams towards grey.
- Take Strip ABC and sew Strip D 1 1/2" x 7 1/2"on the left side.. Press seams towards grey.
- Take Strip ABCD and Sew Strip E 1 1/2" x 2 1/2" to the top end. Press seams towards yellow.
- Take Strip ABCDE and Sew Srip F 1 1/2" x 2 1/2" to the bottom end. Press seams towards yellow.
- Take Strip ABCDEF and Sew Strip G 1 1/2" x 9 1.2" to the left side. Press seams towards yellow.
- Take Strip ABCDEFG and sew Strip H 1 1/2 x 3 1/2" to the top end. Press seams towards grey.
- Take Strip ABCDEFGH and sew Strip I 1 1/2" x 3 1/2" to the bottom end. Press seams towards grey.
- Take Strip ABCDEFGHI and sew Strip J 1 1/2" x 1 1 1/2" to the left side. Press seams towards grey.
- Take Strip K 1 1/2" x 5 1/2" and sew Strip L 1 1/2" x 1 1/2" to each other. Press towards grey.
- Take Strip KL and sew Strip M 1 1/2" x 5 1/2" on the bottom of the yellow. Press towards grey.
- Take Strip ABCDEFGHIJ and sew Strip KLM to the right side. Press towards Strip KLM.
Congrats you Finished one Bookend Maze Block. Now you only have 23 more to you. Your finished Block is 11 1/2" x 5 1/2".
Block 4 - Center Maze Block
Cutting - You have already cut what you need when you cut out under the Bookend Maze Blocks
Assembling the Center Maze Block
Here is a picture of the layout and the numbering. I have only numbered the top half since the bottom half is a flip image and you do the same thing just flipped.

- Sew Strip A 1 1/2" x 2 1/2' to Strip B 1 1/2" and 2 1/2". Press seams towards the grey. Do this step twice for the bottom half of the block.
- Sew Strip D 1 1/2" x 2 1/2" to Strip E 1 1/2" x 2 1/2". Press seams towards the grey. Do this step twice for the bottom half of the block.
- Sew Strip C 1 1/2" x 2 1/2" to the bottom of Strip AB with the grey on the right (see picture below). Press seams towards grey. Do this step again for the bottom of the block.
- Sew Strip F 1 1/2" x 2 1/2" to the bottom of Strip DE with the grey on the left (see picture below). Press seams towards grey. Do this step again for the bottom of the block.

5. Sew Strip G 1 1/2" x 3 1/2" to the right of strip ABC. Press seams towards yellow. Do this step again for the bottom of the block.
6. Sew stripABCG to the strip DEF. Press seams towards yellow. Do this step again for the bottom of the block.
7. Sew strip ABCDEFG to Strip H 1 1/2" x 5 1/2". Press seam towards yellow. Do this step again for the bottom of the block.
8. Sew strip ABCDEFGH to Strip I 1 1/2" x5 1/2". Press towards grey. Do this step again for the bottom of the block.
9. Sew strip ABCDEFGHI to Strip J 1 1/2" x 5 1/2". Press towards grey.
10. Sew strip ABCDEFGHIJ to the bottom strip that you made to mirror the top.
Congrats!!! You have finished this block. All you need to do now is make 11 more. You can do it.
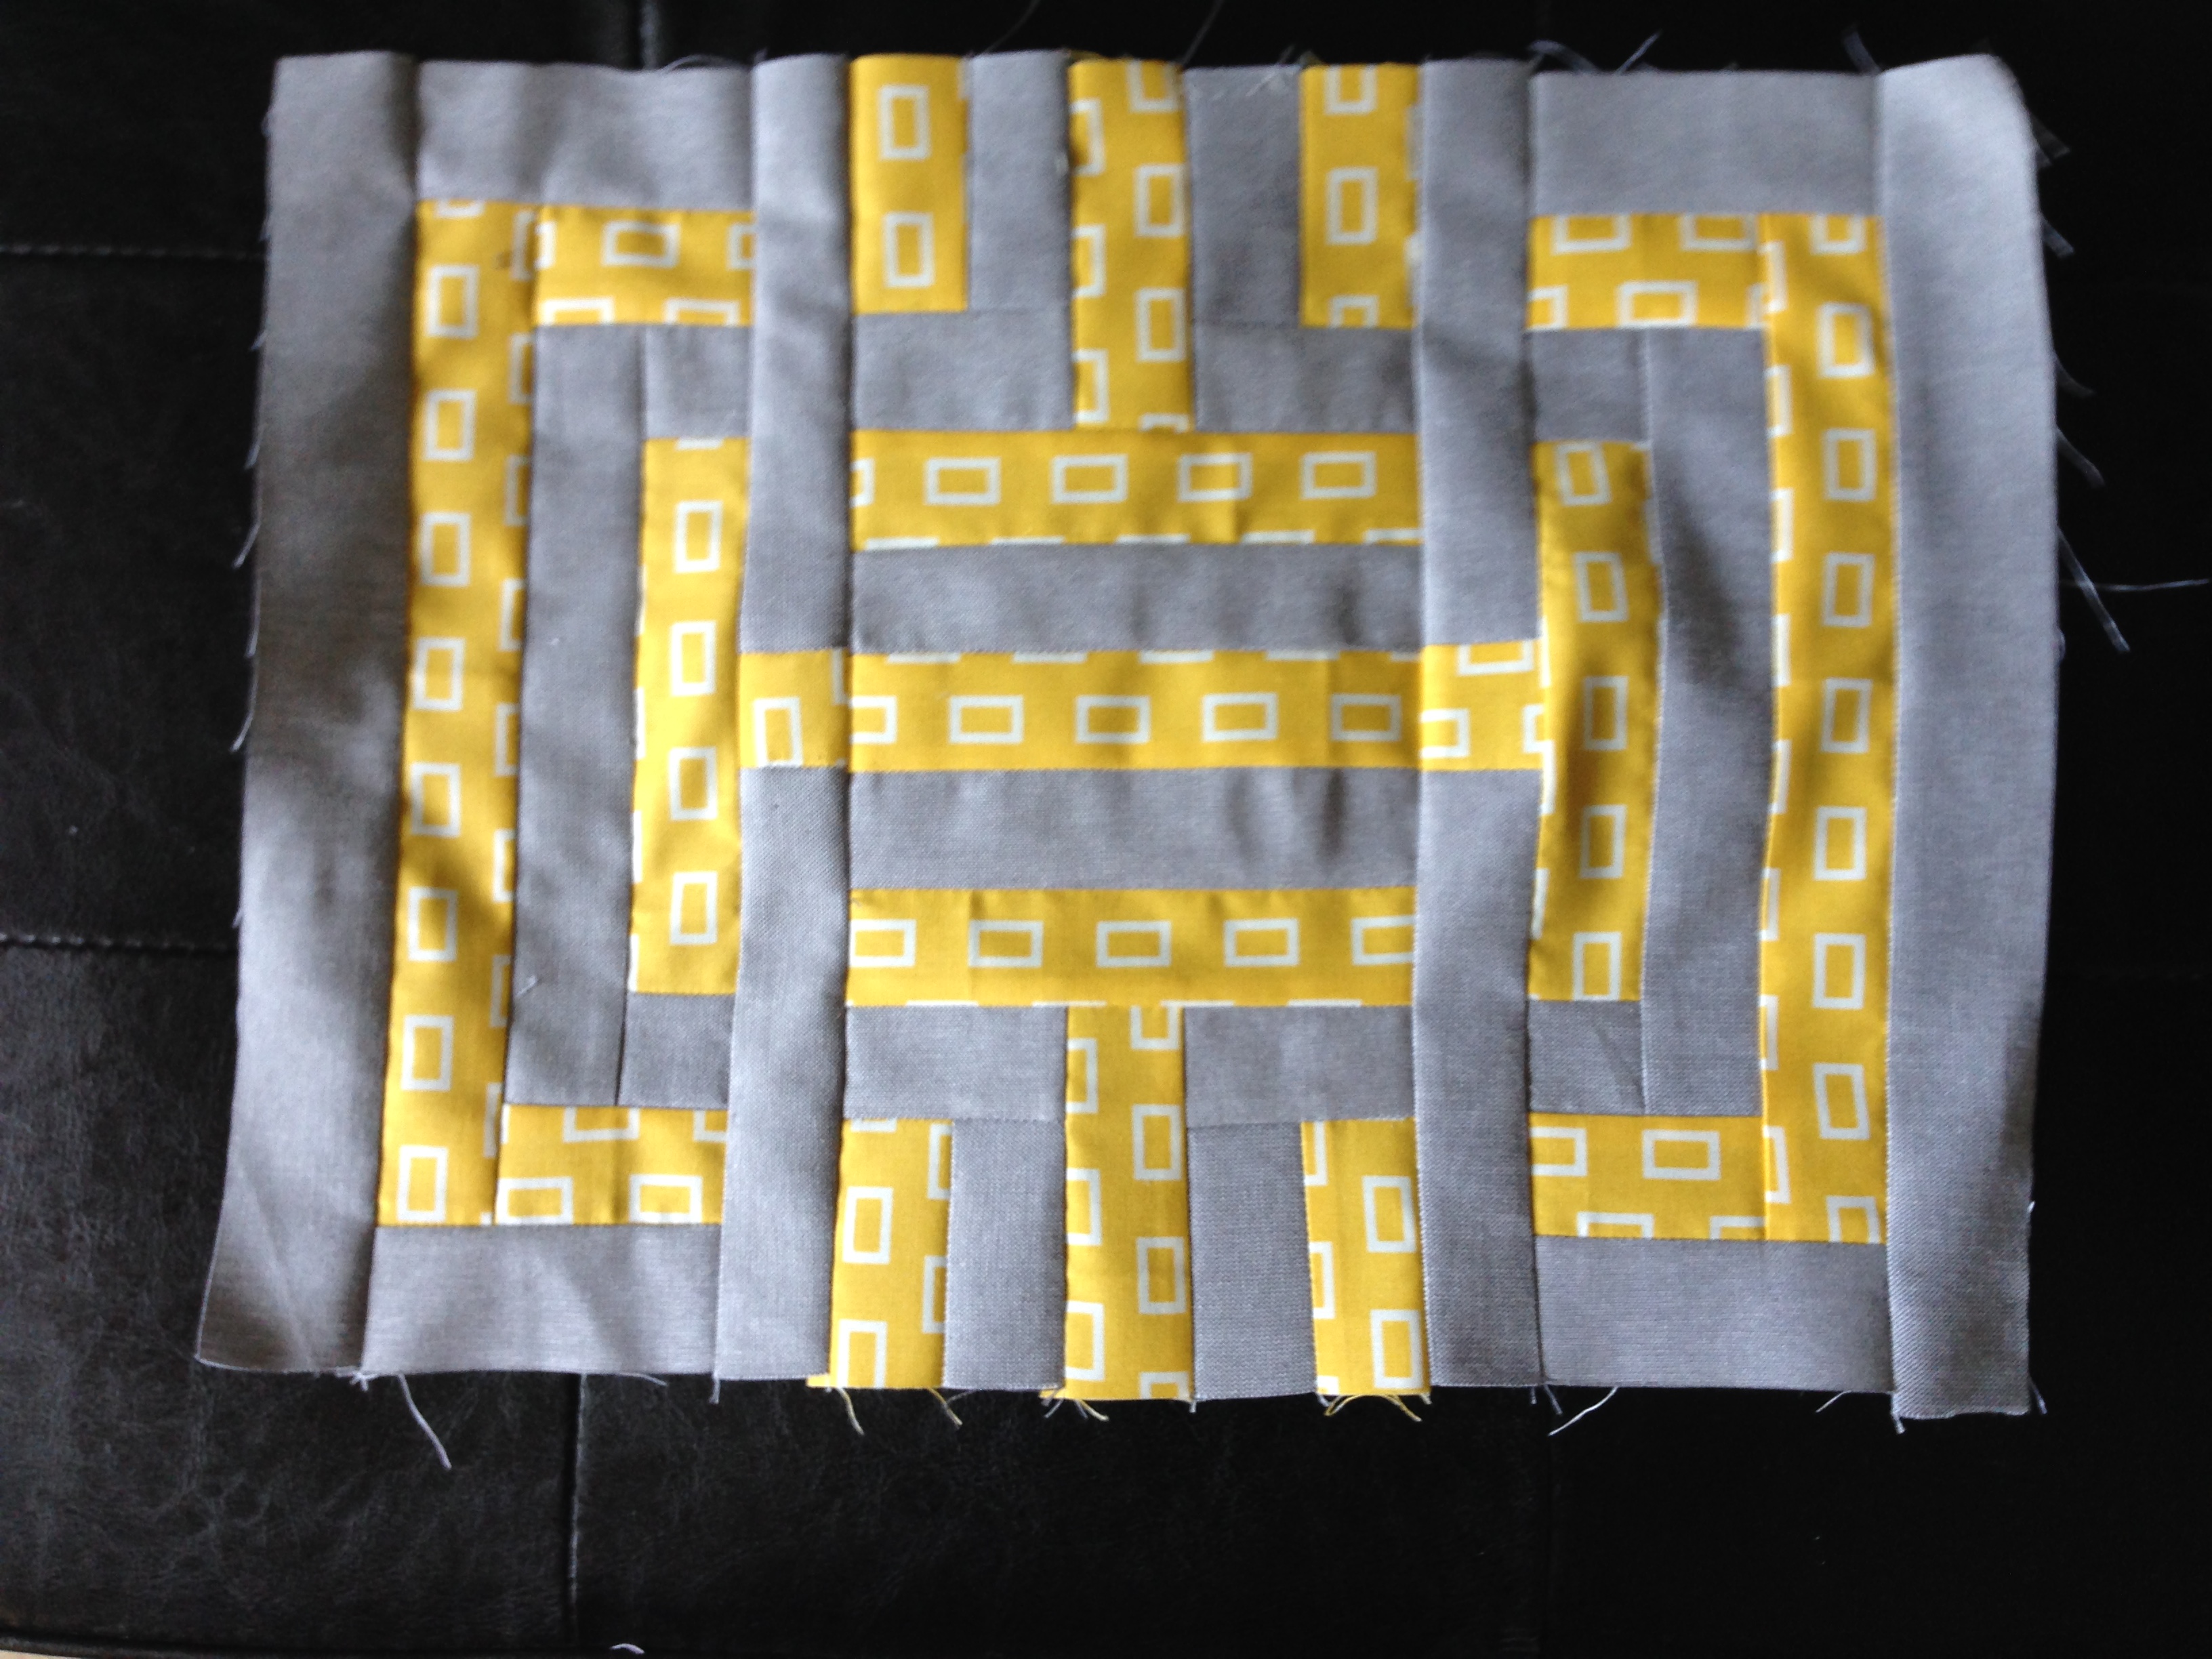
Creating the Maze Block
You now need to put together two Bookend Maze Blocks with a Center Maze Block. I matched material on these blocks - feel free to match or make scrappy.
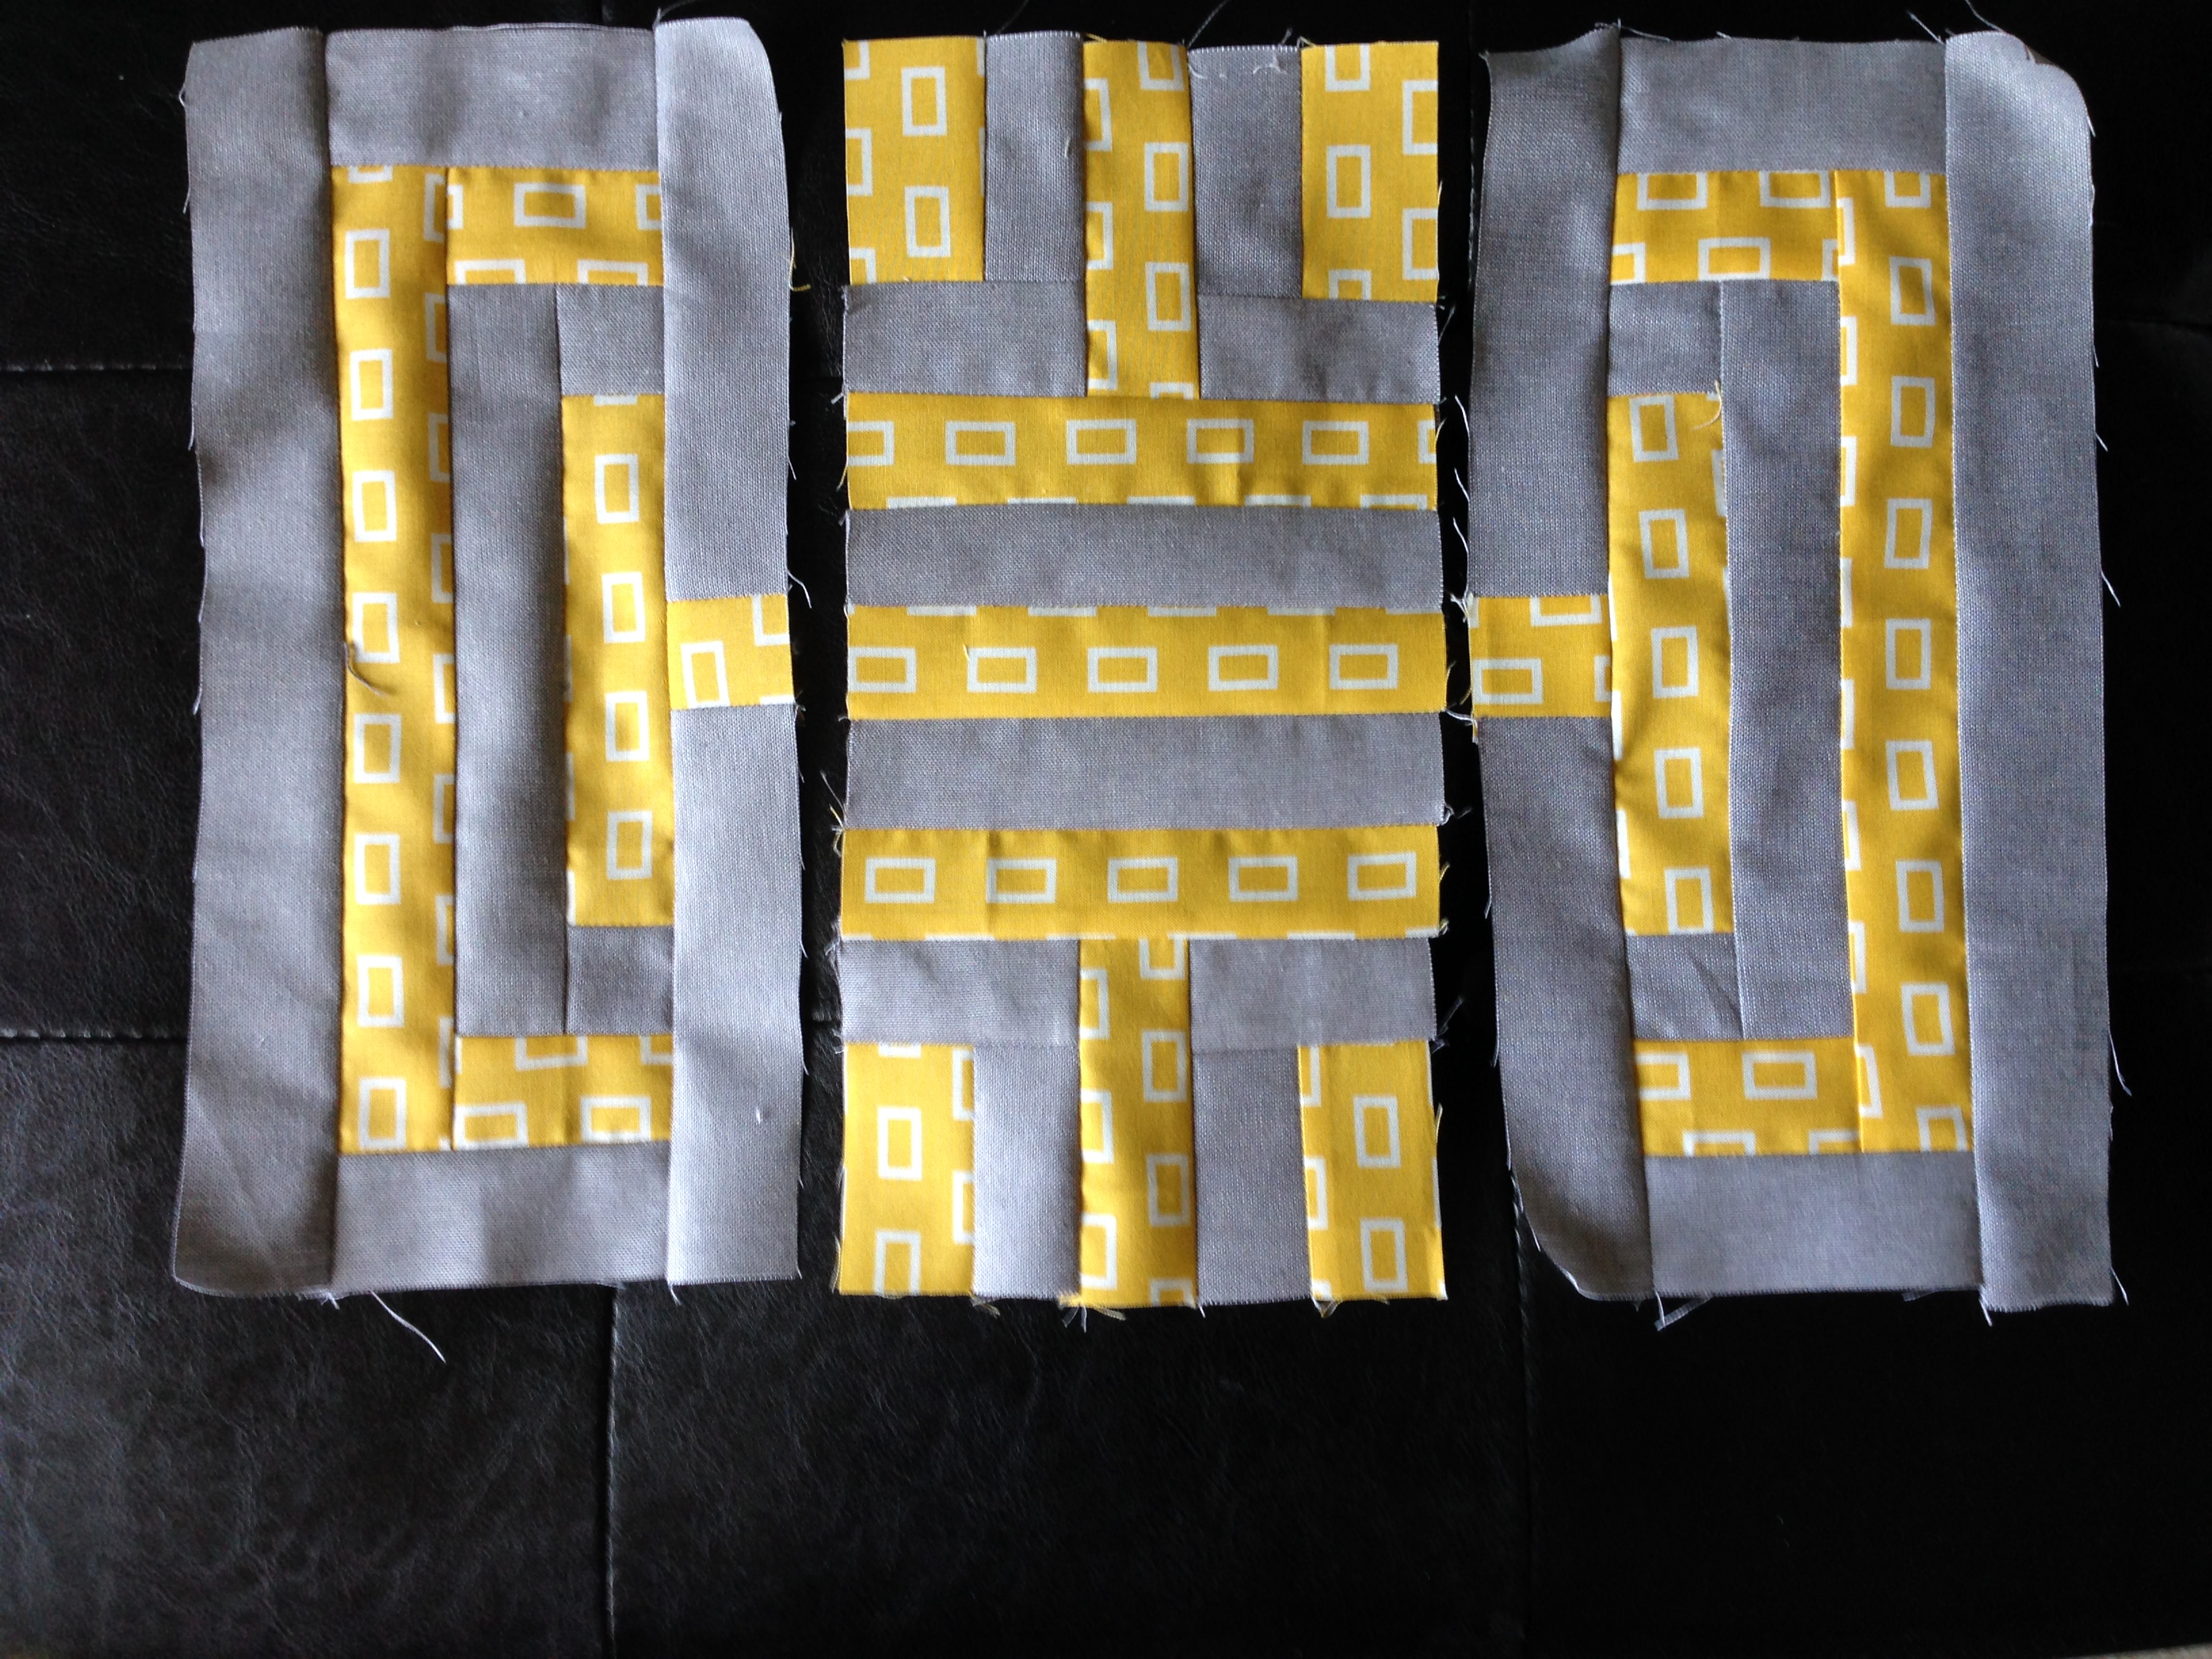
This is what the block will look like when laid out. You will need to make 12 of these blocks.
- Matched the yellow square from the Bookend Maze Block with the Yellow Square on the Center Maze Block. Sew one side and press seams
- Sew the other Bookend Block to the Center Maze Block again matching yellow squares and then press seams.
This block ends up being a 11 1/2" x 15 1/2" block.
Sashing to go between Maze Block and the Cornerstone Blocks (you haven't made these just yet, but sashing is the same)
Cutting Instruction:
Yellow Fabric:
- Cut (6) 1 1/2" x WOF of the yellow sashing fabric
- Subcut (32) 1 1/2" x 6 1/2" rectangles
- Subcut (16) 1 1/2" x 1 1/2"
Grey Fabric:
- Cut (32) 1 1/2 " x 1 1/2" grey squares (You should have scraps left over from your WOF cuts so far that should get you these small squares. If not, Cut (1) 1 1/2" x WOF of grey)
Sashing Assembly
- Sew a yellow 1 1/2" x 6 1/2" rectangle to a 1 1/2" x 1 1/2" grey square. Press seams to the grey.
- Do this step a second time so you have two yellow rectangles with grey squares.
- Sew the grey side (of the yellow/grey strip) to the small yellow 1 1/2" x 1 1/2" square. Press seams.
- Sew the other side of the small yellow square to the grey side of your other grey/yellow strip. Press seams.
Your sashing strip is now complete. Now you have 15 more to go! Enjoy!
Connecting the Maze Blocks together.
You are going to want to put your maze blocks into grouping of three for each size of the Center block. I tried to make sure that I didn't material next to each other, again your choice.
You are going to use 8 of your sashing to put the sets of three Maze Blocks together. See photo below.

- Sew a sashings to the bottom side of the top Maze Block, matching the grey, yellow and grey small squares in the middle. Press seams.
- Sew another sashing to the top side of the bottom Maze Block, matching again the grey, yellow and grey small squares in the middle. Press seams.
- Sew the sashing which is attached to the top Maze Block to top size of the middle Maze Block mataching the grey, yellow and grey small squares in the middle. Press seams.
- Sew the sashing which is attached to the bottom Maze Block to the bottom size of the middle Maze Block matching the grey, yello and grey small squares in the middle. Press seams.
Doesn't this look cool. Do the same process to the remaining 9 Maze blocks giving you a total of 4 sets of three Maze Blocks attached with sashings.
You should have 8 Sashing strips left. Hold onto them, we will use them once we have finished the Cornerstone Blocks which are coming up next.
Block 5 - Cornerstone Block
This is the block that goes in each of the corners of this quilt. See Picture Below. It is the same for all 4, but the yellow square on the outside move depending on what corner it is in. The yellow squares always face the inside of the quilt.
Cutting Instructions:
Yellow Fabric:
Center part of each block. I used the mostly white with yellow flower fat quarter for this part on all 4 blocks. You can use any yellow that you like.
- (2) 6" x 6" yellow square (if you use the method described below to make 16 half square triangles, if using your own method you will need to make SIXTEEN 2 5/8" x 2 5/8" half square triangles)
- (8) 1"x 5 3/4" yellow rectangle
- (8) 1" x 6" yellow rectangle
Grey Fabric:
- (2) 6" x 6" grey square (if you use the method described below to make 16 half square triangles)
Remaining Part of each Cornerstone: (I picked 4 different materials (not same as sashing or center block - you are free to choose your preference))
Yellow Fabric:
From Each Yellow Fabric - You need 4 sets
- For each set cut (6) 1 1/2" x 18" rectangles
- Subcut (2) 1 1/2" x 1 1/2" square
- Subcut (2) 1 1/2" x 7 1/2" rectangles
- Subcut (2) 1 1/2" x 9 1/2" rectangles
- Subcut (2) 1 1/2" x 11 1/2" rectangles
- Subcut (2) 1 1/2" x 13 1/2" rectangles
Grey Fabric: for all 4 Cornerstone Blocks
- Cut (13) 1 1/2" x WOF strips
- (8) 1 1/2" x 5 1/2" rectangles
- (8) 1 1/2" x 6 1/2" rectangles
- (16) 1 1/2" x 7 1/2" rectangles
- (8) 1 1/2" x 9 1/2" rectangles
- (8) 1 1/2" x 11 1/2" rectangles
- (4) 1 1/2" x 13 1/2" rectangles
- (4) 1 1/2" x 15 1/2" rectangles
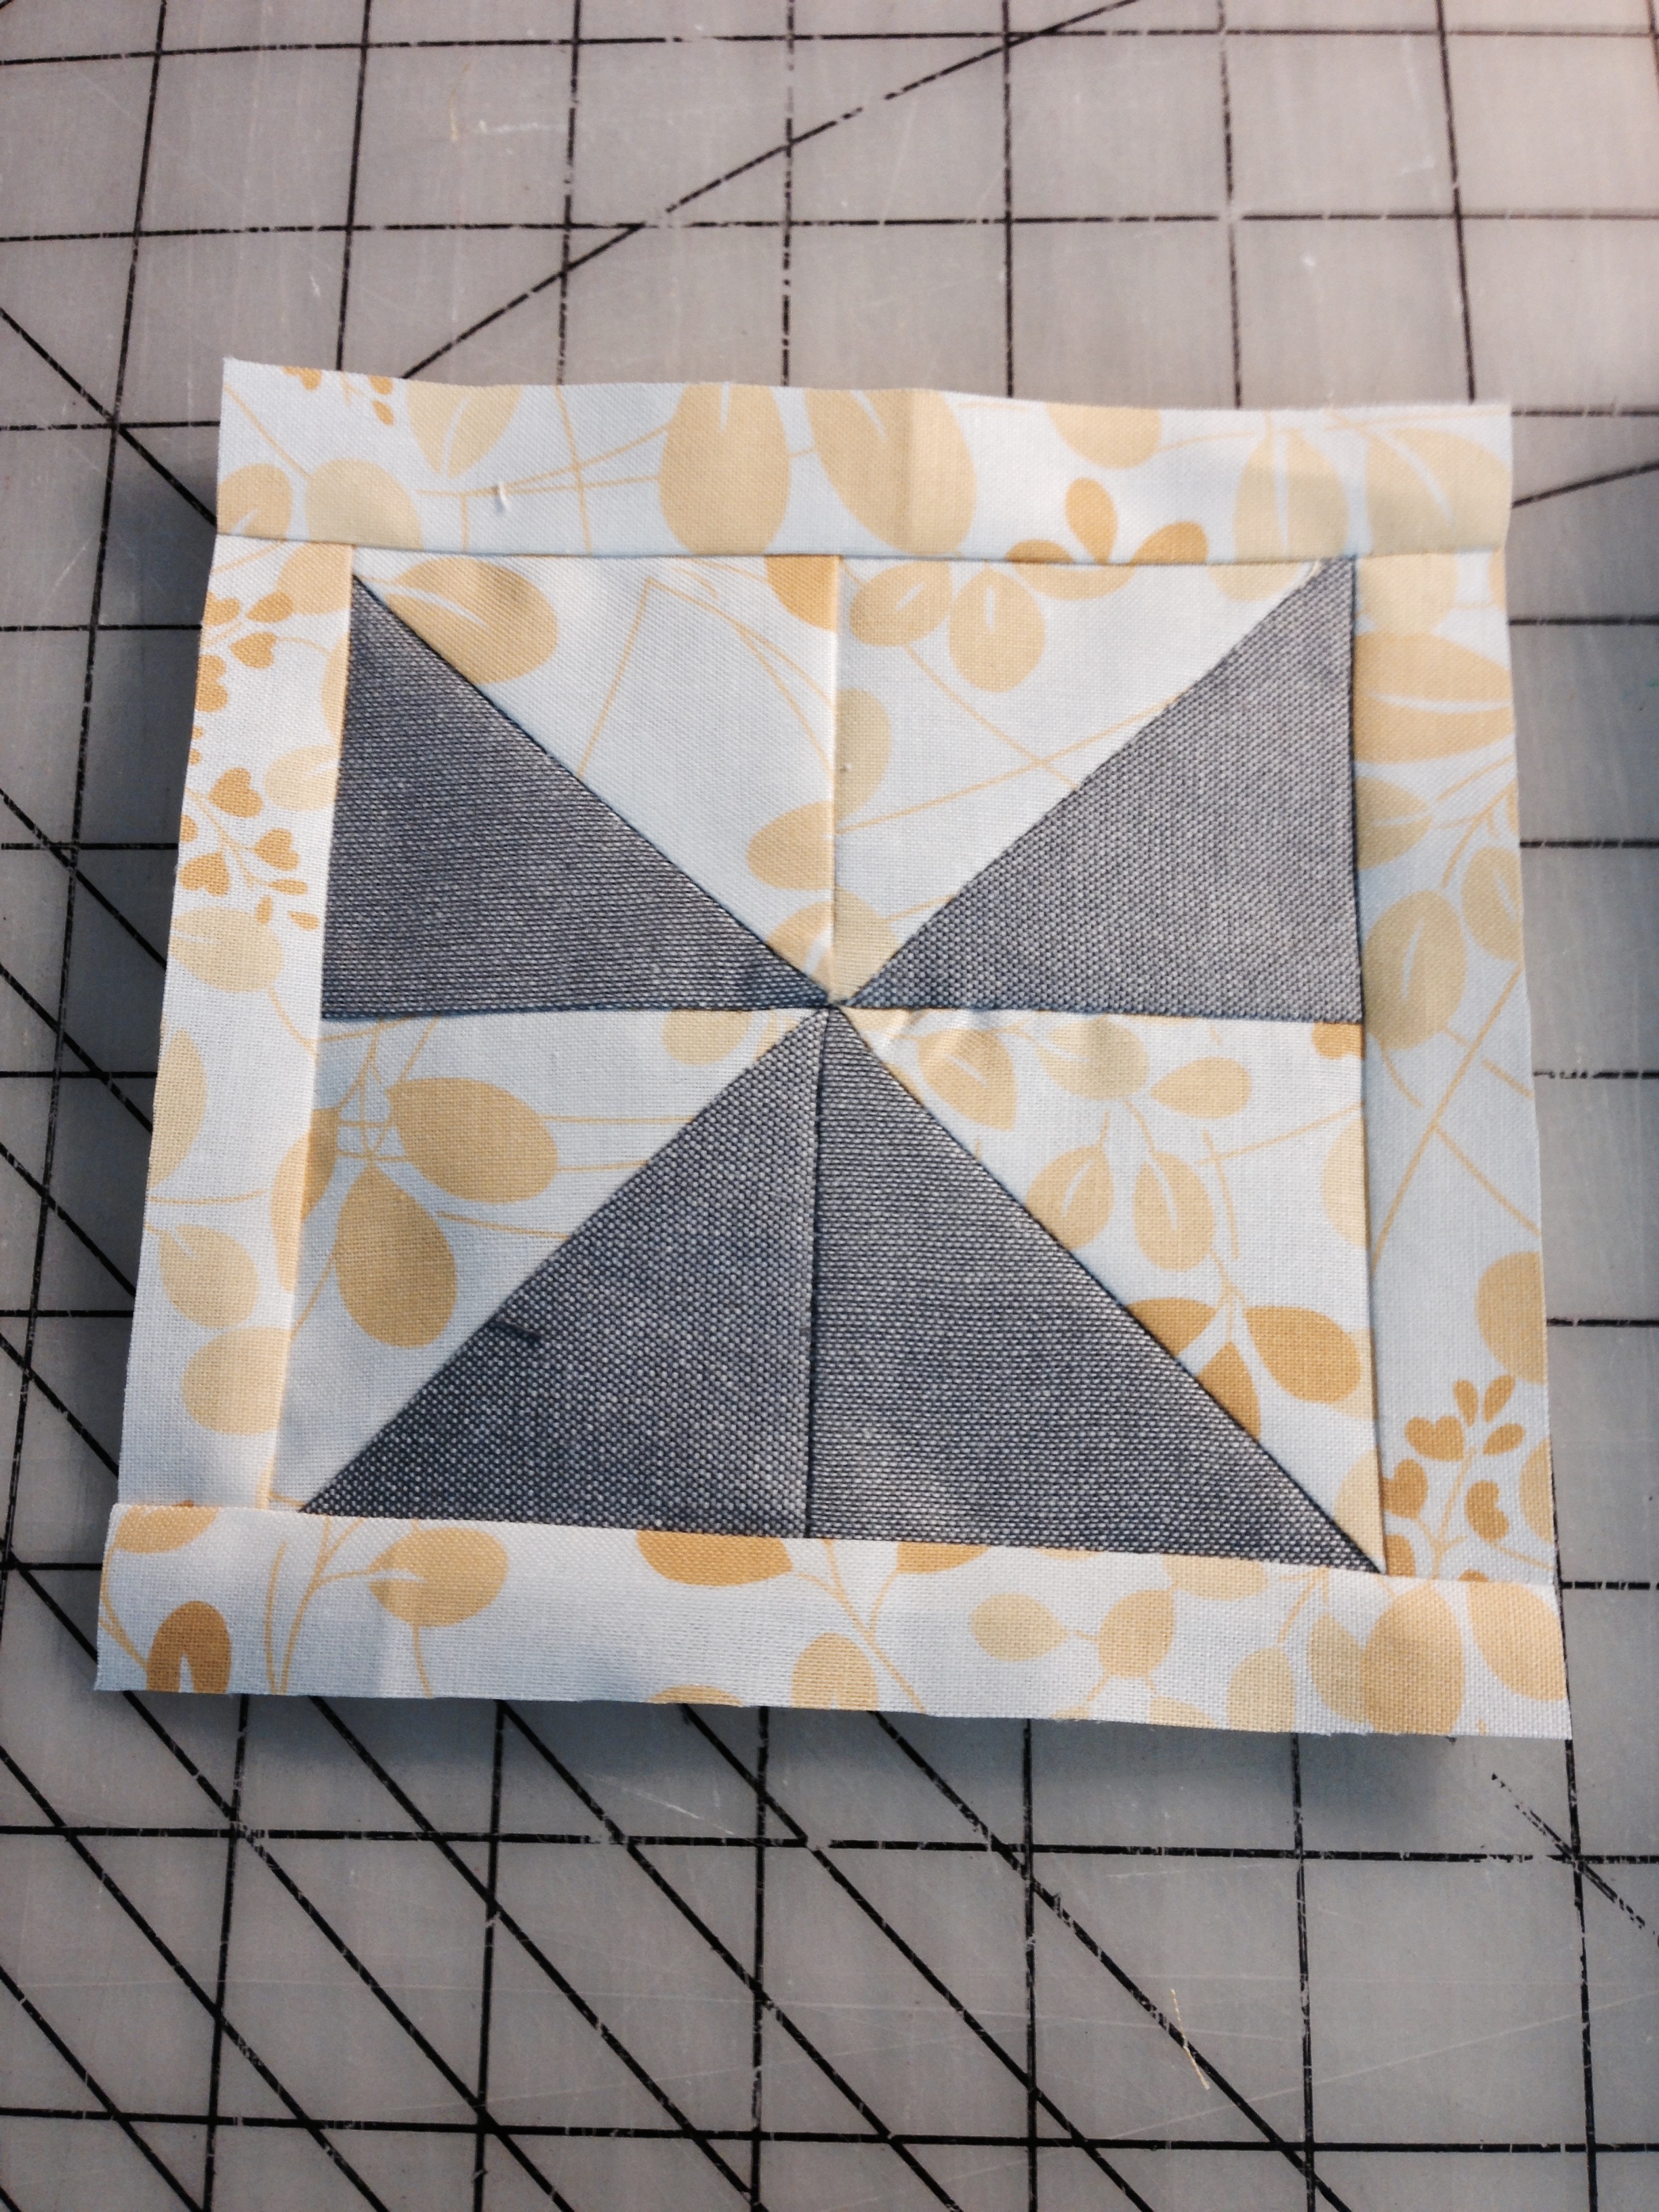
Assembling Inner Block of the Cornerstone Block
- This inner block is made with Half Square Triangles. I love how Sew Mama Sew teaches how to make 8 Half Square Triangles at once. So quick, esp if you are making lots of half square triangles.
- I used a 6" x 6" square of the grey and yellow fabric sewn together to create 8 half square triangles. This is enough to make 2 Center's.
- You need a total of 16 Half square triangles.
- Once you have made your half square triangles, I trimmed off the extra tips, but did not square them up.
- Organize your half square triangles in the pattern pictured below.
6. Sew the Half Square Triangled with the yellow fabric together (top). PRESS TO THE RIGHT SIDE.
7. Sew HAlf Square TRiangles with the grey fabric together (bottom). PRESS TO THE LEFT SIDE. Very important to make sure your material lies flat and isn't too bulky.
8. Sew top (grey on the outside) to bottom (grey on the inside) matching at center seam and at the Point of the greys. Press seams, but don't trim.
9. Sew on opposite sides Yellow 1"x 5 3/4" rectangles. Press seams.
10. Sew on remaining sides Yellow 1" x 6" rectangle. Press seams.
11. Trim it up to a 5.5" square using your ruler.
Repeat process for the other 3 Cornerstone center blocks.
Assemblying the Remainder of the Cornerstone Block
This will put together in a log cabin style alternating between grey and yellow. See picture for step numbers.
- Sew a Grey 1 1/2" x 5 1/2" rectangle on each side and press seams.
- Sew a Grey 1 1/2" x 7 1/2" rectangle on each side and press seams.
- Sew a Yellow 1 1/2" x 7 1/2" rectangle on each side and press seams.
- Sew a Yellow 1 1/2" x 9 1/2" rectangle on each side and press seams.
- Sew a Grey 1 1/2" x 9 1/2" rectangle on each side and press seams.
- Sew a Grey 1 1/2" x 11 1/2" rectangle on each side and press seams.
- Sew a Yellow 1 1/2" x 11 1/2" rectangle on each side and press seams.
- Sew a Yellow 1 1/2" x 13 1/2" rectangle on each side and press seams.
- Sew a Grey 1 1/2" x 7 1/2" rectangle to a yellow 1 1/2" square and press seams.
- Sew a Grey 1 1/2" x 7 1/2" rectangle to the other side of the yellow square and press seams.
- Sew a Grey 1 1/2" x 6 1/2" rectangle to a yellow 1 1/2" square and press seams.
- Sew a Grey 1 1/2" x 6 1/2" rectangle to the other side of the yellow square and press seams.
- You will want to make sure this next grey rectangle goes on the correct side of the block. Using the photo above as your guide you want to sew a Grey 1 1/2" x 13 1/2" rectangle on the side of the block which is on left side of the picture. Press seam.
- Sew a Grey yellow grey strip which measures 1 1/2" x 13 1/2" rectangle on the opposite side and press seam.
- You will want to make sure this next grey rectangle goes on the correct side of the block. Using the photo above as your guide you want to sew a Grey 1 1/2" x 15 1/2" rectangle on the side of the block which is on bottom side (or side that has the grey going all the way across the center block) of the picture. Press seam.
- Sew a Grey yellow grey strip which measures 1 1/2" x 15 1/2" rectangle on the opposite side and press seam.
You are on a roll. Only 3 more Cornerstone Blocks to go.
Assembling the Cornerstone and Maze Border
Cutting Instructions
Yellow Fabric:
- Cut (4) 1 1/2" x WOF from your sashing yellow fabric.
- Subcut (2) 1 1/2" x 35 1/2" rectangles
- Subcut (2) 1 1/2" x 36 1/2" rectangles
- Now that you have all 4 Cornerstone blocks and 4 sets of 3 Maze blocks you are ready to lay them out next to your Center block and attach.
- Start by putting your Center block in the middle of your floor.
- Now you are going to lay down the sashing you just cut along the sides. Put the 1 1/2" x 35 1/2" on opposite sides first and then the 1" x 36 1/2" on the two remaining sides.
- You will then place a set of the Maze blocks along all 4 sides.
- At the end of each Maze Block place one of the sashing strips with yellow and grey squares that you made previously.
- Finally you will place your Cornerstone blocks in each corner matching up the yellow squares on the blocks and sashing.
- We are going to start sewing the center row which included a set of Maze Blocks, sashing, the center block, sashing and a set of Maze Blocks.
- Sew the left Maze Block to a 1 1/2" x 35" sashing. Press seams.
- Sew the 1 1/2" x 35" sashing to the right Maze Block. Press seams.
- Sew the left side Maze block/sashing to the Center Block. Press seams.
- Sew the left size Maze Block/sashing/Center Block to the sashing/right side Maze Block. Press seams.
It should look like this.

You will now sew the top row and then the bottom row using the instructions below:
- Sew the left side Cornerstone Block to the Sashing matching yellow squares. Press seams
- Sew the right side sashing to the right side Cornerstone Block matching yellow squares. Press seams.
- Sew the left side Cornerstone Block/Sashing to the Maze Block matching yellow squares. Press seams.
- Sew the left side Cornerstone Block/Sashing/Maze Block to the right side sashing/Cornerstone Block matching yellow squares. Press seams.
Do this for both the top and the bottom row.
To connect the top, middle and bottom rows you will need to do the following:
- There is a row in between each of the big rows that need to be sewed. It consists of a 15 1/2" sashing (yellow and grey squares in the middle) and a 36 1/2" yellow sashing and a 15 1/2" sashing (yellow and grey squares in the middle). You will need to sew both of these small sashing rows together. Repeat steps for both rows.
- You will need to sew the left side sashing to the 1 1/2" x 36 1/2" yellow sashing. Press seams.
- You will need to sew the left side sashing/36 1/2" sashing to the right side sashing. Press seams.
To combine it all together you will do the following steps:
- Sew the top row (Cornerstone/Maze/Cornerstone) to the sashing, matching the grey and yellow squares on both the Cornerstone Blocks. Press seams.
- Sew the bottom sashing to the bottom row (Cornerstone/Maze/Cornerstone), matching the grey and yellow squares on both the Cornerstone Blocks. Press seams.
- Sew top row and sashing to the middle row (maze/center block/maze) matching the grey and yellow squares on both the Maze Blocks. Press seams.
- Sew Top/Middle Row to the sashing/bottom row, matching the grey and yellow squares on both the Maz Blocks. Press seams.
You are sooooo close. Only a few more easy borders and you have created a master piece. You can do this!!!
Outside Borders
Cutting Instructions:
Yellow Fabric:
- Cut (8) 1 1/2" x WOF of Yellow border material
- Cut (8) 3" x WOF of Yellow border material
Grey Fabric:
- Cut (8) 2 1/2" x WOF of Grey material
Sew two strips together of each of these WOF leaving you with Four strips of each approx 80" long. I found here it is easier to trim as you sew it on, just in case your aren't perfect.
Take your amazing quilt and you are going to add on three more borders.
- First is the Yellow 1 1/2" border. I line up right sides together and sew along one side. When I get close to the end, I trim off the excess material of my border strip.
- Sew the opposite side with another yellow 1 1/2" border. Press seams.
- Next sew yellow fabric the same way along the opposite sides once again trimming of extra material from your border strip. Press seams.
- You will now sew on the Grey 2 1/2" border using the same method: sew opposite sides trimming off the extra and pressing seams
- Then sew opposite sides with Grey fabric, trim extra and press seams.
- You are ready for the final border. Sew on the Yellow 3" border on each side trimming and pressing seams.
- Sew the yellow fabric on the final sides, trim and press seams!!!!!
Step back and look at it. It looks amazing I just know it. Once again take a picture, eat some chocolate, go for a run, do whatever your victory dance is!
Sewing the quilt back.
Cutting Instructions:
Yellow Backing Fabric:
- Cut (2) 82" x WOF
Sew the material the two materials along the selvage to create a 82" x 82" backing.
Sandwich your quilt top, batting and quilt back. Pin and get ready to quilt.
Quilt ( choose to straight line quilt it with my walking foot) and bind as you desire.
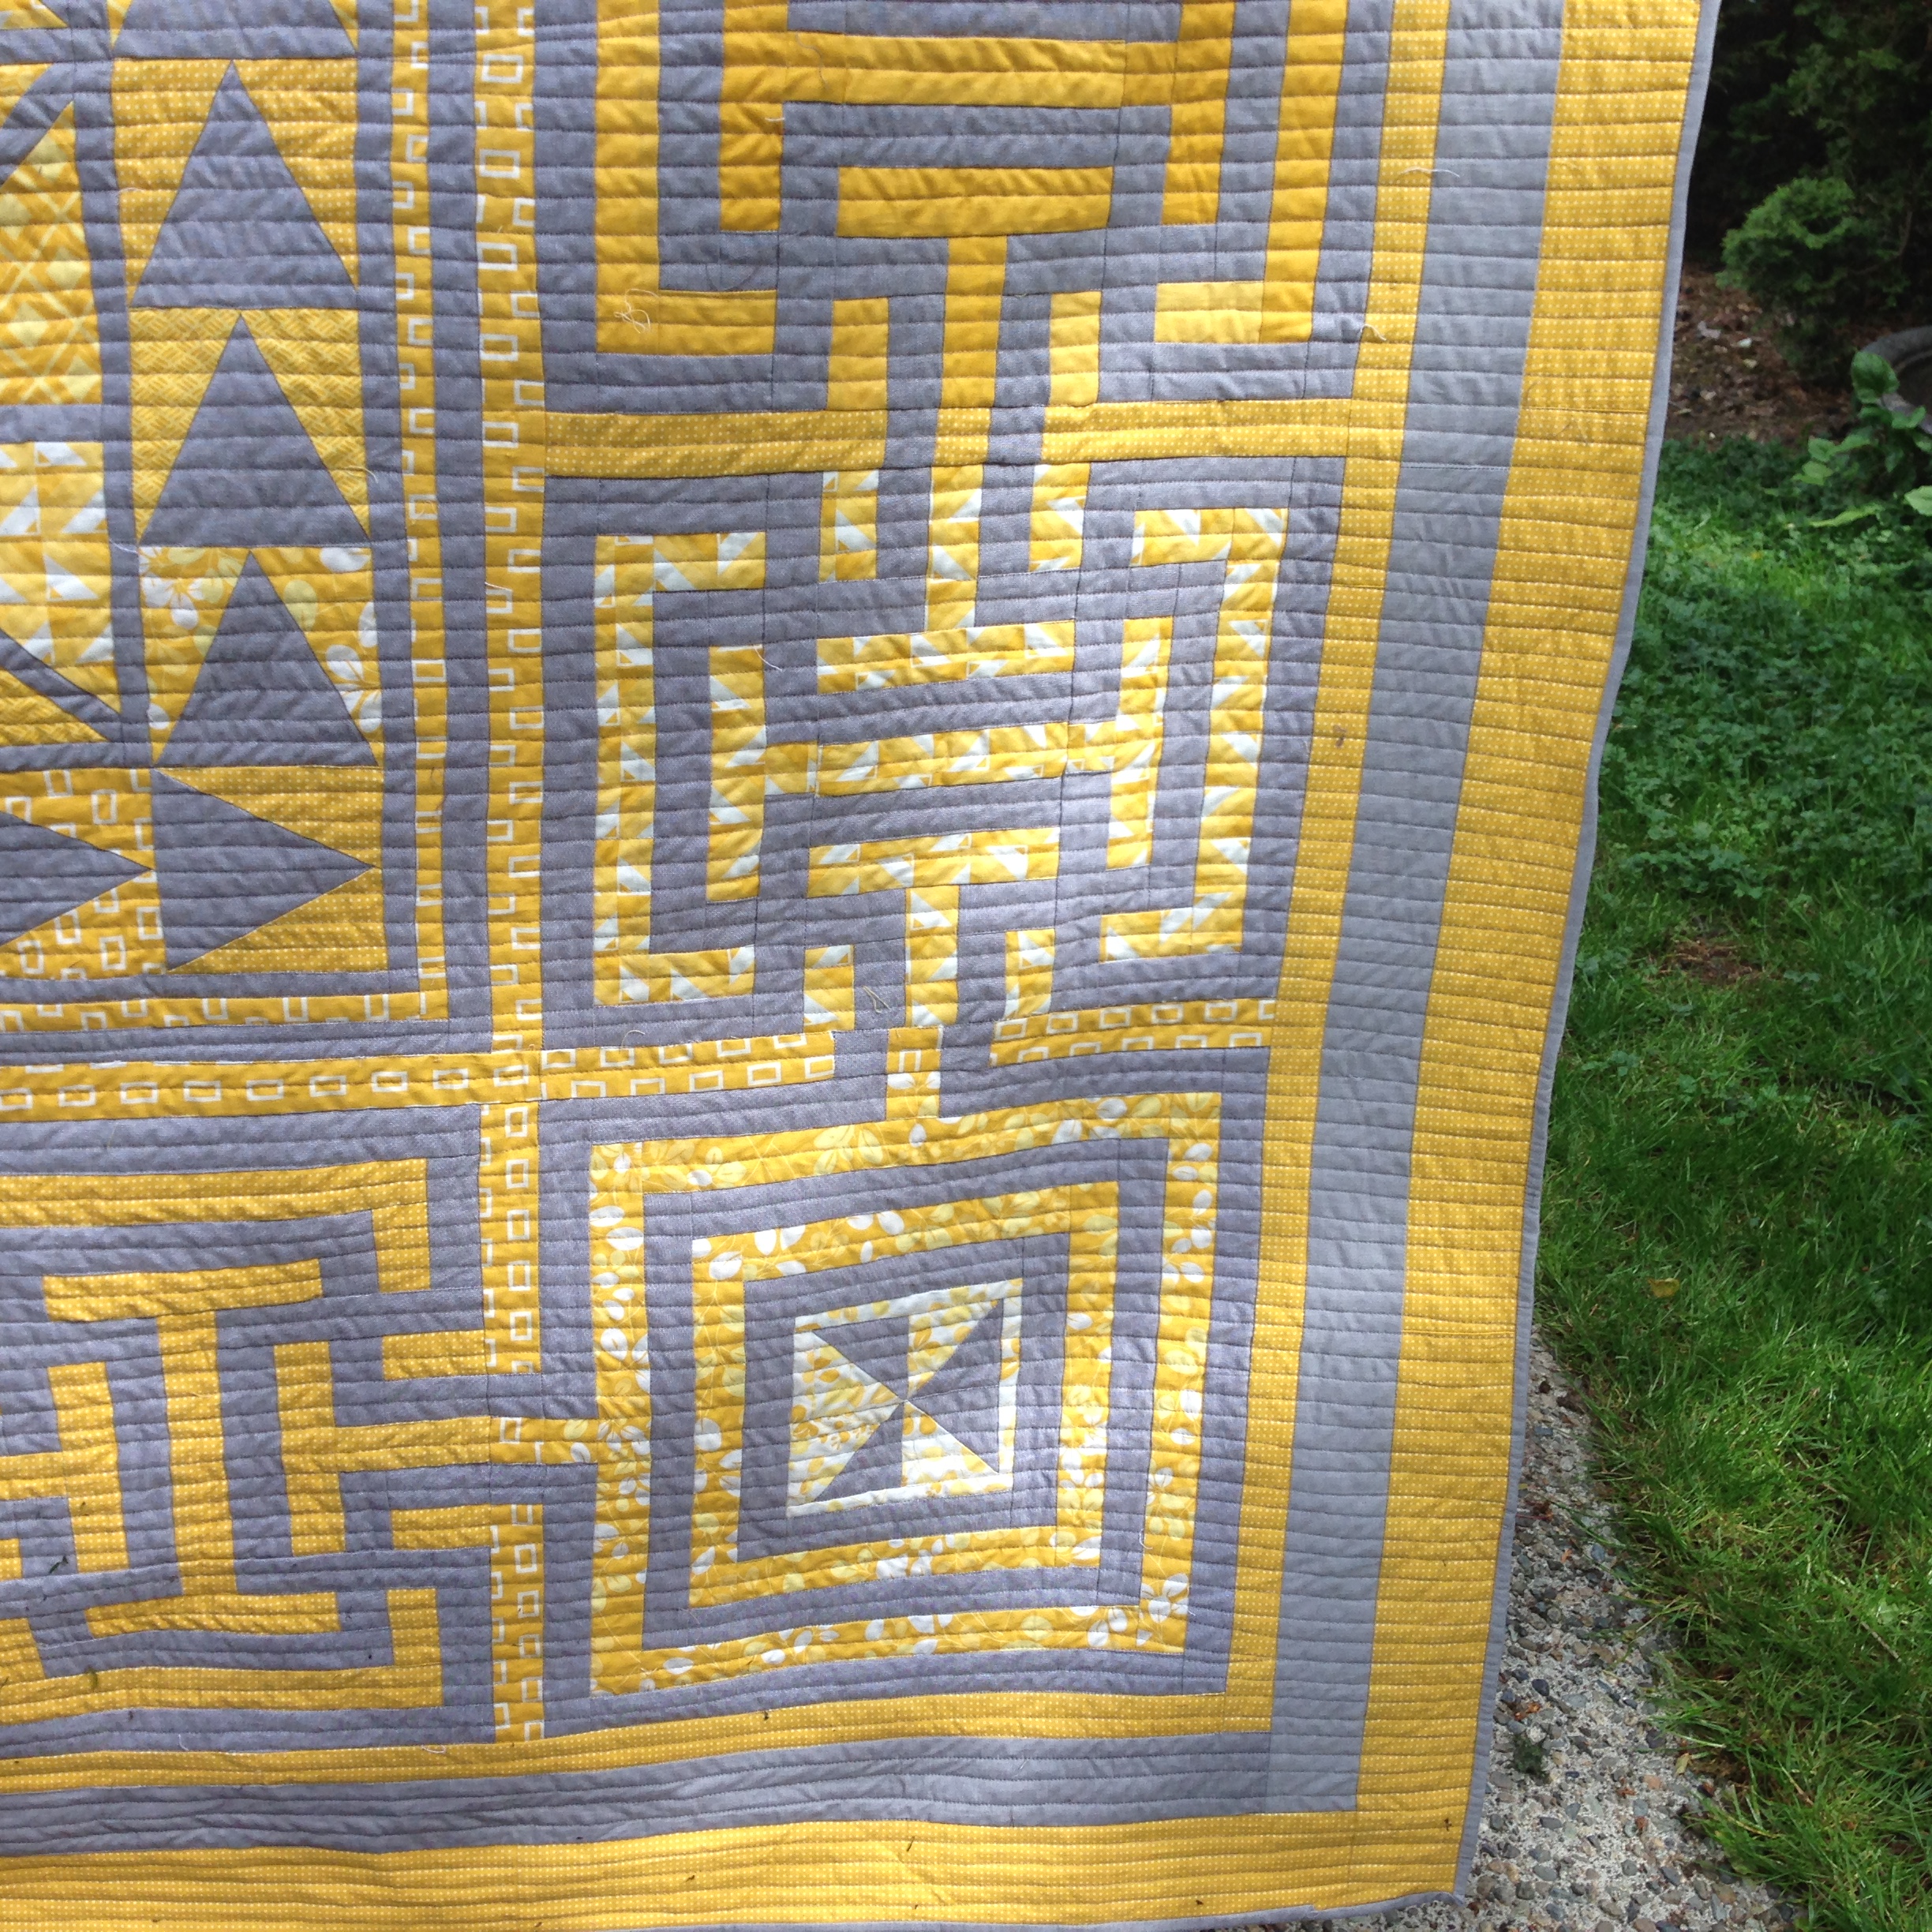
Here are some pictures of the quilt.


Wash your quilt and enjoy huge satisfaction of doing a great job.
Looking forward to seeing all you quilts.
Have a wonderful day and thanks for making it all the way to the end of this tutorial.
Have a great one!
@krisallenrunner (on Instagram)
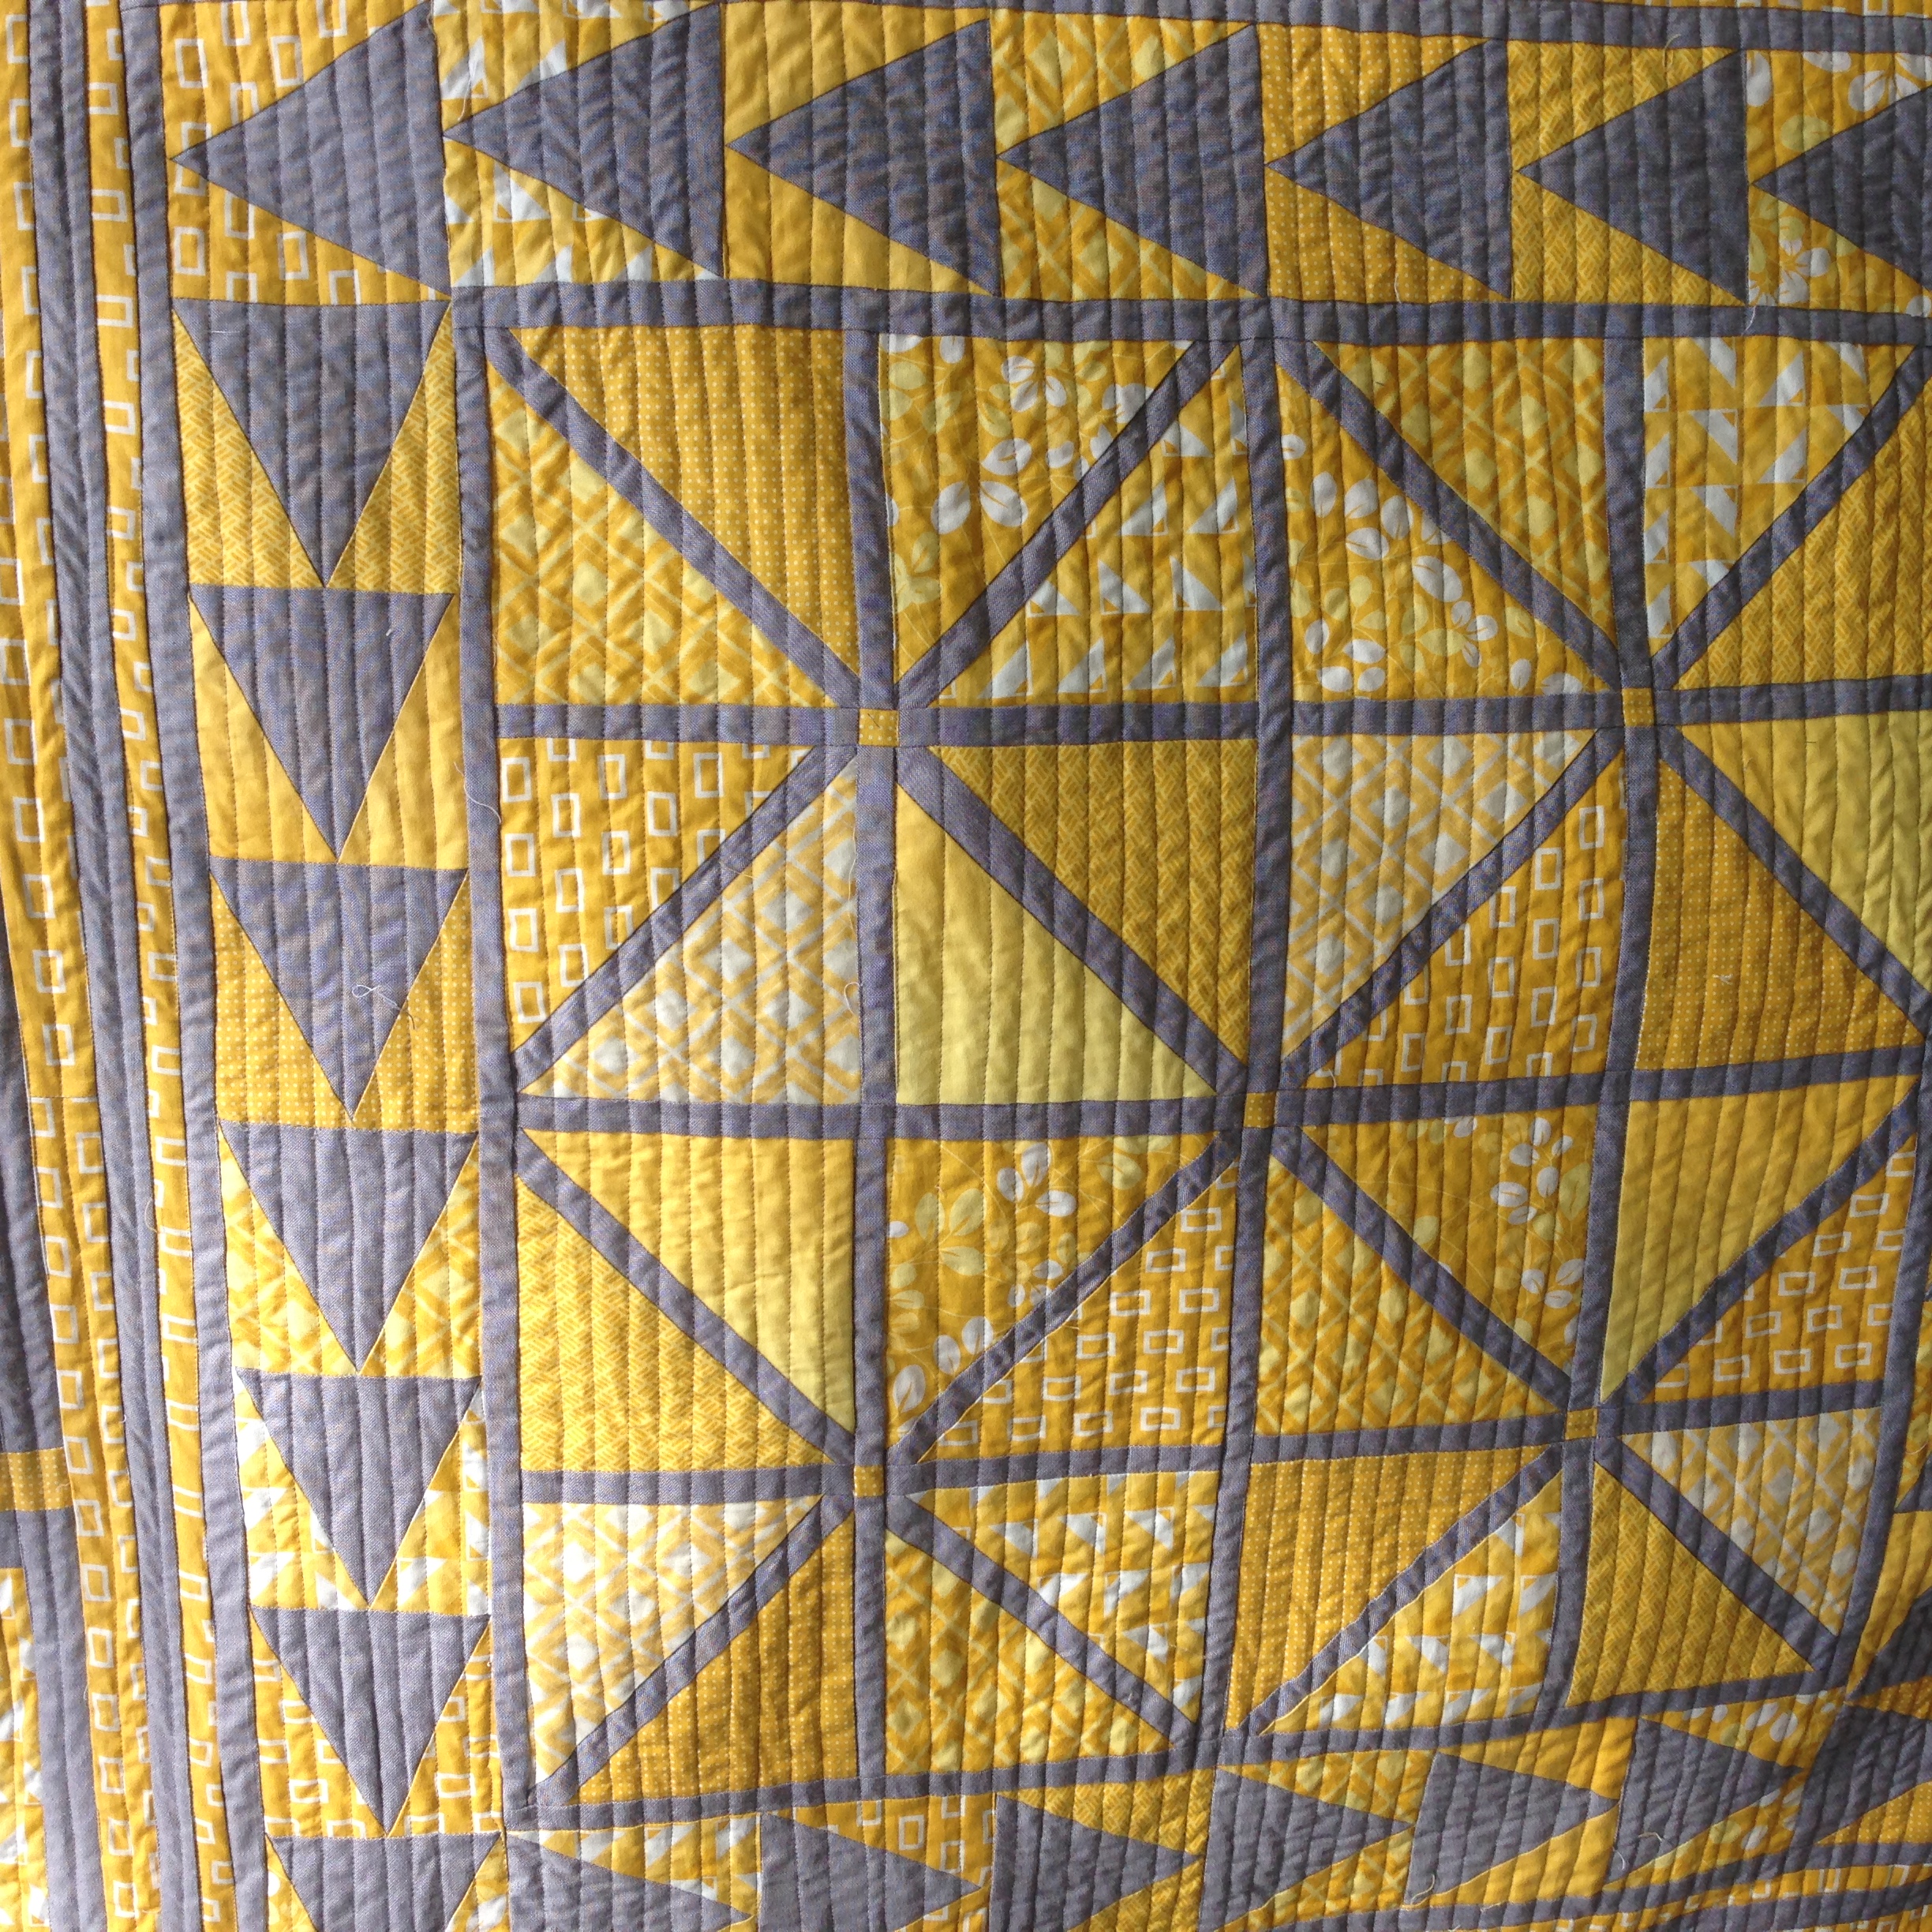
![]()
78" x 78" Pompeii Mosaic Medallion Quilt (before washing)
![]()
Posted in: