Welcome to Moda Fabrics!
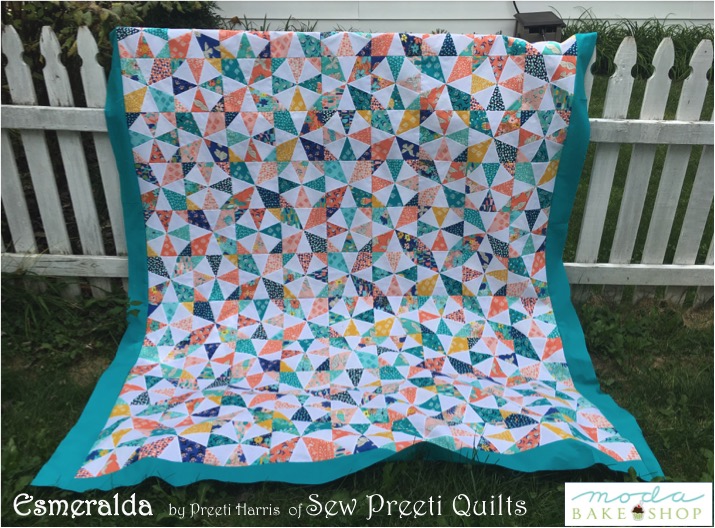
Esmeralda Quilt
Esmeralda Quilt
Published:
Oct 3 2017 - 23:00
![]()
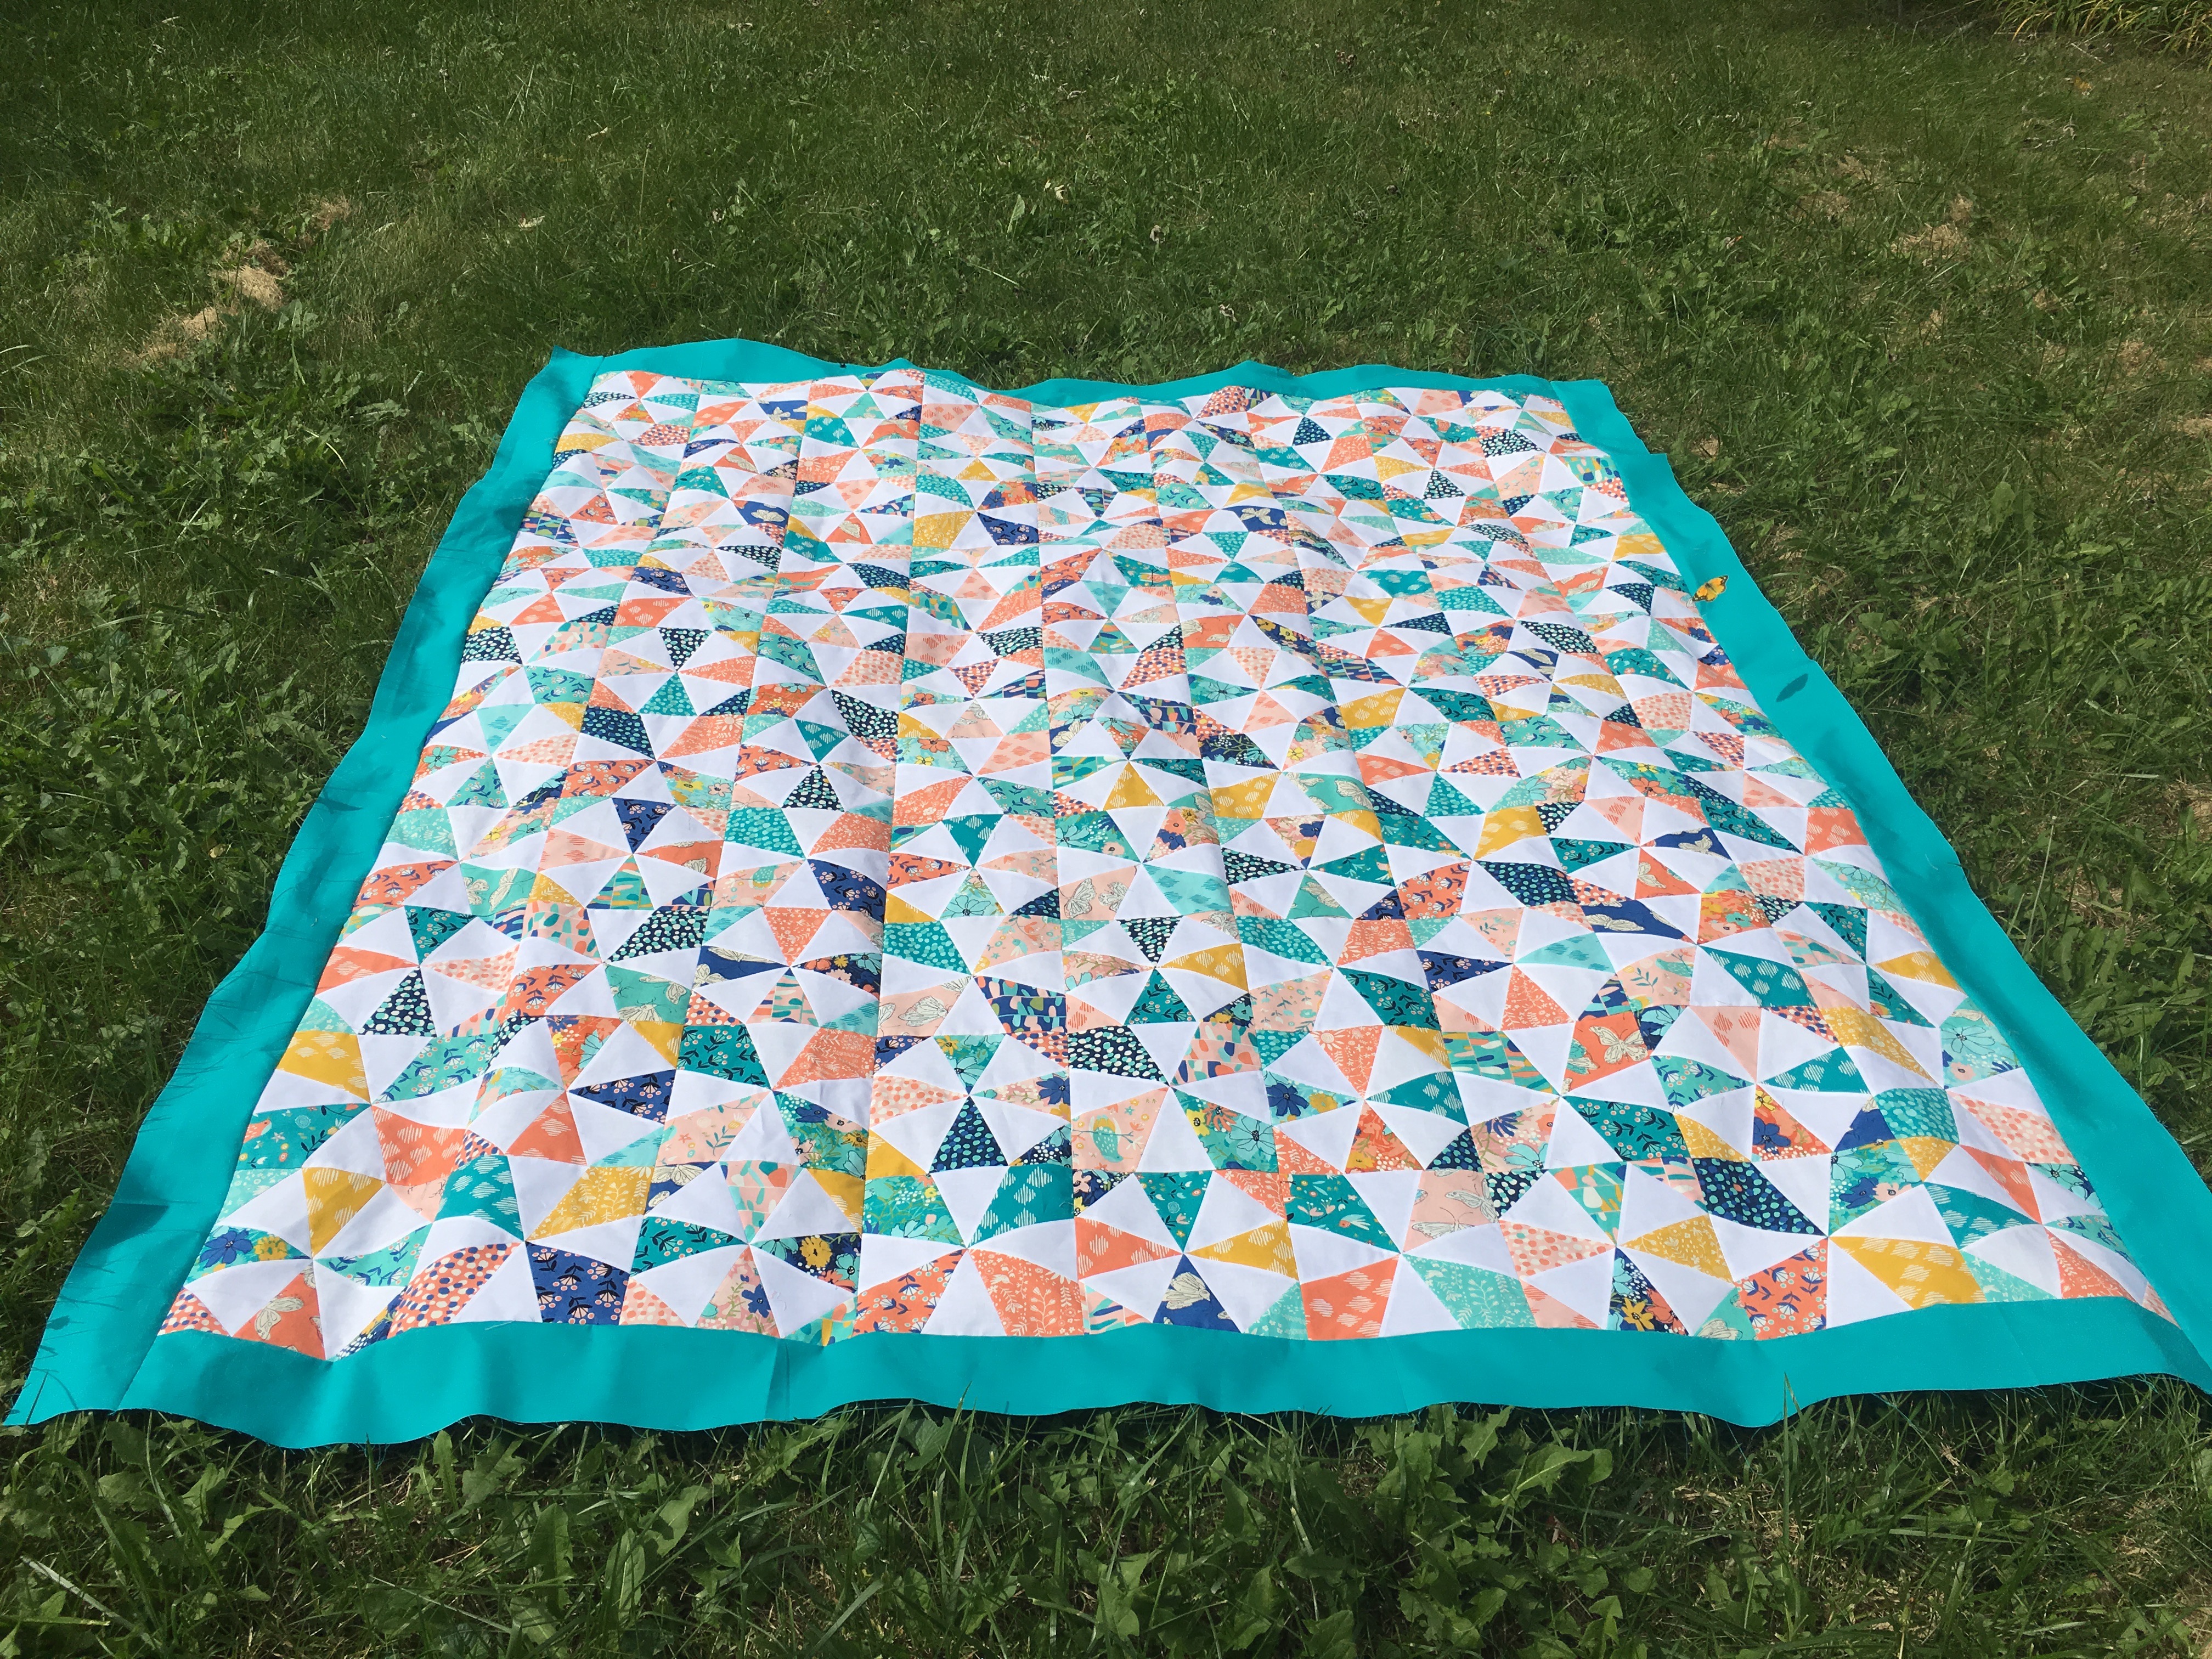
The illusion of interlocking circles gives movement to this quilt. Made of two alternating blocks, each block finishes at 8 inches. Make 100 blocks - 50 of each type.
Arrange 9 by 11. Add 4" borders.
This queen size quilt finishes at about 80" x 96" (with borders).
![]()

2 Layer Cakes® background fabric {Bella Solids in White}*
2 Layer Cakes® focus fabric {Wild Nectar by Crystal Manning}**
1 yard border fabric - (8) 4" x width of fabric (WOF) strips
¾ yard binding fabric - (9) 2½" x WOF strips
2⅓ yard of 108" wide backing
*We need (50) 10" squares which can alternatively be cut from 3½ to 3 5/8 yards of fabric
**We need 50+25 squares. Choose the darker fabrics and avoid those with a cream background. We want a good contrast against the white background.
![]()
The quilt consists of two alternating blocks - A and B. We need a total of 99 blocks (arranged 9 by 11). We will make a total of 100 blocks, 50 each of Block A and Block B. There will be one block leftover.
Since we will be cutting through four layers of fabric several times, I suggest starting with a new blade in your rotary cutter.
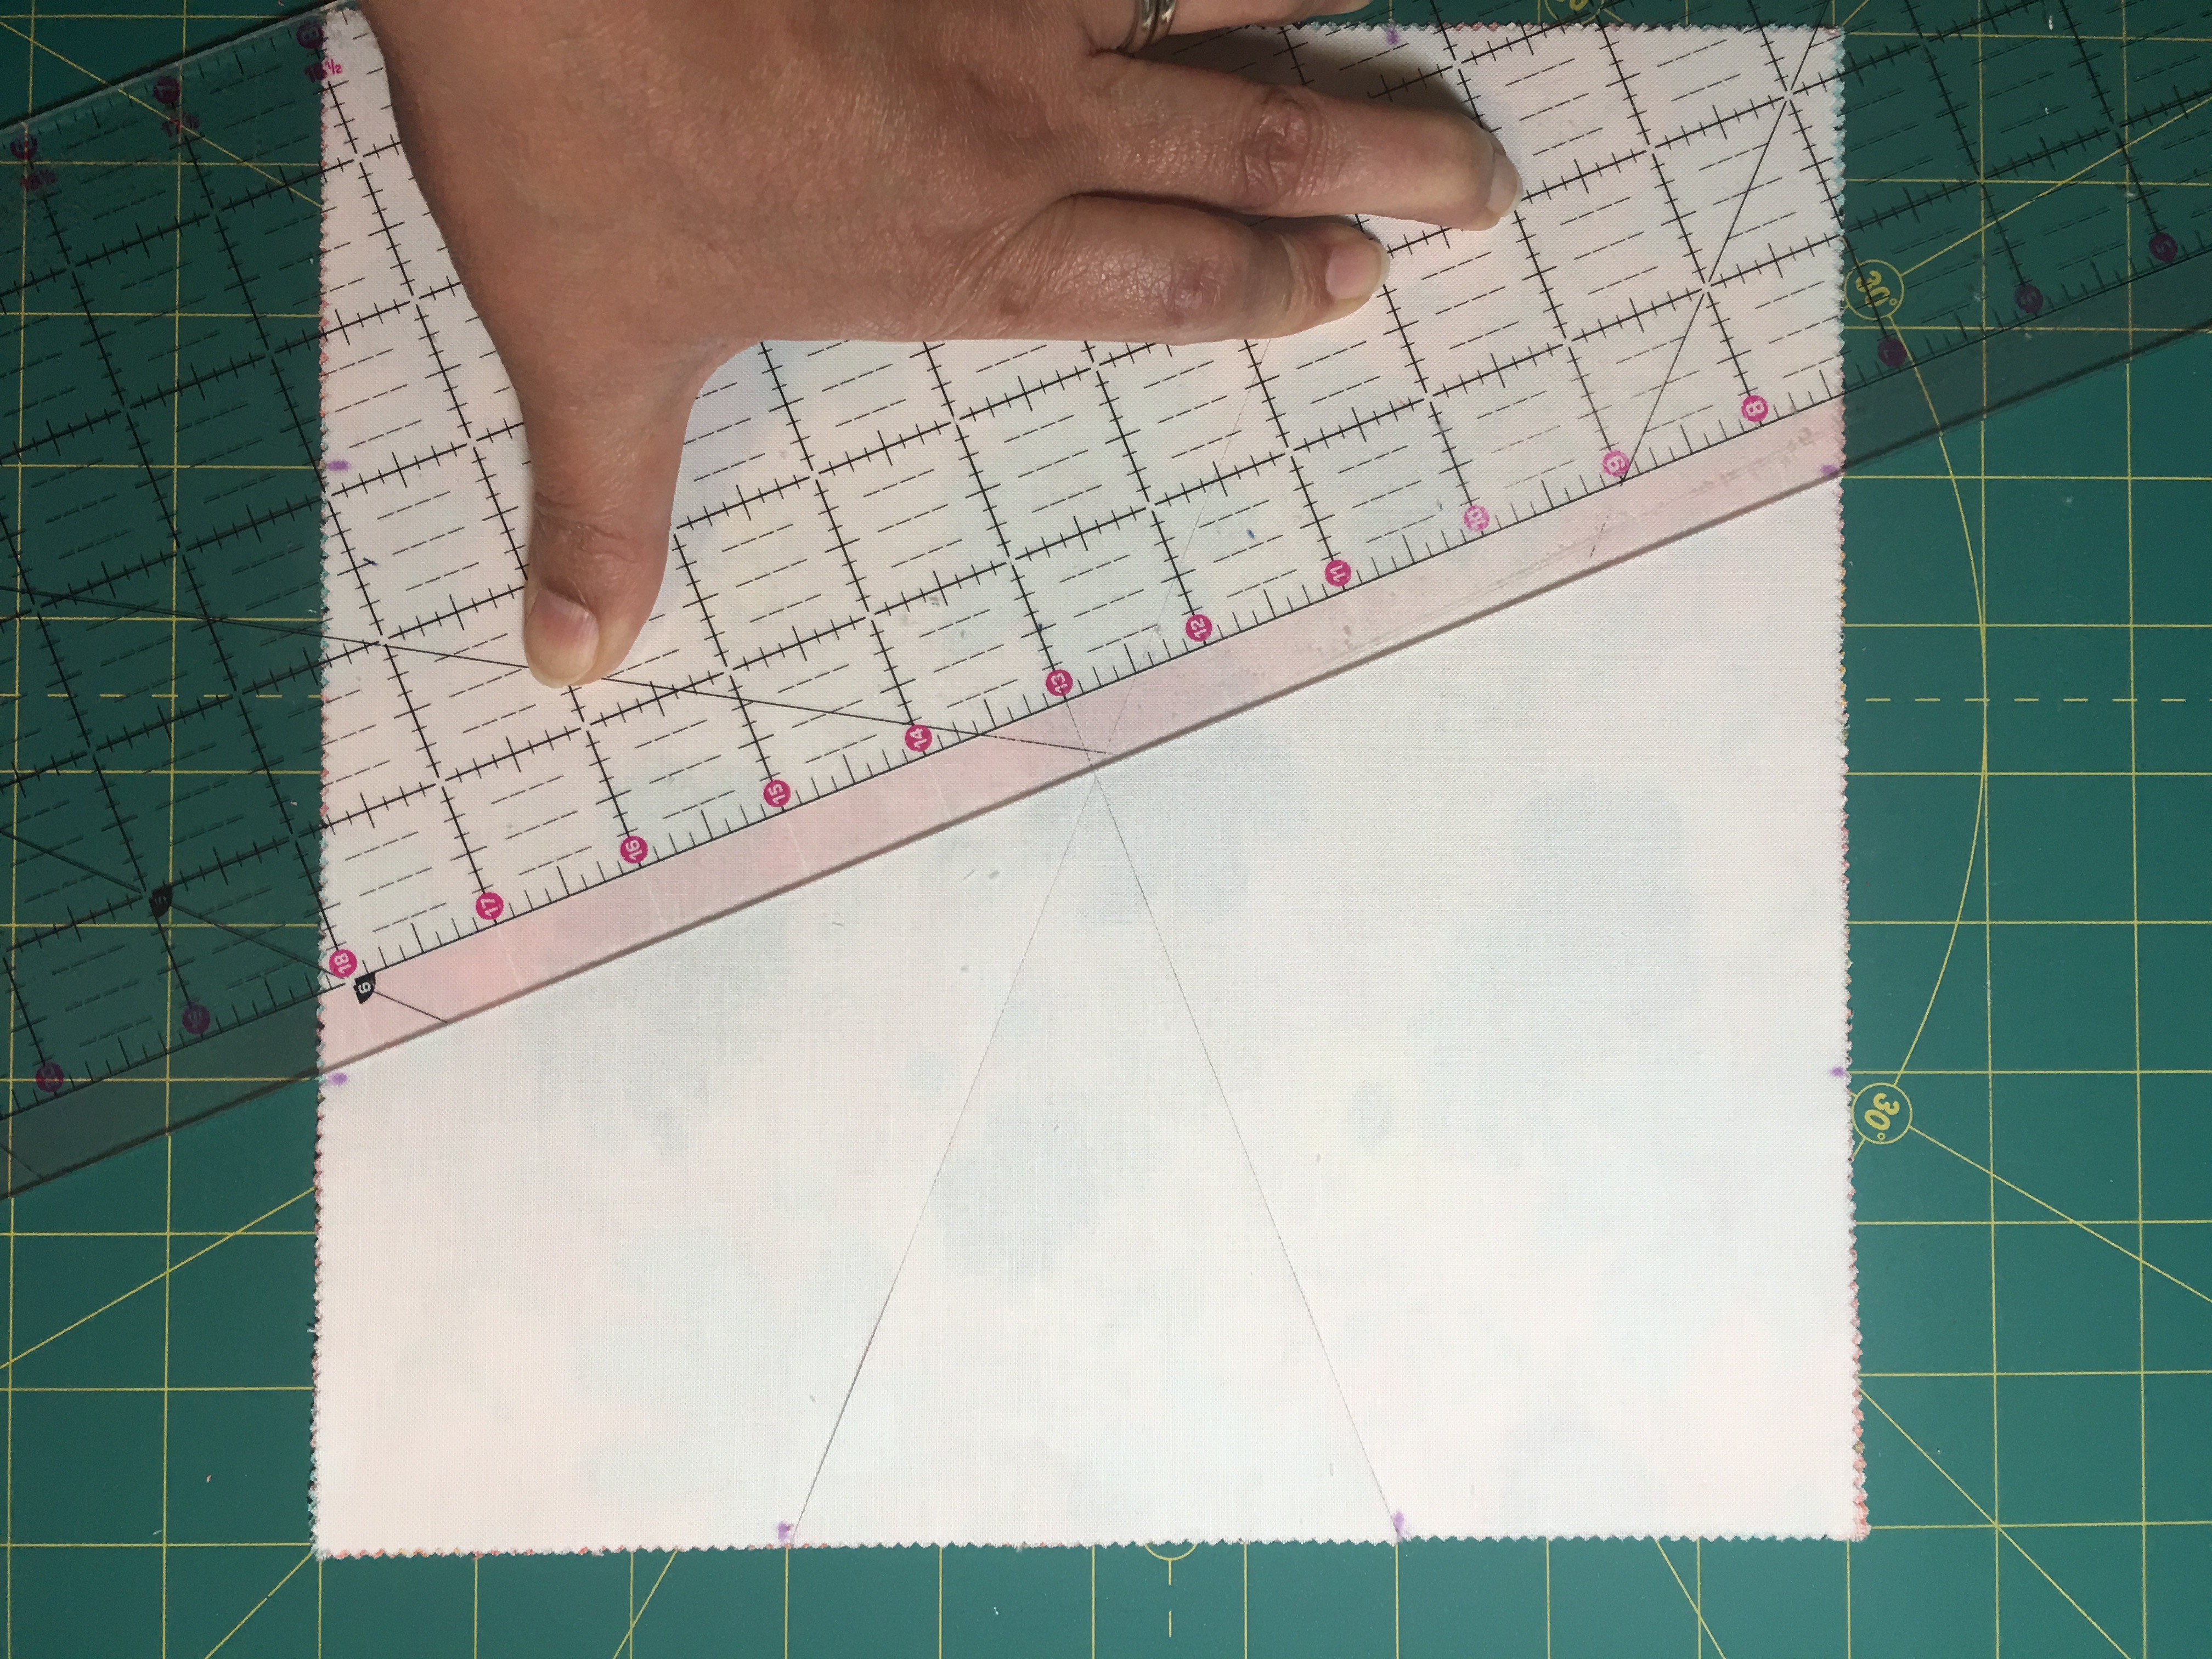
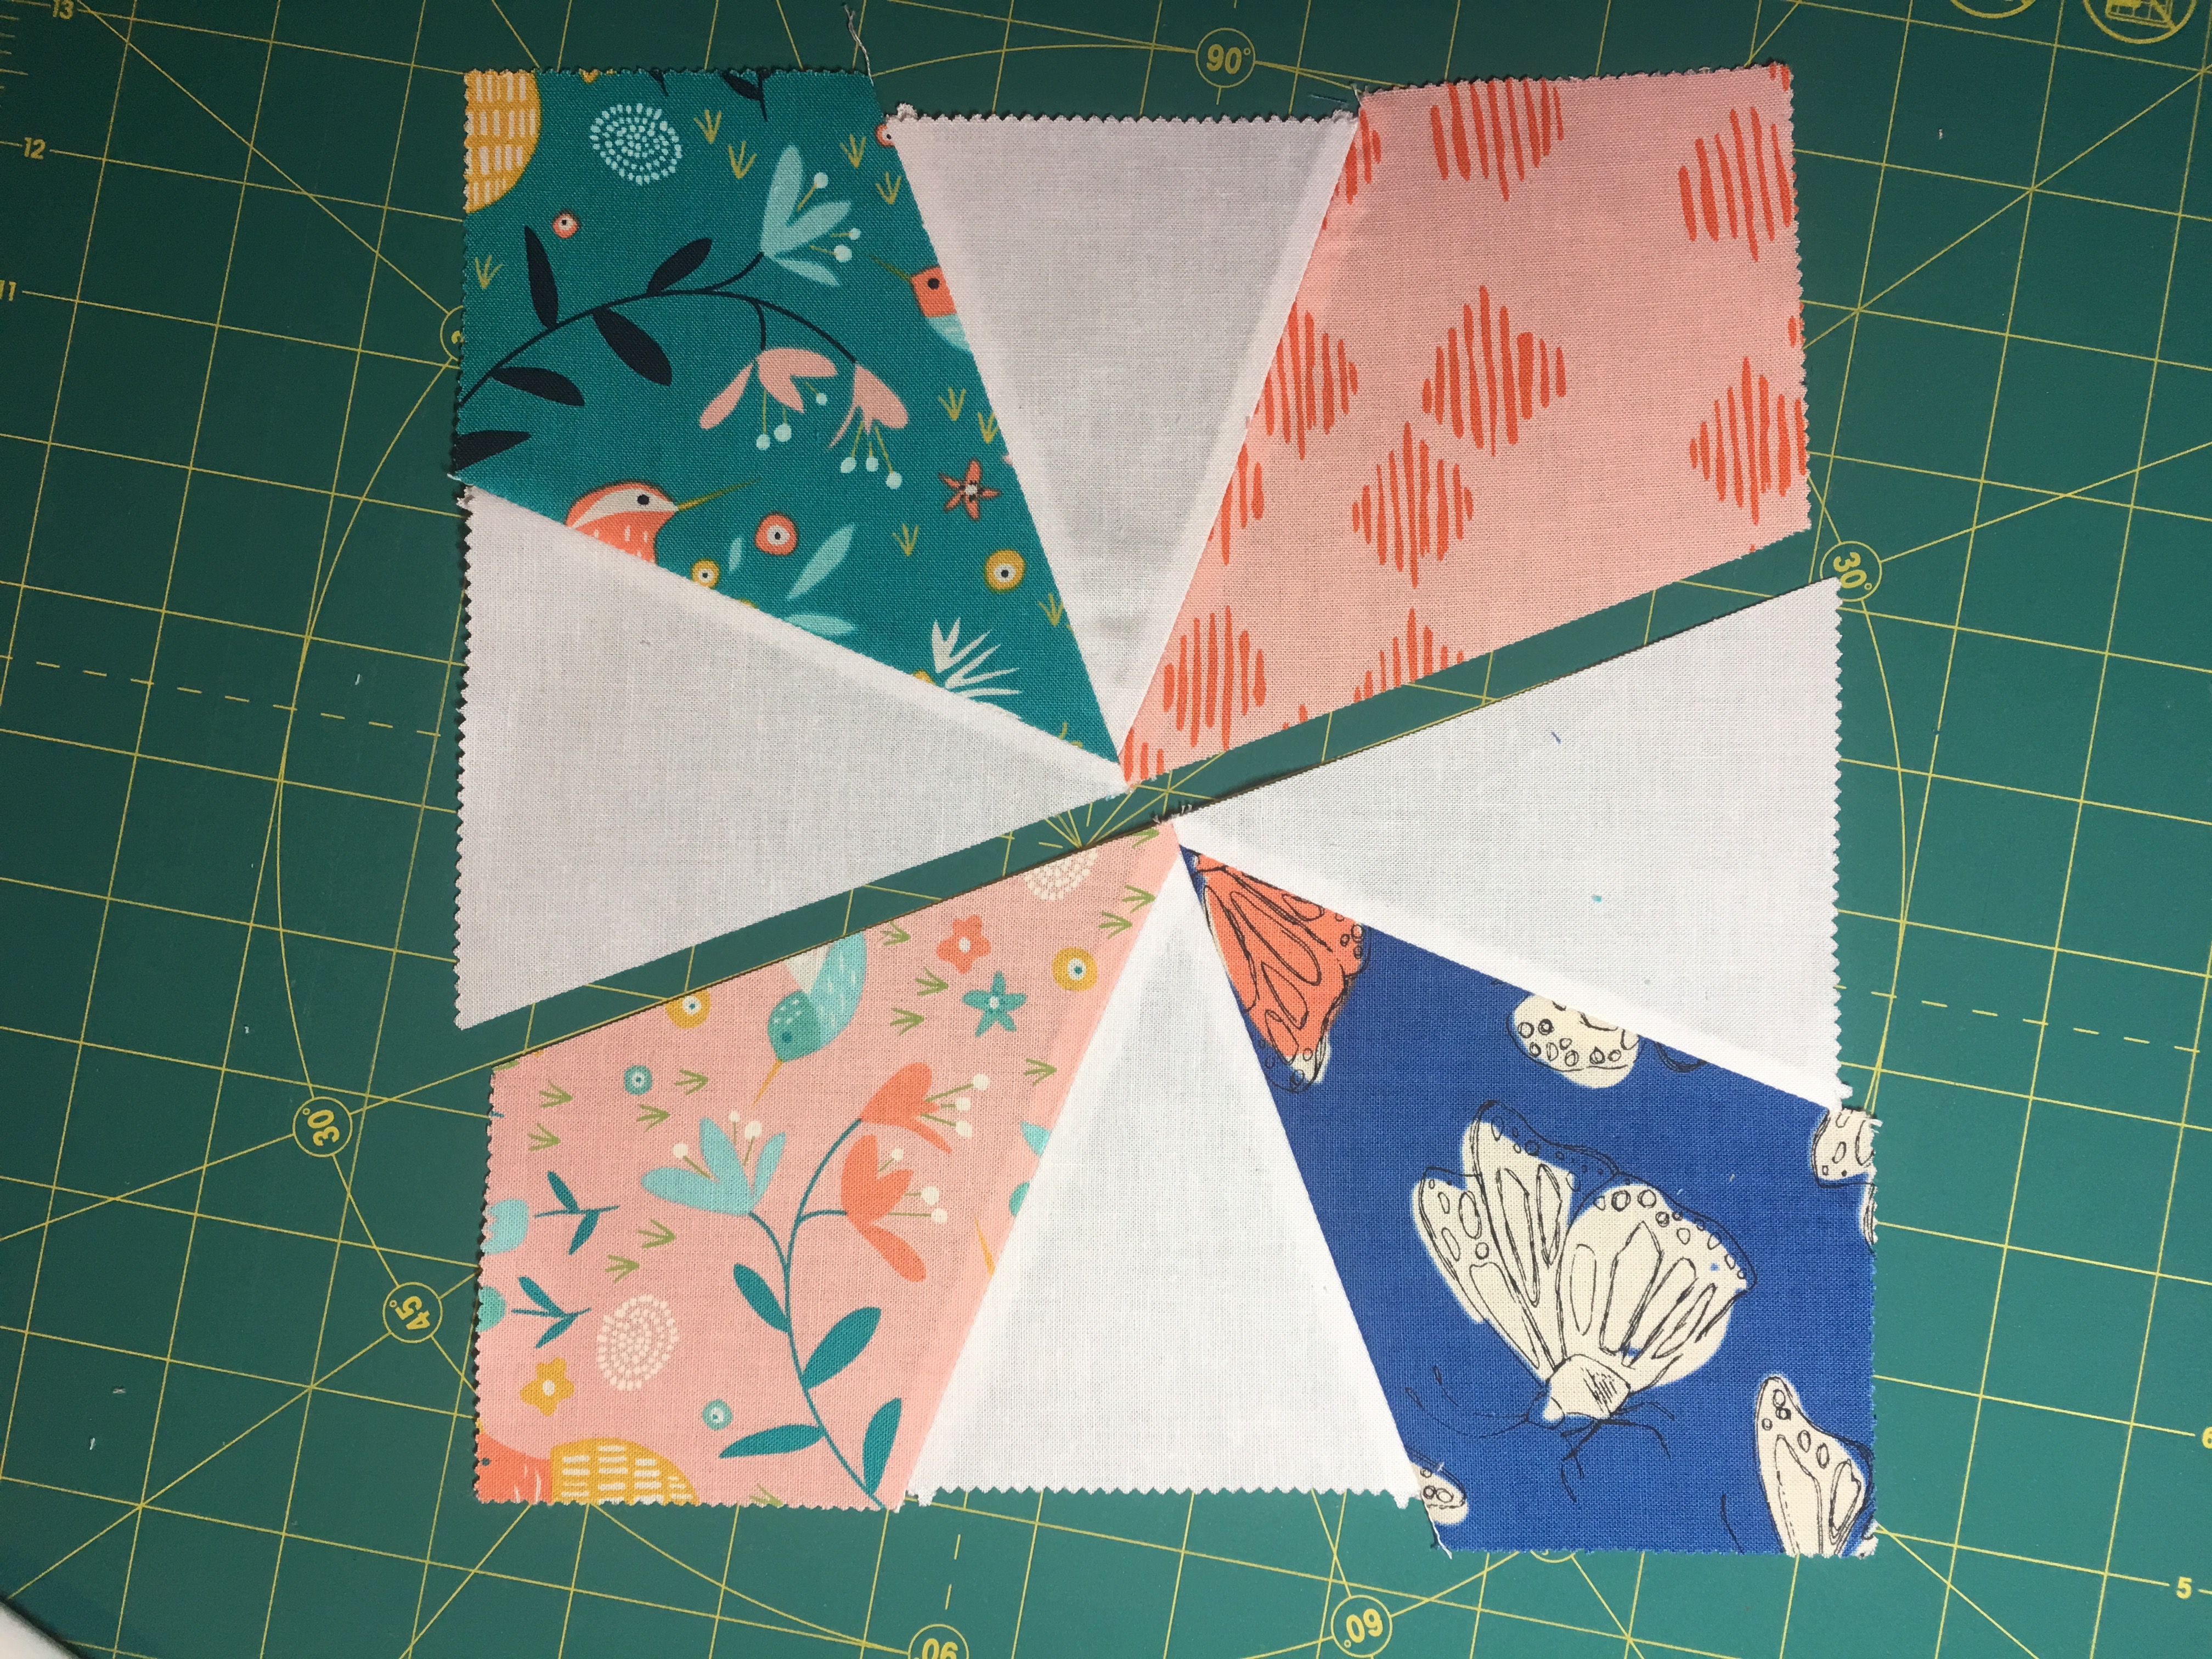
1 - Layer two squares of background fabric over two squares of focus fabric, carefully aligning the edges, as shown.
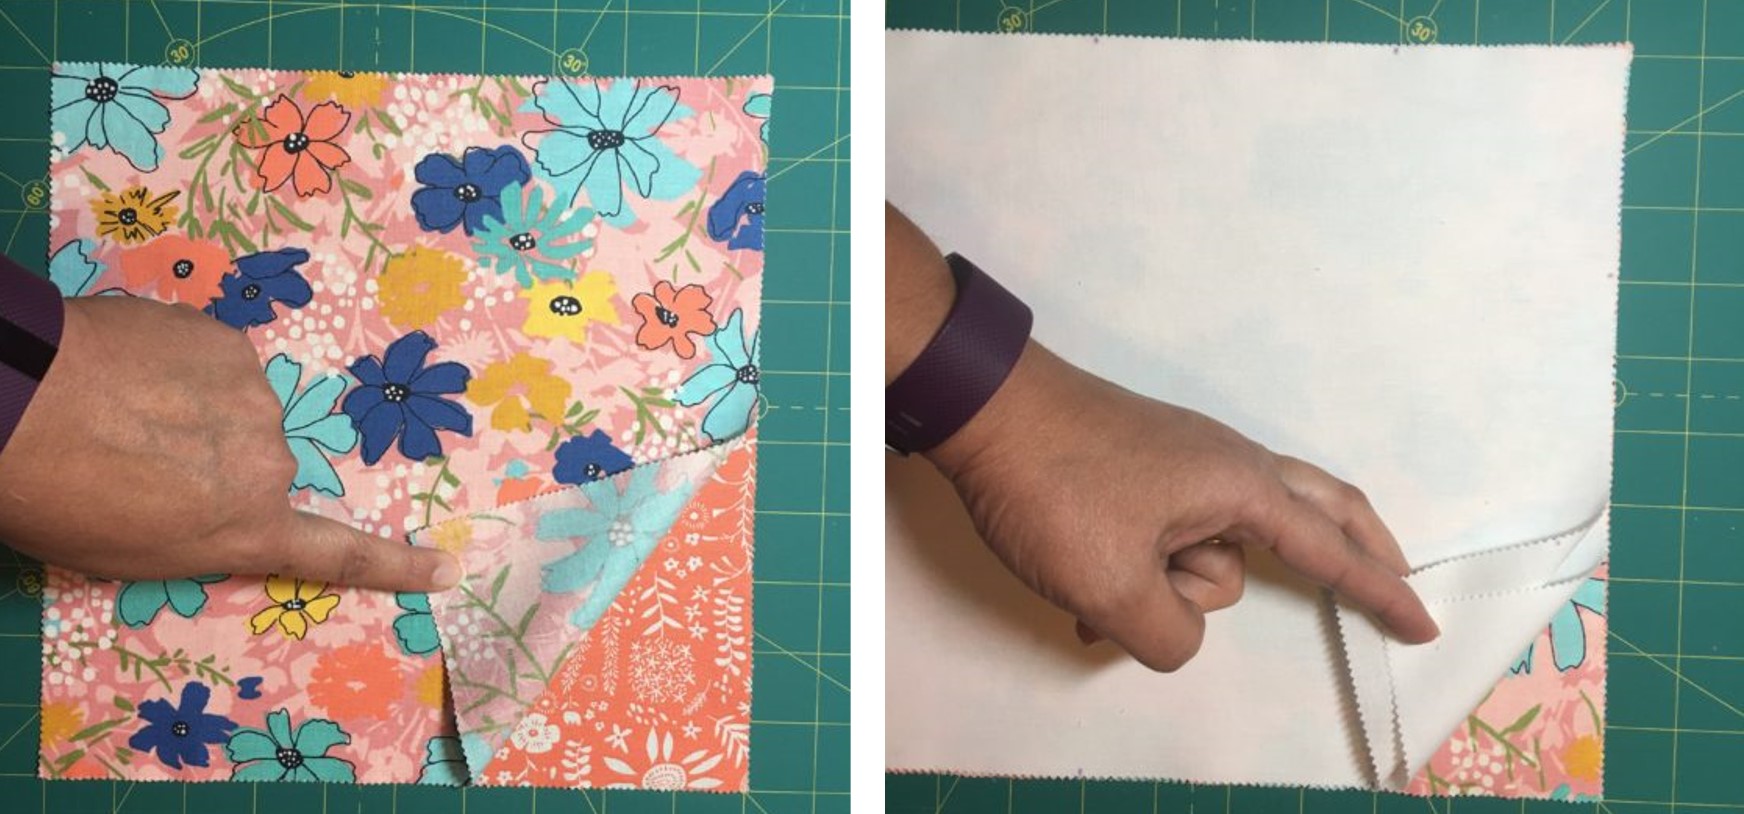
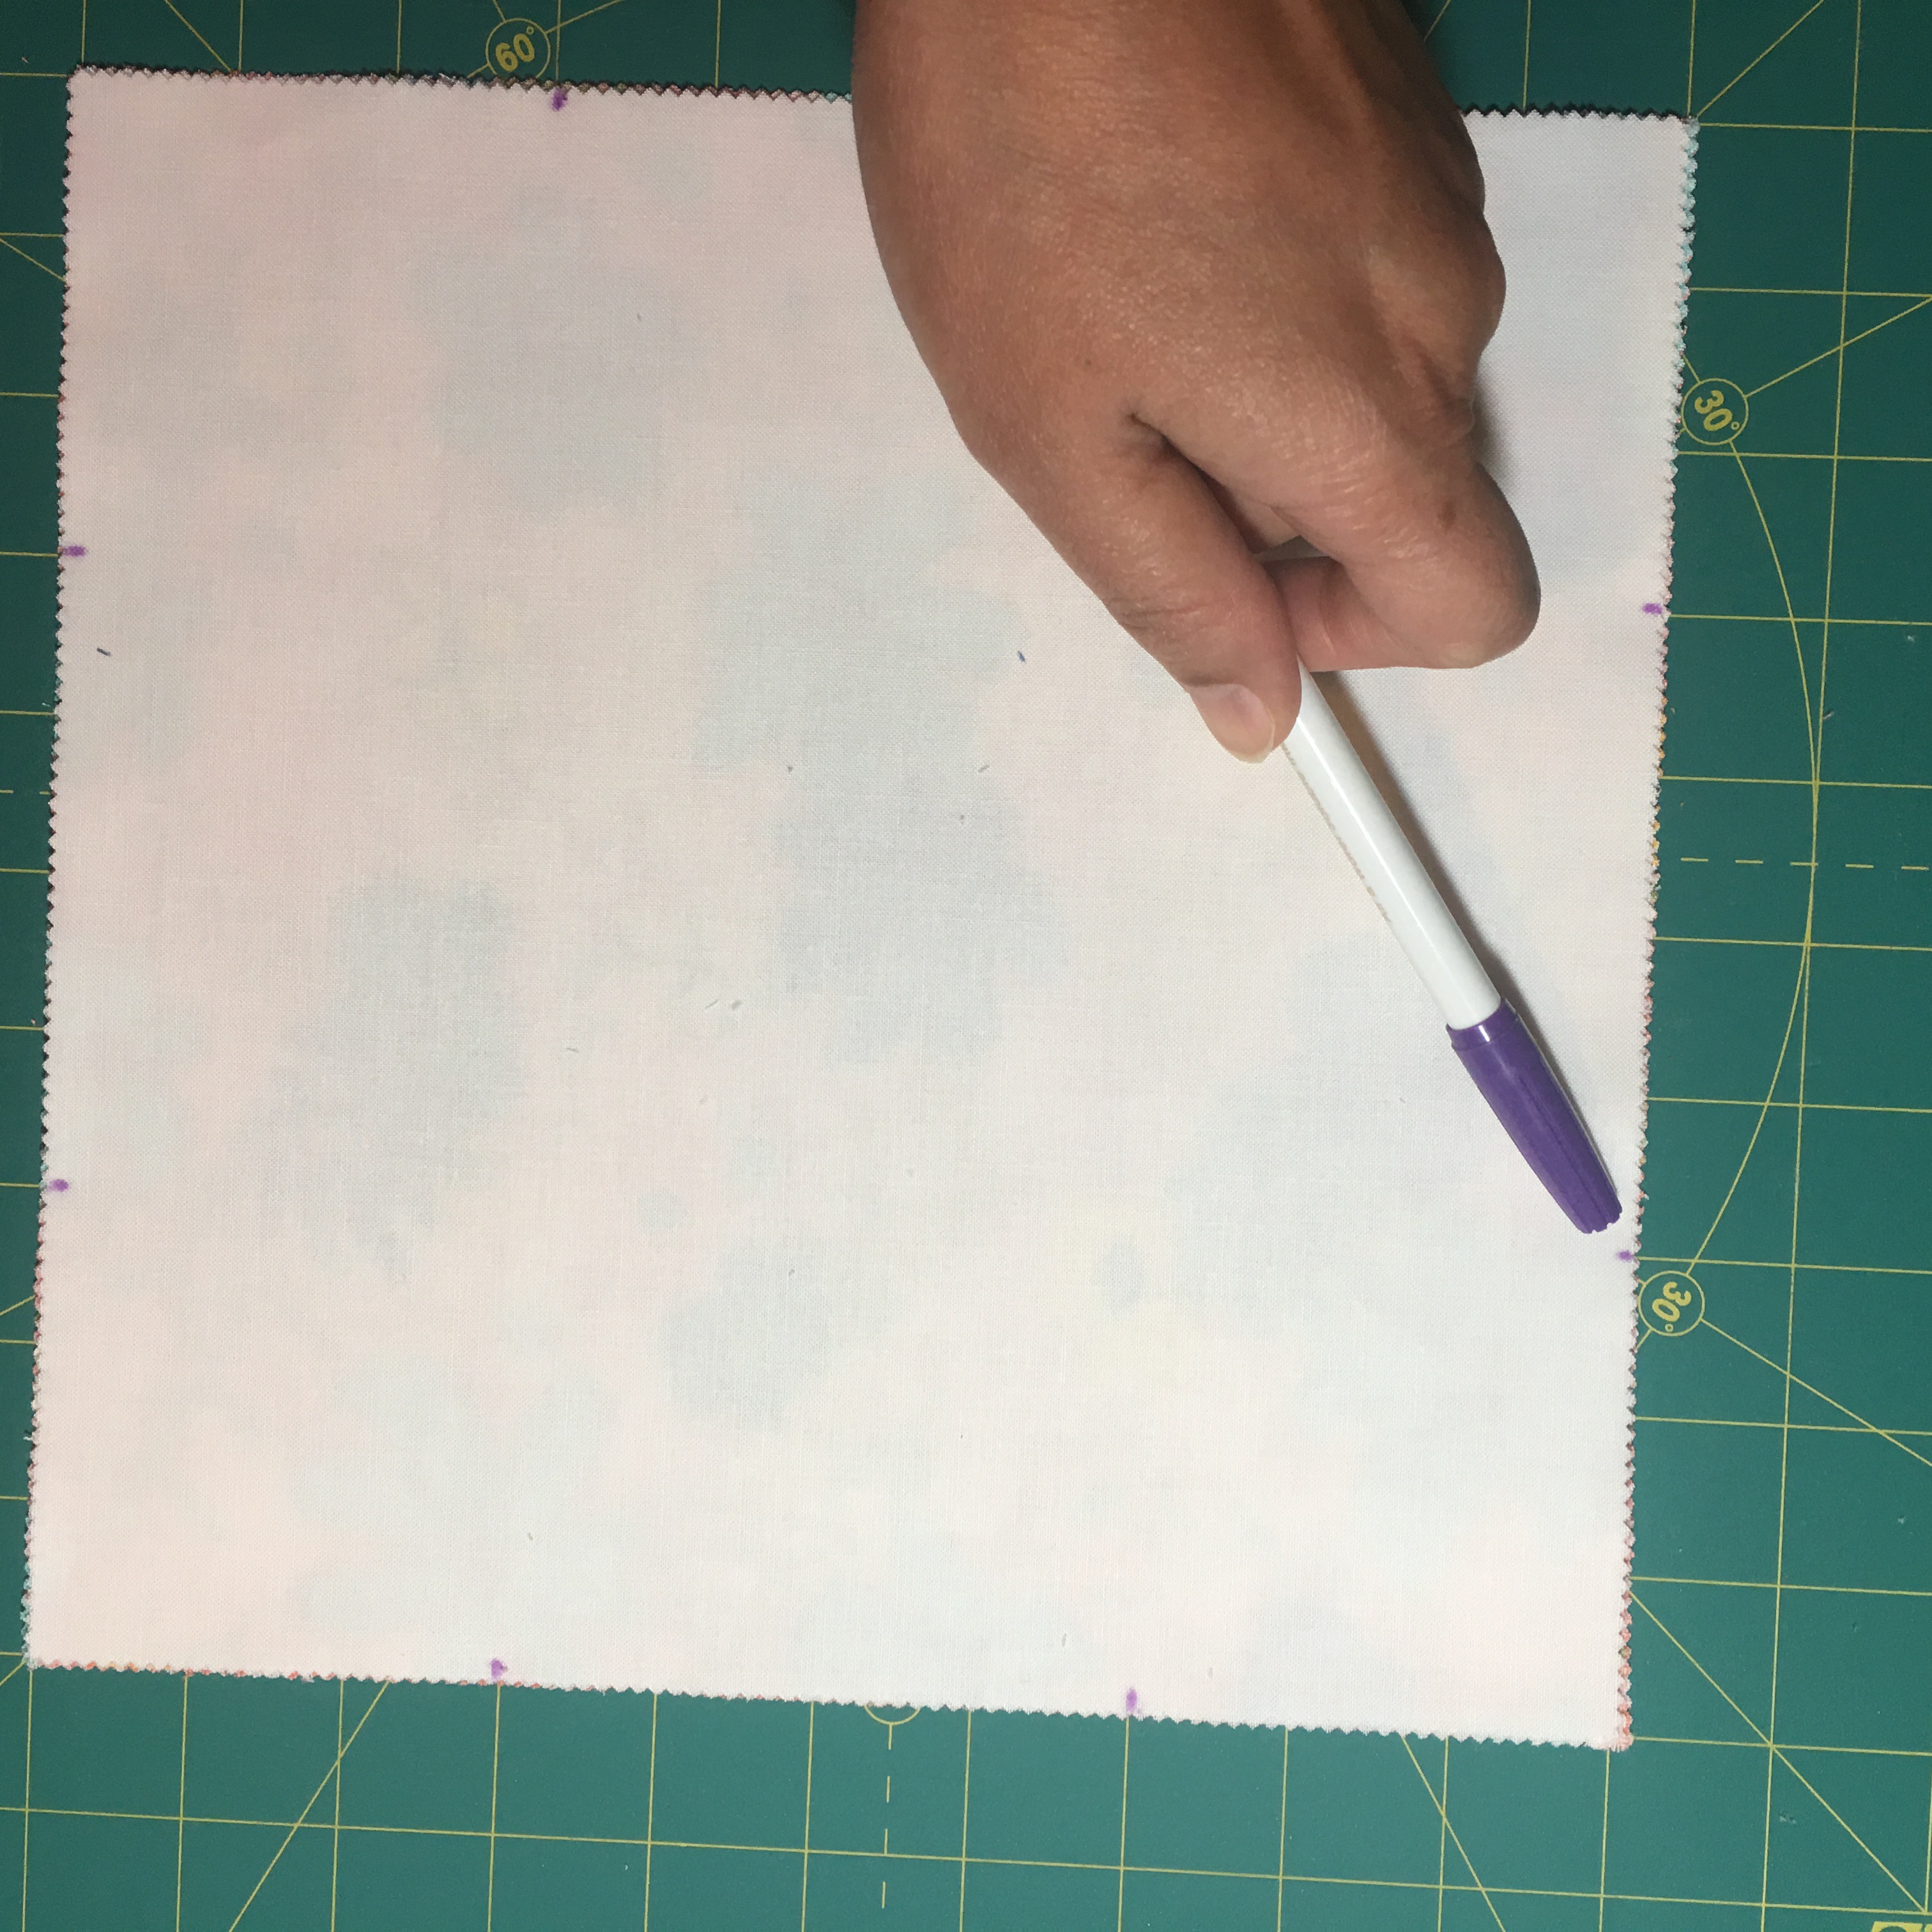
2 - Mark a point 3" from each corner, using a chalk marker/disappearing ink (marks are visible on the left and right edges of the Layer Cake square shown below)

3 - Cut from point to point, as shown. Each cut will go through the center of the squares.

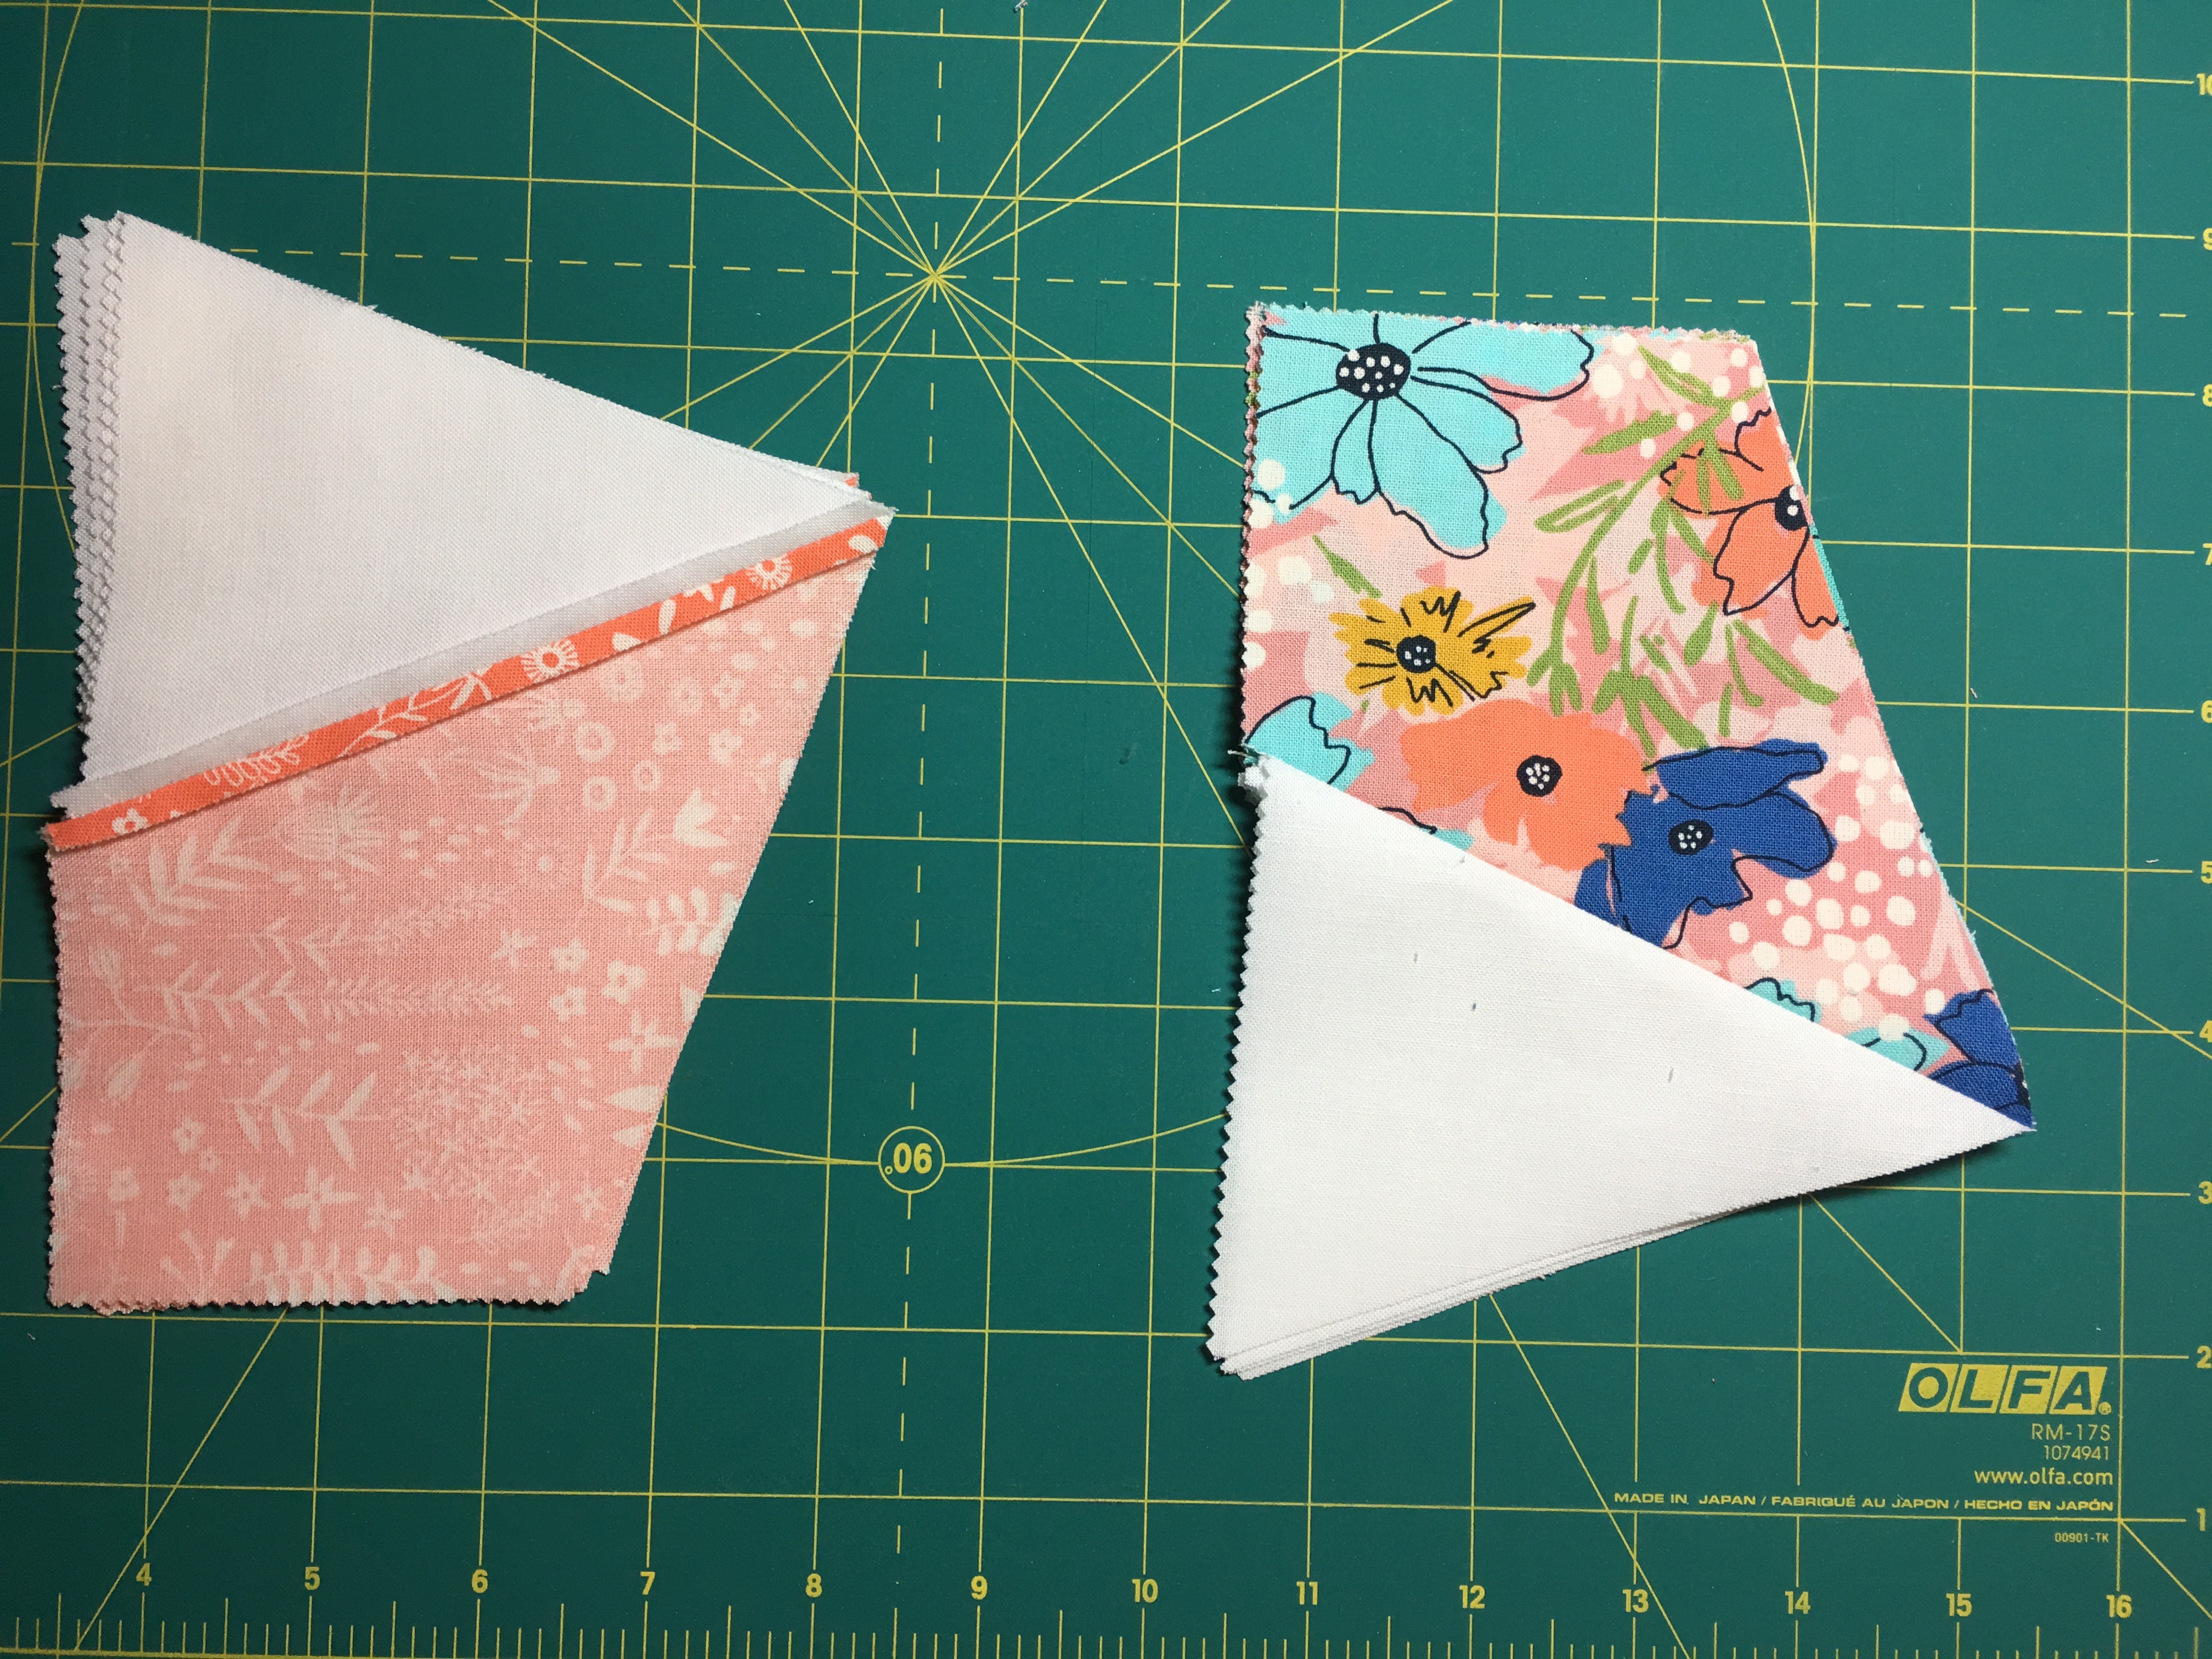
4 - We will have two types of units - a triangle unit and a prism unit. Move the focus fabric triangles from the bottom to the top, as shown.

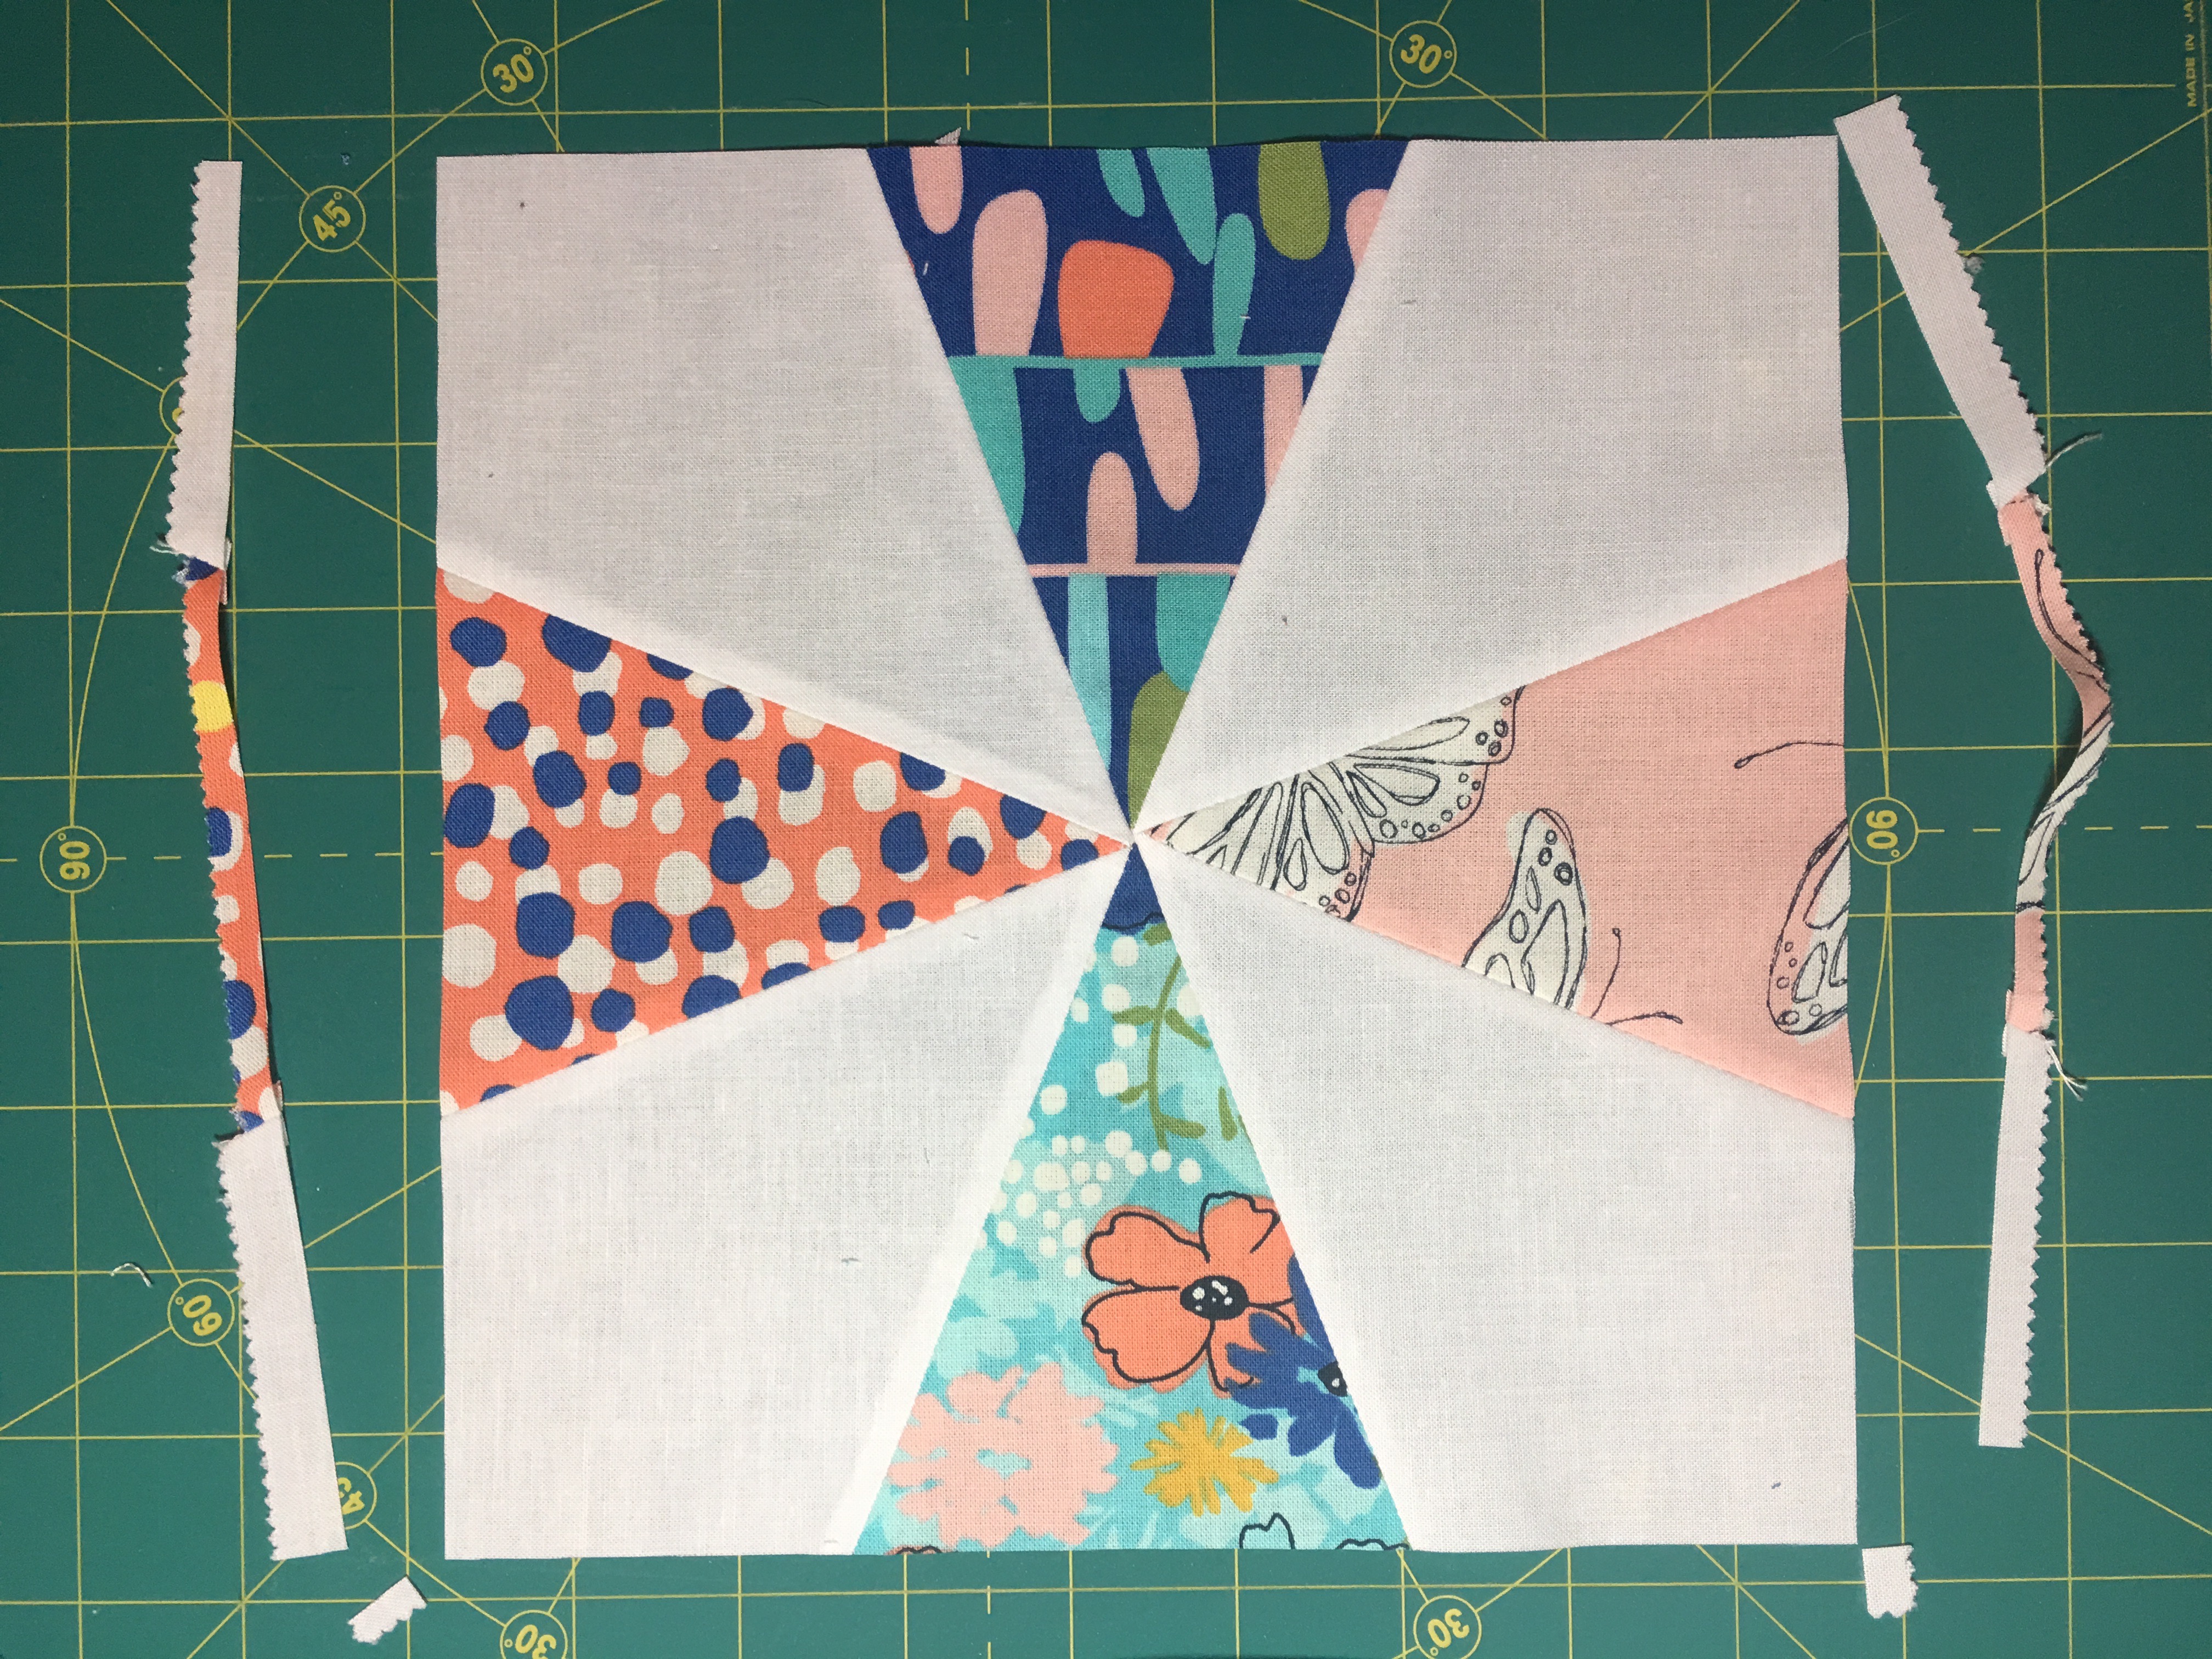
5 - Match each triangle unit with a contrasting prism unit. Place the triangle unit over the prism unit, carefully aligning the right edge and pin. Repeat for all 16 sets. Take to the machine and sew using a scant 1/4" seam. Chain piece.

6 - Press seams open. This is very important.
7 - Square the corner to 90 degrees, as shown. This is very helpful if we want matching points (which we do!)
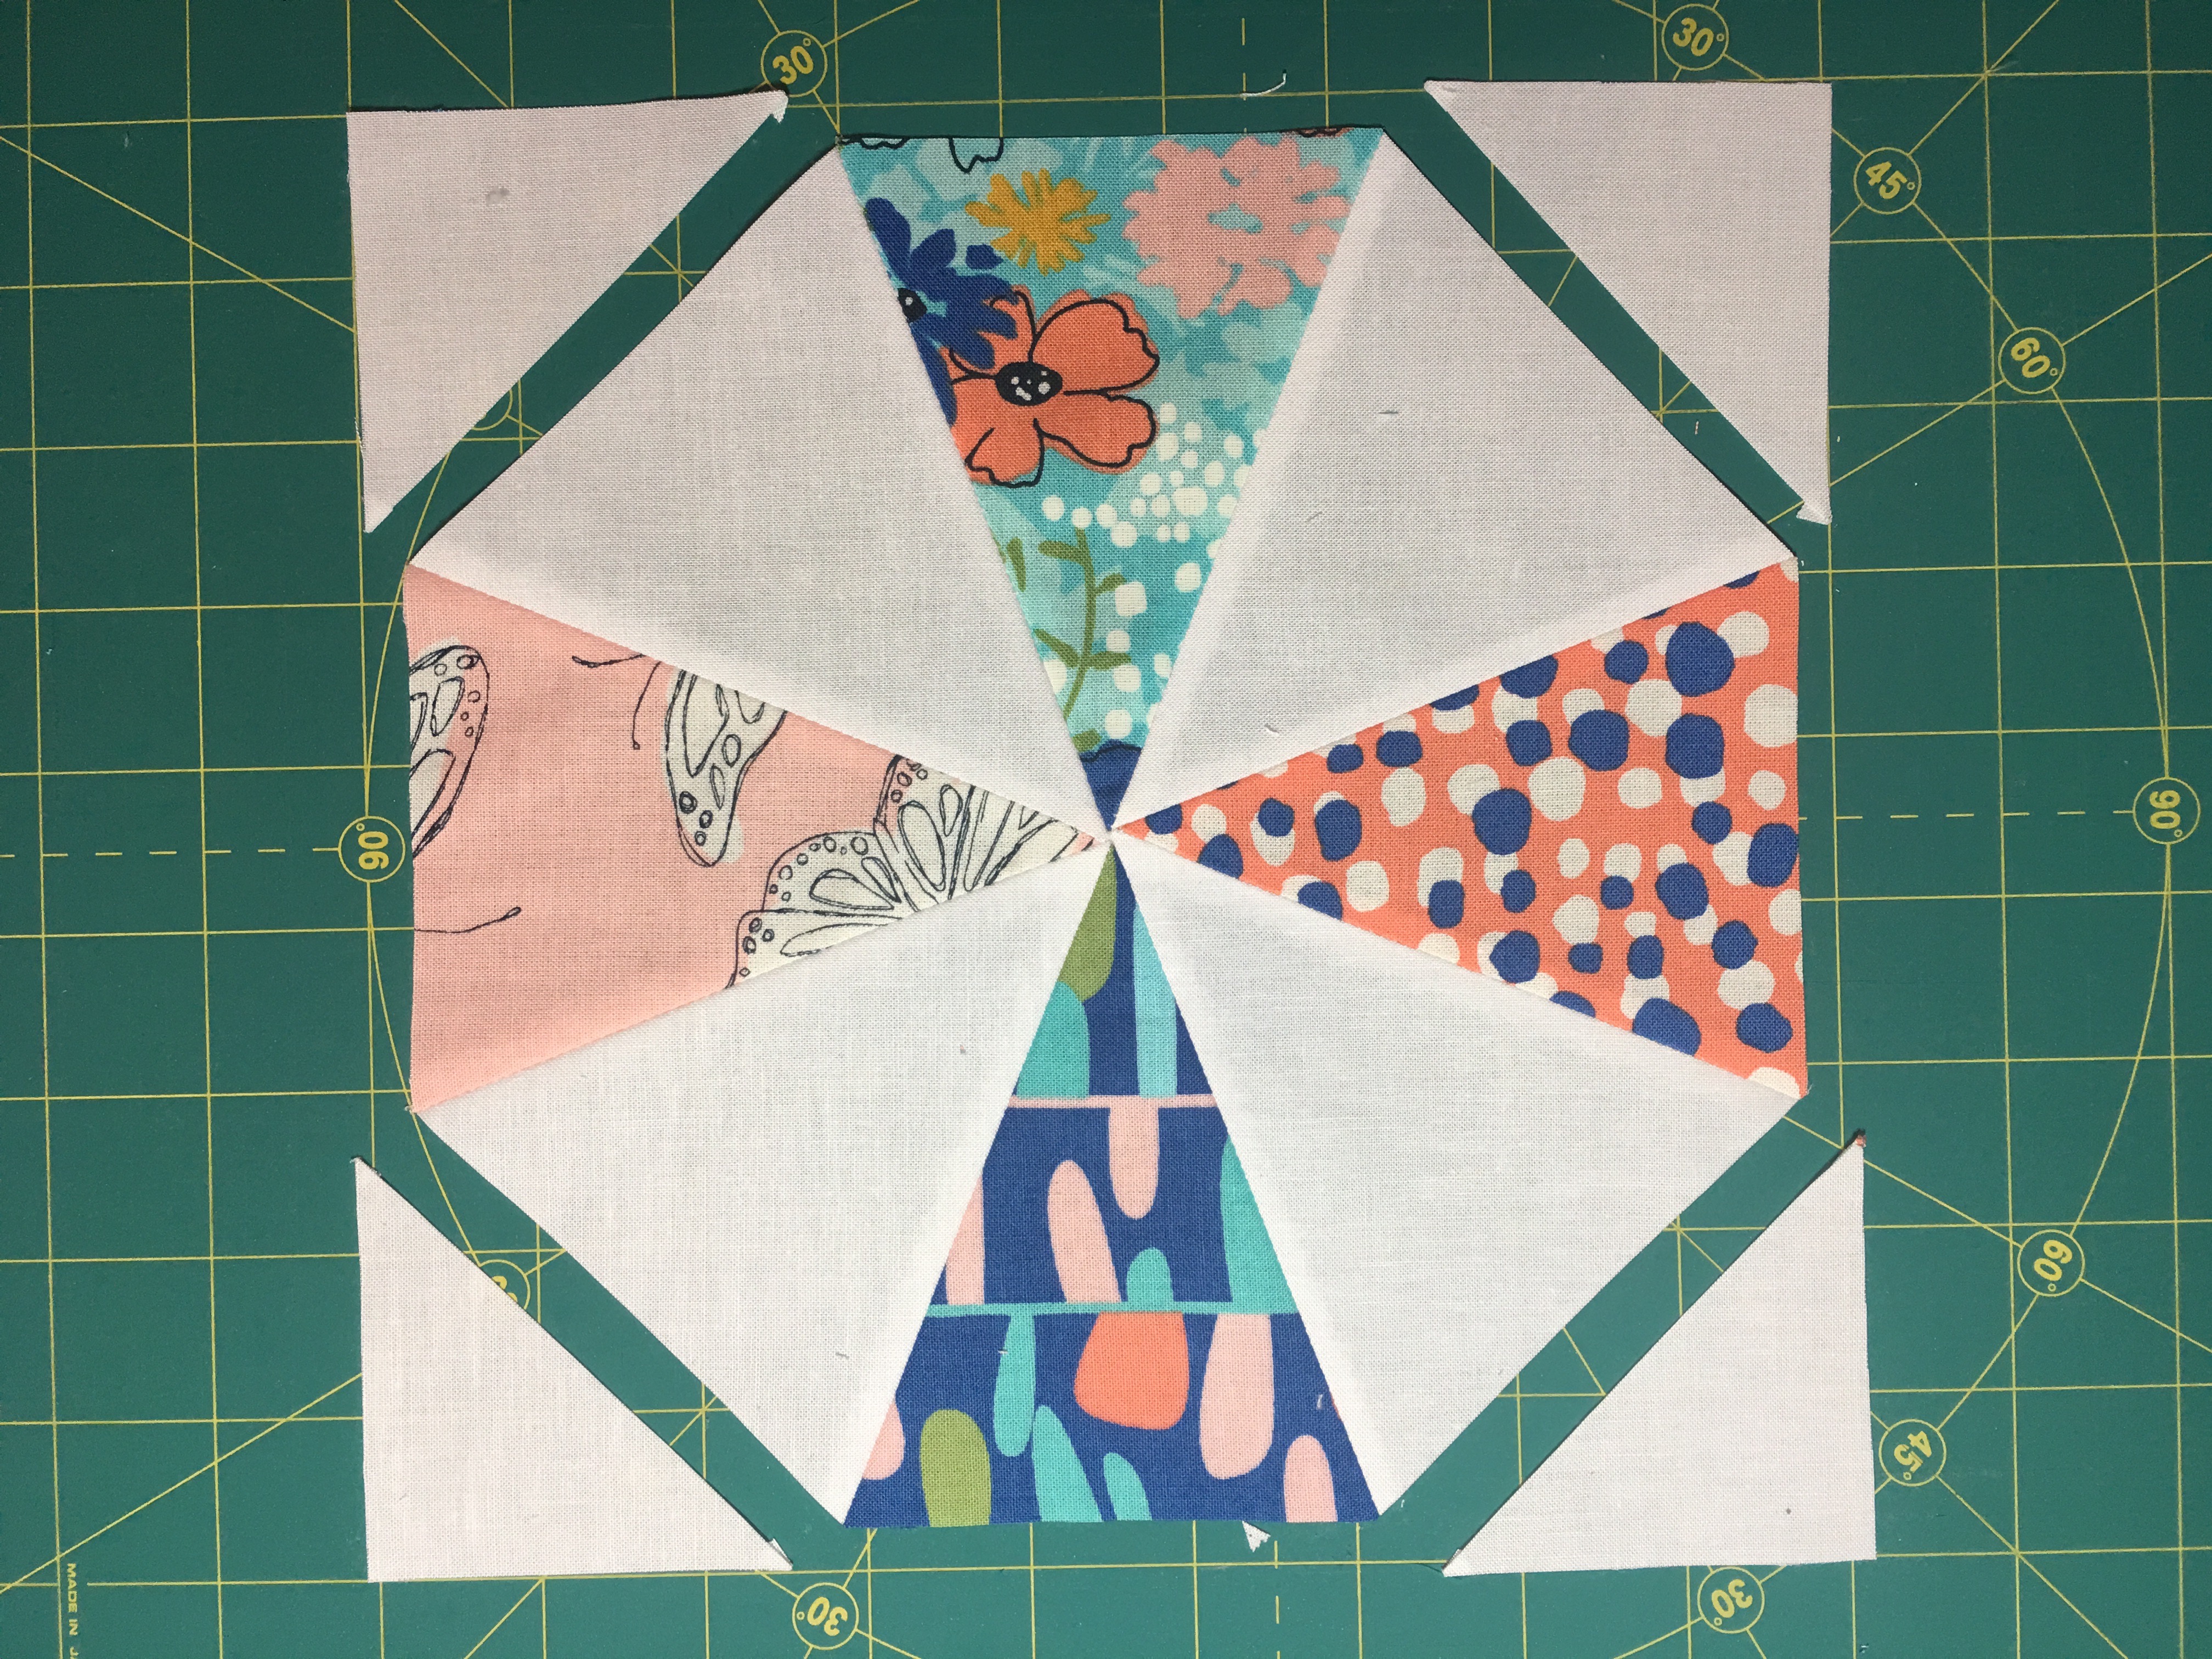
8 - Repeat this process (Steps 1 through 6) for 50 background + 50 focus fabrics squares. We will have 200 units that have background prism (with focus fabric triangles). Set these aside. We will use them to make Block B. Later.
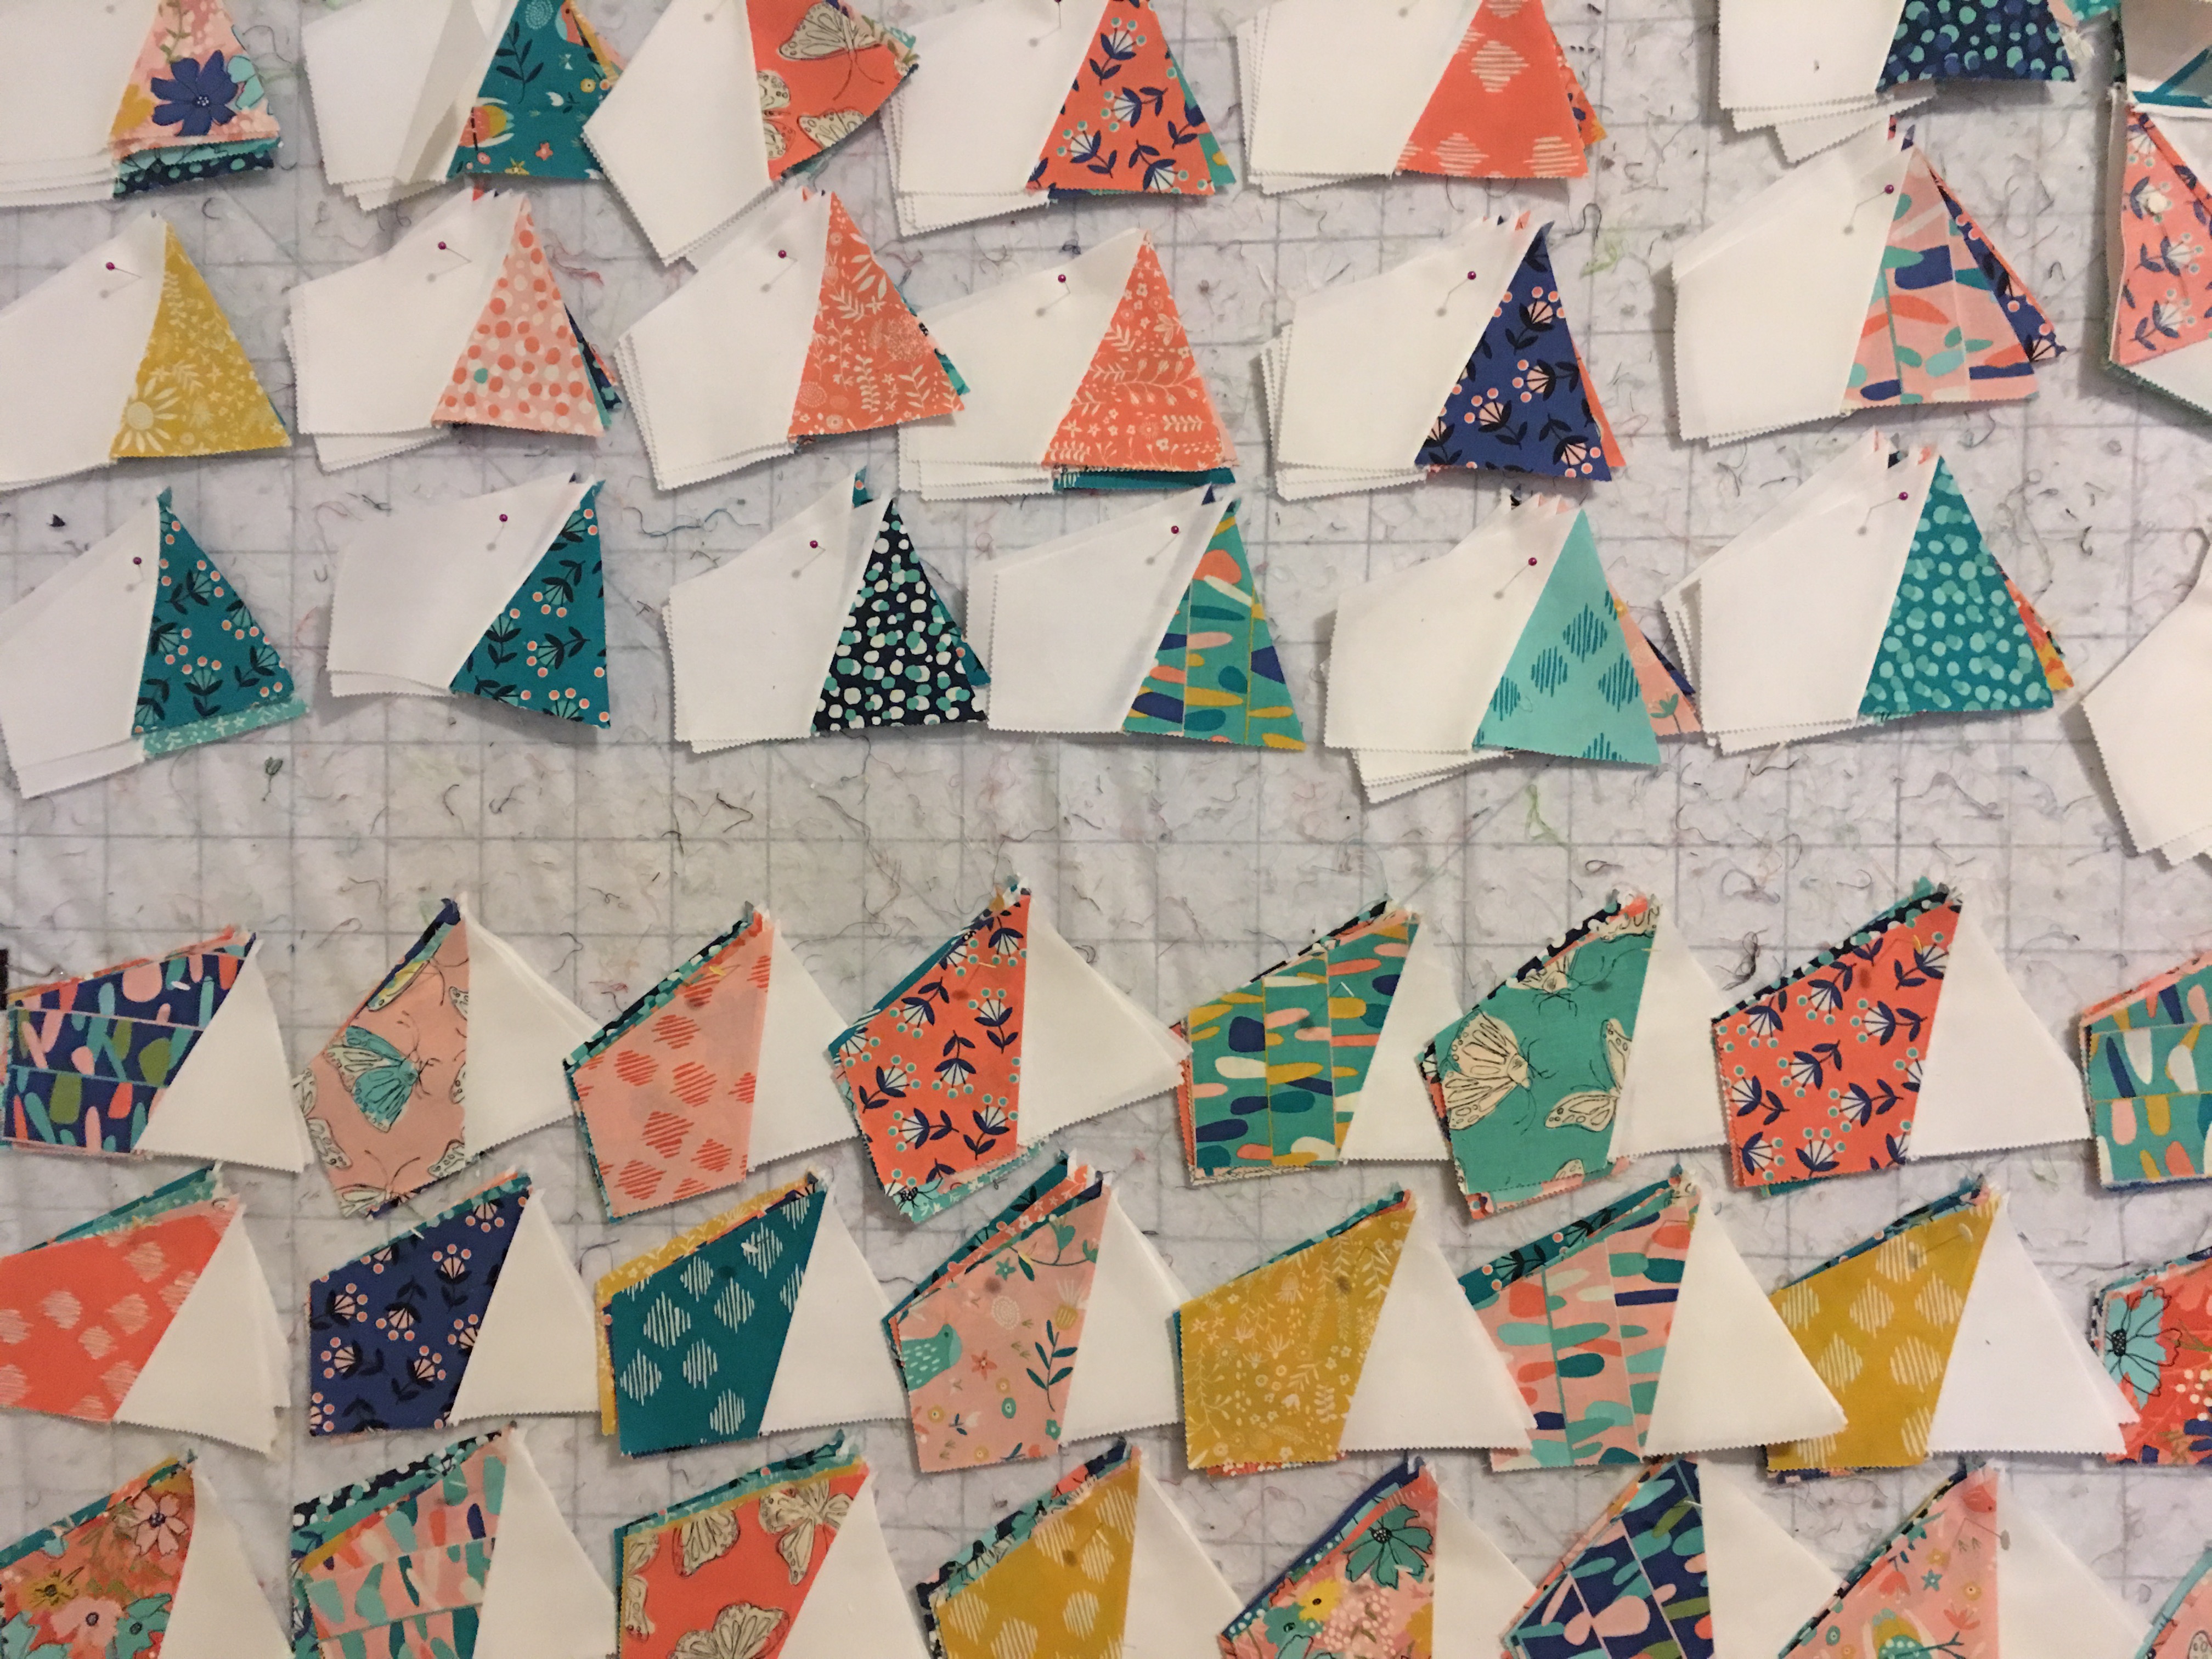
{shown above: Block B units - top 3 rows. Block A units - lower 3 rows}
We will also have 200 units with focus fabric prism (with background triangles). We will use these to make Block A.
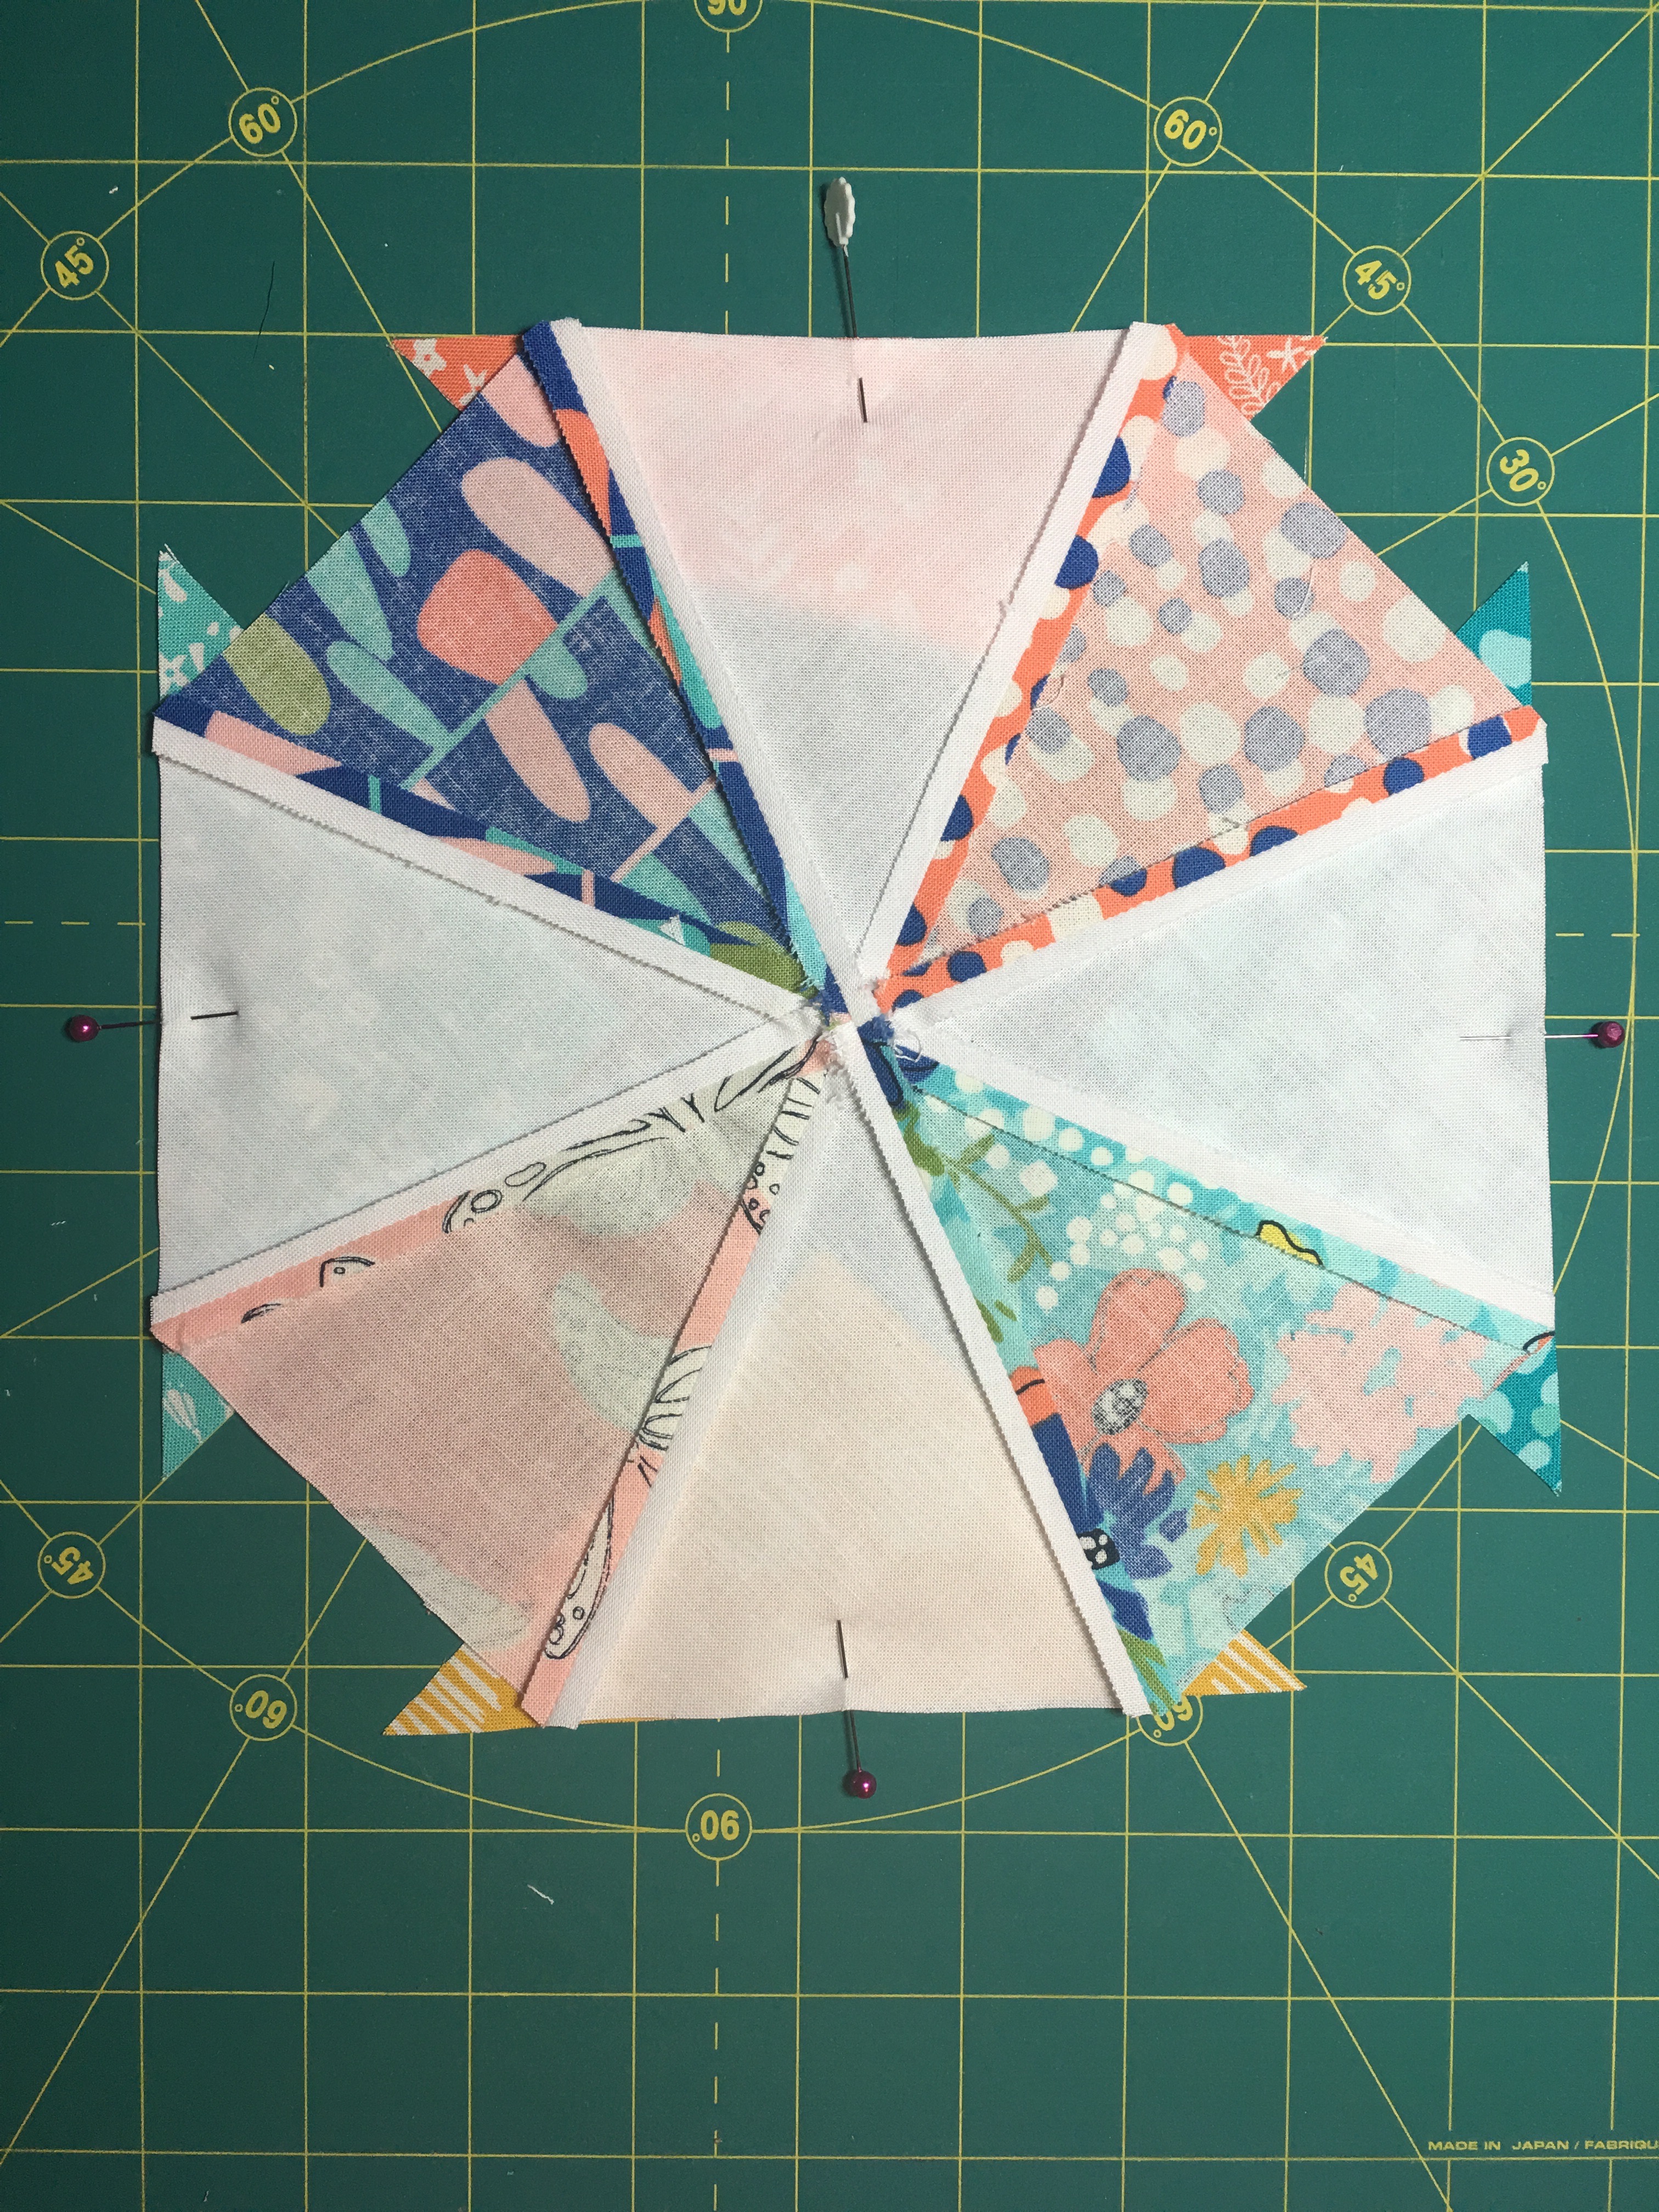
9 - Block A Construction - Pick four units and sew them in twos, carefully matching the points, as shown.

10 - Press seams open. Trim to make the edge straight. Match points, as shown and pin in place.
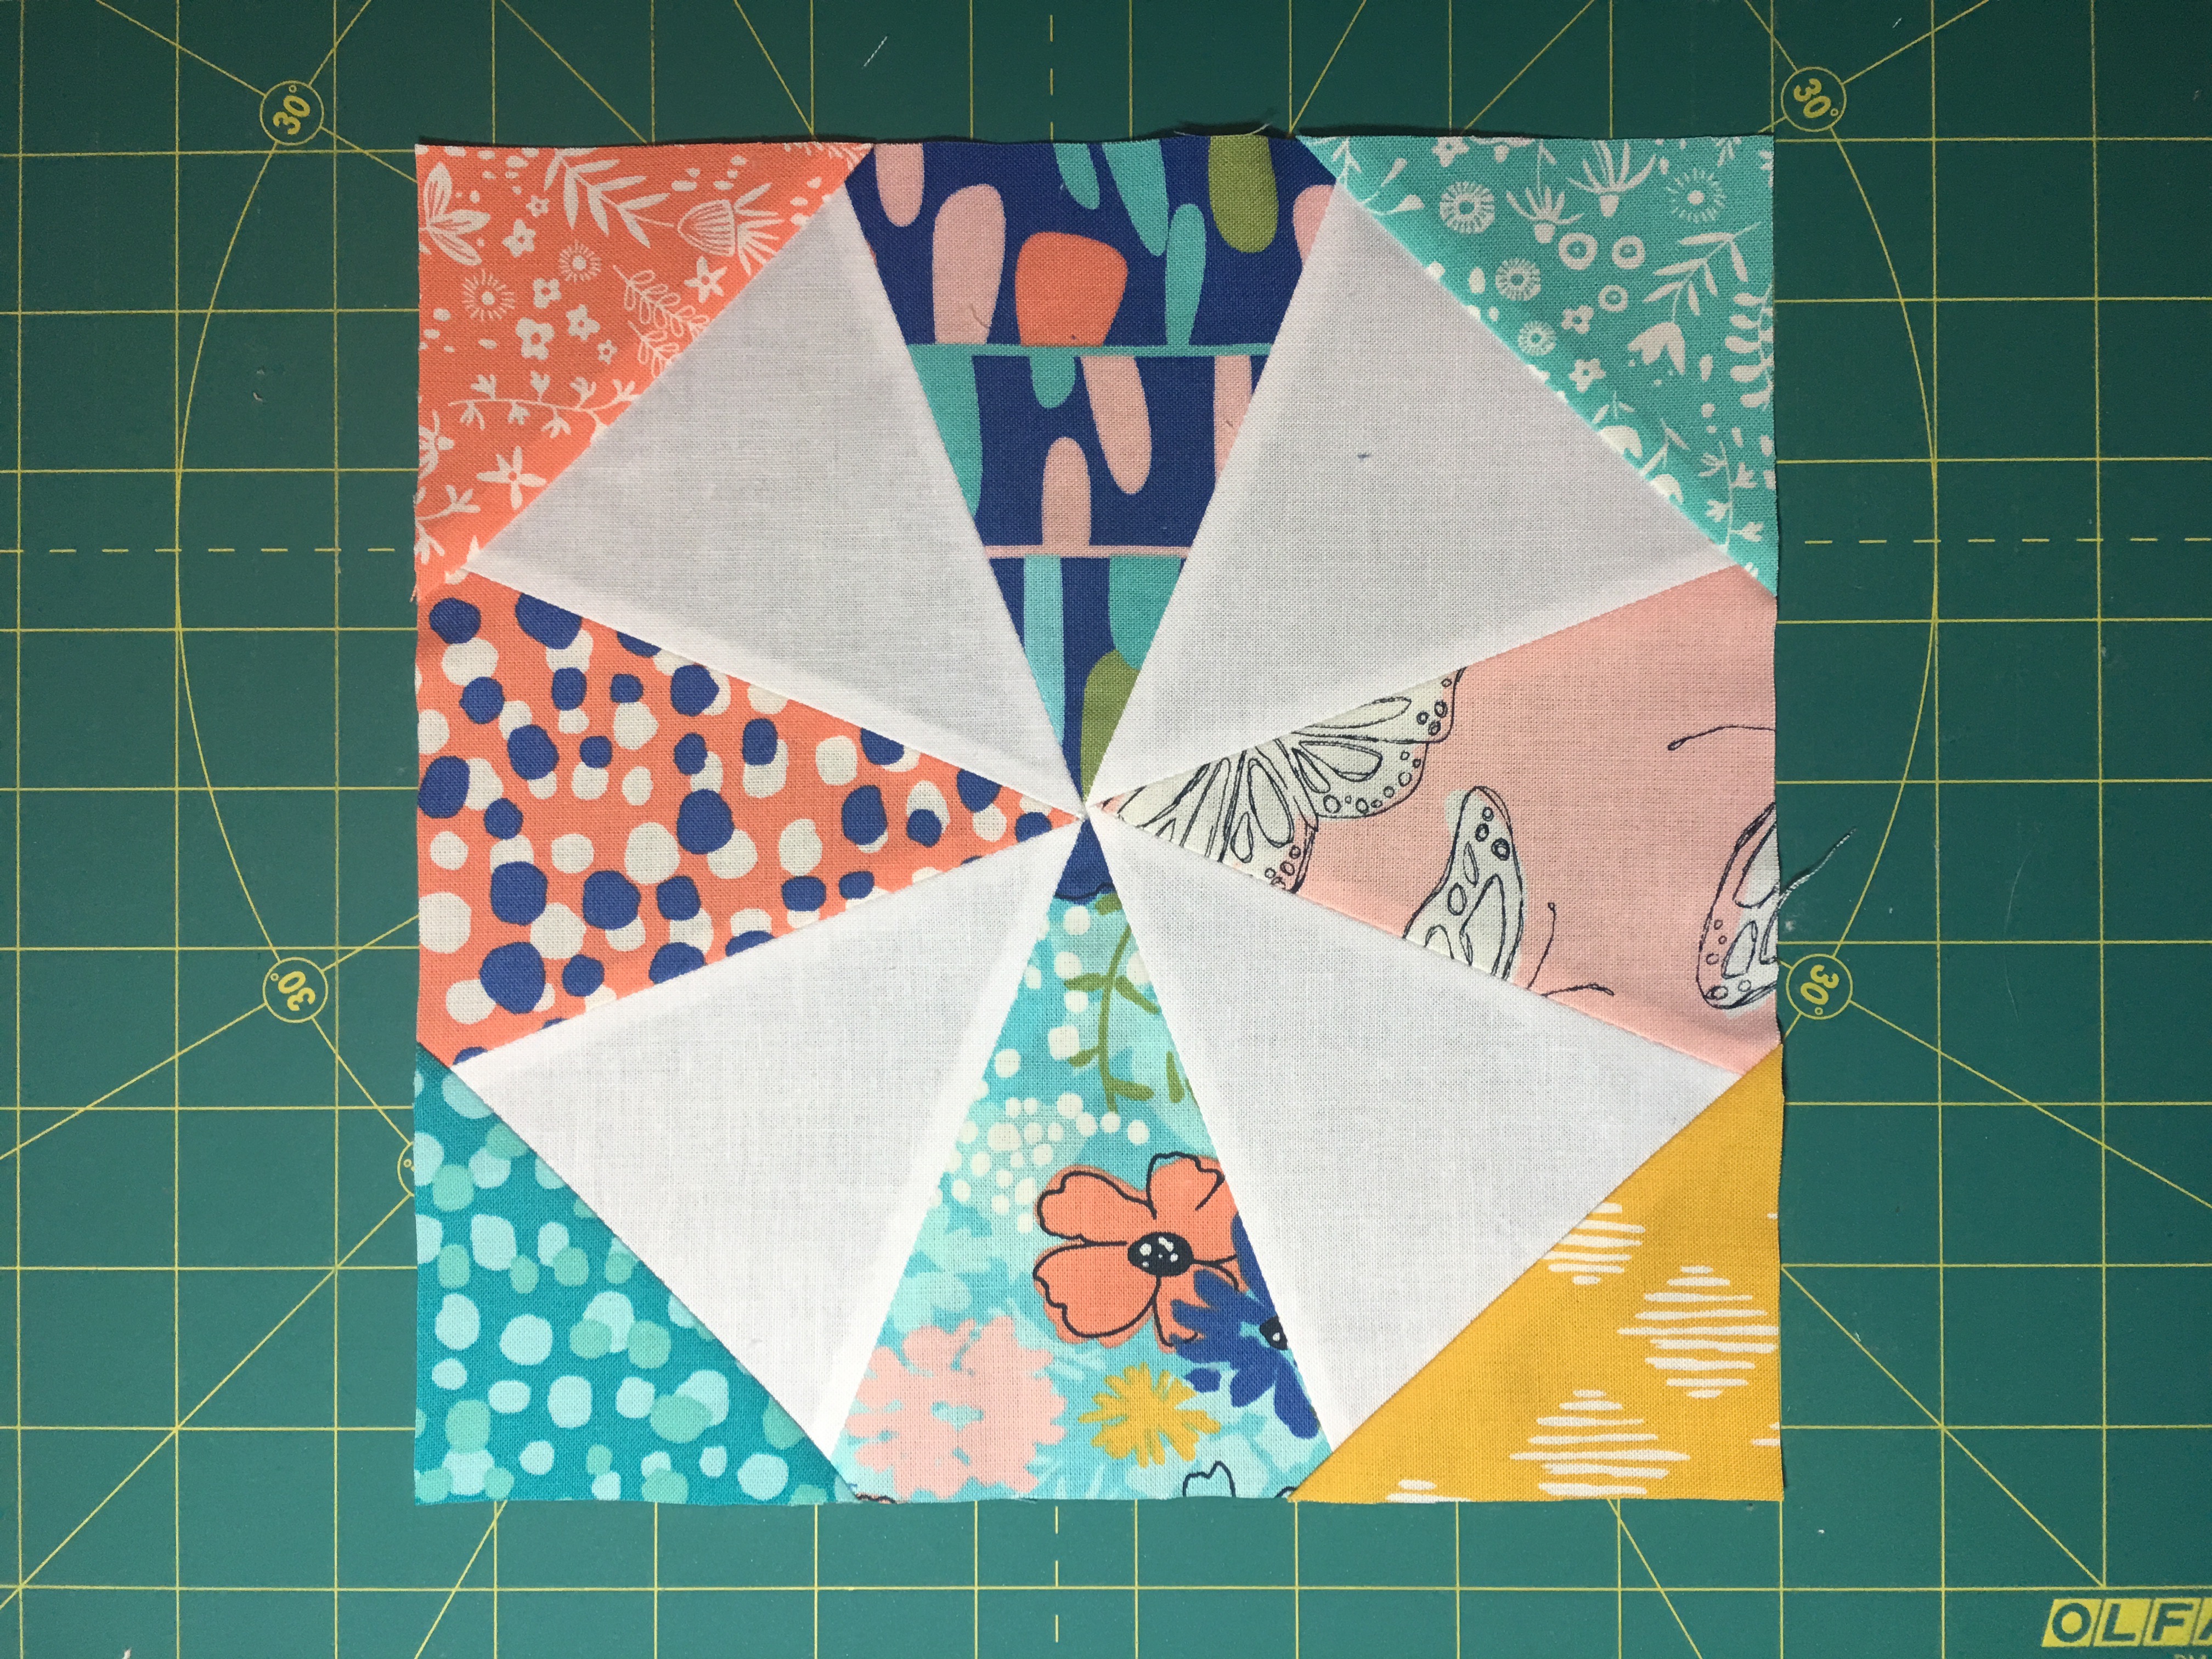
11 - Sew and press seams open. Square to 8.5". Admire your first block.
12 - Repeat to make a total of 50 blocks. Set aside. Congratulate yourself. You have just completed half of the blocks for your queen-sized quilt.
13 - Block B Construction - Pick four units and sew them in twos, as we had done earlier for Block A. Sew the two halves together. Press seams open. Square to 8.5".
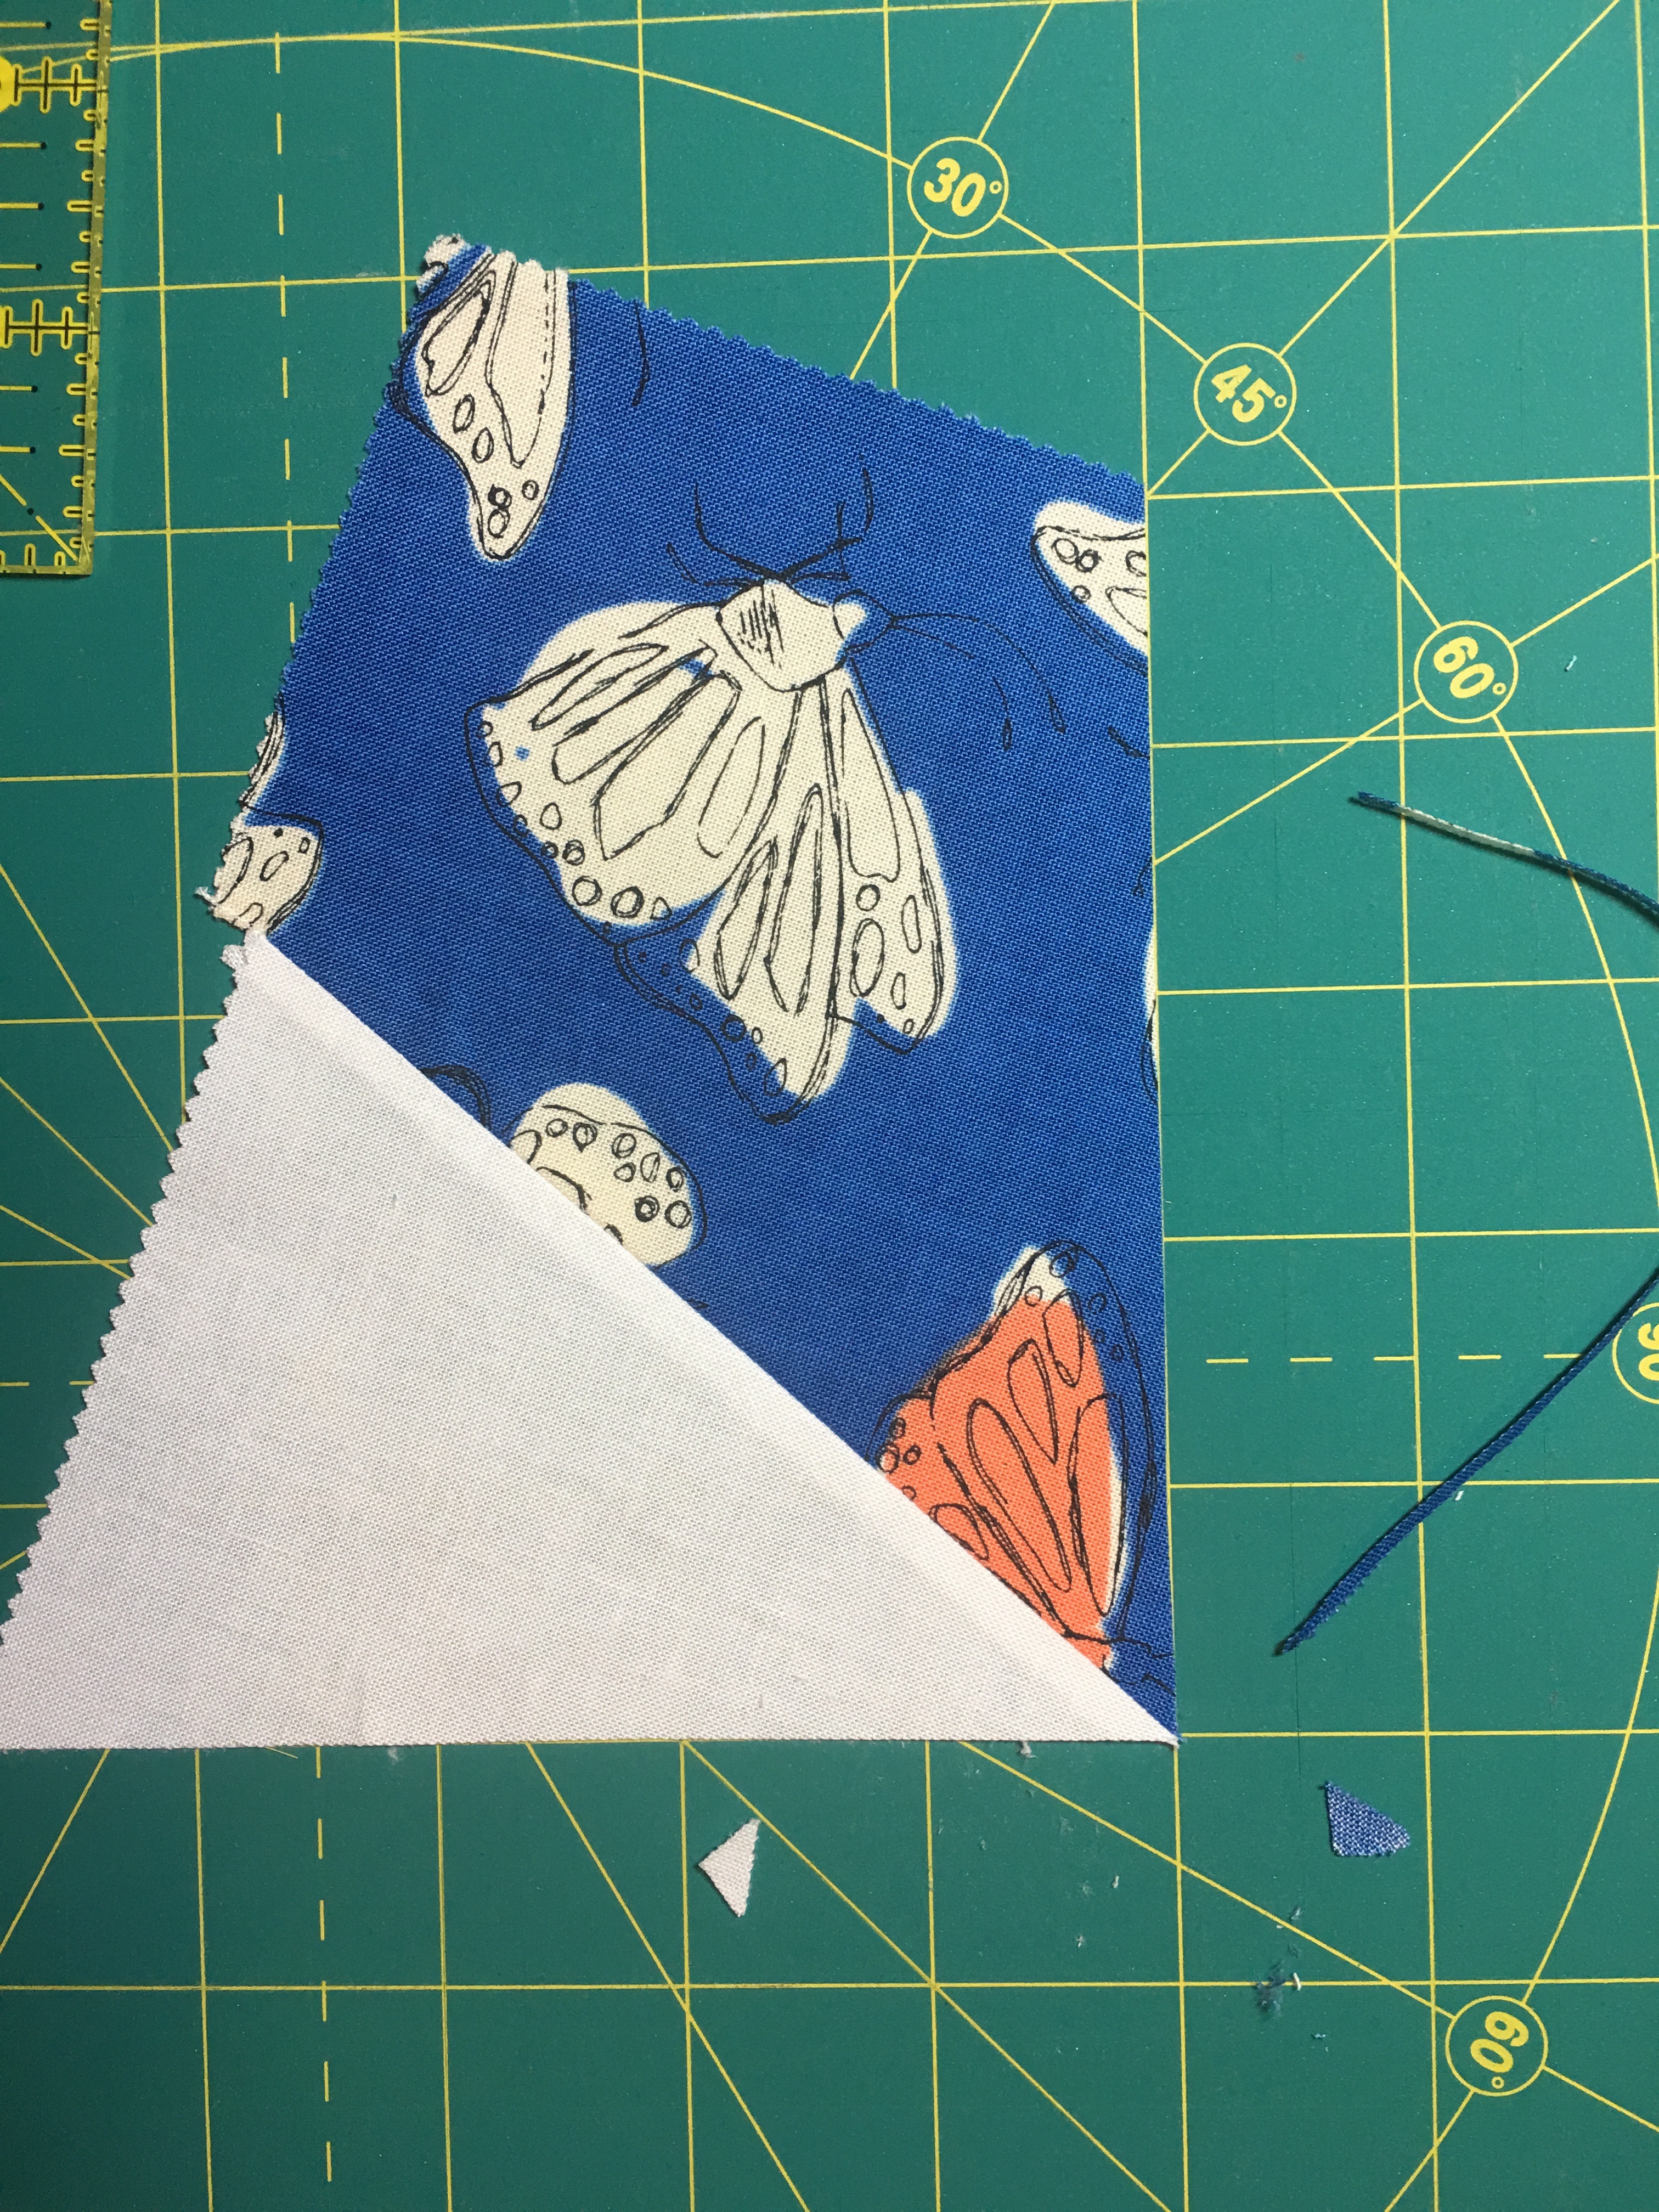
14 - Cut off the corners of the background prisms as shown. Cut to and from the point where the focus fabric meets the background. Discard these small triangles (we don't need them).
15 - Repeat this for all 50 Block B octagon units. Set aside.
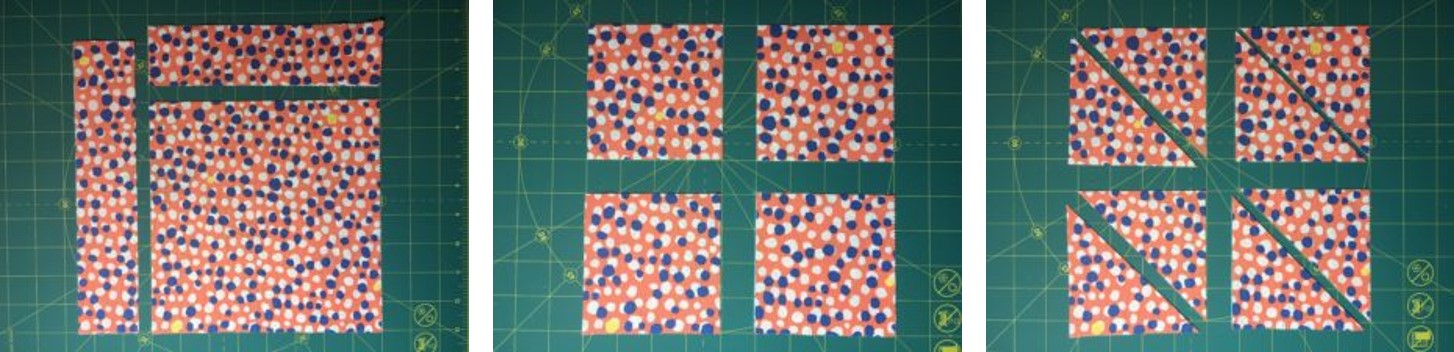
16 - Use the the remaining 25 focus fabric 10" squares to make corner triangles. Layer two focus fabric 10" squares, carefully aligning the edges. Cut Layer Cake squares down to 8" square by trimming 2" sections off two sides. Discard these 2" strips (we do not need these, but save in your scraps basket). Sub-cut 8" squares into (4) 4" squares. Cut each square once on the diagonal to get corner triangles. These focus fabric triangles will take the place of the background triangles we cut and discarded in Step 14.
17 - Repeat for all 25 focus fabric squares. We should have 200 triangles of focus fabric.
18 - Take one of the Block B octagon units from Step 15. Select four different focus fabric triangles from Step 17.

19 - Fold each triangle in half, wrong sides together and finger press. Mark the mid-point of each background section by folding and pressing.

20 - Place each triangle over the background section, making sure that the grooves (created by finger-pressing) on the background and the triangles nest. Pin and repeat on all four sides. Sew using a scant ¼" seam.

21 - Press towards the focus fabric. Square the block to 8.5".
22 - Repeat for all 50 blocks. All blocks are completed. Major accomplishment - do a happy dance.
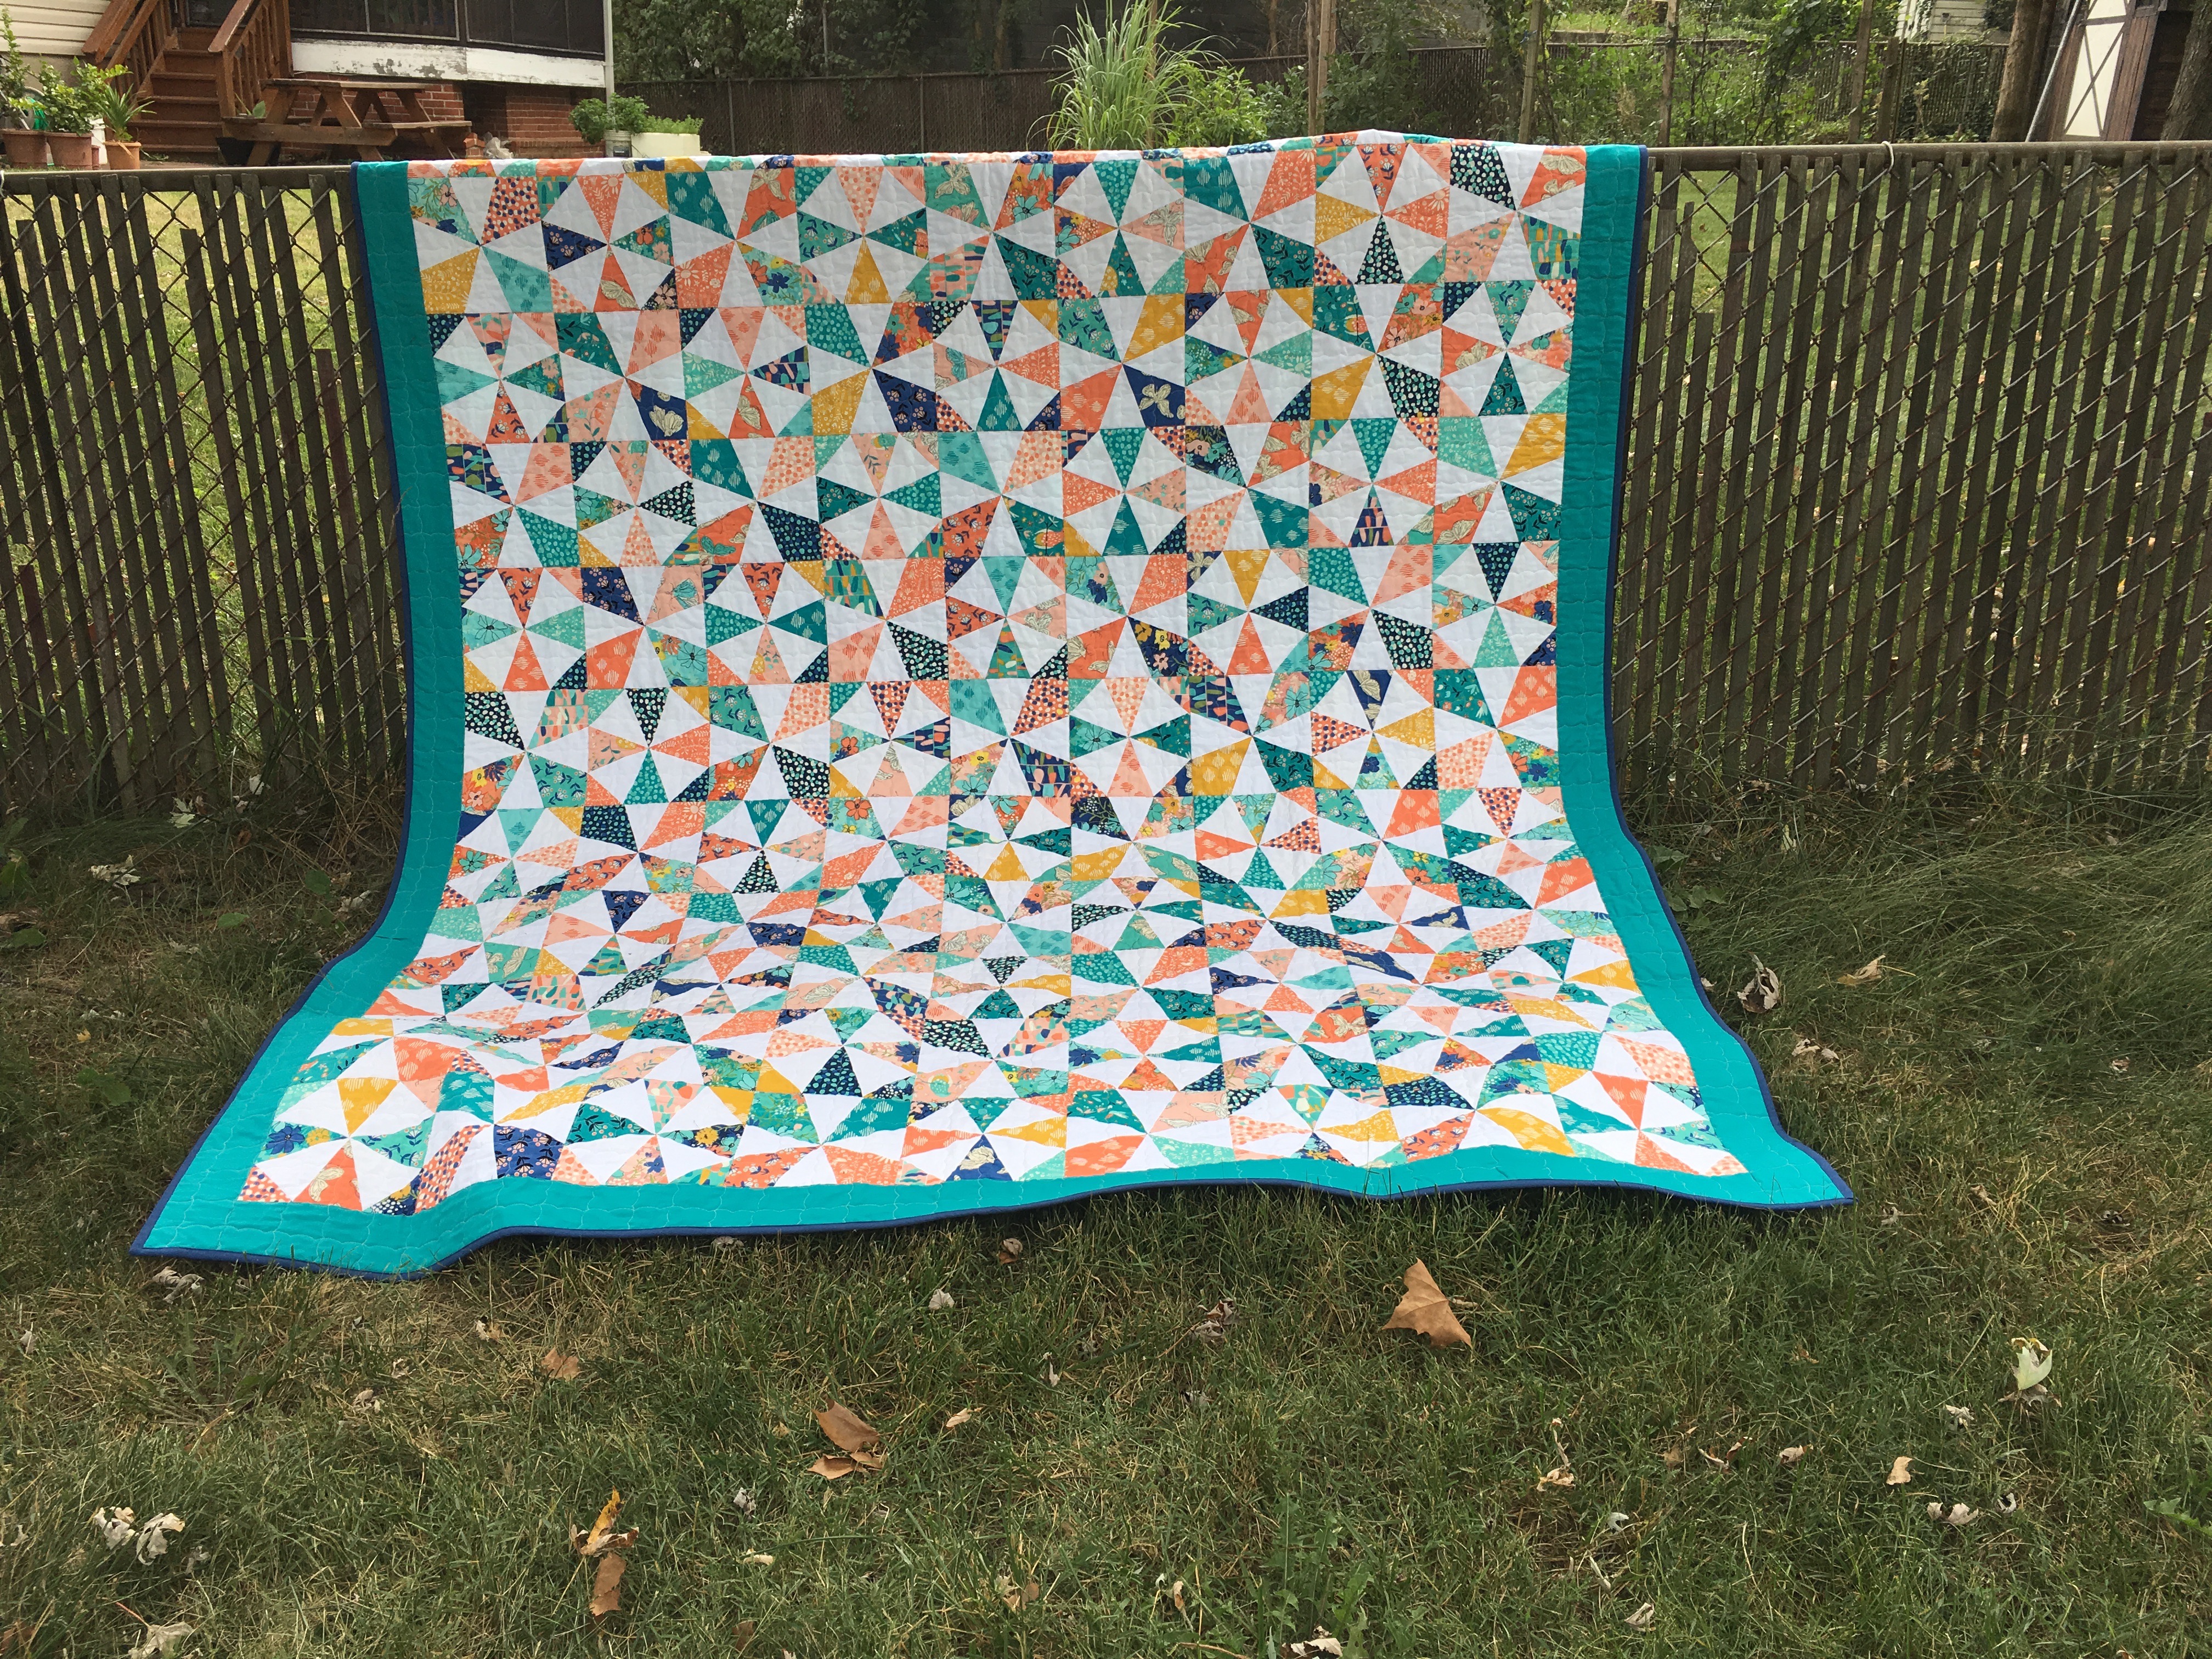
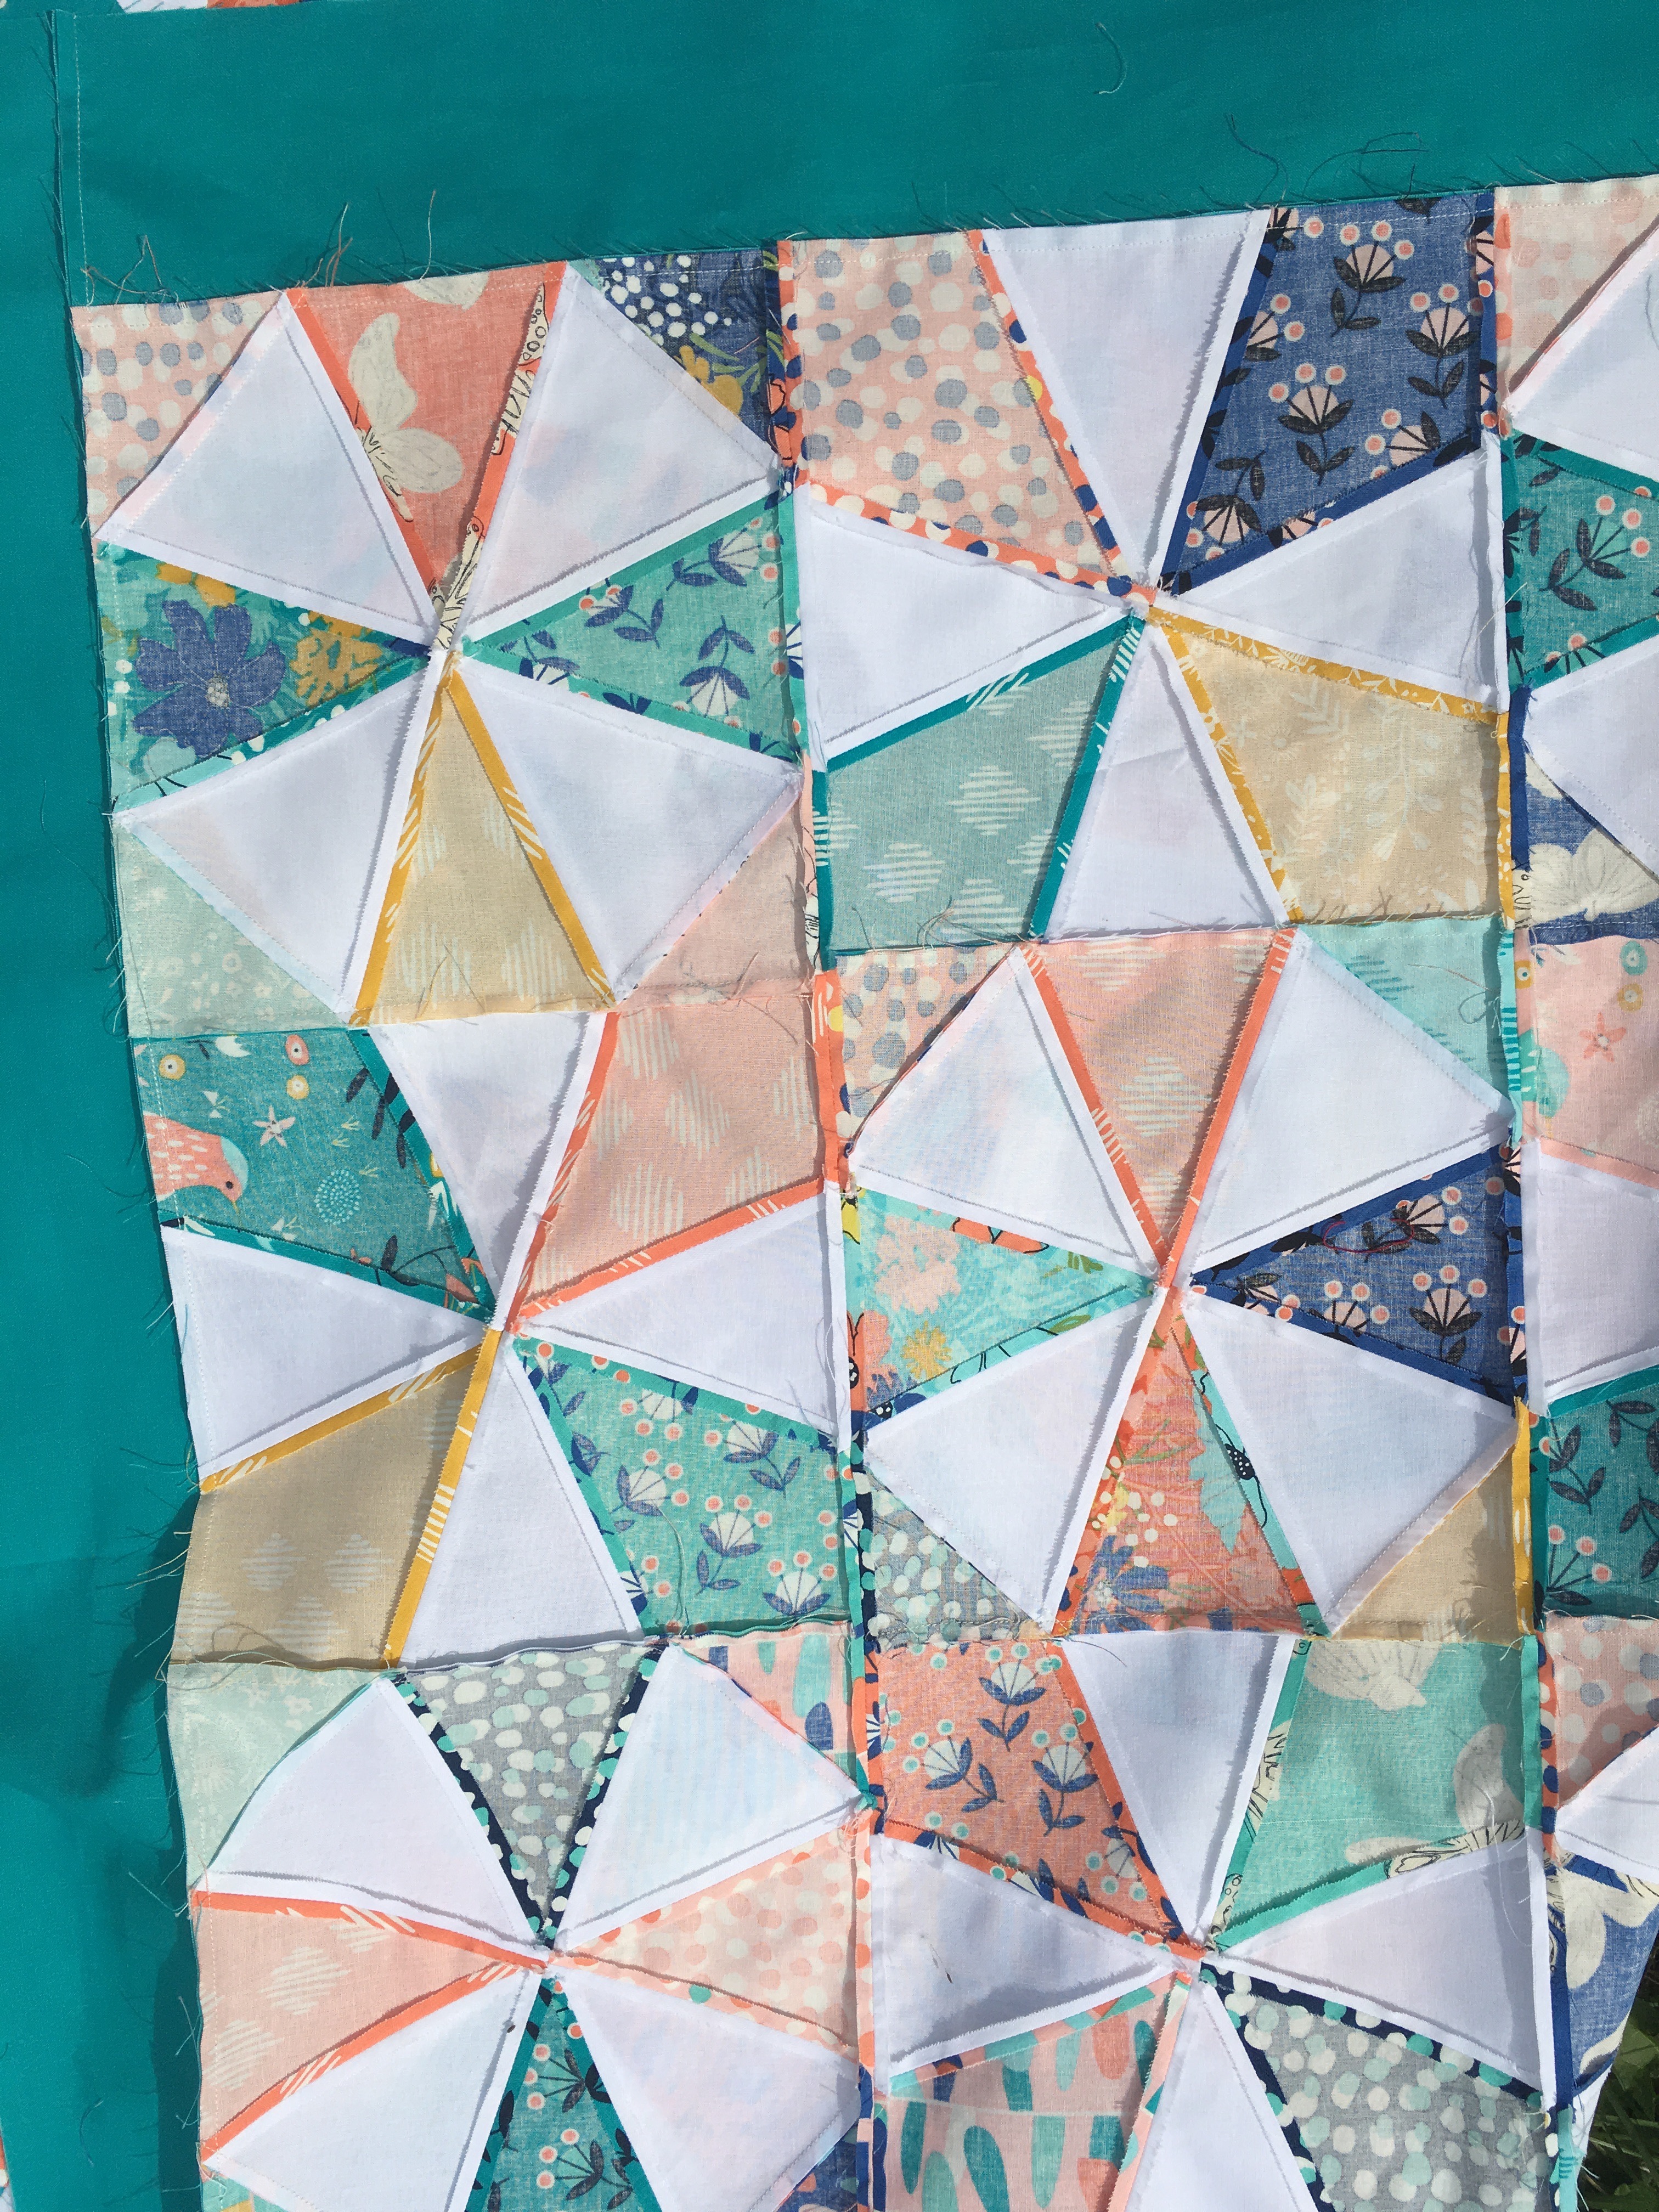
23 - Quilt Layout - Arrange the blocks in 9 columns by 11 rows, alternating between Block A and Block B.

When piecing a row, press seams towards Block A. It will be easier. When piecing the rows together, press seams open.
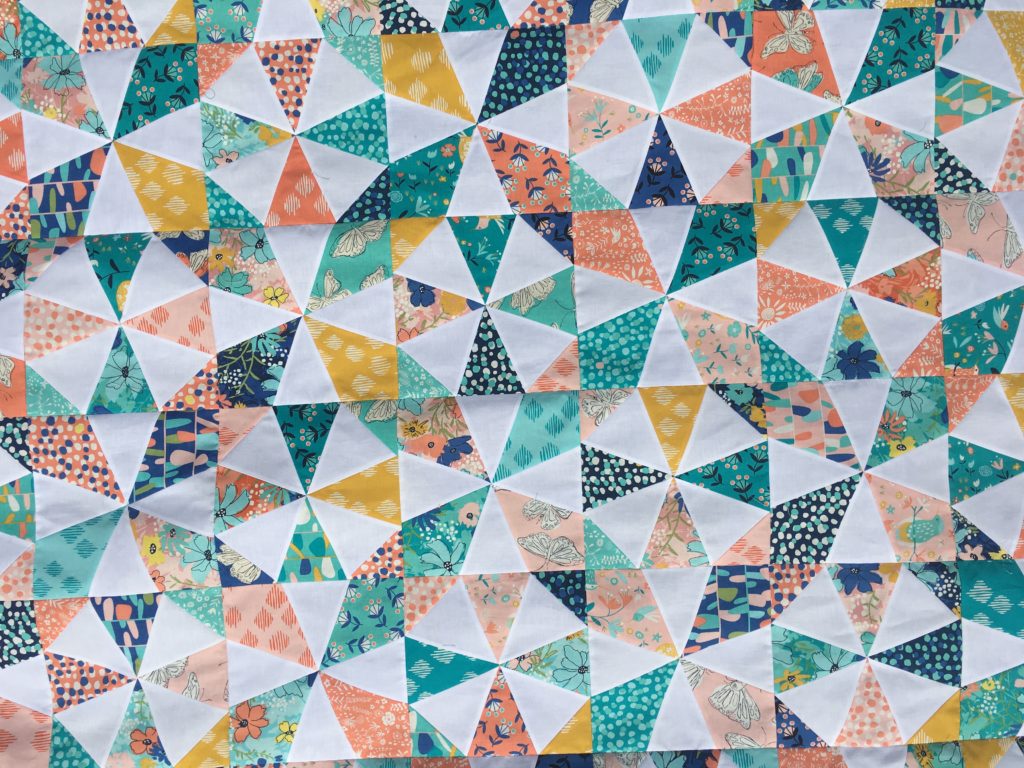
24 - Borders - Stitch four strips end to end. Repeat with the other four strips. We will have two border strips measuring about 174". Using one of these border strips, sew a short border first. Trim off the excess and set aside. Using the other 174" strip, sew the second short border. Trim excess. The two trimmed sections will be adequate for the long borders. Sew the long borders. Your quilt top is complete. Take a break, take pictures and enjoy the movement of the intersecting circles.

25 - Layer, baste, quilt, bind, label and enjoy!!!
![]()
This quilt finishes at 80" x 96".

For a twin size quilt (measuring about 72" by 88"), you will need 80 blocks, arranged 8 by 10. Add 4" borders. This will require 40 10" squares of the background fabric, 60 10" squares of the focus fabric, 1 yard of border fabric and 3/4 yard of binding fabric.
For a lap size quilt (60" by 80"), skip the borders.
If you have any questions, please ask in the comments section. I will respond here so that others can benefit from the answers. For more process pictures, and other tutorials, please visit my blog.
Preeti Harris
{sewpreetiquilts.blogspot.com}
![]()
Posted in:
Comments